
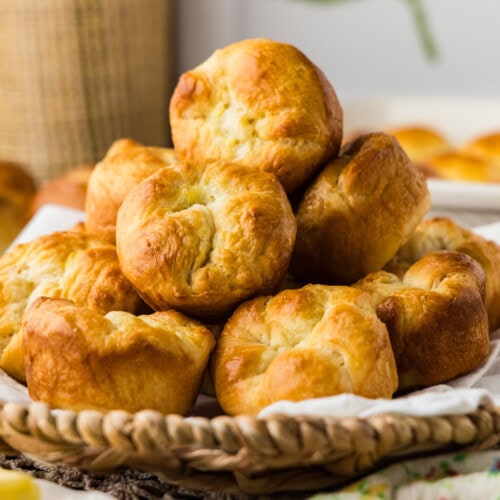
Parker House rolls are soft, buttery, and about as classic as a dinner roll gets. These have a pocket of butter baked right into the middle, and you don’t have to fold a single one!
Why this recipe works
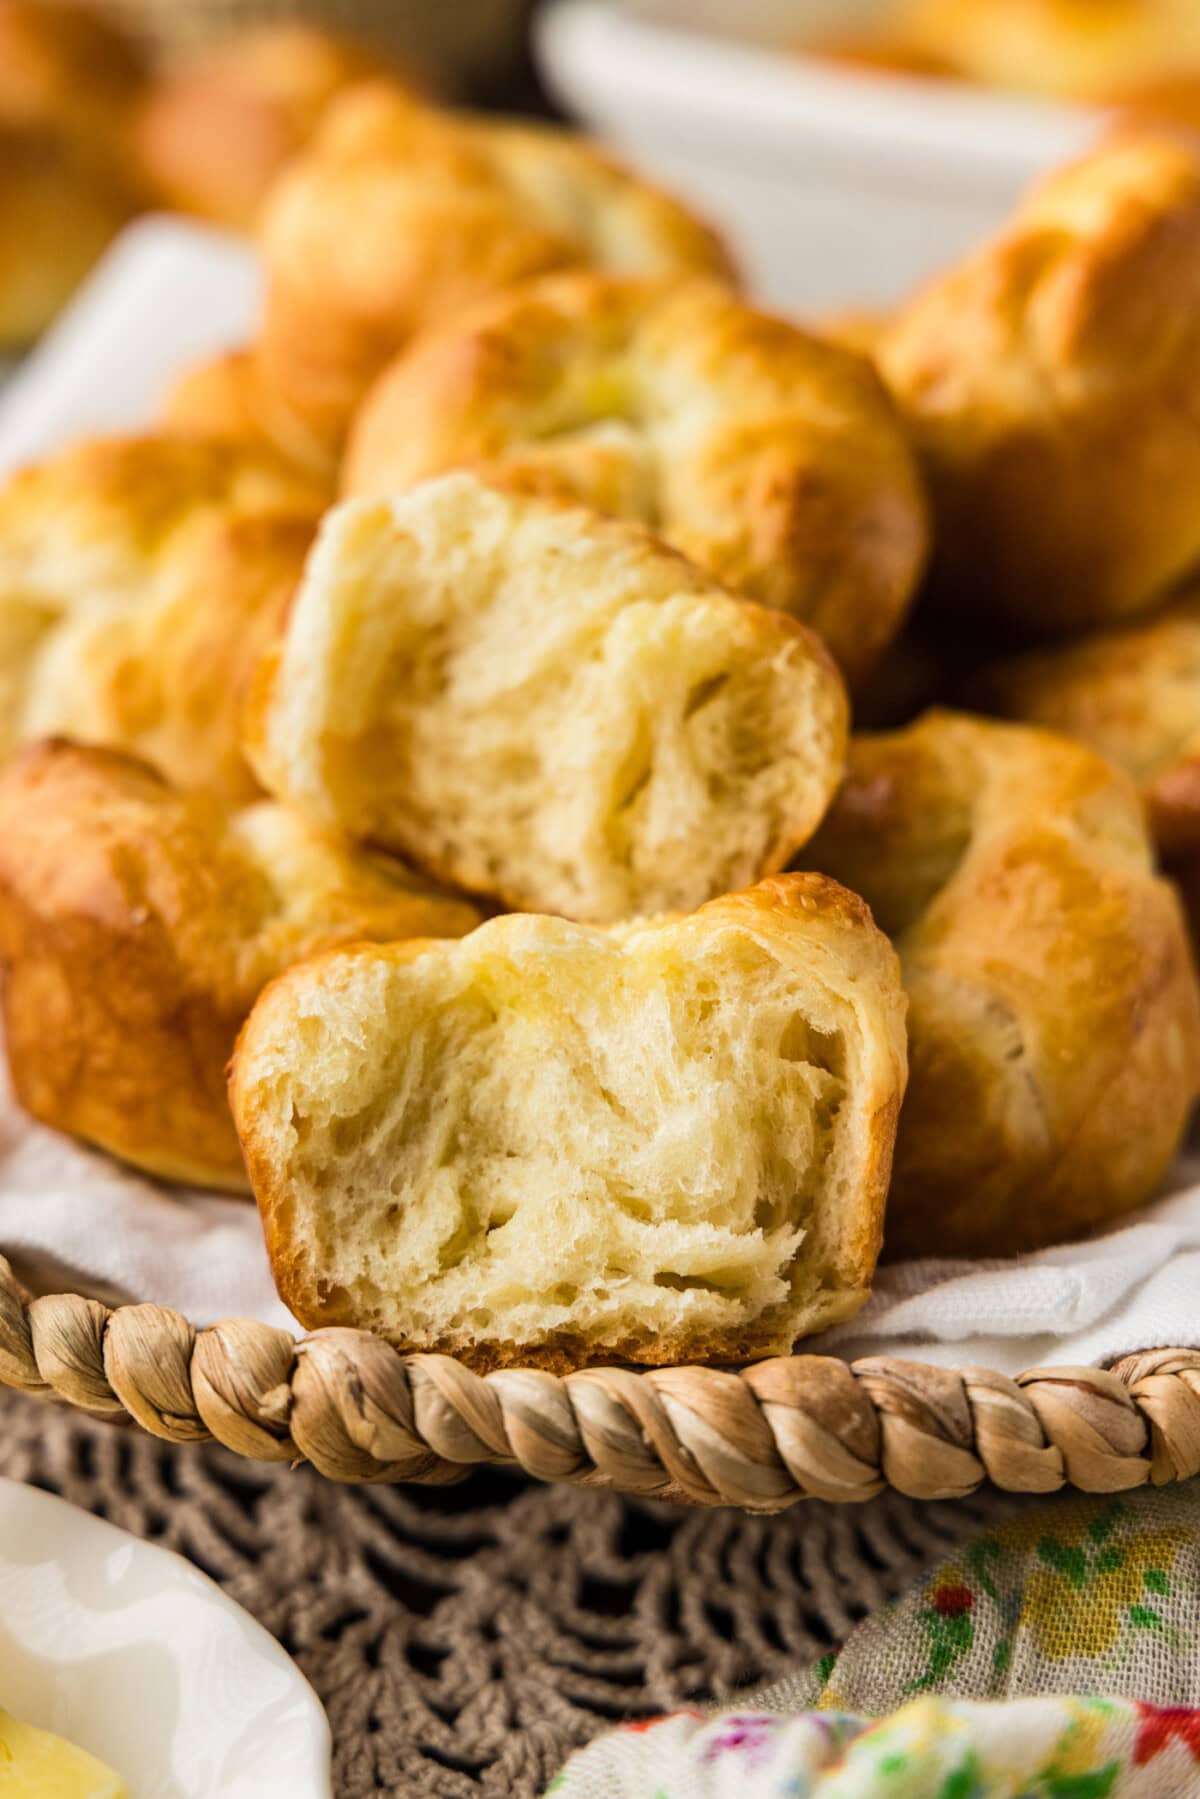
The trick with these Parker House Rolls is where the butter goes. You cut it cold into small pieces, flatten each one with your finger, and press it into the center of a dough ball before the second rise. It melts as the rolls bake and leaves a soft, rich pocket right in the middle, which is what a Parker House roll is known for.
This is an enriched yeast dough that rises twice, gets divided by weight so all 24 rolls come out the same size, and bakes in whatever pan you’ve got. Plan on about 3 1/2 hours start to finish, most of it rising time you don’t have to stand around for. If you want dinner rolls in about an hour instead, my pull apart dinner rolls only need one rise.
As I mention in this post, I worked this recipe pretty hard. I made it 4 times before I got to this version! While the initial tests were problematic with all the folds popping open, it was totally worth more tests because the dough makes really nice fluffy rolls. It was all worth it in the end, I think my youngest daughter ate most of the batch herself!
Ingredients you will need
Get all measurements, ingredients, and instructions in the printable version at the end of this post.
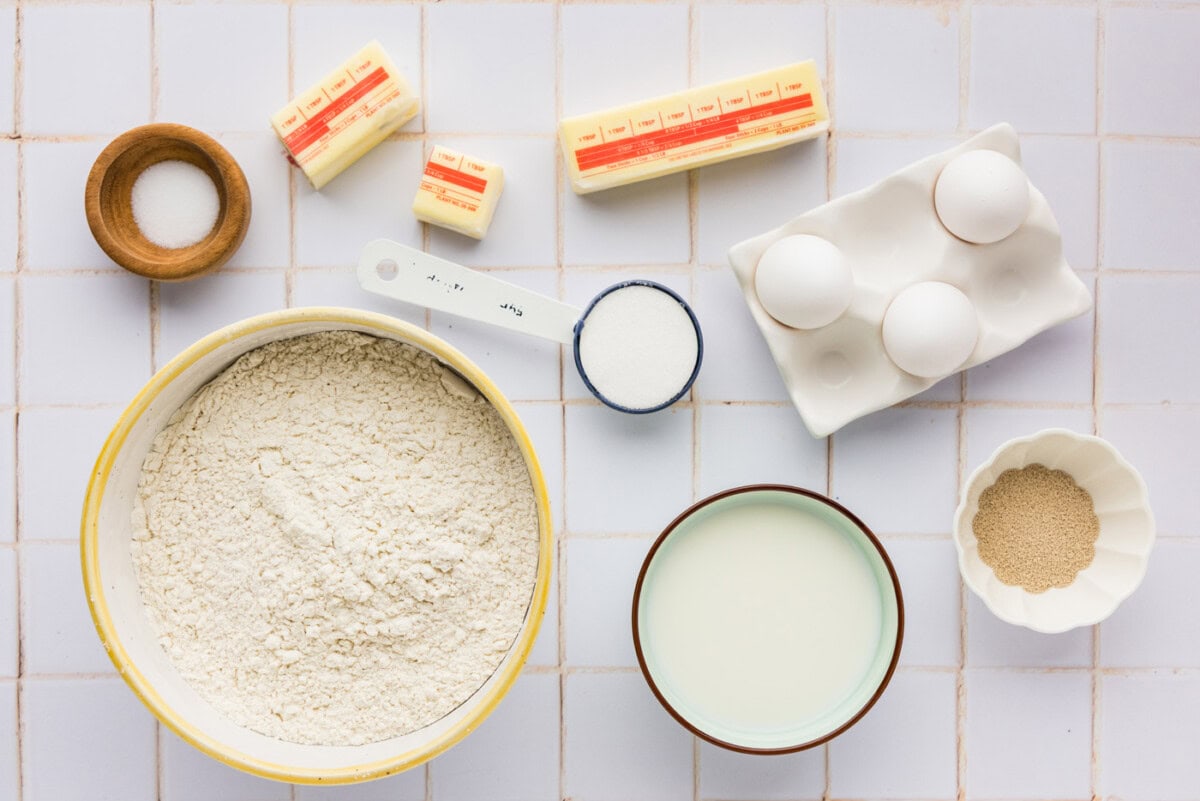
Ingredient Info and Substitution Suggestions
BUTTER – Butter does three separate jobs here, so give the ingredient list a read before you start. A 1/2 cup goes into the dough, melted, and you want to melt that first thing so it has time to cool off. Hot butter will kill your yeast. Another 3 Tablespoons go in cold, cut into 24 little pieces for the centers. The easiest way to get there without counting: cut the 3 Tablespoons into 3 equal pieces, then cut each piece in half, in half again, and in half again. That’s 8 from every piece, 24 total. Flatten each one with your finger and keep them in the refrigerator right up until you shape the rolls, because warm butter smears into the dough and you lose the pocket entirely. The last 2 Tablespoons get melted and brushed over the rolls the second they come out of the oven.
ACTIVE DRY YEAST – You need two full packages here, not one, which works out to 4 1/2 teaspoons. I tested it with one package and the dough took close to two hours on the first rise and still baked up dense. Two packages gets you a proper rise in about 90 minutes, and the crumb is noticeably lighter. Instant yeast works too, and it doesn’t need proofing, so you can skip that step and add it in with the flour if using.
WHOLE MILK – One cup, divided. I use whole milk, but I’ve made these with 2% more than once. Warm all of it to 110-115 F, then pour off 1/3 cup to proof the yeast. The other 2/3 cup goes into the mixer bowl. Anything above about 120 F will kill the yeast, so use a thermometer instead of going by feel. Warm milk in a pan climbs past that faster than you’d think.
SUGAR – A 1/4 cup, also divided. 1 teaspoon goes into the warm milk with the yeast to feed it, and the rest goes in with the butter and salt. The old typed recipe I started from didn’t proof the yeast at all, and I think those 10 minutes are worth it to know your yeast is alive before you commit to the whole batch.
EGGS – Two get beaten and go into the dough, and the third is whisked with a Tablespoon of water for the egg wash. Don’t let all three end up in the dough, which I managed to do on one of my test batches. The two in the dough are what give these rolls their tender crumb, and the wash is what gets you that deep golden top.
ALL-PURPOSE FLOUR – 540 grams, which is 4 1/2 cups. Weigh it if you have a scale, it’s the most accurate way to measure and the best way to get good results. Start there and only reach for more if the dough needs it. The part that trips people up is that the dough should pull cleanly away from the sides of the bowl, but a patch clinging to the bottom center is normal for a soft enriched dough and isn’t a reason to add flour. Give it another minute of kneading first, and only if the sides are still coated after 6 minutes add flour a Tablespoon at a time.
How to Make Parker House Rolls
These step by step photos and instructions are here to help you visualize how to make this recipe. You can Jump to Recipe to get the printable version of this recipe, complete with measurements and instructions at the bottom.
- Melt the butter first so it has a chance to cool a bit. Hot butter will kill your yeast.
- Warm the milk to 110 – 115°F. Pour 1/3 cup into a small bowl, stir in 1 teaspoon of the sugar and the yeast. Let stand 5 to 10 minutes until foamy. If you are using instant yeast, skip this and add it with the flour.
- In the stand mixer bowl, combine the remaining 2/3 cup milk, melted butter, remaining sugar, and salt. Beat on low with paddle attachment until the sugar dissolves. Add the beaten eggs and the proofed yeast.
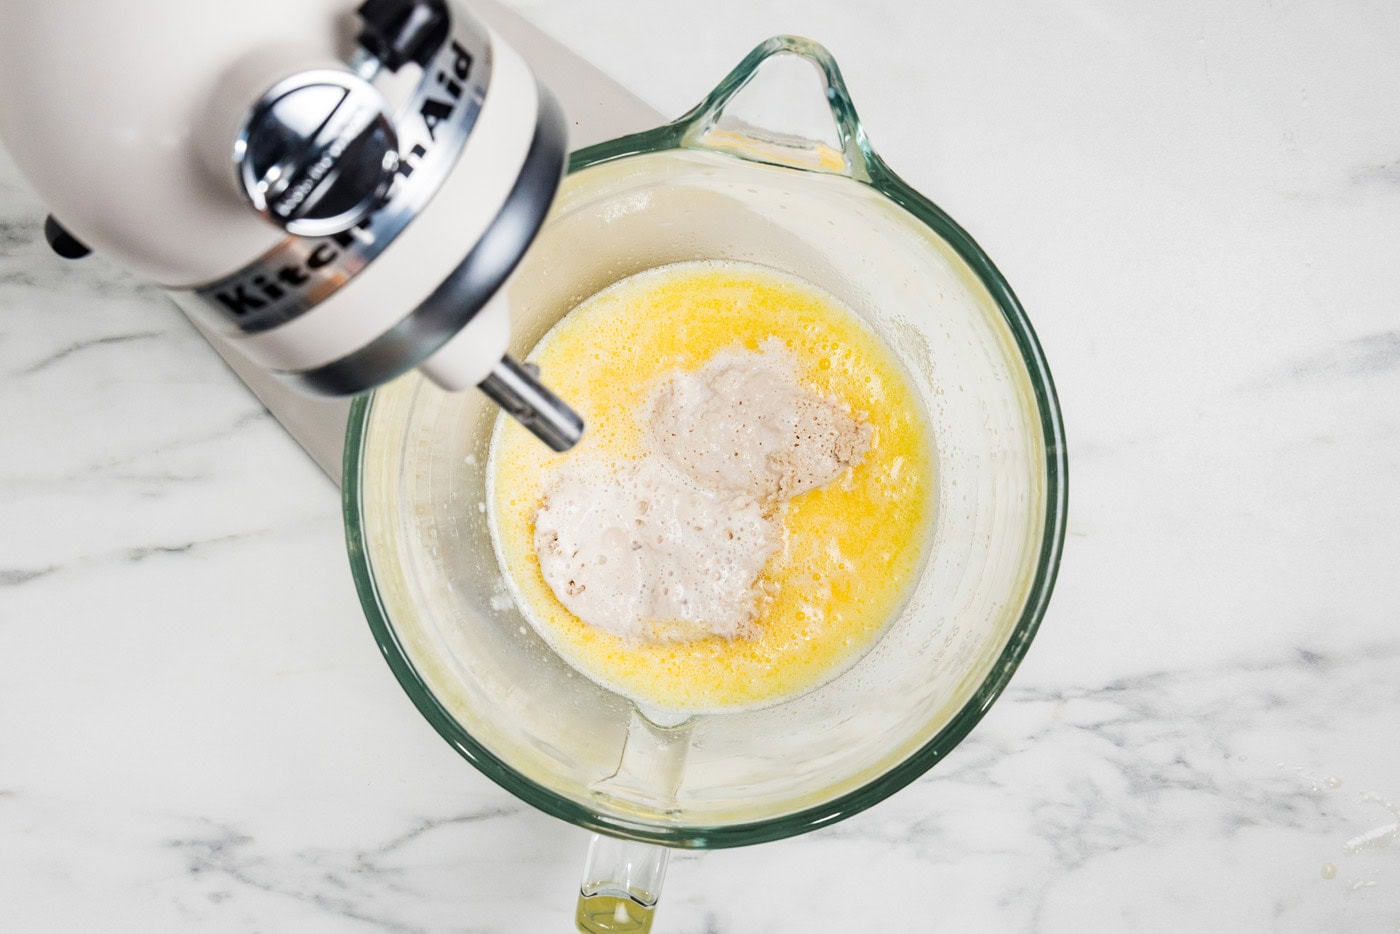
- Add about half the flour and beat on low for a moment (so flour doesn’t fly everywhere) then on medium for 2 minutes, until smooth. Beating at this stage develops gluten efficiently, while the mixture is still loose enough to stretch.
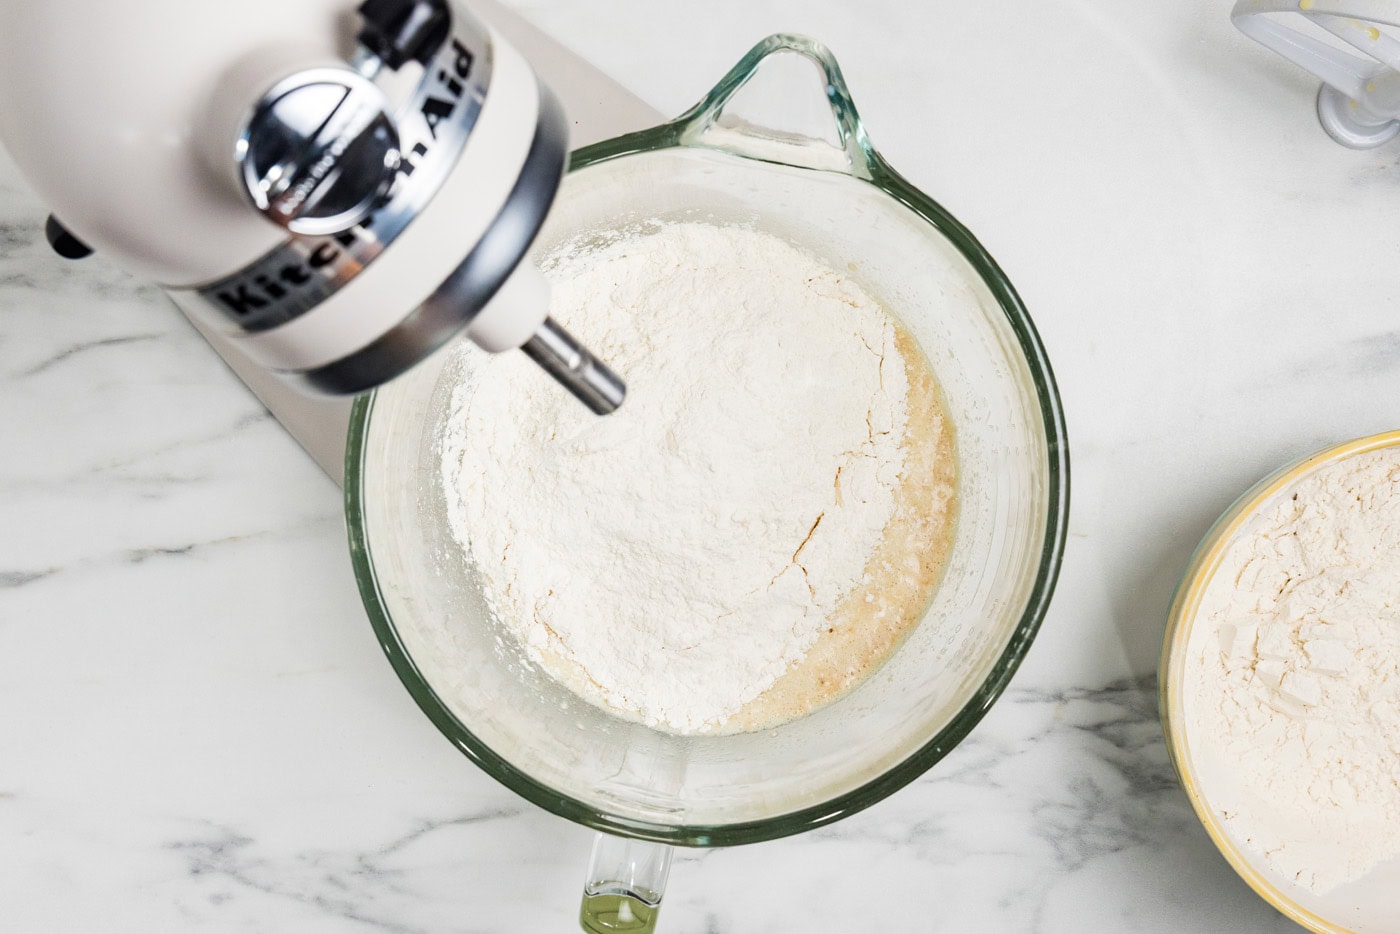
- Add the remaining flour 1/4 cup at a time. Once it stiffens, switch to the dough hook and knead on low for 6 to 8 minutes. The dough should pull cleanly away from the sides of the bowl, but a patch clinging to the bottom center is normal for a soft enriched dough and is NOT a reason to add flour.
TIP: Only if the sides are still coated after 6 minutes, add flour a tablespoon at a time. Do not beat on high at any point.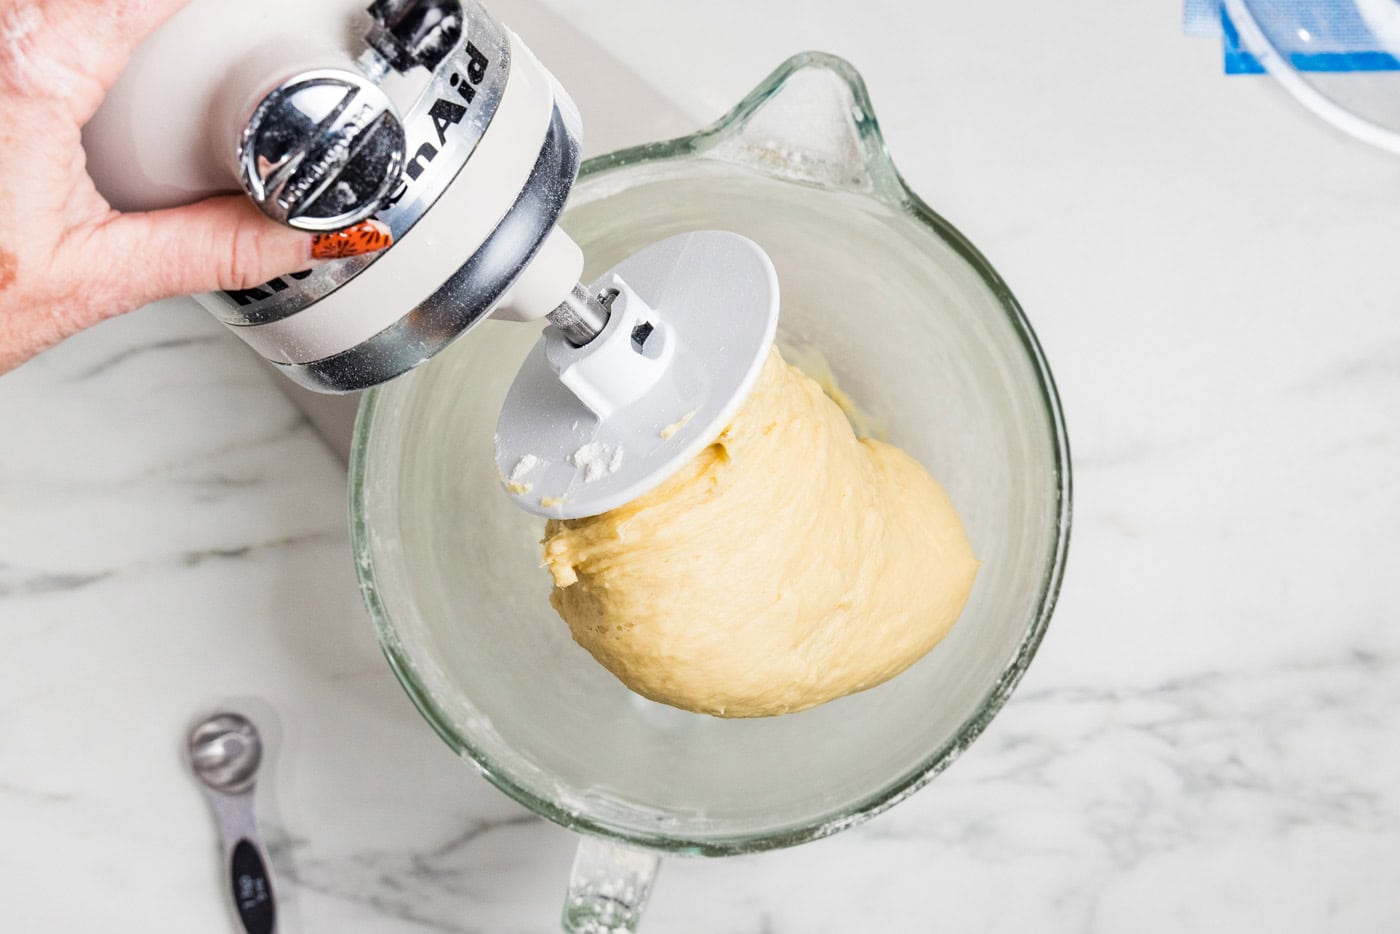
- Turn dough out onto a lightly floured surface and knead 1 to 2 minutes by hand, until smooth.
- Place in a greased bowl, turning to coat the top. Cover and let rise 60-90 minutes (ours was 90), until doubled.
TIP: Do a poke test. A floured finger pressed half an inch in leaves a dent that fills back slowly and incompletely. If it springs straight back, give it more time.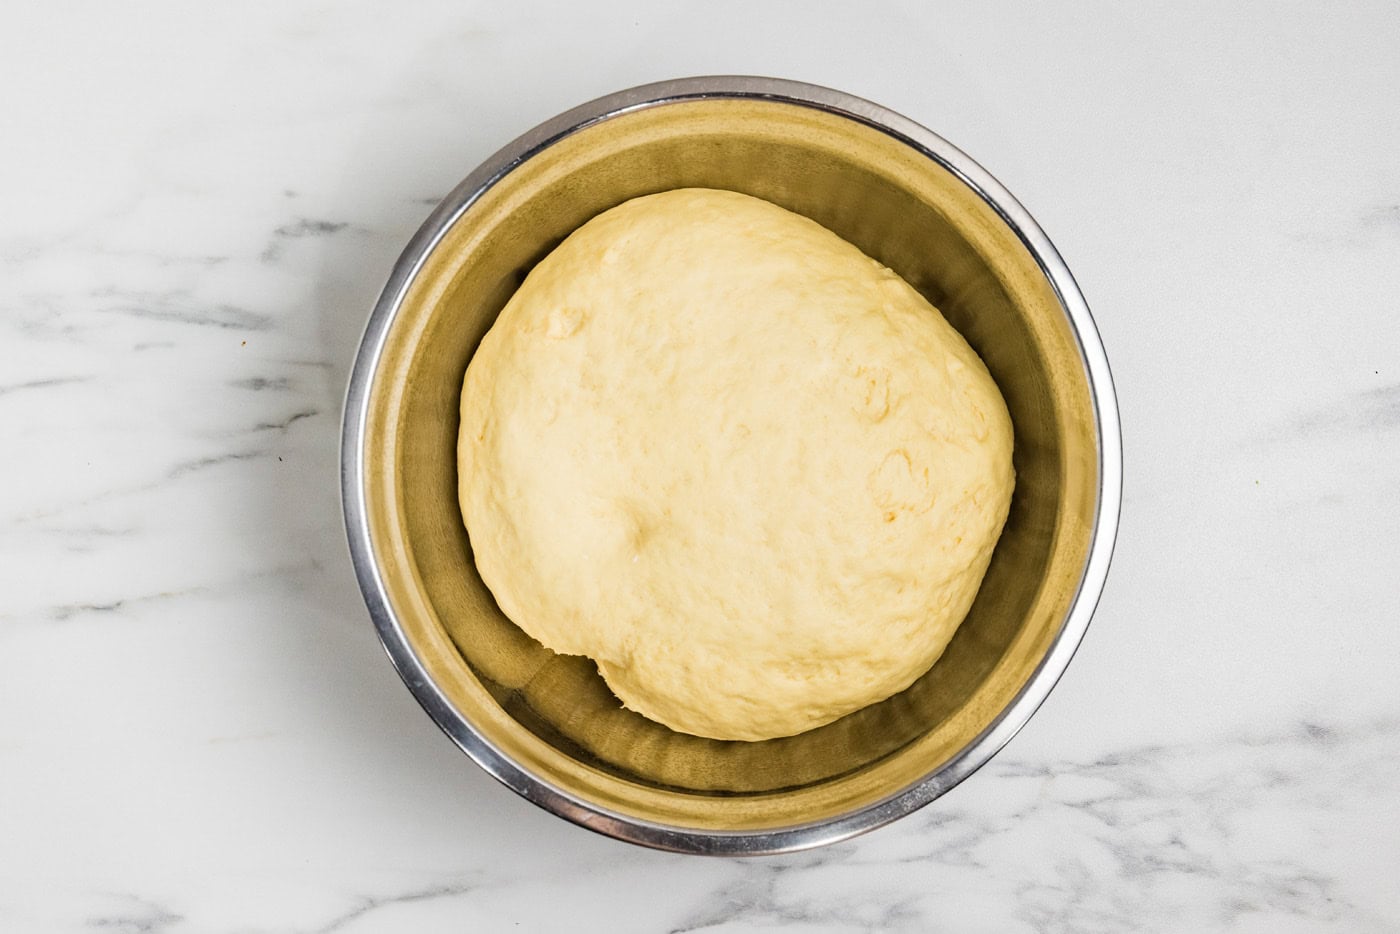
- Punch down the dough and weigh it using a kitchen scale, then divide that weight by 24 to get the piece weight. Cut and weigh 24 pieces and shape each into a tight ball. Cover and rest 10 minutes so the dough relaxes.
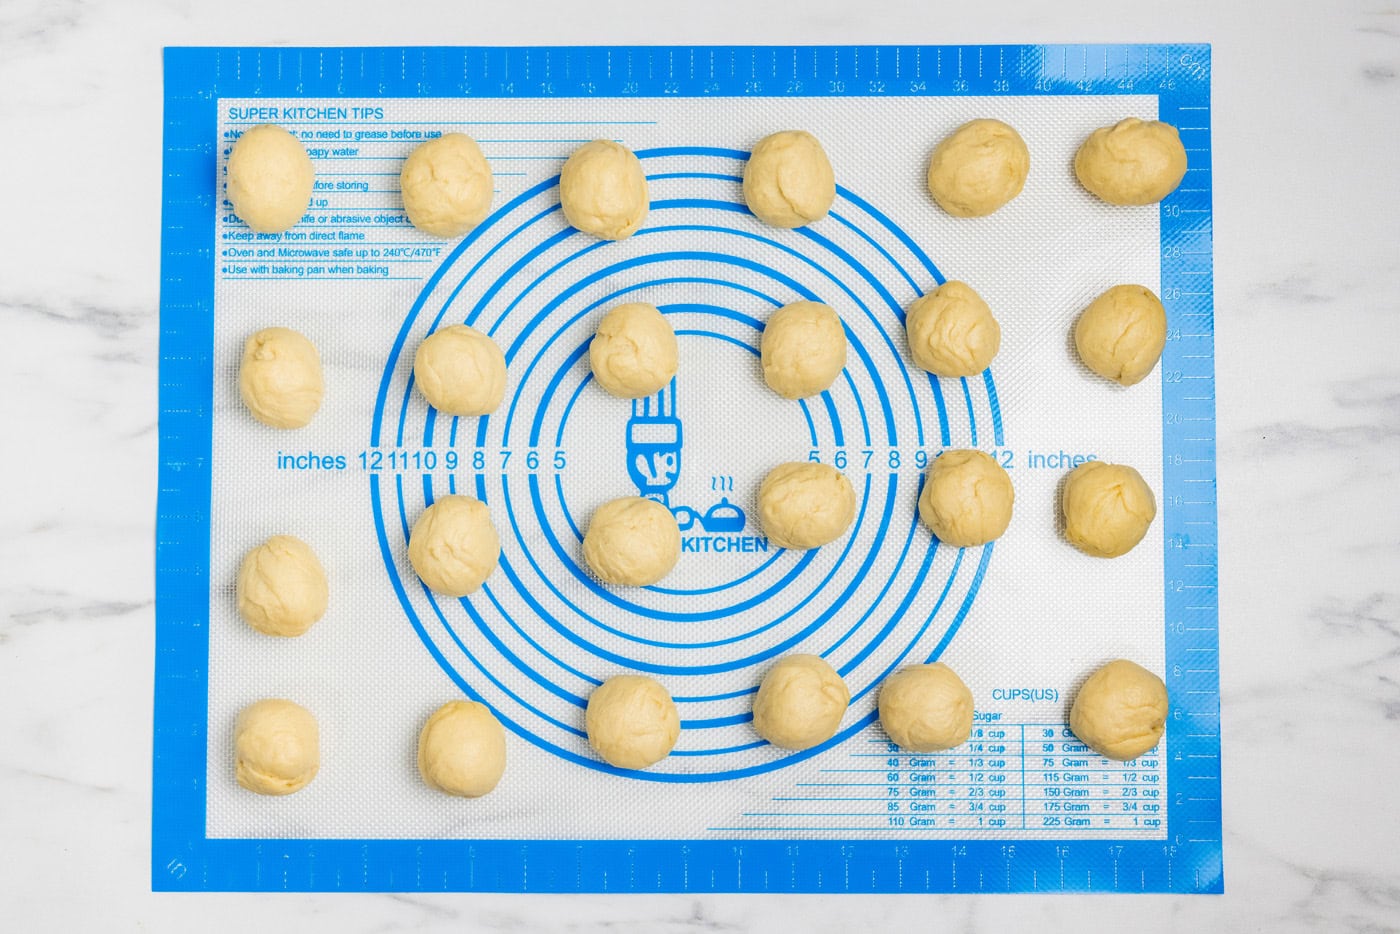
- Spray whichever pan you use with nonstick cooking spray.
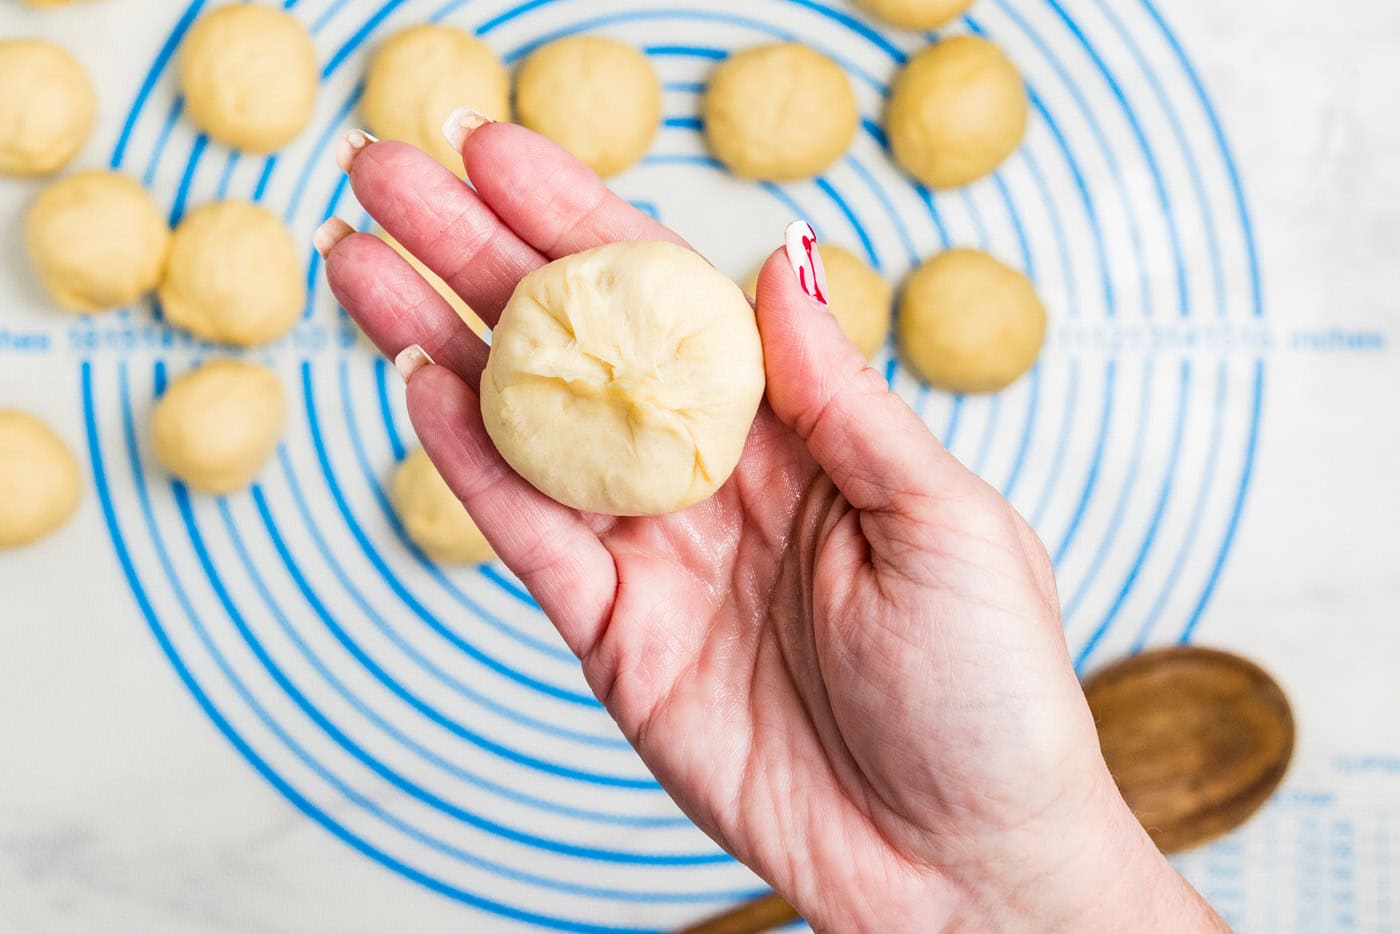
- Using the handle end of a wooden spoon or your finger, press an indentation into each dough ball. Flatten a butter piece with your fingers and set it into the indentation.
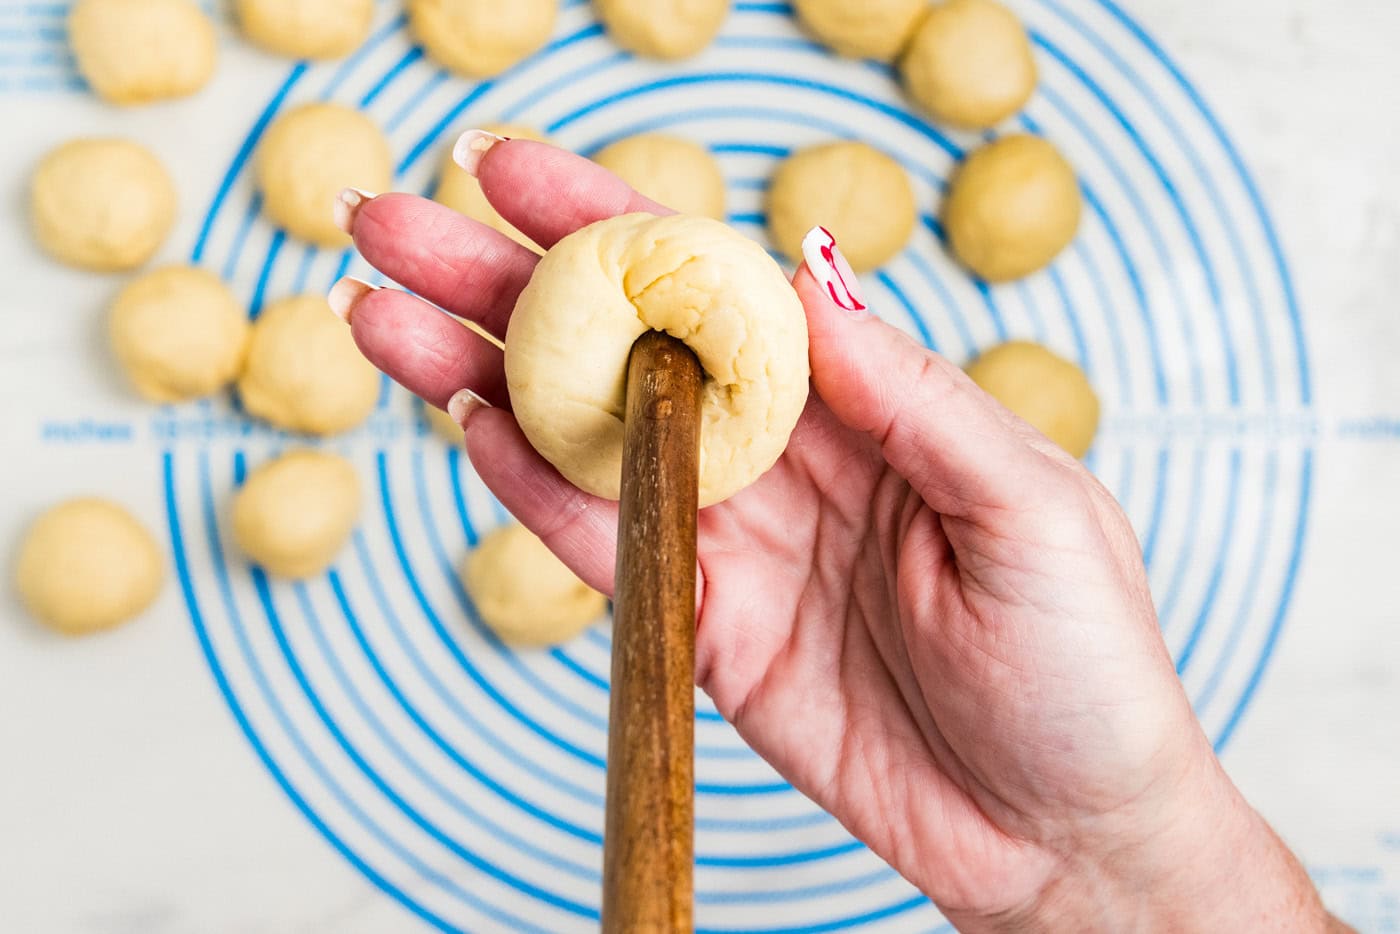
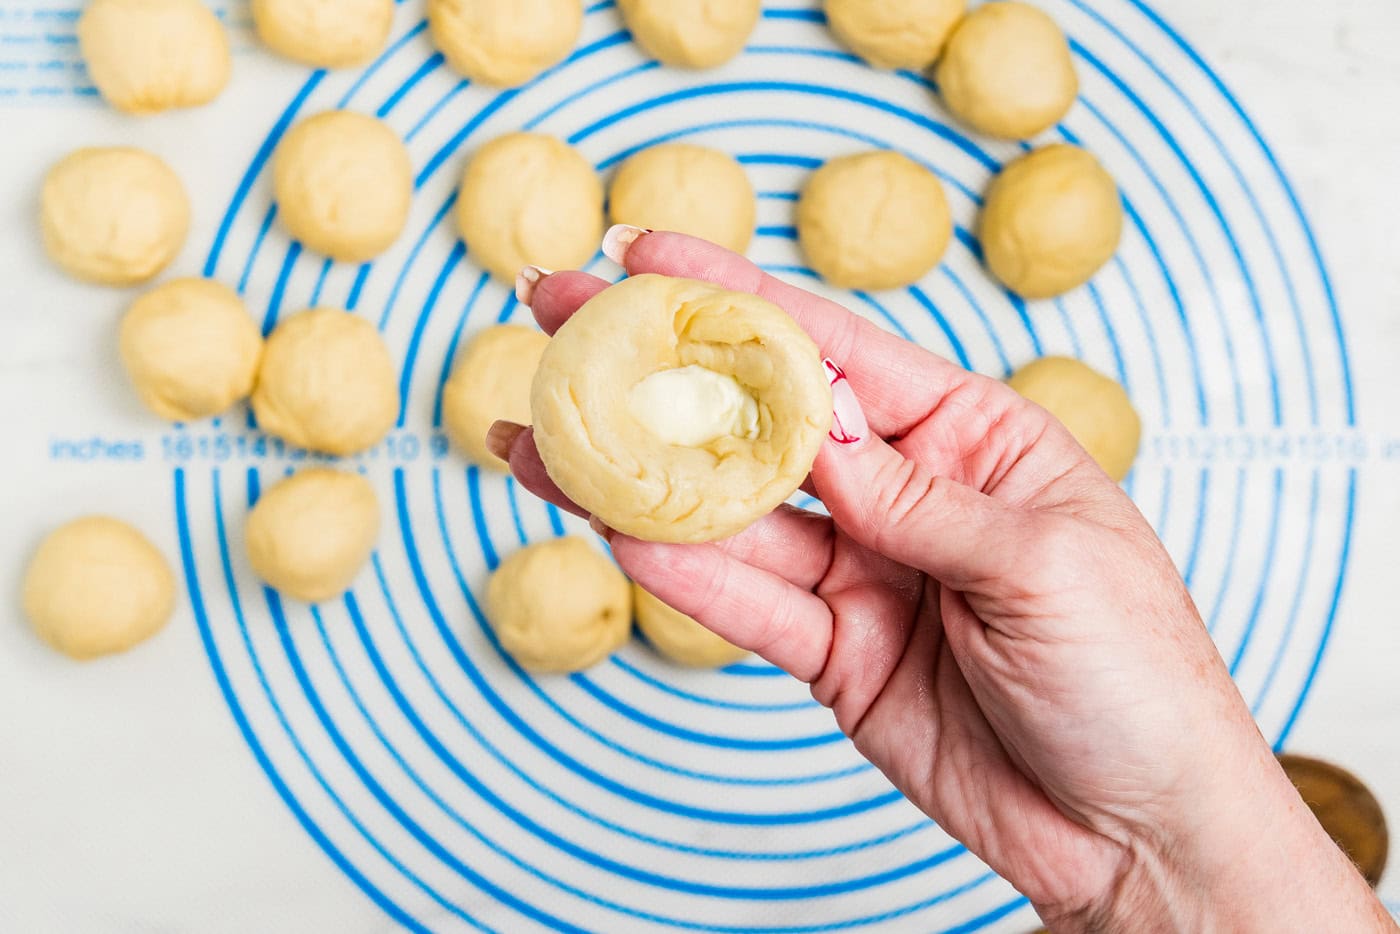
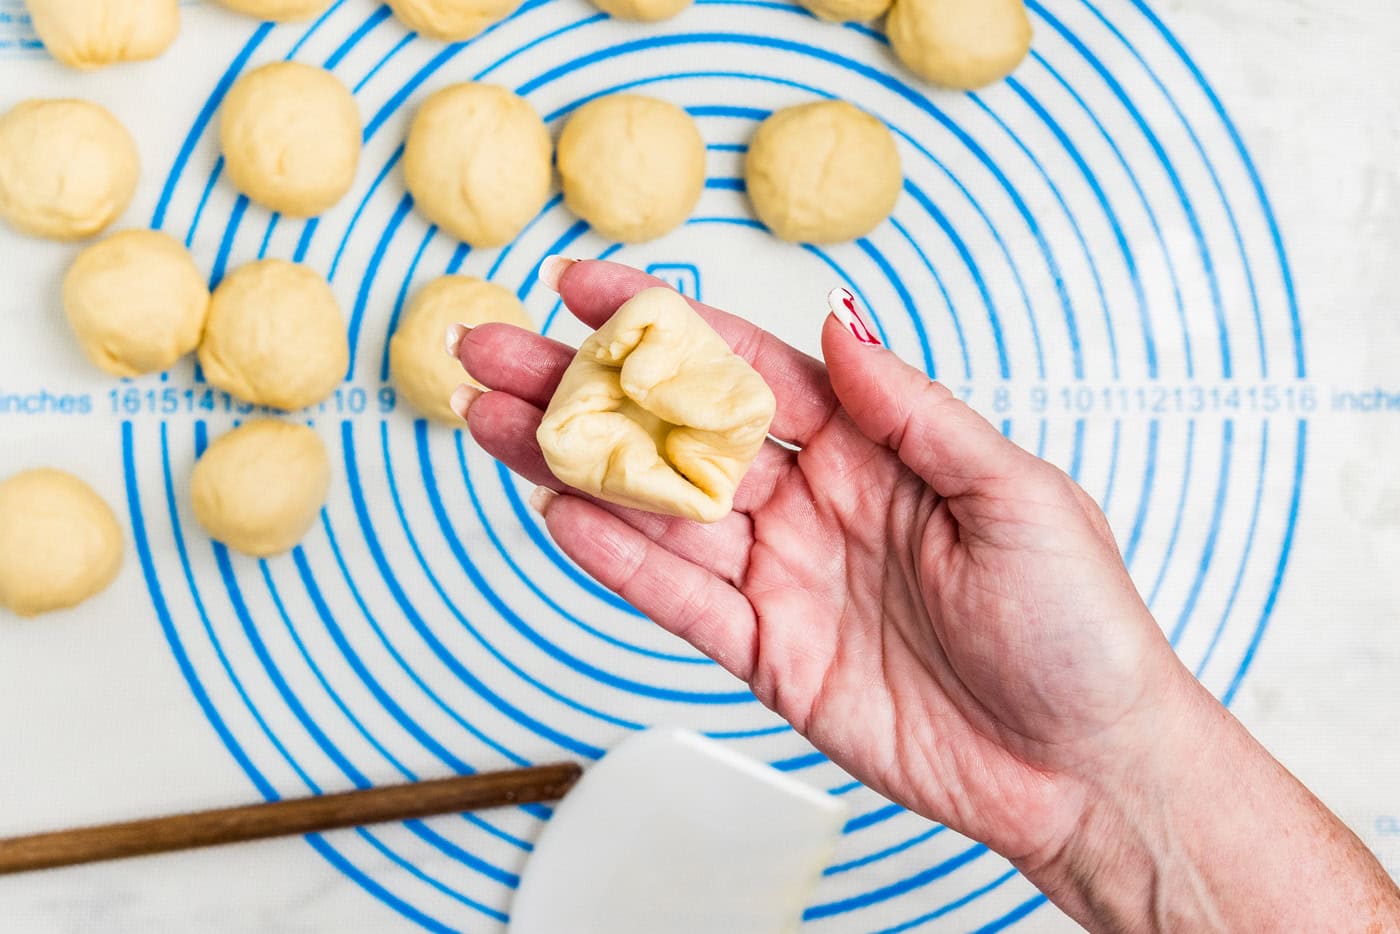
- If using a 13×9 baking dish: Fold the dough around the butter and crimp all the open edges closed, then set it crimp side down.
- If using muffin tins: Fold the dough around the butter but do not crimp, and set it in the muffin tin open side up.
- Cover and rise 45 to 60 minutes, until puffy, using the poke test again.
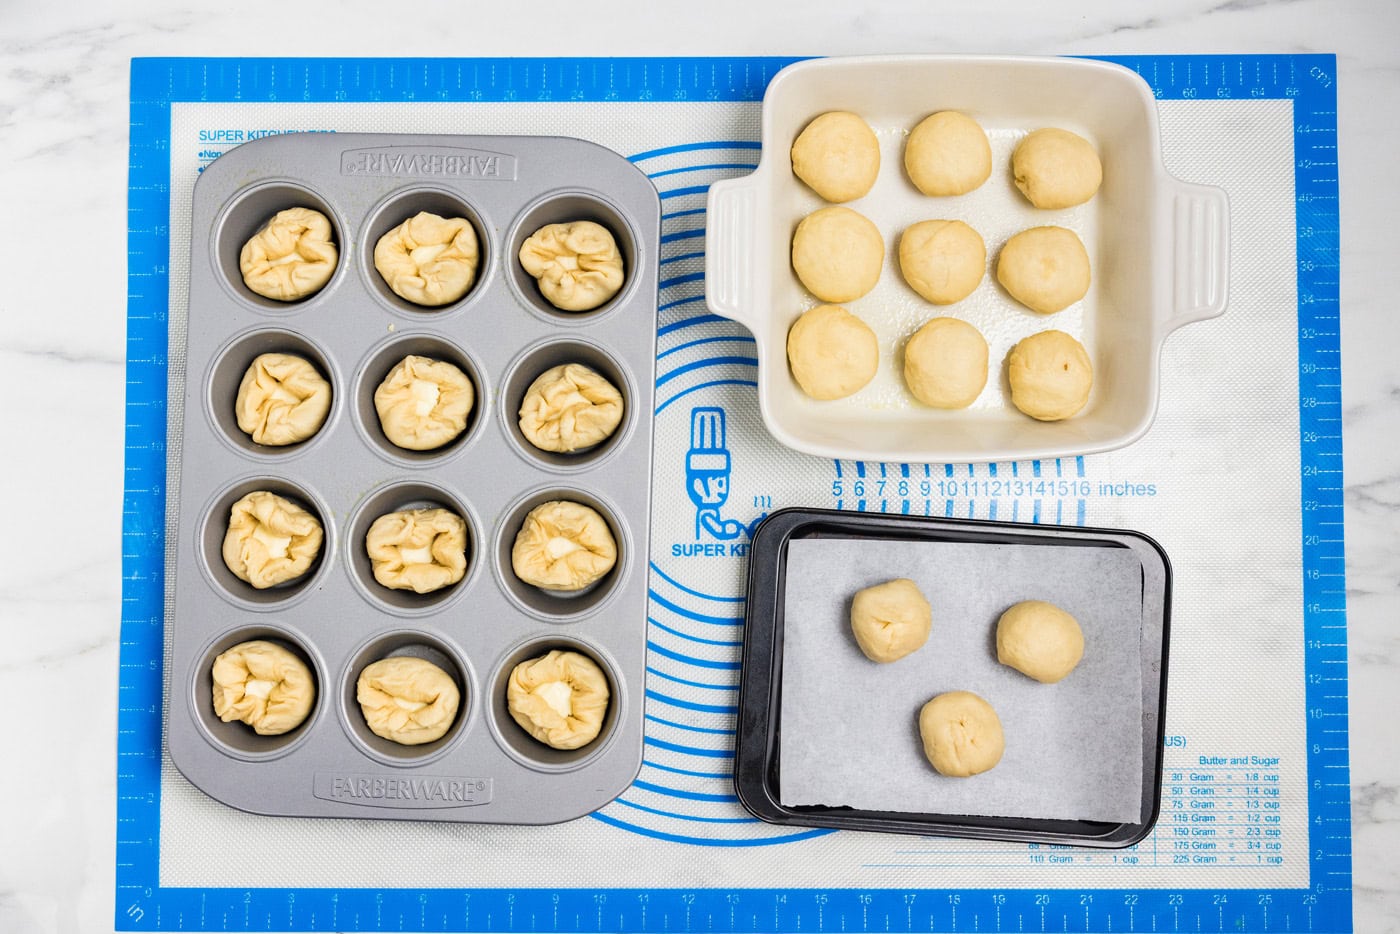
- Set whichever pan you use on top of a baking sheet before it goes in the oven, which keeps the bottoms from over-browning.
- Preheat to 350°F. Whisk together the egg and water to make the egg wash. Brush the risen rolls with the egg wash. Bake 20-25 minutes. Start checking muffin pans at 18 to 20, since metal on all sides browns them faster than the baking dish does. 23 minutes was right for both in testing.
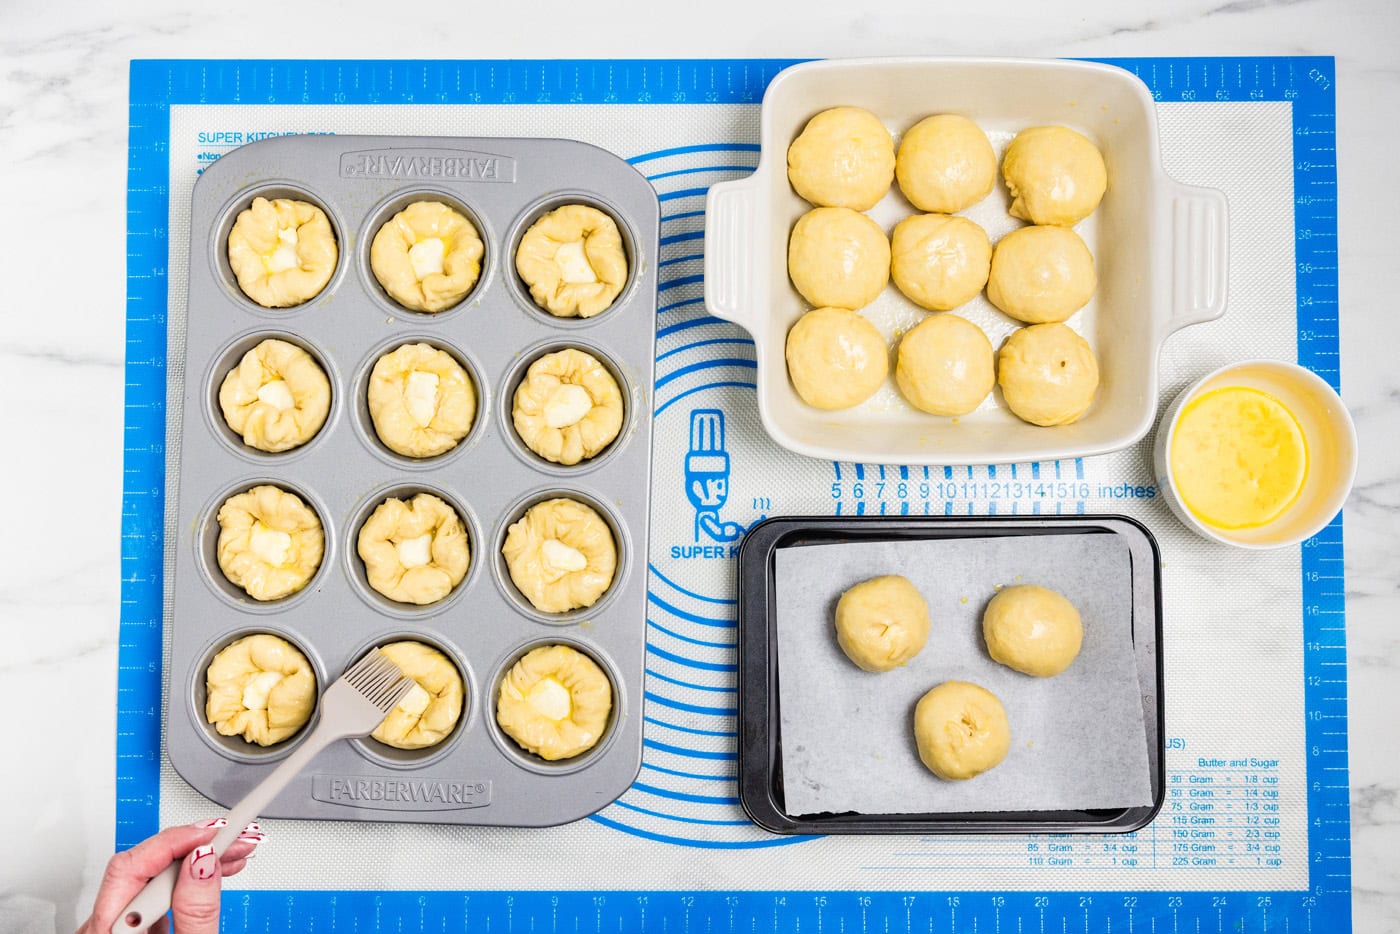
- Brush the hot rolls with the 2 tablespoons of melted butter. Add flaky salt if you like.
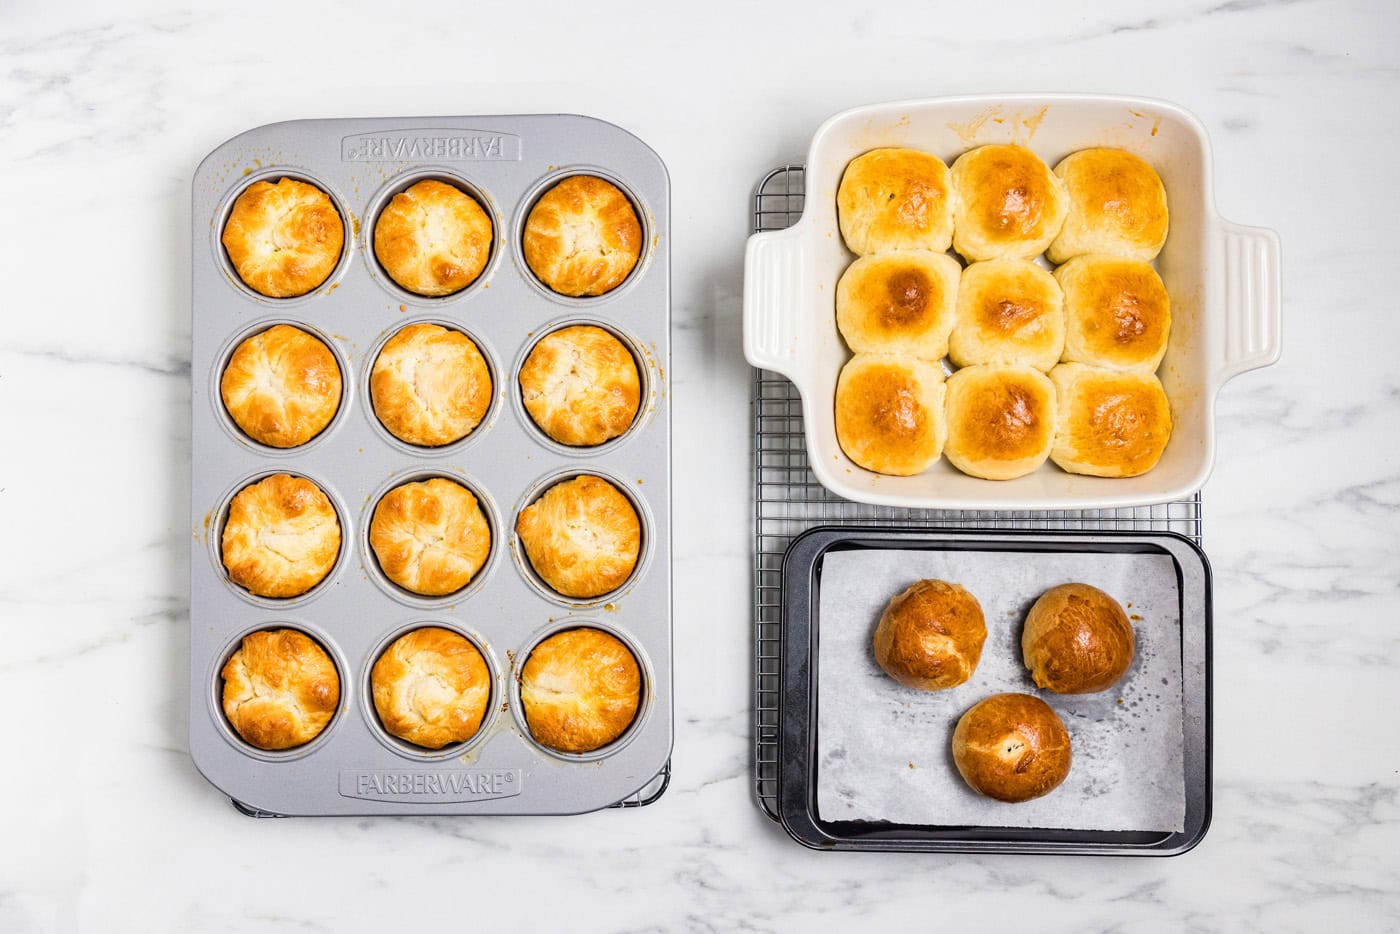
Baking dish, muffin pan, or baking sheet?
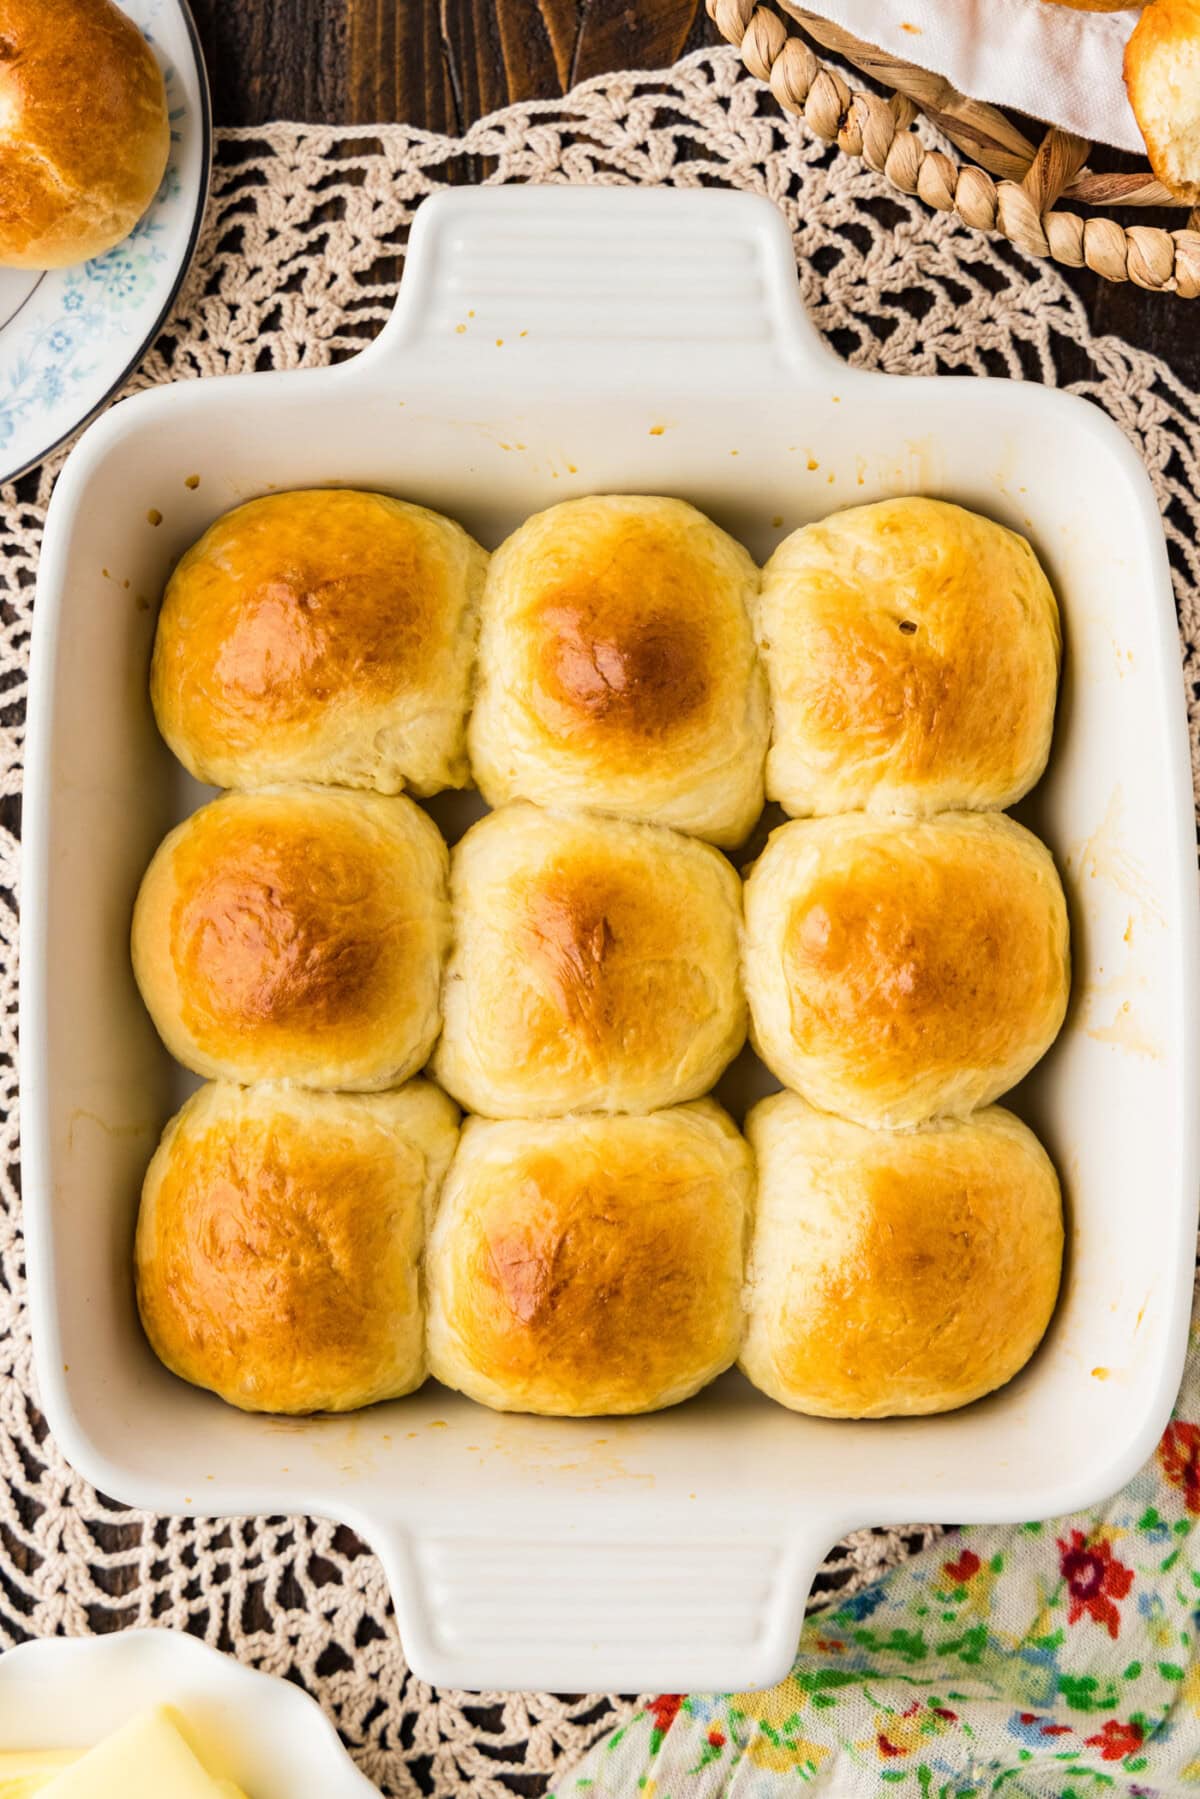
The dough and the shaping are the same either way, so this is just a choice about what kind of roll you want on the table. I baked this batch using all three methods, which is why you’ll see more than one pan in the photos. Spray whichever one you use with nonstick cooking spray before you start filling it, or line a baking sheet with parchment.
A baking dish gives you soft, fluffy sides. The rolls sit close enough to touch, so they protect each other as they bake and come out squared off with a tender edge. Fold the dough around the butter, crimp all the open edges closed, and set each one crimp side down. The full batch fits a 13×9 in 6 rows of 4.
A muffin pan gives you a crust all the way around, because each side of the roll is against metal the whole time. These come out craggy on top and they’re the prettiest of the three. Fold the dough around the butter but don’t crimp it, and set each one open side up. You’ll need two pans for the full batch, 12 rolls each.
A baking sheet gives you round, free-standing rolls with nothing holding their shape but themselves. Line it with parchment and leave a little room between them. Shape these the way you would for the baking dish, crimped closed and crimp side down. I tested this one too and it worked just as well as the others, with no butter leaking out and no dark bottoms.
TIP – If you’re using the baking dish or the muffin pans, set them on top of a baking sheet before they go in the oven. That extra layer keeps the bottoms from going too dark. Start checking the muffin pans at 18-20 minutes because the metal on all sides browns them faster.
About the traditional Parker House fold
Traditional Parker House rolls are folded. You roll the dough out, cut rounds, brush them with butter, and fold each one over into a half moon. That fold is what people picture when they hear the name, It’s what I spent most of my time working on.
I couldn’t get it to behave. The rolls kept springing open in the oven no matter what I changed. I creased the dough first so the fold had a hinge. I folded them off center so the bottom edge stuck out past the top. I left a dry margin around the rim so the two halves had something to grip. I changed pans, I changed the yeast, I weighed every single piece of dough. Some batches held and some popped right open, in the same pan, on the same day.
I’m not the only one. King Arthur says straight out that they gave up on the cut-and-fold method because their rolls popped open and wouldn’t hold their shape. Girl Versus Dough rolls her dough half as thin to get around the same problem.
So I stopped fighting it. Putting the butter inside the roll gets you the same soft, buttery pocket with none of the fuss, and honestly the rolls look better. If you want to try the fold yourself, roll to 1/2 inch, cut 3 inch rounds, press a crease just off center, butter the middle while leaving a dry rim, and fold the smaller half over. Just know going in that some of them will open up on you.
Frequently Asked Questions & Expert Tips
The shape. A traditional Parker House roll is a round of dough folded in half with butter brushed between the layers. Mine skips the fold and tucks a piece of cold butter inside a ball of dough instead. Same soft, buttery, slightly sweet roll, same butter pocket in the middle, with no folding.
About 3 1/2 hours from start to table, but only about 45 minutes of that is hands-on. The rest is the two rises, 60 to 90 minutes for the first and 45 to 60 for the second, where the dough does the work and you don’t. Mine went the full 90 minutes on the first rise.
Cut your 3 Tablespoons into 3 equal pieces, then cut each of those in half, in half again, and in half again. Three halvings gets you 8 from every piece, which is 24 without counting.
Do a poke test. Press a floured finger about half an inch into the dough, and it should leave a dent that fills back in slowly and not all the way. If it springs straight back, it needs more time. This works for both rises, so don’t just go by the clock.
Whichever you’ve got, because all three work. The baking dish gives softer sides since the rolls touch, which makes it the one for a pull-apart tray. The muffin pan gives a crust all the way around and the rolls come out prettiest. A parchment-lined baking sheet gives you round, free-standing rolls without digging out a special pan. I baked this batch across all three and I’d happily put any of them on the table.
Yes. Instant yeast doesn’t need to be proofed, so you can skip the first step and add it straight in with the flour. If you proof it anyway, it’s fine.
Probably not. The dough should pull away from the sides of the bowl, but a patch holding onto the bottom center is exactly what a soft enriched dough is supposed to do. Give it another minute or two on the hook before you add anything, because flour is the one thing that will make these dense. Only if the sides are still coated after 6 minutes should you add any, and then a Tablespoon at a time.
Nine times out of ten it’s temperature. Above about 120 F the milk will kill the yeast and there’s no coming back from it, and melted butter that goes in still hot will do the same thing, which is why you melt it first and let it cool. The other culprit is skipping the second package of yeast. I tried it with one and learned my lesson.
You don’t have to, but I’d really encourage it. Weighing the dough and dividing by 24 means every roll proofs and bakes on the same clock, so none of them come out underdone next to a tray of finished ones. It takes about 5 extra minutes.
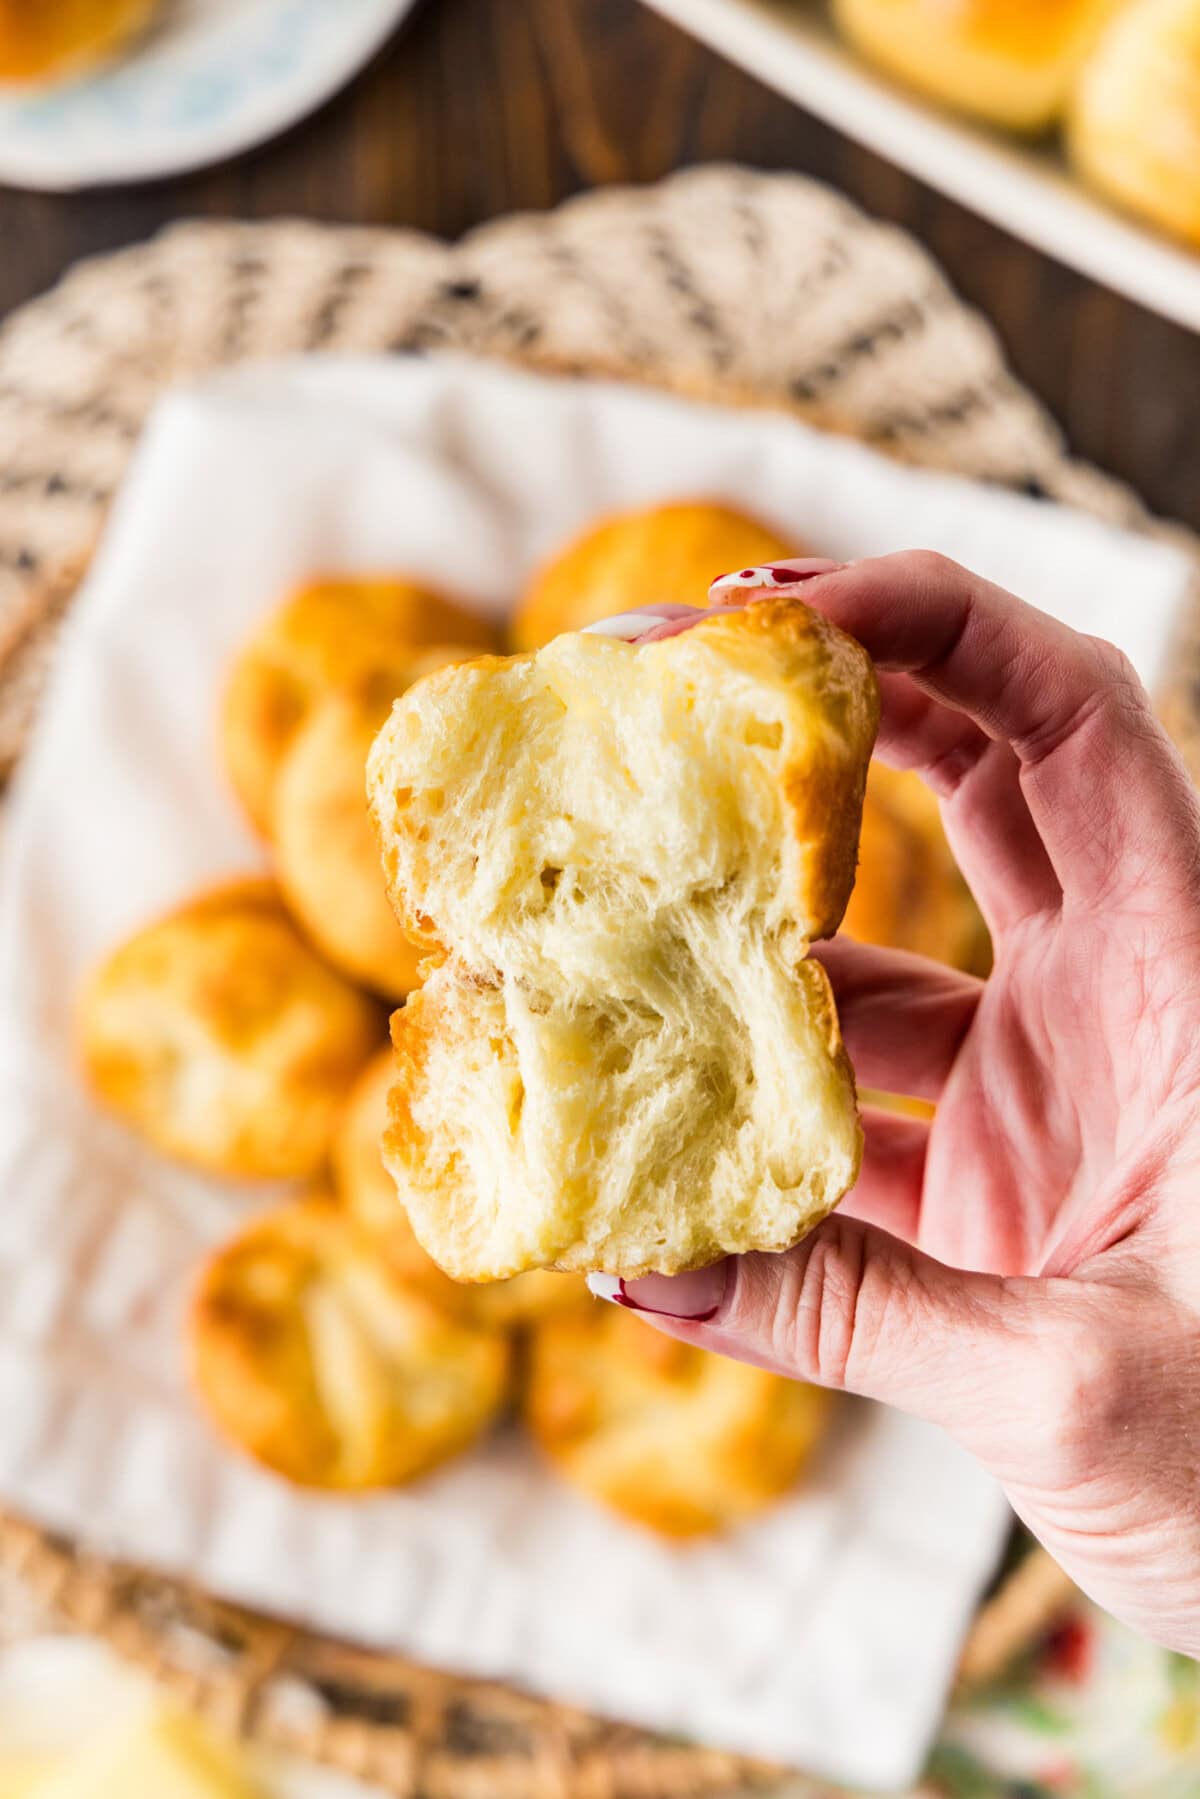
Storage and Freezing Information
These keep for 3-4 days. Let them cool completely first, then store them in an airtight container at room temperature.
To freeze them, let the rolls cool completely and wrap them tightly in aluminum foil. Slide the foil-wrapped rolls into a heavy-duty freezer-safe plastic bag and squeeze out as much air as you can. They’ll keep for up to 3 months. Since they go in wrapped together, you’ll be thawing the whole batch at once, so wrap them in smaller bundles if you’d rather pull out just a few.
You’ve got two ways to bring them back. To thaw them, unwrap them while they’re still frozen and let them come to room temperature. Don’t let them sit and thaw in the wrapping, and don’t use the refrigerator. To warm them straight from the freezer, take them out of the bag, leave them in the foil, and put them in a 300 F oven for 20-25 minutes, until they’re heated through.
Serving Suggestions
Serve these warm. The butter pocket in the middle is at its best right out of the oven while it’s still soft. They belong next to anything with a sauce or gravy worth mopping up. They’re great for the holiday table alongside turkey and dressing, or next to a roast on a Sunday. They’re just as good split and buttered with a bowl of soup on a cold night. Enjoy!
More Roll and Bread Recipes You’ll Love
If the butter tucked inside is what you’re after, my gooey garlic cheese rolls play the same game with cheese and garlic butter instead.
And if you’ve got more yeast baking in you this season, my 1963 homemade white bread is always good!
Here are a few more ideas.
I love to bake and cook and share my kitchen experience with all of you! Remembering to come back each day can be tough, that’s why I offer a convenient newsletter every time a new recipe posts. Simply subscribe and start receiving your free daily recipes!
Parker House Rolls
IMPORTANT – There are often Frequently Asked Questions within the blog post that you may find helpful. Simply scroll back up to read them!
Print It Pin It Rate ItIngredients
- ½ cup butter melted
- 1 cup whole milk divided
- 4 ½ teaspoons active dry yeast 2 packages
- ¼ cup granulated sugar divided
- 1 ½ teaspoons salt
- 2 eggs beaten
- 540 grams all purpose flour 4 1/2 cups
- 3 Tablespoons cold butter cut into 24 pieces, for the centers (cut into 3 equal pieces, then halve each one three times)
Finishing
- 1 large egg
- 1 Tablespoon water
- 2 Tablespoons butter melted, for brushing after baking
- flaky salt optional
Things You’ll Need
- 2 Muffin pan or a 13×9 baking dish
Before You Begin
- Give yourself about 3 1/2 hours. Only about 45 minutes of that is hands-on; the rest is the two rises.
- A parchment-lined baking sheet works too, and gives you round, free-standing rolls. Space them out and shape them crimped side down, the same as for the baking dish.
- Melt the 1/2 cup of butter for the dough first thing, so it has time to cool before it goes in. Hot butter kills yeast.
- Warm the milk to 110-115 F and check it with a thermometer. Above about 120 F the yeast dies and the dough won’t rise.
- Use both packages of yeast, 4 1/2 teaspoons. One package isn’t enough for this much flour and the rolls come out dense.
- Cut the 3 Tablespoons of butter for the centers into 3 equal pieces, then each piece in half, in half again, and in half again. That’s 24 pieces without counting. Keep them cold until you shape.
- Don’t beat the dough on high at any point.
- Weigh the dough and divide it by 24 so every roll is the same size and bakes evenly.
Instructions
- Melt the butter first so it has a chance to cool a bit. Hot butter will kill your yeast.
- Warm the milk to 110 – 115°F. Pour 1/3 cup of the milk into a small bowl, stir in 1 teaspoon of the sugar and the yeast. Let stand 5 to 10 minutes until foamy. If you are using instant yeast, skip this and add it with the flour.4 1/2 teaspoons active dry yeast
- In the stand mixer bowl, combine the remaining 2/3 cup milk, melted butter, remaining sugar (3 tablespoons + 2 teaspoons) and the salt. Beat on low with paddle attachment until the sugar dissolves. Add the beaten eggs and the proofed yeast.1/2 cup butter, 1 1/2 teaspoons salt, 2 eggs
- Add about half the flour (270g) and beat on low for a moment (so flour doesn’t fly everywhere) then on medium for 2 minutes, until smooth. Beating at this stage develops gluten efficiently, while the mixture is still loose enough to stretch.
- Add the remaining flour 1/4 cup at a time. Once it stiffens, switch to the dough hook and knead on low for 6 to 8 minutes. The dough should pull cleanly away from the sides of the bowl, but a patch clinging to the bottom center is normal for a soft enriched dough and is NOT a reason to add flour.TIP: Only if the sides are still coated after 6 minutes, add flour a tablespoon at a time. Do not beat on high at any point.
- Turn dough out onto a lightly floured surface and knead 1 to 2 minutes by hand, until smooth.
- Place in a greased bowl, turning to coat the top. Cover and let rise 60-90 minutes (ours was 90), until doubled.TIP: Do a poke test. A floured finger pressed half an inch in leaves a dent that fills back slowly and incompletely. If it springs straight back, give it more time.
- Punch down the dough and weigh it using a kitchen scale, then divide that weight by 24 to get the piece weight. Cut and weigh 24 pieces and shape each into a tight ball. Cover and rest 10 minutes so the dough relaxes.
- Spray whichever pan you use with nonstick cooking spray.
- Using the handle end of a wooden spoon or your finger, press an indentation into each dough ball. Flatten a butter piece with your fingers and set it into the indentation.
- If using a 13×9 baking dish: Fold the dough around the butter and crimp all the open edges closed, then set it crimp side down.
- If using muffin tins: Fold the dough around the butter but do not crimp, and set it in the muffin tin open side up.
- Cover and rise 45 to 60 minutes, until puffy, using the poke test again.
- Set whichever pan you use on top of a baking sheet before it goes in the oven, which keeps the bottoms from over-browning.
- Preheat to 350°F. Whisk together the egg and water to make the egg wash. Brush the risen rolls with the egg wash. Bake 20-25 minutes. Start checking muffin pans at 18 to 20, since metal on all sides browns them faster than the baking dish does. 23 minutes was right for both in testing.1 large egg, 1 Tablespoon water
- Brush the hot rolls with the 2 tablespoons of melted butter. Add flaky salt if you like.2 Tablespoons butter
Expert Tips & FAQs
- Bake at 350 F for 20-25 minutes. 23 minutes was right for every pan in my testing. Start checking muffin pans at 18-20, since metal on all sides browns them faster.
- Use the poke test for both rises instead of the clock. A floured finger pressed half an inch in should leave a dent that fills back slowly and incompletely. If it springs straight back, give it more time.
- Cool completely, then store in an airtight container at room temperature. They keep 3-4 days.
- To freeze, cool completely, wrap the rolls tightly in aluminum foil, then slide them into a heavy-duty freezer-safe plastic bag with the air squeezed out. They keep up to 3 months. Wrap in smaller bundles if you don’t want to thaw all 24 at once.
- To thaw, unwrap while still frozen and let them come to room temperature. Don’t thaw them in the wrapping and don’t use the refrigerator.
- To warm them straight from frozen, take them out of the bag, leave them in the foil, and put them in a 300 F oven for 20-25 minutes until heated through.
Nutrition
The recipes on this blog are tested with a conventional gas oven and gas stovetop. It’s important to note that some ovens, especially as they age, can cook and bake inconsistently. Using an inexpensive oven thermometer can assure you that your oven is truly heating to the proper temperature. If you use a toaster oven or countertop oven, please keep in mind that they may not distribute heat the same as a conventional full sized oven and you may need to adjust your cooking/baking times. In the case of recipes made with a pressure cooker, air fryer, slow cooker, or other appliance, a link to the appliances we use is listed within each respective recipe. For baking recipes where measurements are given by weight, please note that results may not be the same if cups are used instead, and we can’t guarantee success with that method.
- Parker House Rolls - November 11, 2026
- Snickers Salad - November 3, 2026
- Pumpkin Spice Mudslide - October 22, 2026




Leave a Reply