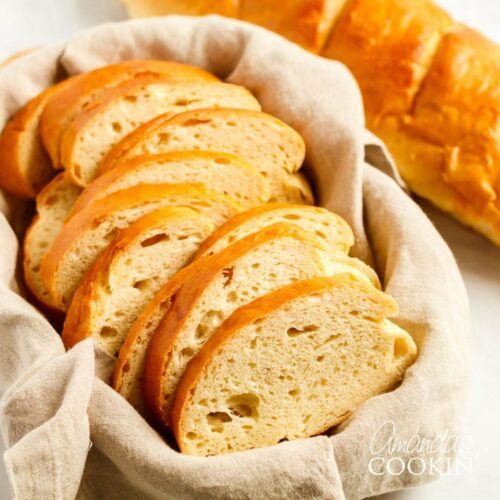
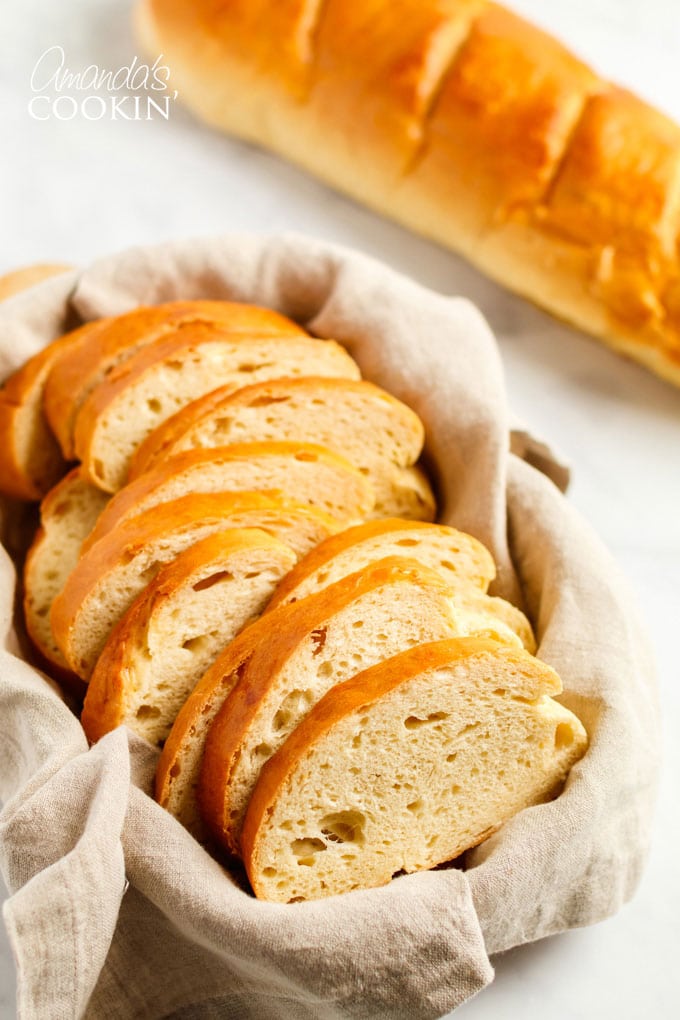
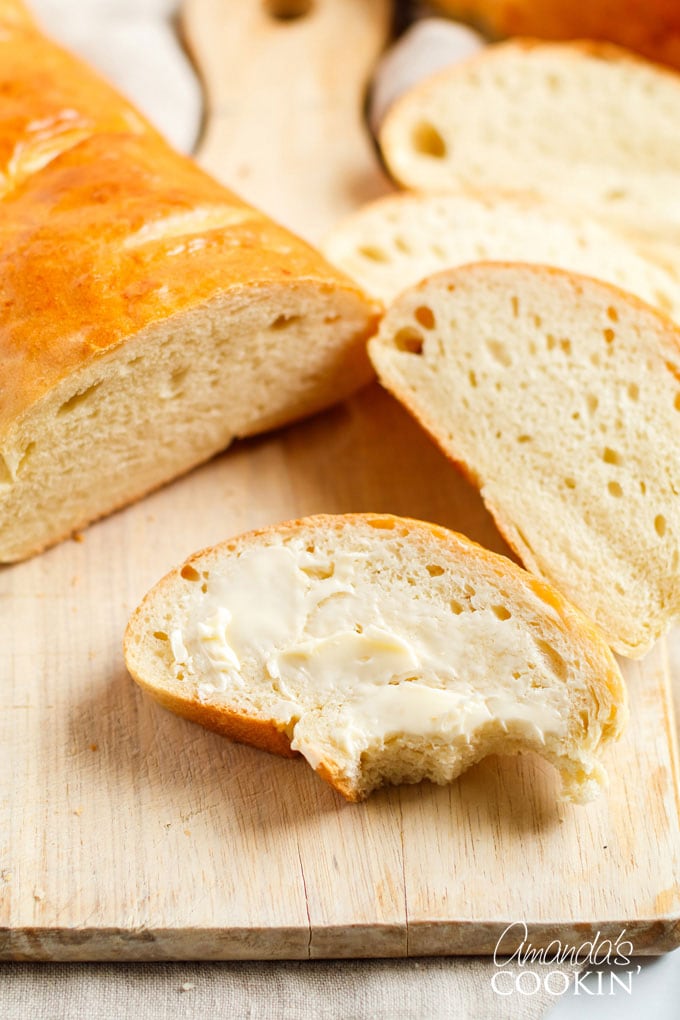
Homemade Italian bread is actually very easy to make and tastes delicious! While you could buy a loaf of Italian bread from the grocery store, baking bread is fun and satisfying. Warm, toasty bread from the oven is pure comfort food.
I love my 1963 homemade white bread for sandwiches and everything peasant bread for snacking, but this Italian loaf is perfect with a bowl of spaghetti, or alongside a plate of my crockpot roast beef!
Italian Bread Recipe
There’s a definite difference between French bread and Italian bread. Most of the general population either doesn’t know or simply doesn’t care, but there are differences nonetheless.
Basically though, French bread only uses flour, yeast, salt, and water. In fact, French law states that added oils or fats are prohibited. A French loaf is usually long and thin, while an Italian loaf is shorter and wider.
Expert Tips & FAQs
In this section I like to provide tips and recommendations about the different ingredients used. I also try to answer questions about substitutions. You will find the full list of ingredients with measurements in the printable recipe card at the end of this post.
- You can use the packets of active dry yeast available at any grocery store. I bake a lot of bread, so I prefer to by SAF instant yeast in larger packages.
- When a bread recipe calls for warm water, the temperature should be around 110 degrees F. If the water is too hot it will kill the yeast, and too cold will delay the rise process.
- You’ll also use hot water in this recipe, but since you are mixing it with other ingredients before adding the yeast mixture it will be fine. You want hot tap water, about 115-120 F, not boiling water.
- This recipe calls for vegetable oil, but olive oil can also be used.
- We are using all-purpose flour, white not wheat, to make this bread.
You can freeze the dough for up to 3 months. If kept in the fridge, the yeast will continue to grow, even if it’s slowly. This can be done for about a day, but I wouldn’t do it much longer than that. Wrap the dough tightly in plastic wrap and store in freezer bags. When ready to bake, remove from the freezer and thaw at room temperature. It will take about 4 hours to thaw. Then bake according to the recipe.
Helpful kitchen tools:
- Mixing bowls
- Stand mixer or hand mixer
- Baking sheets
- Wire cooling rack
- Pastry brush
- Rolling pin
- Bread knife
Bread Machine instructions are at the end!
How to Make Italian Bread
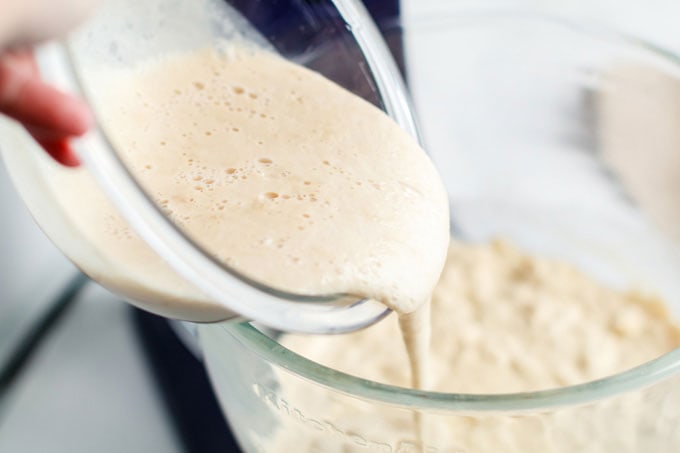
- Dissolve yeast, 1/2 cup warm water (110 F), and 1/2 teaspoon granulated sugar in a small bowl.
A NOTE ABOUT YEAST: You can use either active dry yeast or instant yeast. If you use active dry yeast it needs to be proofed in order for it to be reactivated. Instant dry yeast doesn’t need proofing. Active dry yeast must be reactivated by proofing in warm water, or the bread won’t rise properly. This process is to “prove” that the yeast is still alive.
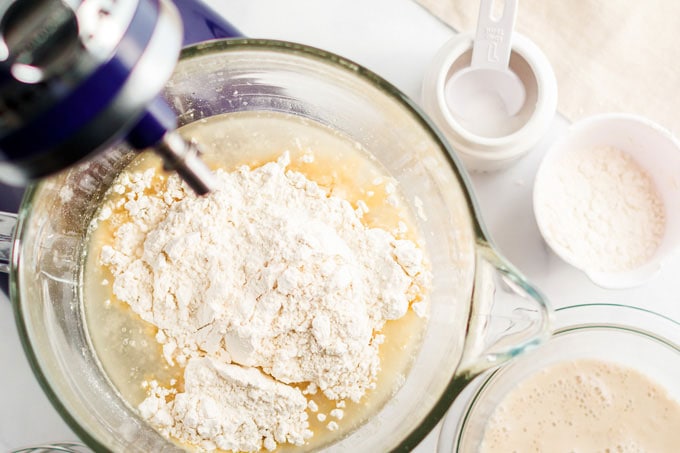
- In a large bowl or stand mixer, combine 2 cups hot water (115-120 F), 3 tablespoons granulated sugar, the salt, and the oil. Add 3 cups of flour to the mixture in this large bowl/mixer and mix well.
- Stir in yeast mixture.
- Add 2 – 3 cups more flour and mix until well blended. (At this point your dough will still be quite sticky).
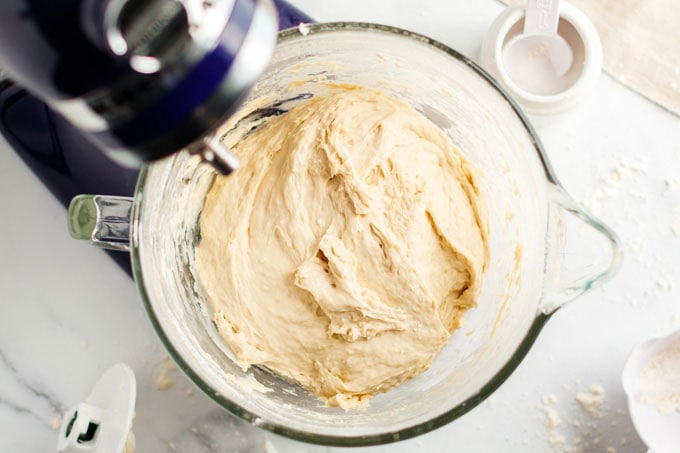
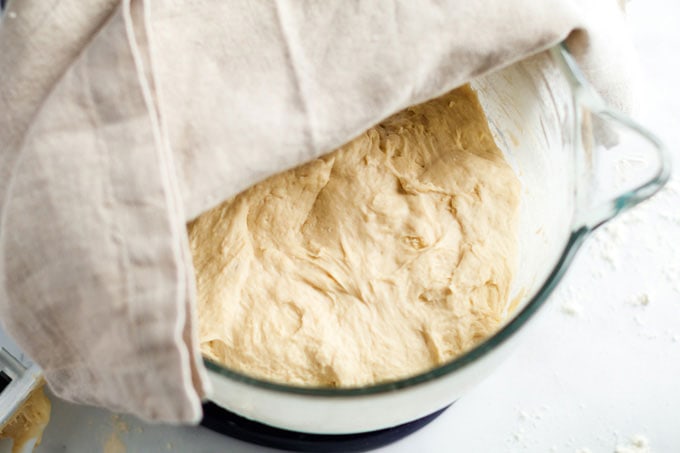
- Leave in bowl, cover with a towel and let rise for 1 hour. (If using a mixer, remove the bowl from the mixer and cover it with a towel. Otherwise your paddle attachment or dough hook will get covered in dough when it rises).
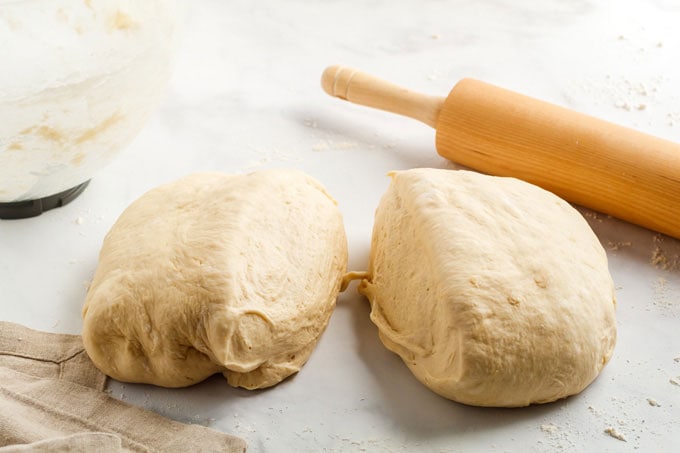
- Divide dough into 2 (or 3 if you want smaller loaves) pieces.
NOTE: This dough does not require kneading.
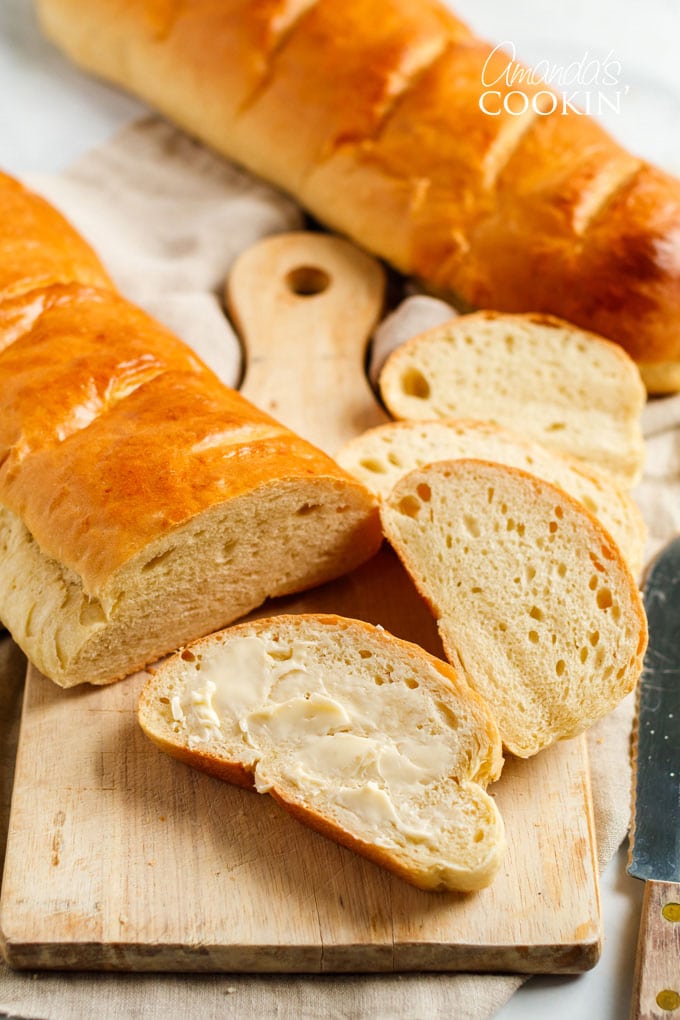
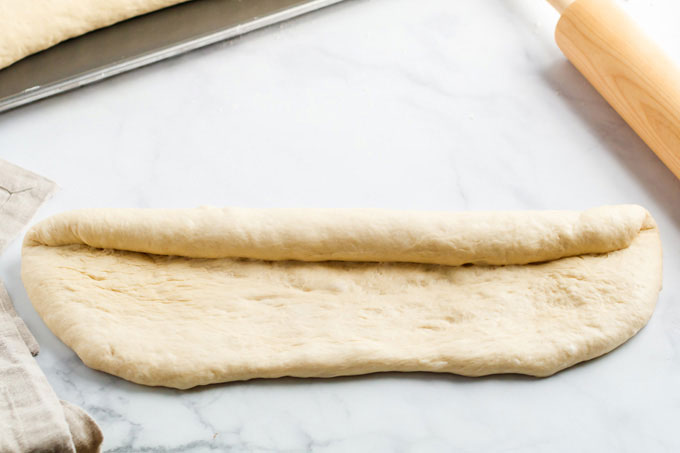
- Roll out each piece on a floured surface into the length desired then roll up length wise like a jelly roll.
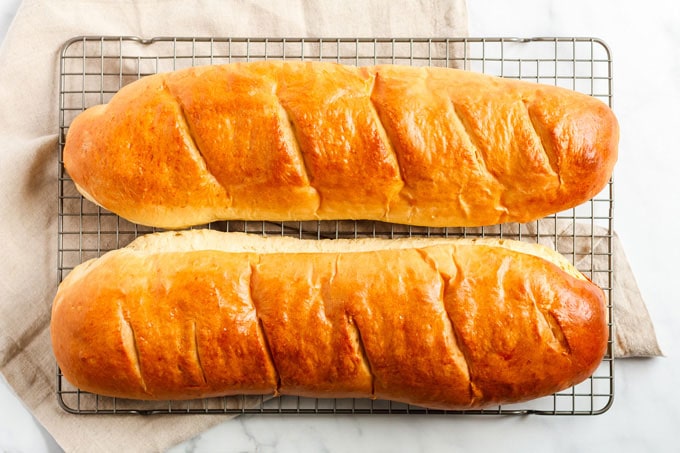
- Put on a greased cookie sheet, sealed side down, and tuck the ends under. Slash the top diagonally across the top every couple of inches with a sharp knife.
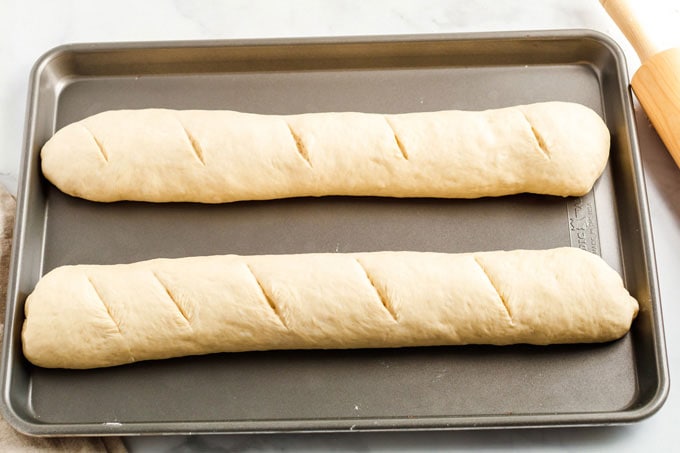
- Cover and let loaves rise 30 more minutes.

- While loaves are rising, preheat oven to 400 degrees Fahrenheit.
- Whisk the egg white and brush over the top of loaves.
- Bake for 25 – 30 minutes.
How to Make Italian Bread in a Bread Machine
Several people have asked if this Italian bread can be prepared in a bread machine. We were able to test it successfully and have provided the instructions below. Please note, the preparation of the dough is in the bread machine, but you will still remove the dough, form a loaf, and bake it in your conventional oven.
- Using the printable recipe below, cut the ingredients in half, and eliminate the water and sugar step used for proofing the yeast.
- Put 1 cup of water (110 F) and 1/4 cup oil in the bread machine bucket (make sure the paddle is on).
- Add 4 1/2 teaspoons sugar and 1 1/2 teaspoons salt.
- Gently add 3 cups flour over the water mixture so that it is all covered.
- Place 2 1/4 teaspoons (one packet) of yeast on top of flour with nothing else touching it.
- Place bucket in bread machine and enter dough cycle.
- When it beeps, take out and roll dough, adding more flour if needed.
- Roll up (follow instructions in printable recipe for forming loaf) and place on baking sheet, add slashes to top, and cover with towel to let rise (again, according to recipe).
- Brush with egg white and bake at 400 F (see recipe instructions below).
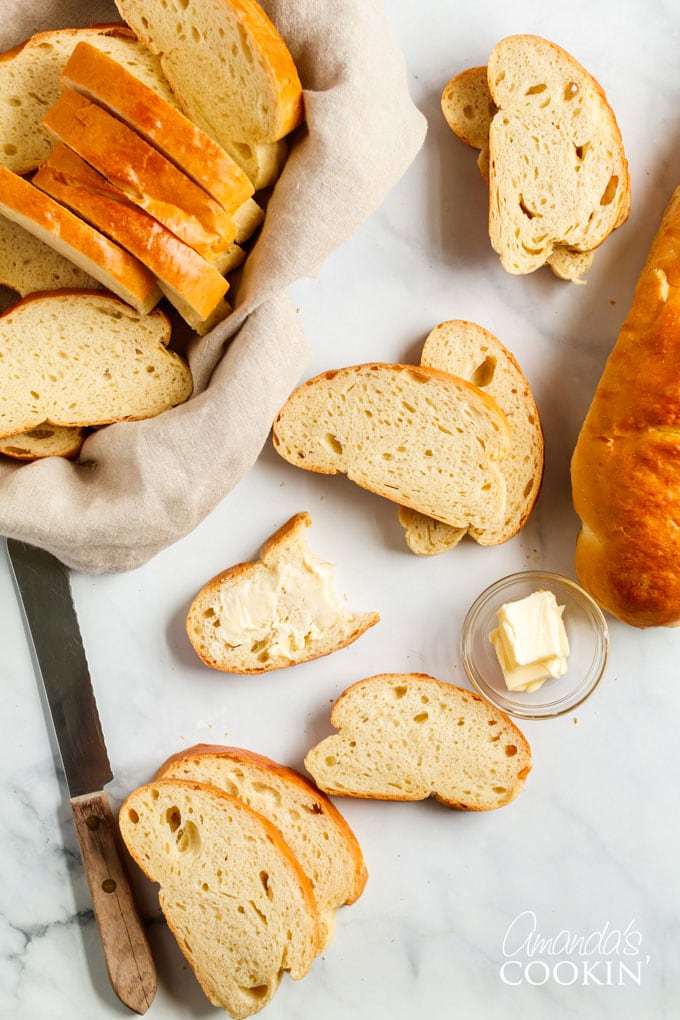
How to Enjoy this Italian Bread
There are plenty of dinners that we like to eat this homemade bread with, and they aren’t all Italian meals! I’ve been known to sop up the juices of my favorite pork sirloin roast using a hunk of this bread.
A big bowl of Italian Sausage Tomato Orzo Soup or my Cheddar Cheese Potato Soup screams for a piece of warm, buttered bread. It’s also amazing with this Zuppa Toscana for those Olive Garden fans out there! Another dinnertime favorite is this Chicken Cacciatore, and it’s great to have a hunk of bread for dipping into the sauce.
Try our new Crockpot Lasagna, it would be perfect with this bread!
Need more ideas? Find all my dinner recipes here!
What Our Readers Are Saying
Never baked bread before? Want to make sure before you invest the time and ingredients? Here’s just a small sampling of what our readers are saying about this recipe! You can find more reviews in the comments down below!
“I have made this twice and it is very tasty, good crust and soft inner not dense , very good flavor, I have been baking bread for 40 years, this is in the top five, Thanks.” ~ Thomas
“By far one of the best and easiest bread recipes I have come across!! Dough comes out perfect and is so easy to roll!! So glad I came across this recipe it’s a game changer.” ~ Tracy
“This bread was so, so delicious! I am proud of myself for going through with it. I was scared to do it and usually need video ( visual learner ) but went ahead and one of the two loaves is already gone! I wish I could attach a pic! I will make this over and over!” ~ Desiree
“I never post reviews… but after making this, I had to!!! I only had bread flour, so used that… but that was the only deviation. I followed the recipe exactly. The bread came out PERFECT! Crispy outside and moist inside. This is some of the best bread I’ve ever made. It will definitely be made again. Thank you!!” ~ Terri
“‘This is a million times better than store bought bread’
‘You have to make this every time we have pasta now’
‘Nom nom nom…’Feedback from my family after serving them this bread for dinner. Excellent recipe!” ~Dave
“OMG! I made this bread today and have to say this is the BEST bread I have ever made, and I’ve tried a lot of recipes! It was very light and fluffy yet just crispy enough on the crust. The only changes I made were I used bread flour and only used 2.5 tablespoons of the sugar instead of three. Thank you for sharing this! I am throwing away all my other bread recipes!” ~ Nadine

Homemade Italian Bread
IMPORTANT – There are often Frequently Asked Questions within the blog post that you may find helpful. Simply scroll back up to read them!
Print It Pin It Rate ItIngredients
- 1 ½ tablespoons active dry yeast 2 packets
- ½ cup warm water 110F
- ½ teaspoon granulated sugar
- 2 cups hot water hot to the touch, not boiling (115-120F)
- 3 tablespoons granulated sugar
- 1 tablespoon salt
- ½ cup vegetable oil
- 5-6 cups all-purpose flour add more if needed to get to a pliable dough
- 1 large egg white for brushing on loaves
Before You Begin
- If your dough is still super sticky, you can add small amounts of flour until the dough just comes together.
- You can use the packets of active dry yeast available at any grocery store. I bake a lot of bread, so I prefer to by SAF instant yeast in larger packages. If you use active dry, just follow the instructions in the recipe and let it sit for a few minutes to proof (it will get a little foamy).
- When a bread recipe calls for warm water, the temperature should be around 110 degrees F. If the water is too hot it will kill the yeast, and too cold will delay the rise process.
- Use regular white granulated sugar for this recipe.
- In a separate step, you’ll also use hot water in this recipe. Since you are mixing it with other ingredients before adding the yeast mixture it will be fine. You want hot tap water, not boiling water.
- Regular everyday table salt is used, not Kosher or sea salt.
- This recipe calls for vegetable oil, but olive oil can also be used.
- We are using all-purpose flour, white not wheat, to make this bread.
Instructions
- Dissolve yeast, 1/2 cup warm water (110F), and 1/2 teaspoon granulated sugar in a small bowl.
- In a large bowl or stand mixer, combine 2 cups hot water (115-120F), 3 tablespoons granulated sugar, the salt, and the oil. Add 3 cups of flour to the mixture in this large bowl/mixer and mix well. Stir in yeast mixture.
- Add 2 – 3 cups more flour and mix until well blended. (At this point your dough will still be quite sticky). Leave in bowl, cover with a towel and let rise for 1 hour. (If using a mixer, remove the bowl from the mixer and cover. Otherwise your paddle attachment or dough hook will get covered in dough when it rises). NO KNEADING IS REQUIRED.
- After the rise, if the dough is too sticky to handle, add more flour until its workable. For some people this can be up to a cup or more! Just don't dry out the dough. Add by quarter cupfuls until its workable.
- Divide dough into 2 (or 3 if you want smaller loaves) pieces. Roll out each piece on a floured surface into the length desired then roll up lengthwise like a jelly roll. If it's still too sticky, add more flour until it's workable but not dry.
- Put on a greased cookie sheet, sealed side down, and tuck the ends under. Slash the top diagonally across the top every couple of inches with a sharp knife.
- Cover and let loaves rise 30 more minutes.
- While loaves are rising, preheat oven to 400 degrees Fahrenheit.
- Whisk the egg white and brush over the top of loaves.
- Bake for 25 – 30 minutes.
Nutrition
The recipes on this blog are tested with a conventional gas oven and gas stovetop. It’s important to note that some ovens, especially as they age, can cook and bake inconsistently. Using an inexpensive oven thermometer can assure you that your oven is truly heating to the proper temperature. If you use a toaster oven or countertop oven, please keep in mind that they may not distribute heat the same as a conventional full sized oven and you may need to adjust your cooking/baking times. In the case of recipes made with a pressure cooker, air fryer, slow cooker, or other appliance, a link to the appliances we use is listed within each respective recipe. For baking recipes where measurements are given by weight, please note that results may not be the same if cups are used instead, and we can’t guarantee success with that method.
This recipe was originally published here on January 28, 2009

- 26 Best Ground Beef Casseroles for Easy Family Dinners - July 8, 2026
- Strawberry Shortcake Kabobs - July 2, 2026
- 30 Ground Beef Dinners Ready in 30 Minutes - June 26, 2026


Anna says
I’ve made this several times always comes out GREAT.
Leah says
The only bread I’ve ever made successfully is banana bread. Until today. Even with my clumsy rolling skills & tendency to over-flour, I pulled two very respectable looking loaves from my oven a half hour ago. The crust is crisp & the inside is tender & fluffy. I waited 15 minutes (okay, okay…more like 10) & cut the first slice. It is delicious!!! I rarely leave reviews & have never left one immediately after trying a recipe, but I’m so thrilled with the results I had to say thanks!
Amanda Davis says
Thanks Leah, that says a lot! Really appreciate you taking the time to leave this comment and we are so glad you loved it!
Linda M. says
First attempt. I only used half the recipe as there is only the two of us. Turned out pretty good; soft, moist and good texture.
Amanda Davis says
Looks great Linda, thanks so much for sharing!
Adam says
Excellent bread thank you! How do you recommend storing it?
Amanda Davis says
It should last a day or two wrapped in foil or plastic wrap at room temp. After that it should be refrigerated for 3-5 days. Since there are no preservatives, it won’t have the life that store bought bread will.
Scott Archer says
First time I’ve tried this recipe. Fantastic! Light ,airy ,moist, nice crust. Used 1/4 stick butter to carmelize garlic and 1/4 veg oil. My new go to
Angel says
Since I don’t need to proof using instant yeast, should I skip the first step entirely? or do I still dissolve the instant yeast in water and sugar?
Amanda Davis says
You can skip the step. I always use instant yeast but I still do proof it, just in case. But technically you can just add it to the dry ingredients.
Edna says
Note to self: when adapting to bread machine add 1/4 cup of water with the one cup which is indicated. If, in the full recipe, you use 1/2 cup + the yeast, then 2 cups later, the total for 2 loaves is 2&1/2 cups of water. Therefore to get a good elastic dough, for halfing the recipe for bread machine, add 1&1/4 cups water….
Bridget Dallaire says
This bread turned out delicious , bread machine then oven … delicious
Khristyna Reich says
I think I added too much flour because my came out dense and almost the consistency of cornbread in a way. I’m going to try again with not as much flour. Still tasted delicious and the family loved it!
Jill D says
Khristyna – I’ve had the same happen. It is a much wetter dough than I was used to so I thought I knew better than the author – I was wrong. Once I got the consistency of the dough down, this is probably one of the best Italian bread recipes I’ve ever made. It’s my go-to for this type of bread. I hope you do give it another try. You won’t regret it!
Linda Hall says
Can I bake this bread in a loaf pan also?
Amanda Davis says
We haven’t personally tested that yet, but several of our readers in the comments have done so successfully!
LeeAnn says
if I accidentally coated 8n olive oil to rise have I ruined it?
Amanda Davis says
I’m not sure I understand the question, maybe there’s a typo? Are you saying you brushed the loaf with olive oil?
Christopher Pfeiffer says
2nd time success! Something was off with my measurements somewhere?
Still, 2 beautiful loaves born a few minutes ago!
Peace, and Bake on,
Chris
Amanda Davis says
These loaves are gorgeous! So glad you had success this time! :)
Elise says
This was so fun to make!! Turned out amazing and I can’t wait to share with my family.
Amanda Davis says
Looks wonderful! Wish I could have a slice, thanks for sharing with us!
Wendy says
I used 3 cups of flour and extra on top to roll so it did t stick. My bread was dense. How do you know if you use 2 cups or 3 cups?
Amanda Davis says
Every time I make this I use 6 cups of flour total in the dough, plus a handful for dusting the board. The dough will still be a little sticky, so if you kept adding more until the dough was no longer sticky at all, that would cause it to be dense.
Gena says
First attempt at Italian Loaf. The recipe was easy to follow. I do not have a mixer, so i did it by hand.
I added a little Italian seasonings to the dough and some sesame seeds to the top. These could never be mistaken for being baked by a professional, but they sure came out yummy! Thank you, I will add this to my fav’s.
Amanda Davis says
They look delicious, love the topping!
Linda says
I’m using instant yeasr,when would I add? thank you
Amanda Davis says
You can just follow the instructions as written.
Austen says
Hello! Are you able to freeze the dough? If so, how what you recommend on doing when it came time to thaw it out? Thank you!
Amanda Davis says
We have not tested this yet (but will be soon), but it should work to form the dough into loaves after the FIRST rise, then freeze it. When ready to bake, thaw the dough, allow it to rise again, and then bake as usual.
Victoria says
I love this recipe it’s so easy, I always do the first rise then make my 4 loaves since it’s my husband and I, I freeze the other 3 loaves for later. when I take it out of the freezer I thaw then let it rise the second time then cook. I always cook one loaf then freeze the other 3 wrap with Saran wrap add a light coat of oil to the Saran wrap. it always turns out very good.
MadMike740 says
The is the best bread I’ve ever made in my life. I used olive oil instead of vegetable and kosher salt instead of table salt. So soft and fluffy in the middle. Absolutely delicious.
Amanda Davis says
Oh those are picture perfect, thanks so much for sharing with us!
Terra Meek says
Turned out very nice for this non-baker!
Amanda Davis says
Gorgeous!
Suha Abu Shamat says
A favorite! Second time making it :)
Amanda Davis says
Looks beautiful!