
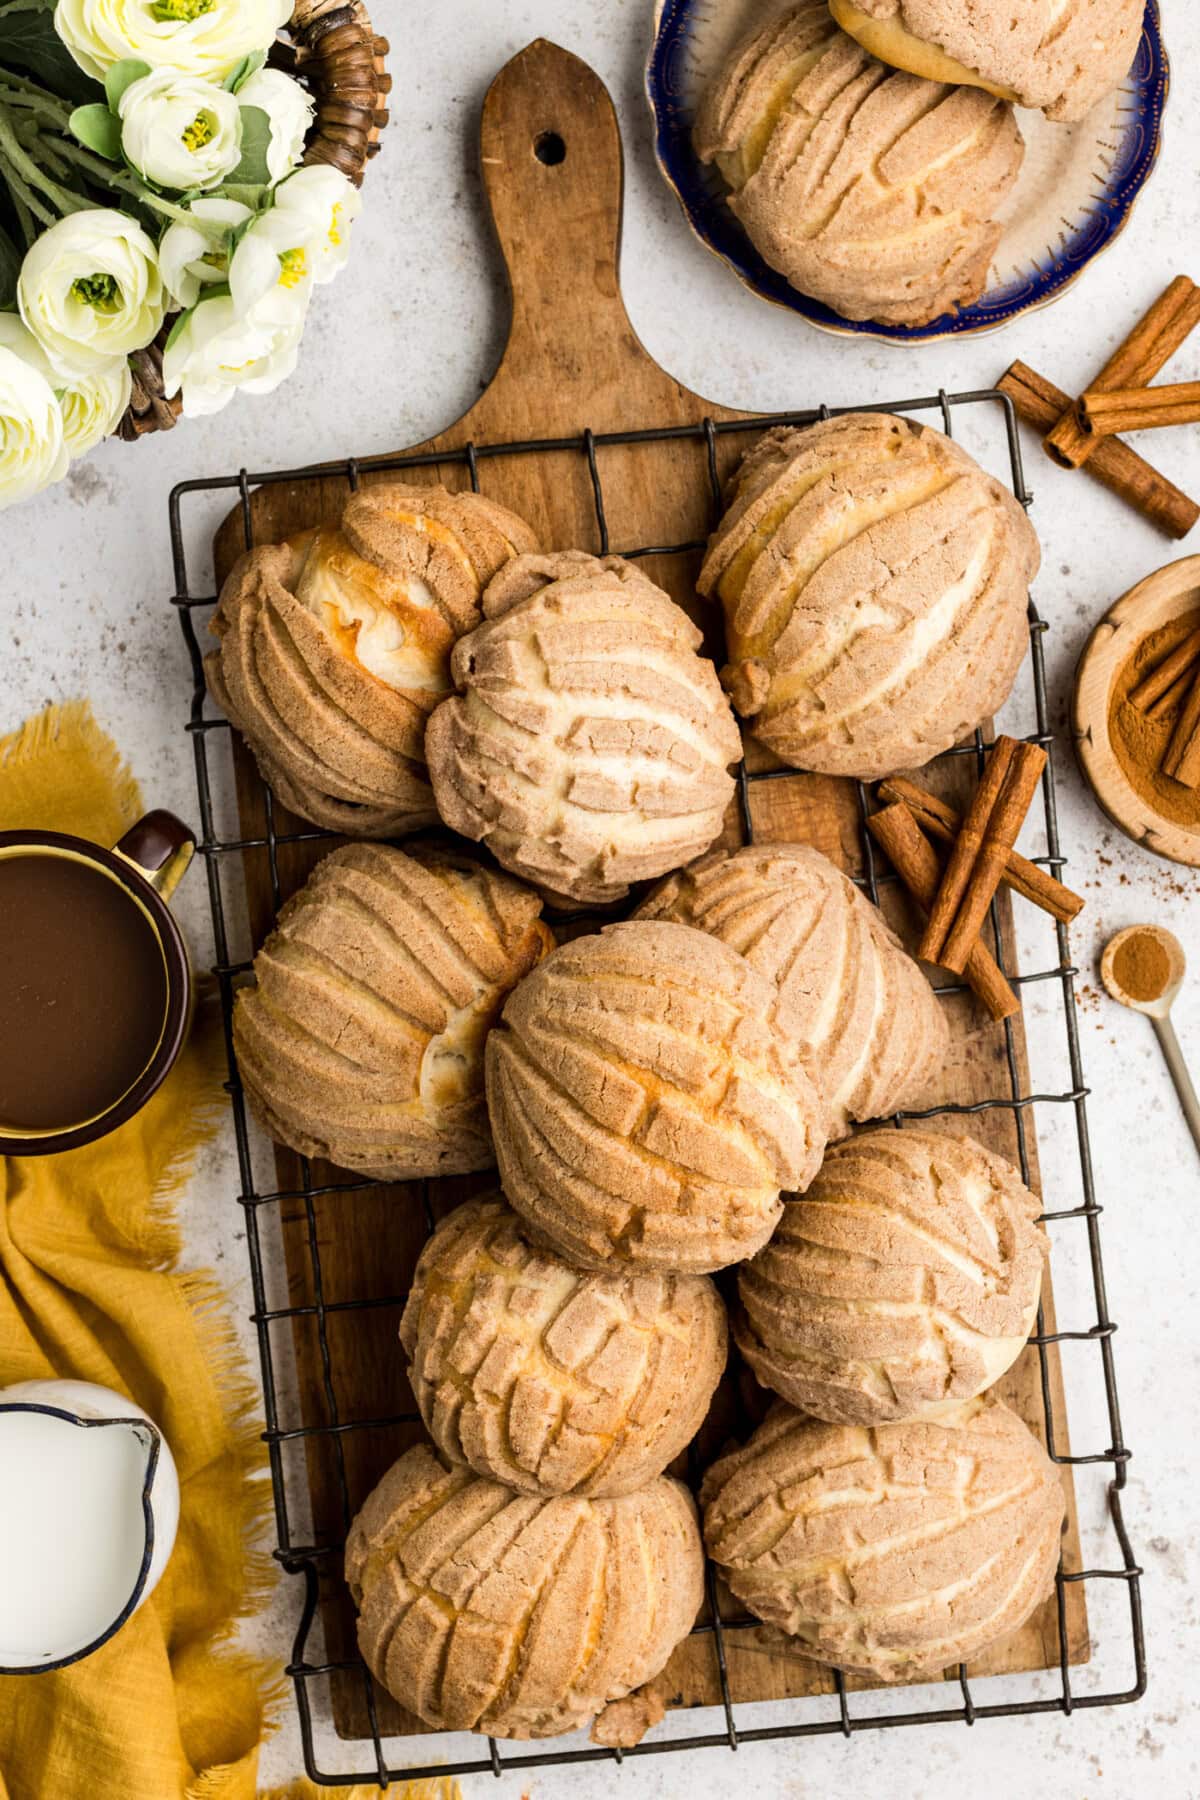
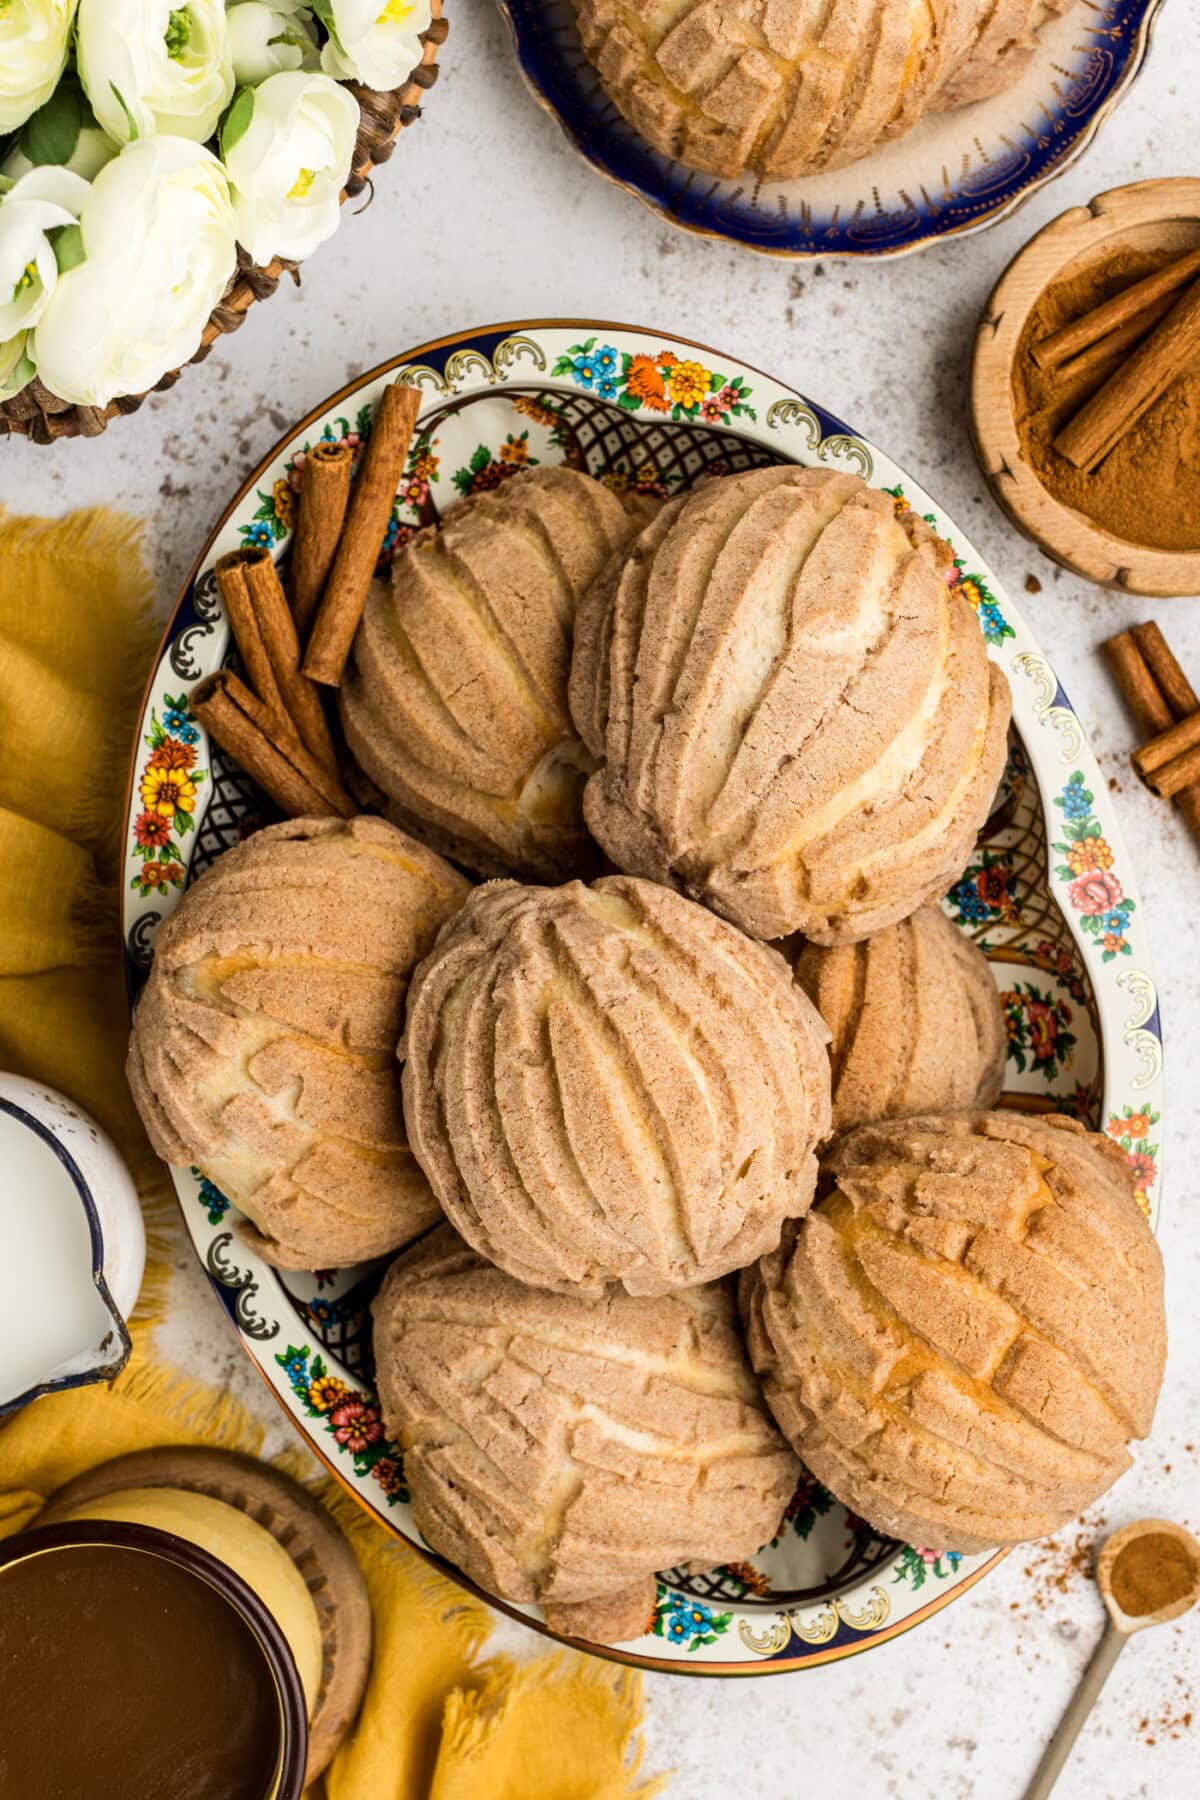
Fluffy, soft, and slightly sweet with that iconic crumbly sugar crust, this recipe for Mexican sweet bread uses easy pantry staple ingredients so you can make your own conchas right at home.
Why this recipe works
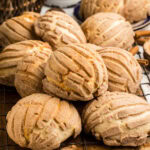
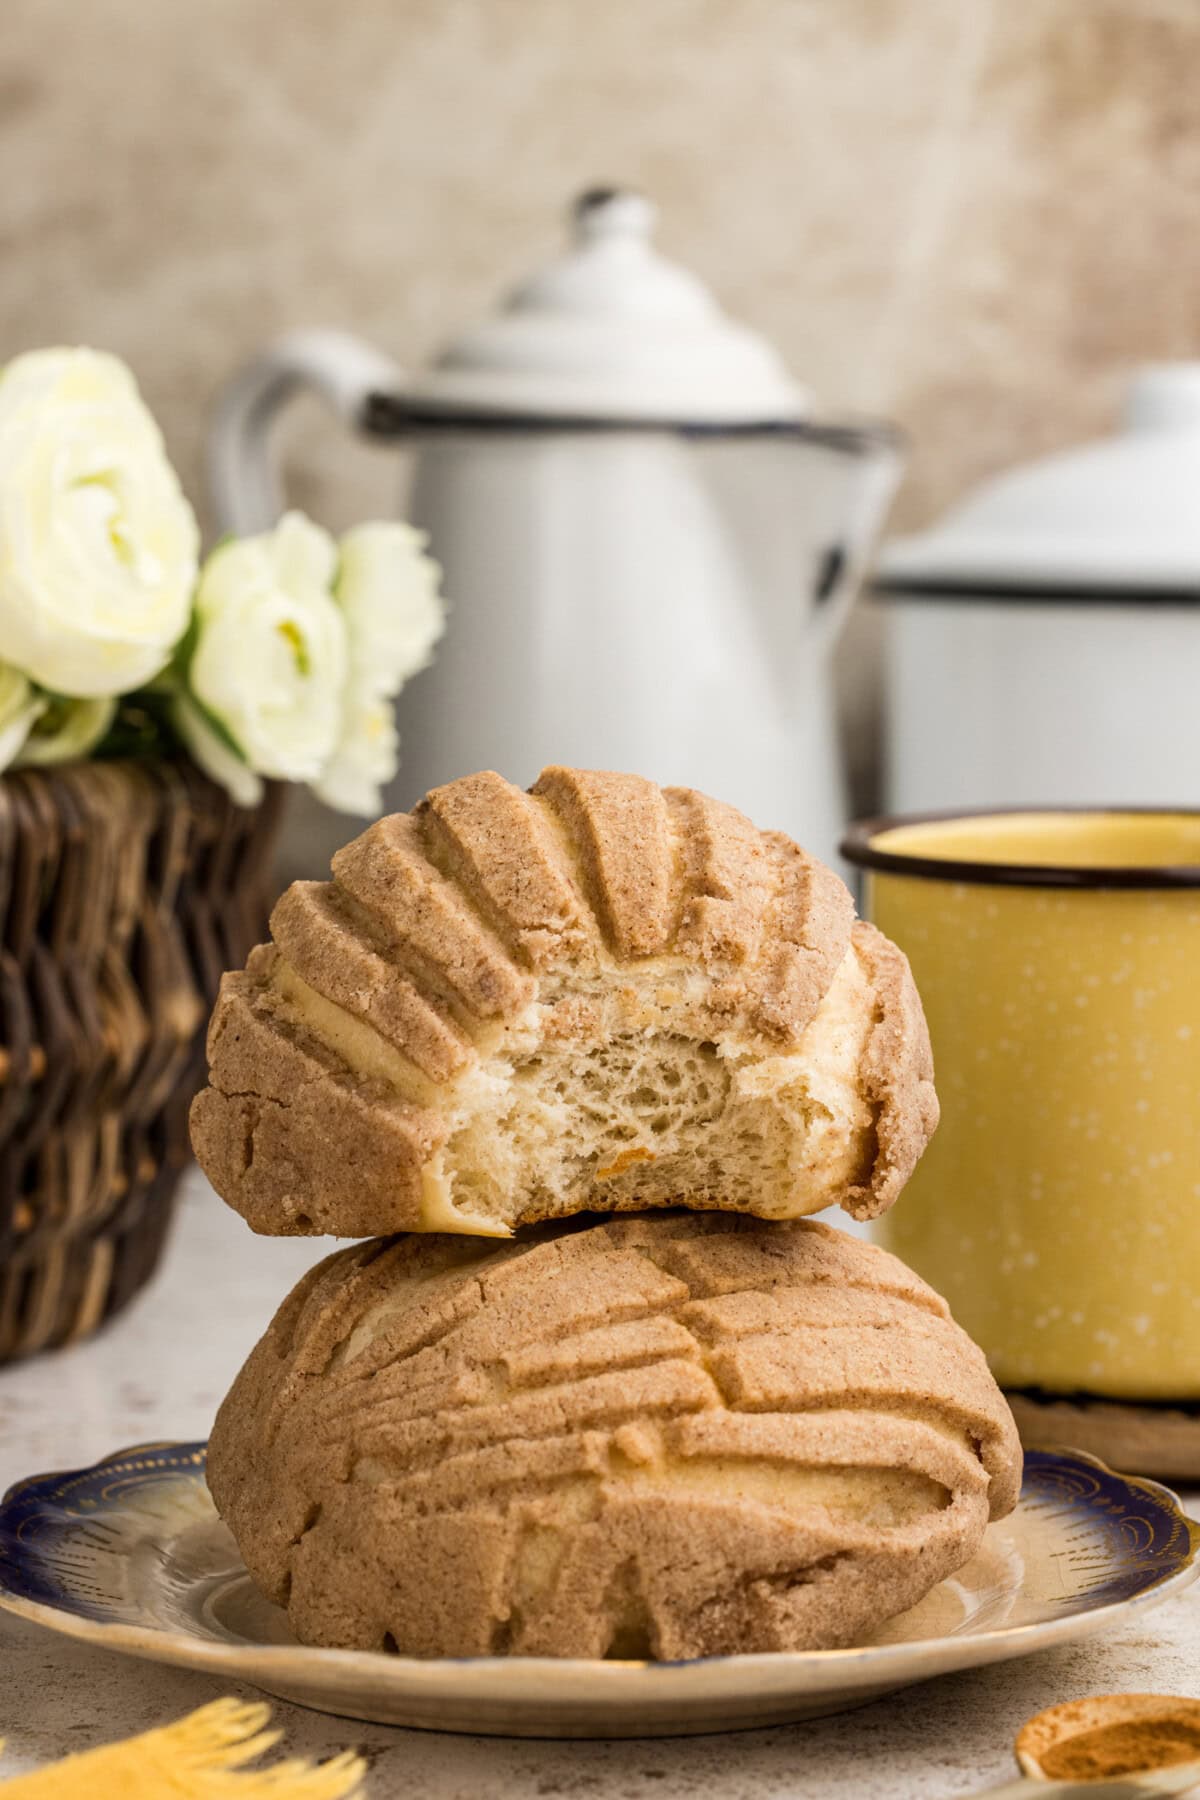
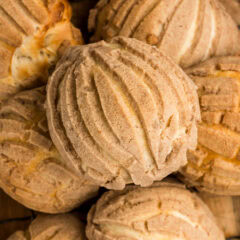
Oh, Mexican sweet bread. That signature seashell carved crust that’s sugary, crumbly, and oh so very tantalizing atop a soft, brioche-like roll… Whatever would we do without you?
Conchas, the iconic Mexican sweet bread, is probably one of the most recognizable pan dulce out there. And if you didn’t know, they’re named after the Spanish word, conchas, which translates to shell. Hence, the beautiful shell-shaped pattern carved on top of the crust. They might look difficult to make, but they’re actually pretty easy. So long as you make ’em with love, just like the local Mexican panaderia.
RELATED – One of my favorite ways to enjoy conchas is with a hot cup of champurrado. That is, of course, if I happen to refrain from eating it all with my morning coffee.
Ingredients you will need
Get all measurements, ingredients, and instructions in the printable version at the end of this post.
Ingredient Info and Substitution Suggestions
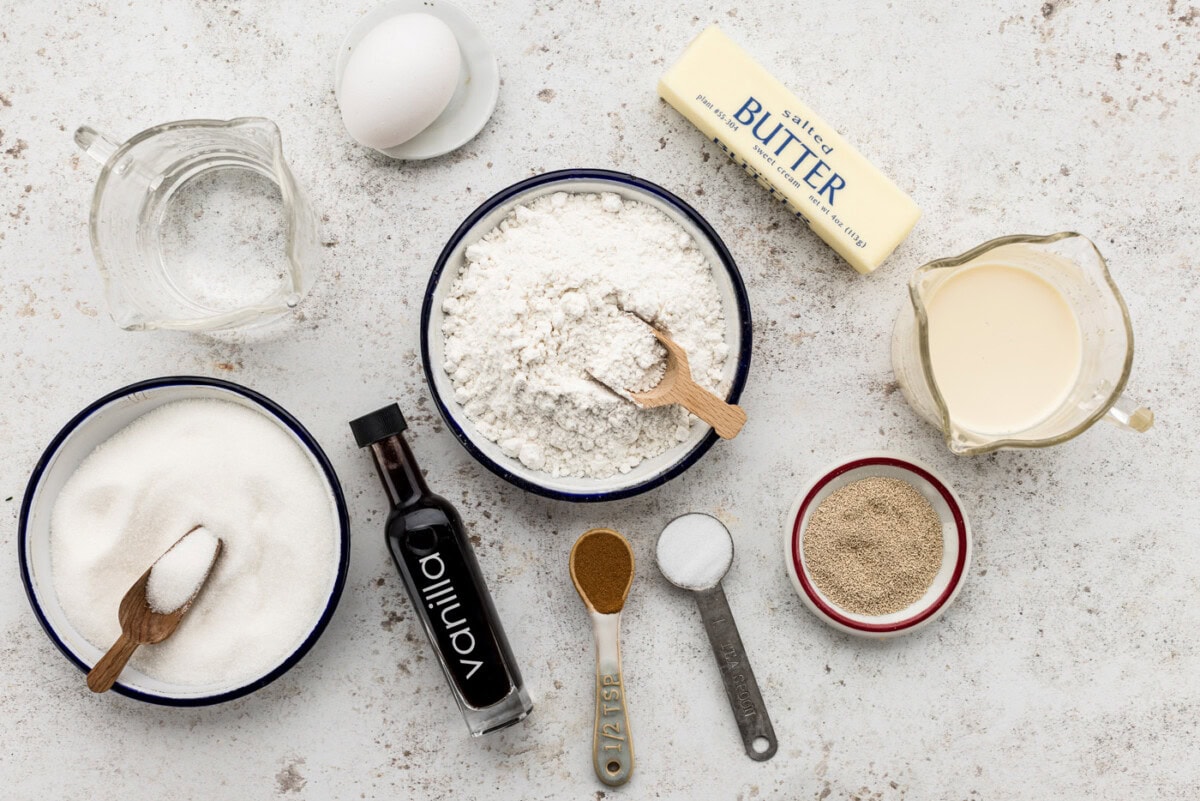
YEAST – Active dry yeast is the ol’ reliable when it comes to home baking. Be sure to check your expiration date before starting. It’s important to use properly warmed water when proofing yeast, aim for 115-120F. We’re also adding warmed evaporated milk. It’s warmed to the same temperature so that it doesn’t slow down the yeast activation. Evaporated milk adds richness to the dough while also helping it stay soft and tender!
FLOUR – I highly recommend using a kitchen scale to weigh your flour for the best results. Too much flour can leave you with dry, dense rolls, whereas too little flour can affect the rise and leave you with sticky, wet dough. If you don’t own a scale, use the scoop and sweep method. Aerate the flour with a spoon, then spoon it into a measuring cup until overflowing. Gently level off the cup with the back end of a butter knife. You never want to pack flour into a measuring cup, which often happens if you scoop with the cup directly from the bag.
How to Make Conchas Mexican Sweet Bread
These step by step photos and instructions are here to help you visualize how to make this recipe. You can Jump to Recipe to get the printable version of this recipe, complete with measurements and instructions at the bottom.
- In a large bowl, stir together yeast and warm water, let stand for ten minutes.
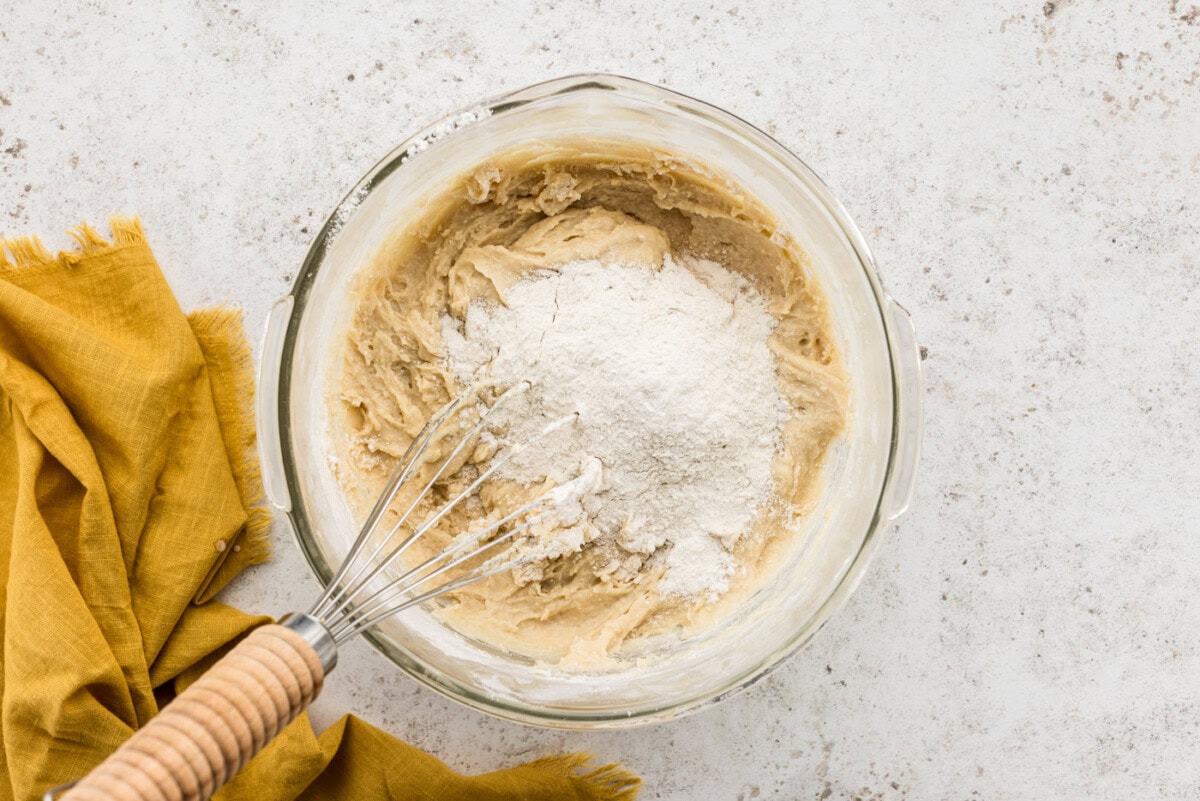
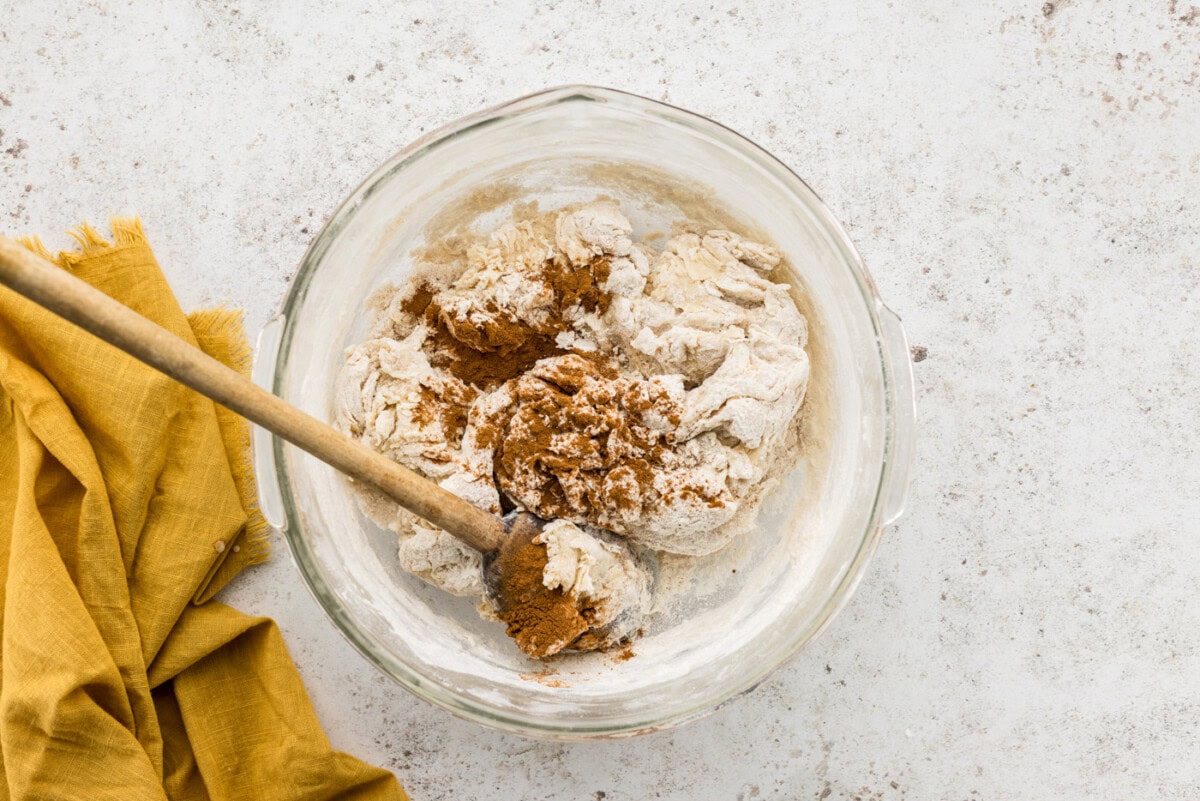
- Stir in evaporated milk, 1/3 cup sugar, melted butter, egg, and salt. Stir in 2 cups of flour. Gradually stir in the remaining 2 cups of flour and the 1/2 teaspoon of cinnamon to make the dough.
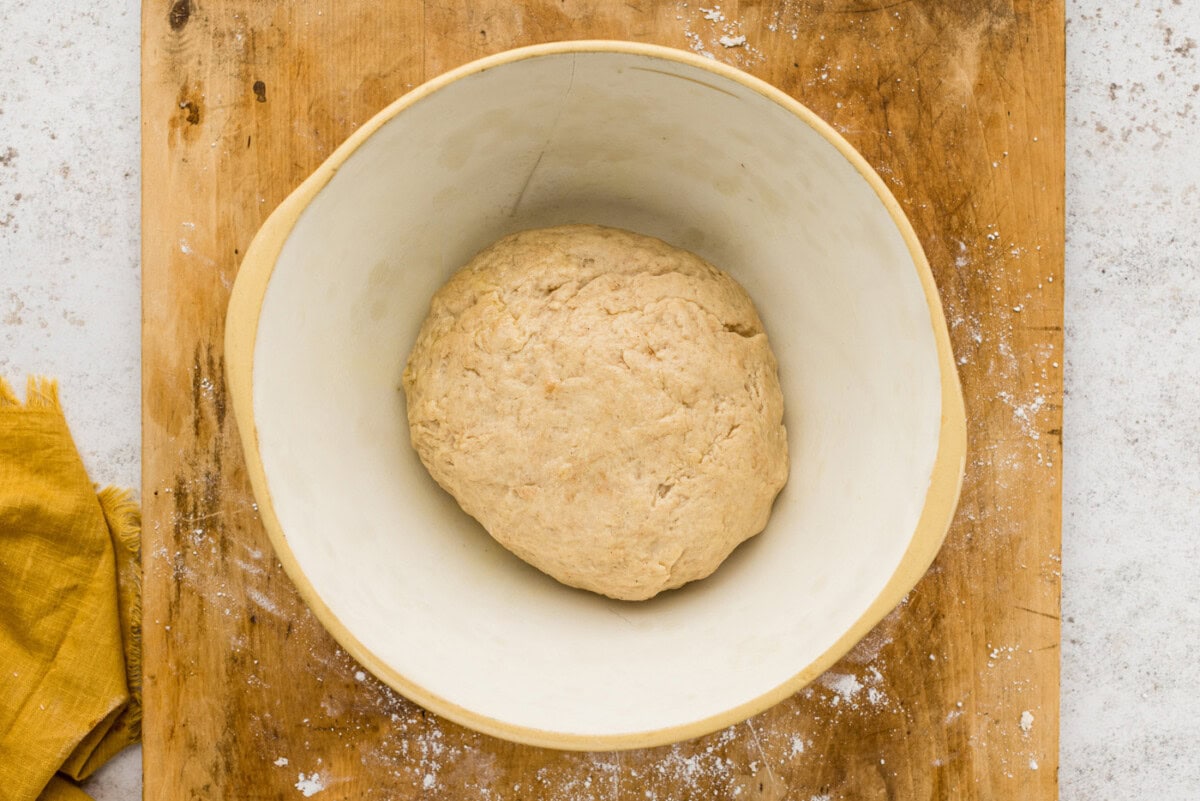
- Turn dough out onto a lightly floured surface. Knead 3-5 minutes, until smooth and elastic. Shape into a ball and transfer to a greased bowl, turning the dough to coat. Cover and let rise until doubled, about 60-75 minutes.
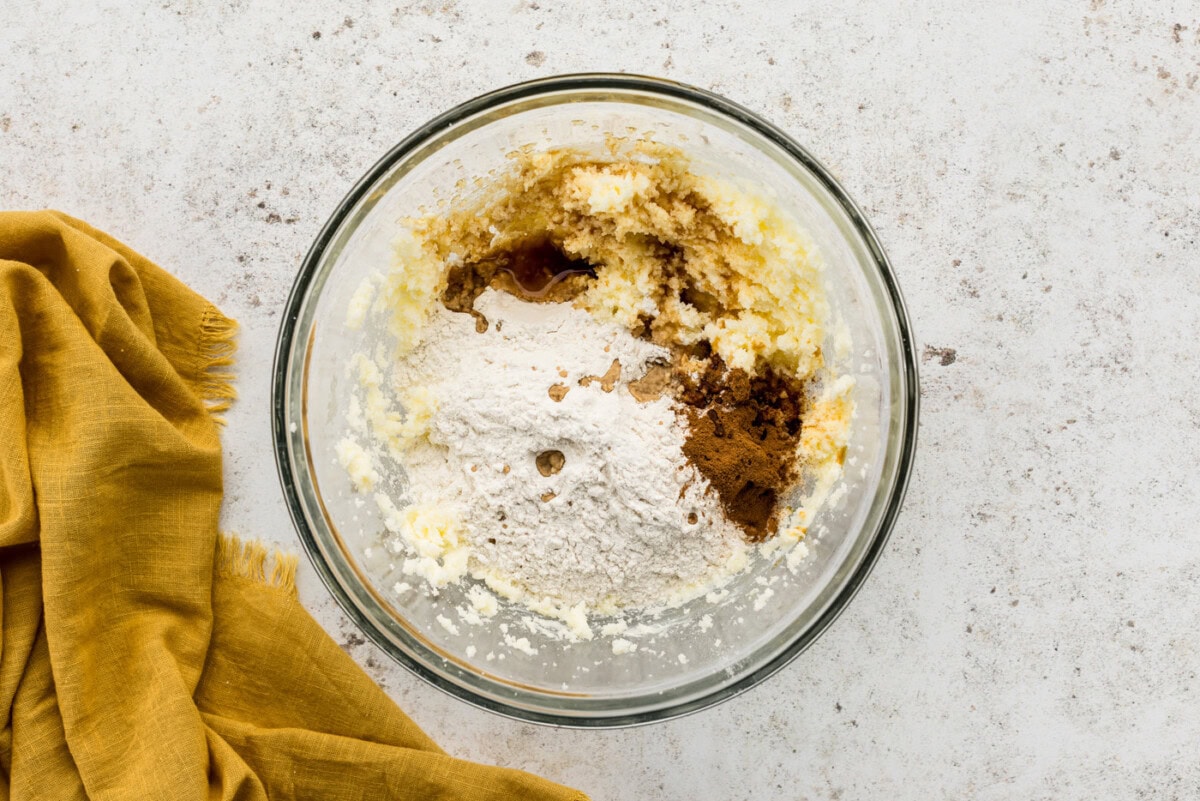
- Meanwhile, for the topping, in a medium bowl, beat softened butter with a mixer on medium for 30 seconds. Add 2/3 cup sugar, beat until well mixed. Stir in 1 cup flour, 2 teaspoons cinnamon, and vanilla. It may be easier to do the final mix with your hands, bringing the mixture together to the consistency of playdough.
- Punch down the dough then cover and let stand ten minutes.
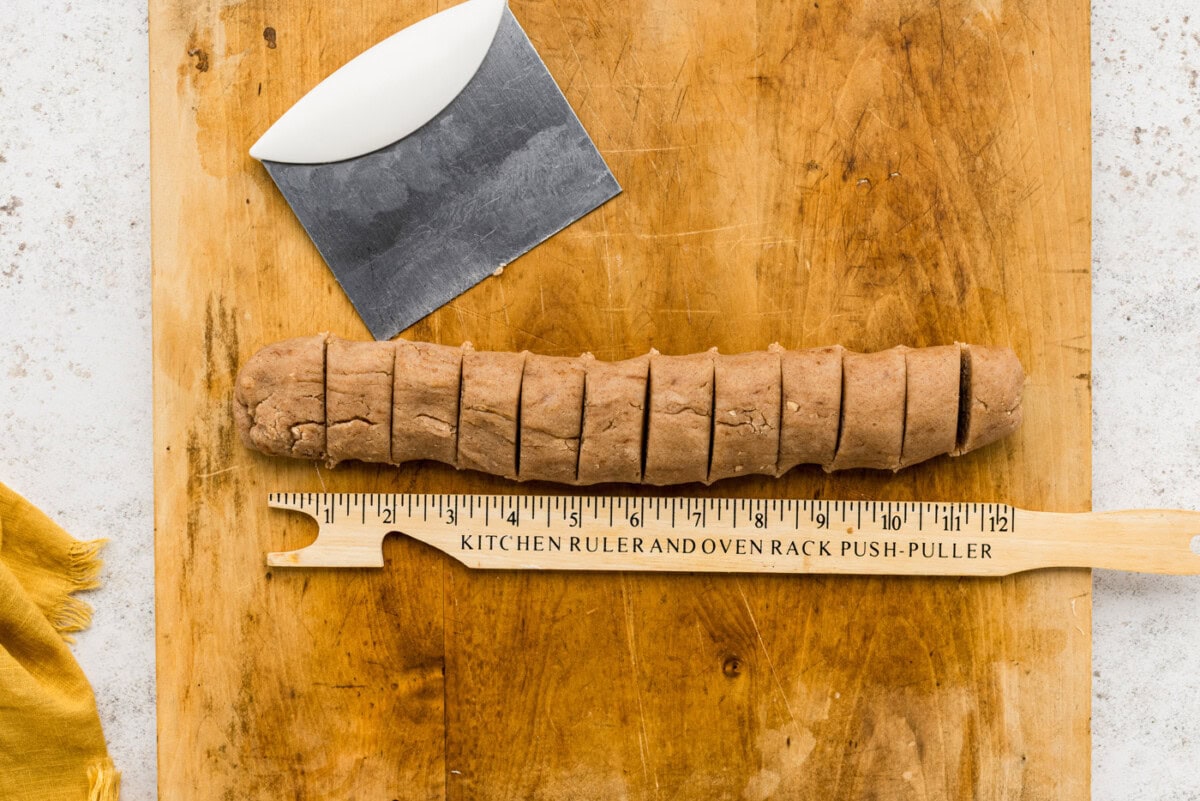
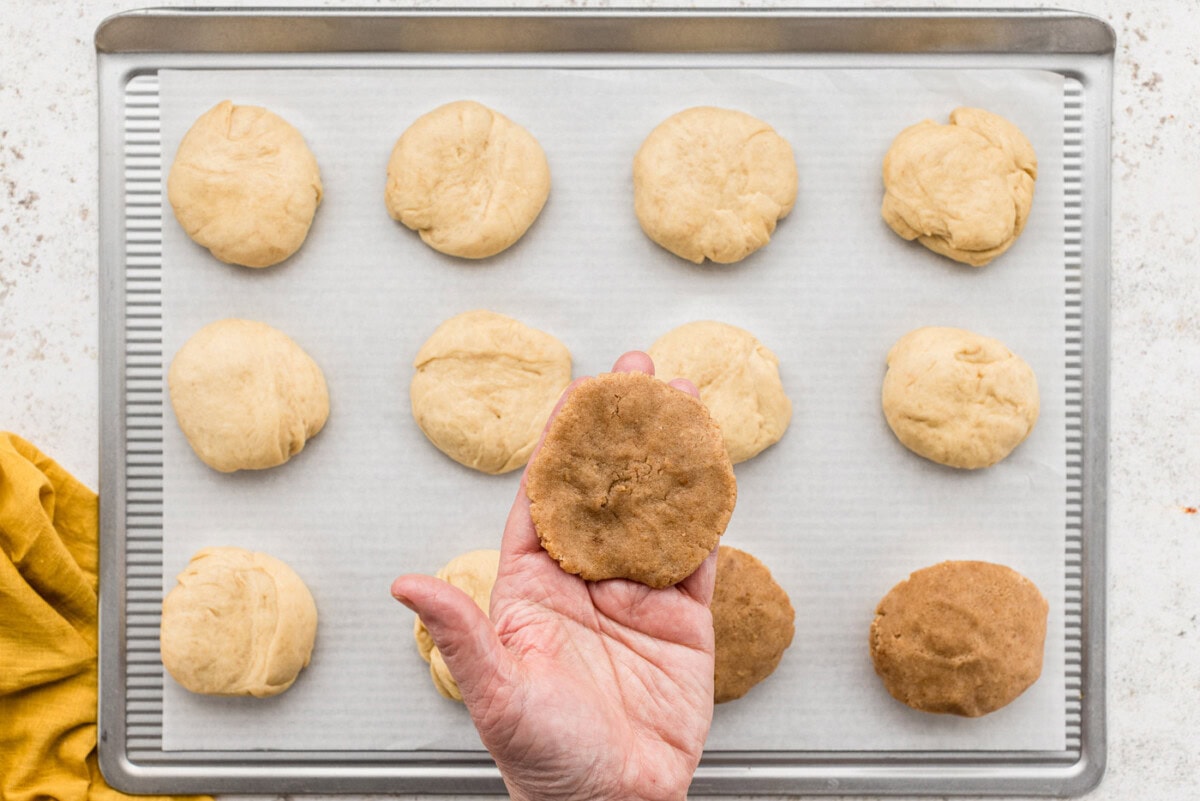
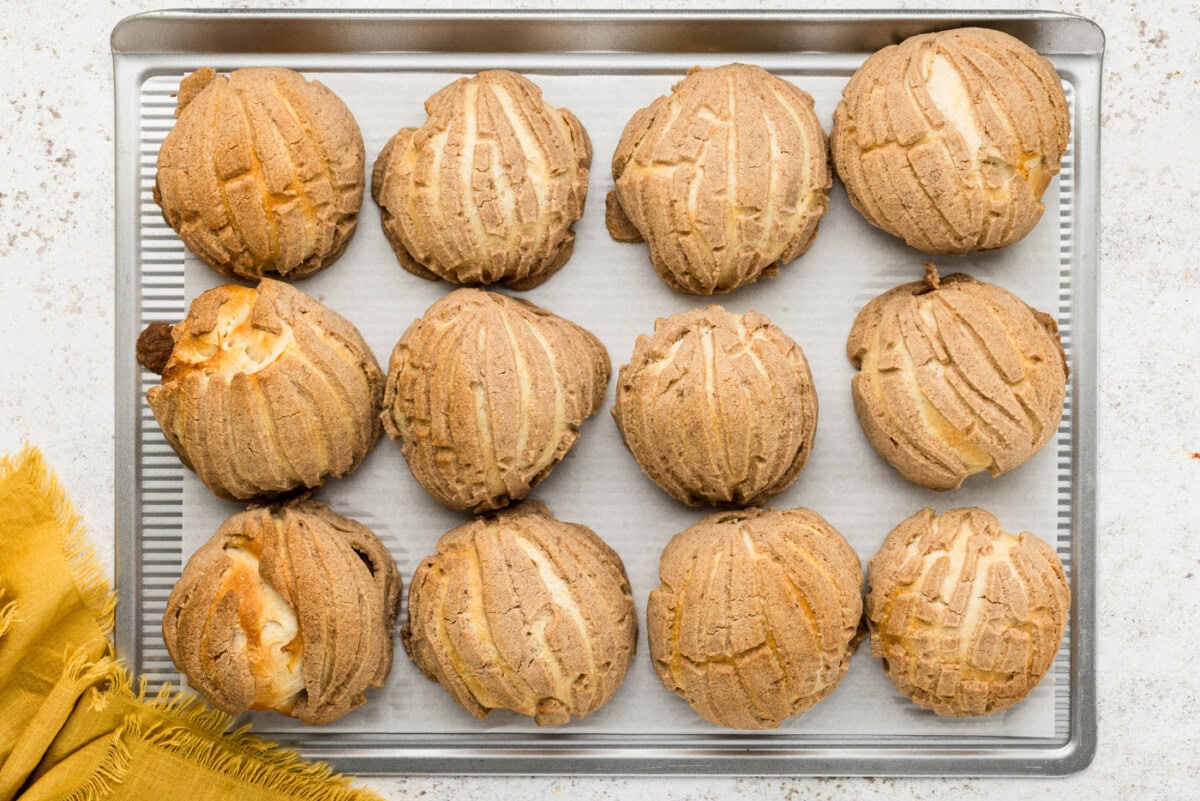
- Divide dough into 12 pieces. Roll each piece into a ball and place 3 inches apart on a parchment lined baking sheet. Press balls down slightly.

- Divide topping into 12 balls, pat each ball flat using the palms of your hands. Or, form the balls by placing them between parchment paper to roll flat into a 3 inch circle. Place one round of topping onto each dough ball, pressing slightly into the sides of the dough balls to help it stick.
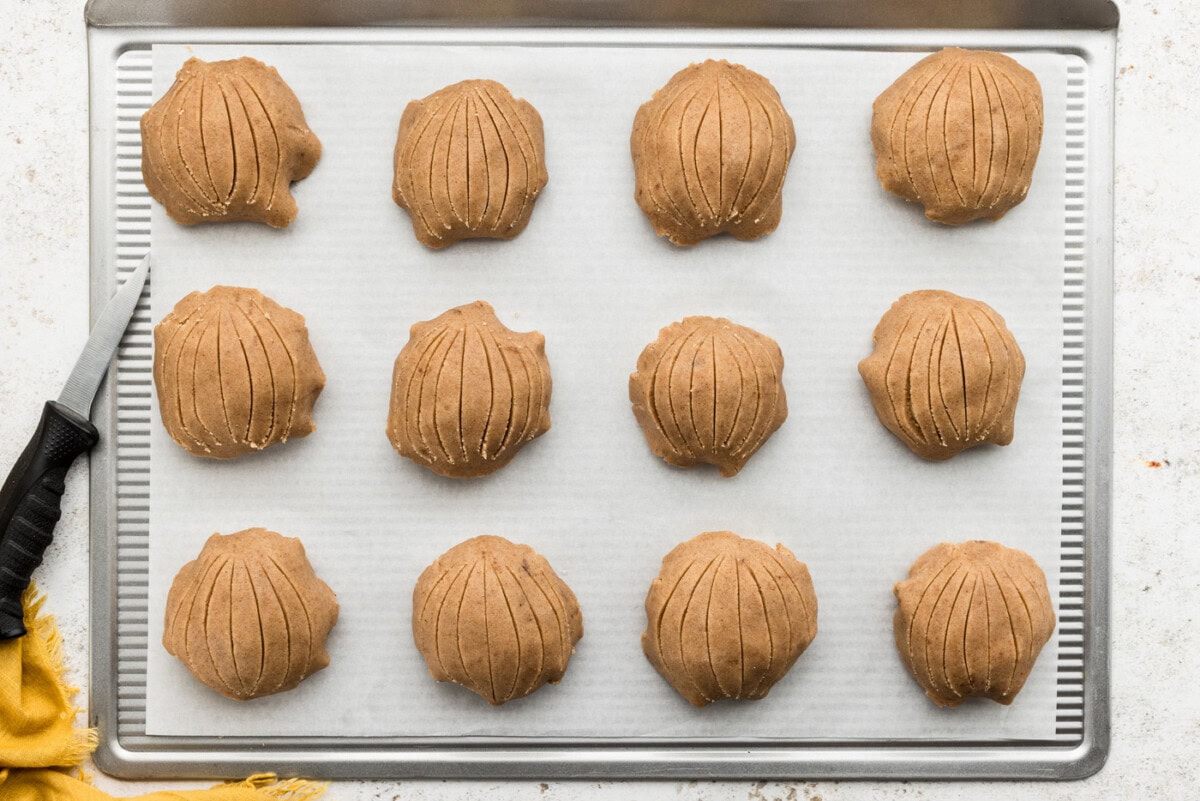
- With a light hand, use a sharp paring knife to gently cut grooves in the topping to resemble a scallop shell. You do not need to score deeply. Cover rolls and let rise until doubled, about 45 minutes.
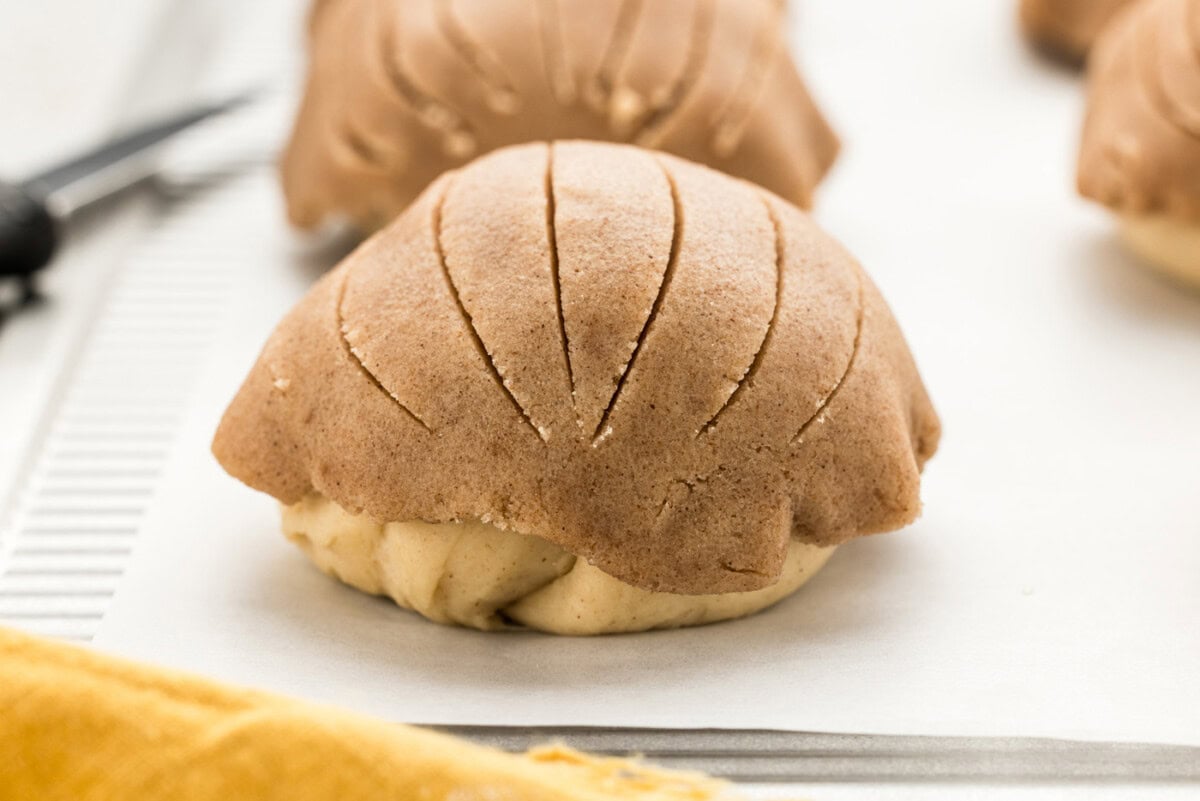
- Meanwhile, preheat oven to 375 F. Bake rolls 18-20 minutes, or until light golden brown. Remove from baking sheet and cool on wire racks.
Frequently Asked Questions & Expert Tips
Yes, conchas are sweet, but not overly sweet. The sugar topping isn’t strictly sugar though, it’s made from a mixture of sugar, butter, flour, cinnamon, and vanilla to form a crunchy, crumbly crust on top. So while yes, they are sweet, they aren’t nearly as sweet as a frosted donut would be! The yeast bread against the sugary crust balances each other really well and pairs nicely with coffee, tea, or champurrado.
Yes, of course! Though, I would suggest only prepping the dough ahead of time as conchas are truly best when served fresh. To prep the dough in advance, allow it to do its first rise, punch it down, then cover it tightly with plastic wrap. Transfer the dough to the fridge overnight. The following morning, remove it from the fridge and let it rest at room temperature for around 30 minutes. Then, begin rolling out the dough balls. Bake as normal.
Store any leftovers in an airtight container or large ziptop bag for up to 3 days. Since they are prone to drying out, you can individually wrap them in plastic wrap before placing them in a bag or container. If your conchas have hardened a bit, try warming them for 10-15 seconds in the microwave wrapped in a slightly dampened paper towel.
Yes, you can freeze baked and cooled conchas for later. Wrap each concha individually in plastic wrap a few times, then place them in a large ziptop bag. Freeze for up to 2 months. Thaw at room temperature.
Serving Suggestions
Mexican sweet bread is by far one of the best treats to wake up to. Dunk them in coffee or enjoy them later in the evening with some champurrado or atole. There’s nothing quite like fresh pan dulce.
More Mexican-Inspired Recipes
I love to bake and cook and share my kitchen experience with all of you! Remembering to come back each day can be tough, that’s why I offer a convenient newsletter every time a new recipe posts. Simply subscribe and start receiving your free daily recipes!
Original recipe credit – BHG Ultimate Mexican Magazine.
Conchas – Mexican Sweet Bread
IMPORTANT – There are often Frequently Asked Questions within the blog post that you may find helpful. Simply scroll back up to read them!
Print It Pin It Rate ItIngredients
Dough
- 2 ¼ teaspoons active dry yeast 1 package, 1/4 ounce
- ½ cup warm water 115-120 F
- ½ cup warm evaporated milk 115-120 F
- 2.6 ounces granulated sugar 1/3 cup
- ⅓ cup butter melted
- 1 egg room temperature
- 1 teaspoon salt
- 19.3 ounces all purpose flour 4 cups
- ½ teaspoon ground cinnamon
Topping
- ½ cup butter softened at room temp
- 5.1 ounces granulated sugar 2/3 cup
- 4.8 ounces all purpose flour 1 cup
- 2 teaspoons ground cinnamon
- 1 teaspoon vanilla extract
Things You’ll Need
- Stand mixer or hand mixer
Before You Begin
- Be sure to check the expiration date on your active dry yeast before beginning.
- You can use salted or unsalted butter here, depending on your preference.
- It’s important to use properly warmed water when proofing yeast, aim for 115-120F. We’re also adding warmed evaporated milk. It’s warmed to the same temperature so that it doesn’t slow down the yeast activation.
Instructions
- In a large bowl stir together yeast and warm water, let stand for ten minutes.2 1/4 teaspoons active dry yeast, 1/2 cup warm water
- Stir in evaporated milk, 1/3 cup sugar, melted butter, egg, and salt. Stir in 2 cups flour. Gradually stir in remaining 2 cups flour and the 1/2 teaspoon cinnamon to make the dough.1/2 cup warm evaporated milk, 2.6 ounces granulated sugar, 1/3 cup butter, 1 egg, 1 teaspoon salt, 19.3 ounces all purpose flour, 1/2 teaspoon ground cinnamon
- Turn dough out onto lightly floured surface. Knead 3-5 minutes, until smooth and elastic. Shape into a ball and transfer to a greased bowl, turn the dough to coat. Cover and let rise until doubled, about 60-75 minutes.
- Meanwhile, for the topping, in medium bowl, beat softened butter with mixer on medium for 30 seconds. Add 2/3 cup sugar, beat until well mixed. Stir in 1 cup flour, 2 teaspoons cinnamon, and vanilla. It may be easier to do the final mix with your hands, bringing the mixture together to the consistency of playdough.1/2 cup butter, 5.1 ounces granulated sugar, 4.8 ounces all purpose flour, 2 teaspoons ground cinnamon, 1 teaspoon vanilla extract
- Punch down the dough then cover and let stand ten minutes.
- Divide dough into 12 pieces. Roll each piece into a ball and place 3 inches apart on a parchment lined baking sheet. Press balls down slightly.
- Divide topping into 12 balls, pat each ball flat using the palms of your hands. Or, form the balls place between parchment paper to roll flat into a 3 inch circle. Place one round of topping onto each dough ball, pressing slightly into the sides of the dough balls to help it stick.
- With a light hand, use a sharp paring knife to gently cut grooves in the topping to resemble a scallop shell. You do not need to score deeply. Cover rolls and let rise until doubled, about 45 minutes.
- Meanwhile, preheat oven to 375 F. Bake rolls 18-20 minutes, or until light golden brown. Remove from baking sheet and cool on wire racks.
Expert Tips & FAQs
- Store any leftovers in an airtight container or large ziptop bag for up to 3 days. Since they are prone to drying out, you can individually wrap them in plastic wrap before placing them in a bag or container. If your conchas have hardened a bit, try warming them for 10-15 seconds in the microwave wrapped in a slightly dampened paper towel.
Nutrition
The recipes on this blog are tested with a conventional gas oven and gas stovetop. It’s important to note that some ovens, especially as they age, can cook and bake inconsistently. Using an inexpensive oven thermometer can assure you that your oven is truly heating to the proper temperature. If you use a toaster oven or countertop oven, please keep in mind that they may not distribute heat the same as a conventional full sized oven and you may need to adjust your cooking/baking times. In the case of recipes made with a pressure cooker, air fryer, slow cooker, or other appliance, a link to the appliances we use is listed within each respective recipe. For baking recipes where measurements are given by weight, please note that results may not be the same if cups are used instead, and we can’t guarantee success with that method.

- Pineapple Salsa - July 16, 2026
- 26 Best Ground Beef Casseroles for Easy Family Dinners - July 8, 2026
- Strawberry Shortcake Kabobs - July 2, 2026


Frances says
Your recipes are great and I love Them!
Amanda Formaro says
thank you Frances!
Anna says
My father is from Mexico so whenever we go there I love to get these!I will definetly be making these!
Susan Liebowitz says
Wow!! When visiting my dad in Colorado there was a Latin market that sold these. We have been looking for a recipe to make them here in Northern New England as they don’t have anything like that in the area. These are just the ticket! They are now a family favorite!
Amanda says
Good luck Angie! I bet they'll be awesome!
Angie Rodriguez says
Hi Amanda, Well mine a rising on the stove as we speak. I buy them all the time fir my family but wanted to surprise them with homemade ones. Wish me luck. Angie Rodriguez
Anonymous says
Hi, loved the recipe and the effort to recreate our food. This Conchas look great! I'd only like to make an observation hoping it helps: the bread part is not really that big, I found a picture of real conchas where you will get the idea of the proportions http://wwwcharmingevent.files.wordpress.com/2009/09/pan-dulce.jpg
:) thx
Amanda says
These are really easy Patty, you should definitely try them!