Why do some recipes with ground beef taste deep and meaty, while others taste flat, even when you’ve followed the directions exactly?
It’s almost always the same thing: the beef got cooked through, but it never got properly browned. Those are two different things, and once you know the difference, every recipe you make with ground beef gets better.
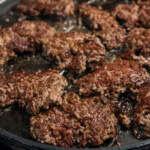
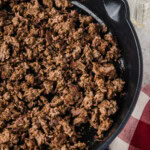
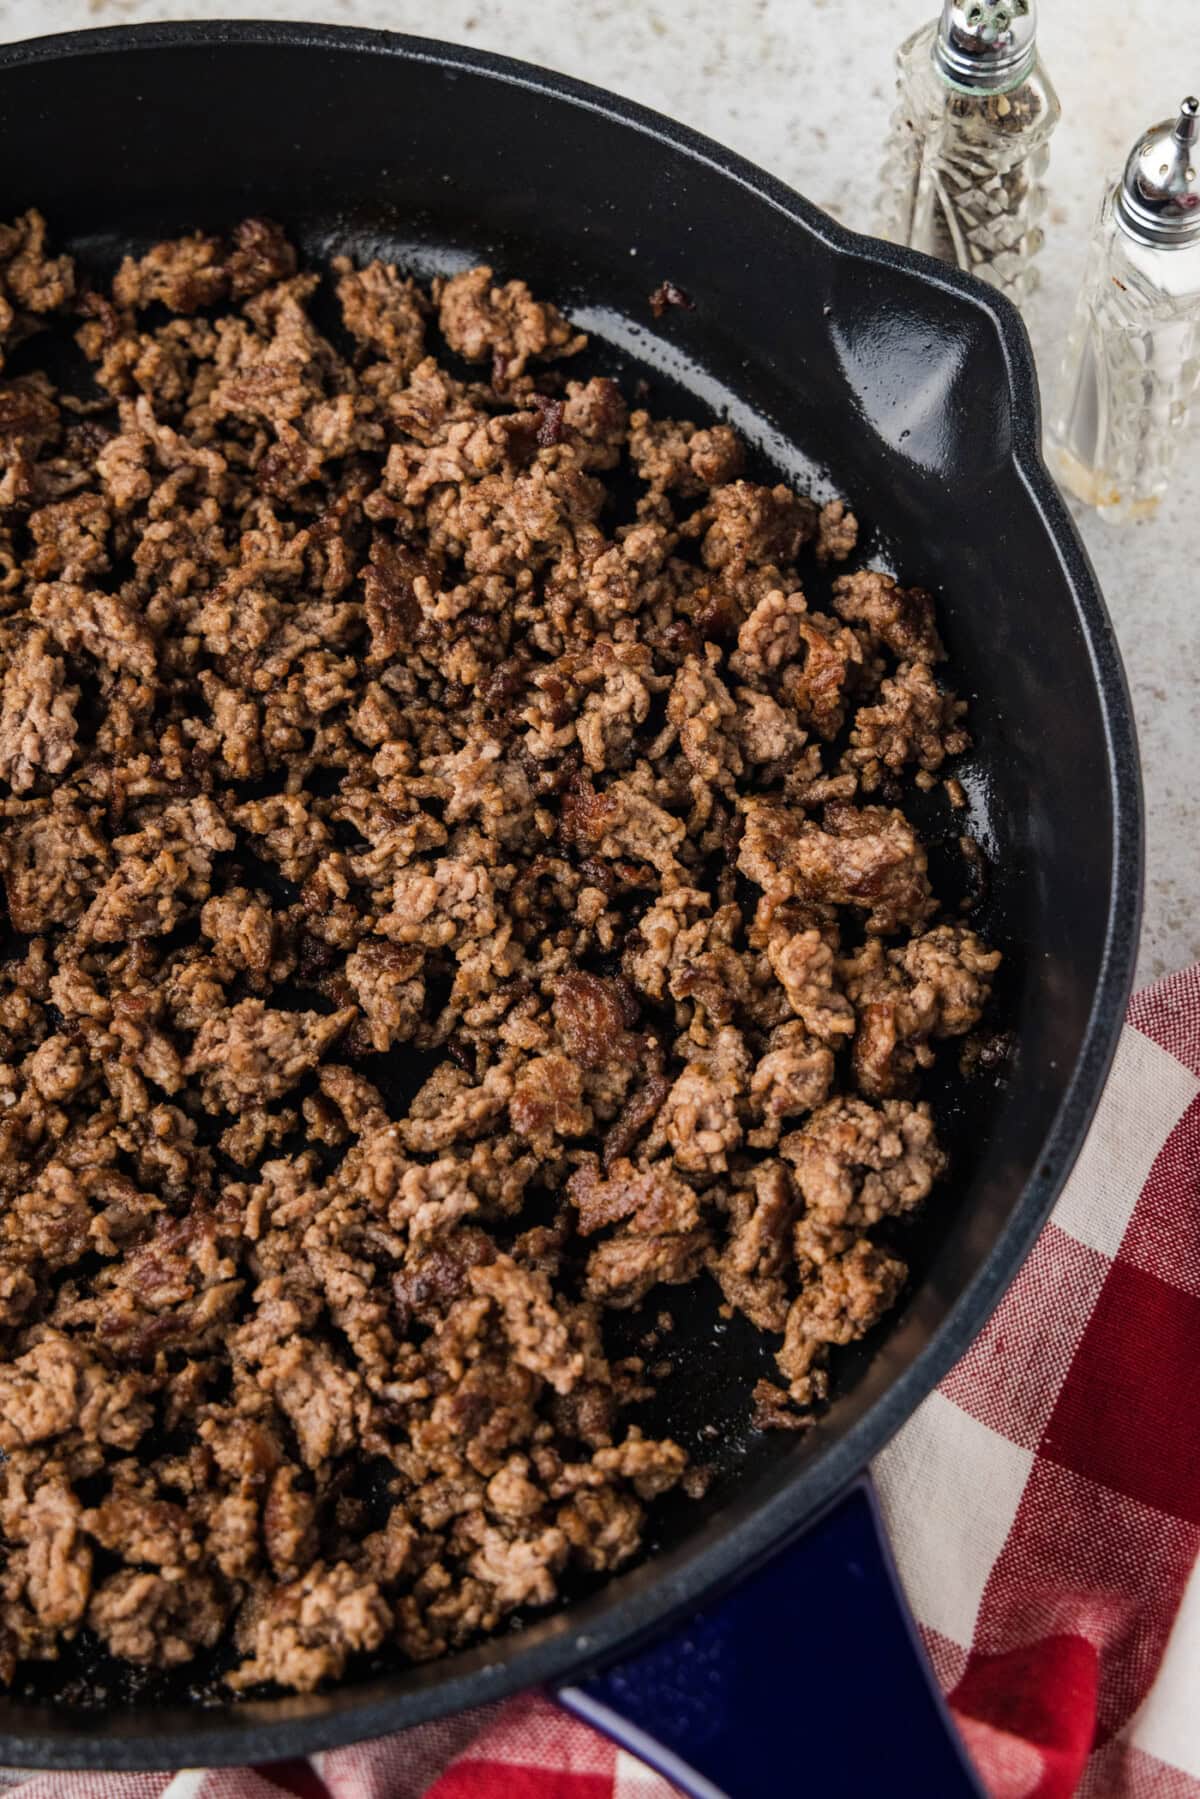
Properly browned ground beef looks completely different than what you may be used to. Deep caramelized brown on every chunk, with little crispy edges where the meat hit the pan and developed a real crust. It tastes different too, and it makes a noticeable difference in every recipe that calls for it. The best part is the technique itself is so simple! Most people just don’t know what to do with the first three minutes after the beef hits the pan.
These tips work for so many of the recipes in my collection of 90+ ground beef recipes, the casseroles, the skillet dinners, the pasta sauces, and more. A few small changes to how you brown the beef will quietly improve all of them.
Why “browning” is different from “cooking through”
Here’s the thing nobody tells you. Cooking ground beef until it’s no longer pink isn’t the same as browning it. Those are two different things.
When meat hits a hot, dry surface, something called the Maillard reaction kicks in. That’s when the proteins and sugars in the beef react with the heat to create hundreds of new flavor compounds. That’s where the deep, savory, almost nutty taste of really good browned beef comes from. It’s the same reason a seared steak tastes wildly better than a poached one.
But here’s the catch. The Maillard reaction needs temperatures above 300°F to happen. And ground beef releases a lot of water as it cooks. If that water can’t evaporate fast enough, it pools in the pan and the meat steams instead of browning. Steam tops out at 212°F, which is nowhere near hot enough for the magic to happen. Gray beef is beef that got cooked but never got browned.
Almost every “my ground beef turned out bland” problem traces back to this single issue: too much water, not enough heat, beef ends up steamed instead of seared.
Choosing the right ground beef
A quick word on fat content, because it matters more than people think.
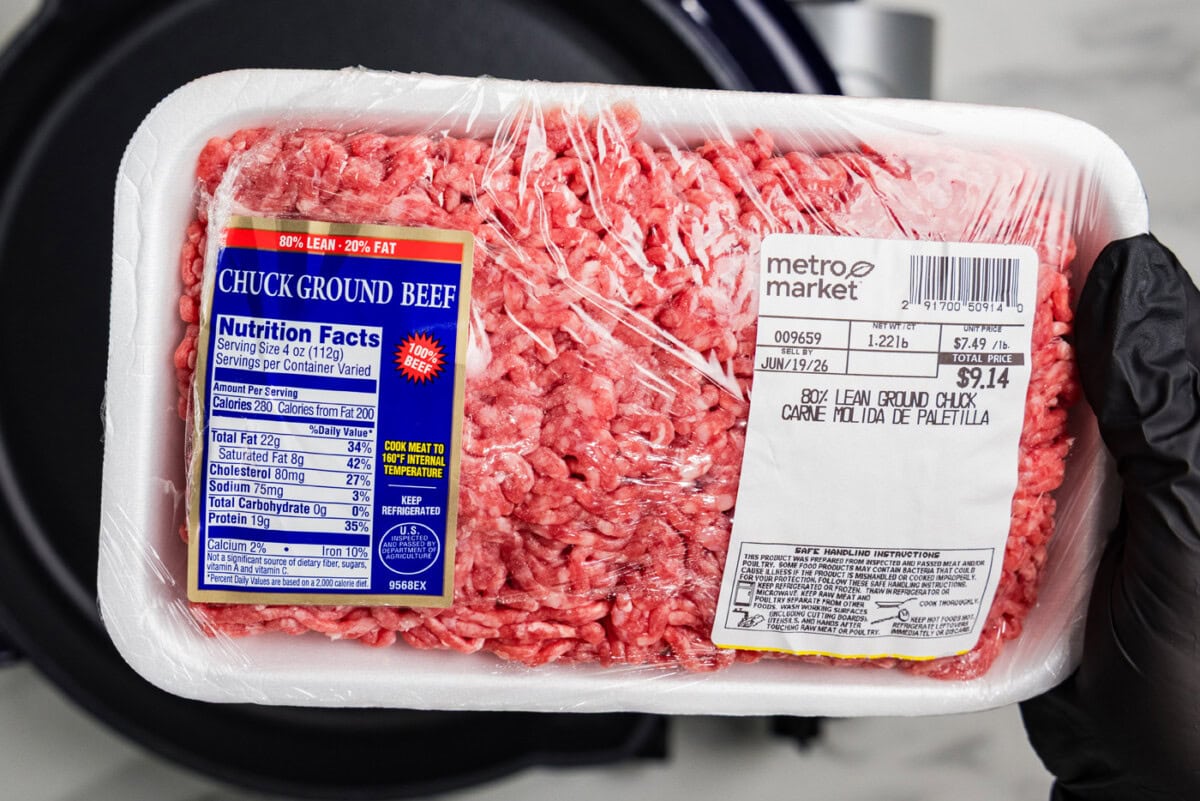
- 80/20 (or 85/15) ground chuck is the sweet spot for almost everything. The fat carries flavor, helps with heat conduction (more fat means better browning), and renders out enough to drain if a recipe calls for it.
- 90/10 ground sirloin is leaner. It can absolutely be browned well, but it needs higher heat and a watchful eye. Less fat means less margin for error, and lean beef dries out fast.
- 73/27 ground beef is too wet for good browning. There’s so much fat that the pan floods with grease almost immediately, and the meat ends up boiling in its own fat. Skip it.
If a recipe doesn’t specify, use 80/20 or 85/15. It’s usually the best value at the meat counter too, which matters when you’re stretching a pound of beef through one of my budget-friendly ground beef meals for a family.
The five-step technique
This is where the actual magic happens. Read through this whole section before you start, because the order really matters.
1. Preheat the pan first
Get a heavy skillet (cast iron or stainless steel both work great. Nonstick will work but won’t develop as much crust) over medium-high heat. Let it sit for 2 to 3 minutes before adding anything. You want it genuinely hot. Flick a few drops of water onto it, they should evaporate within a second or two. If they just sit and bead, the pan isn’t ready yet.
If your beef is 80/20 or fattier, you don’t need oil. If you’re using 90/10, add a tablespoon of olive oil or other neutral oil.
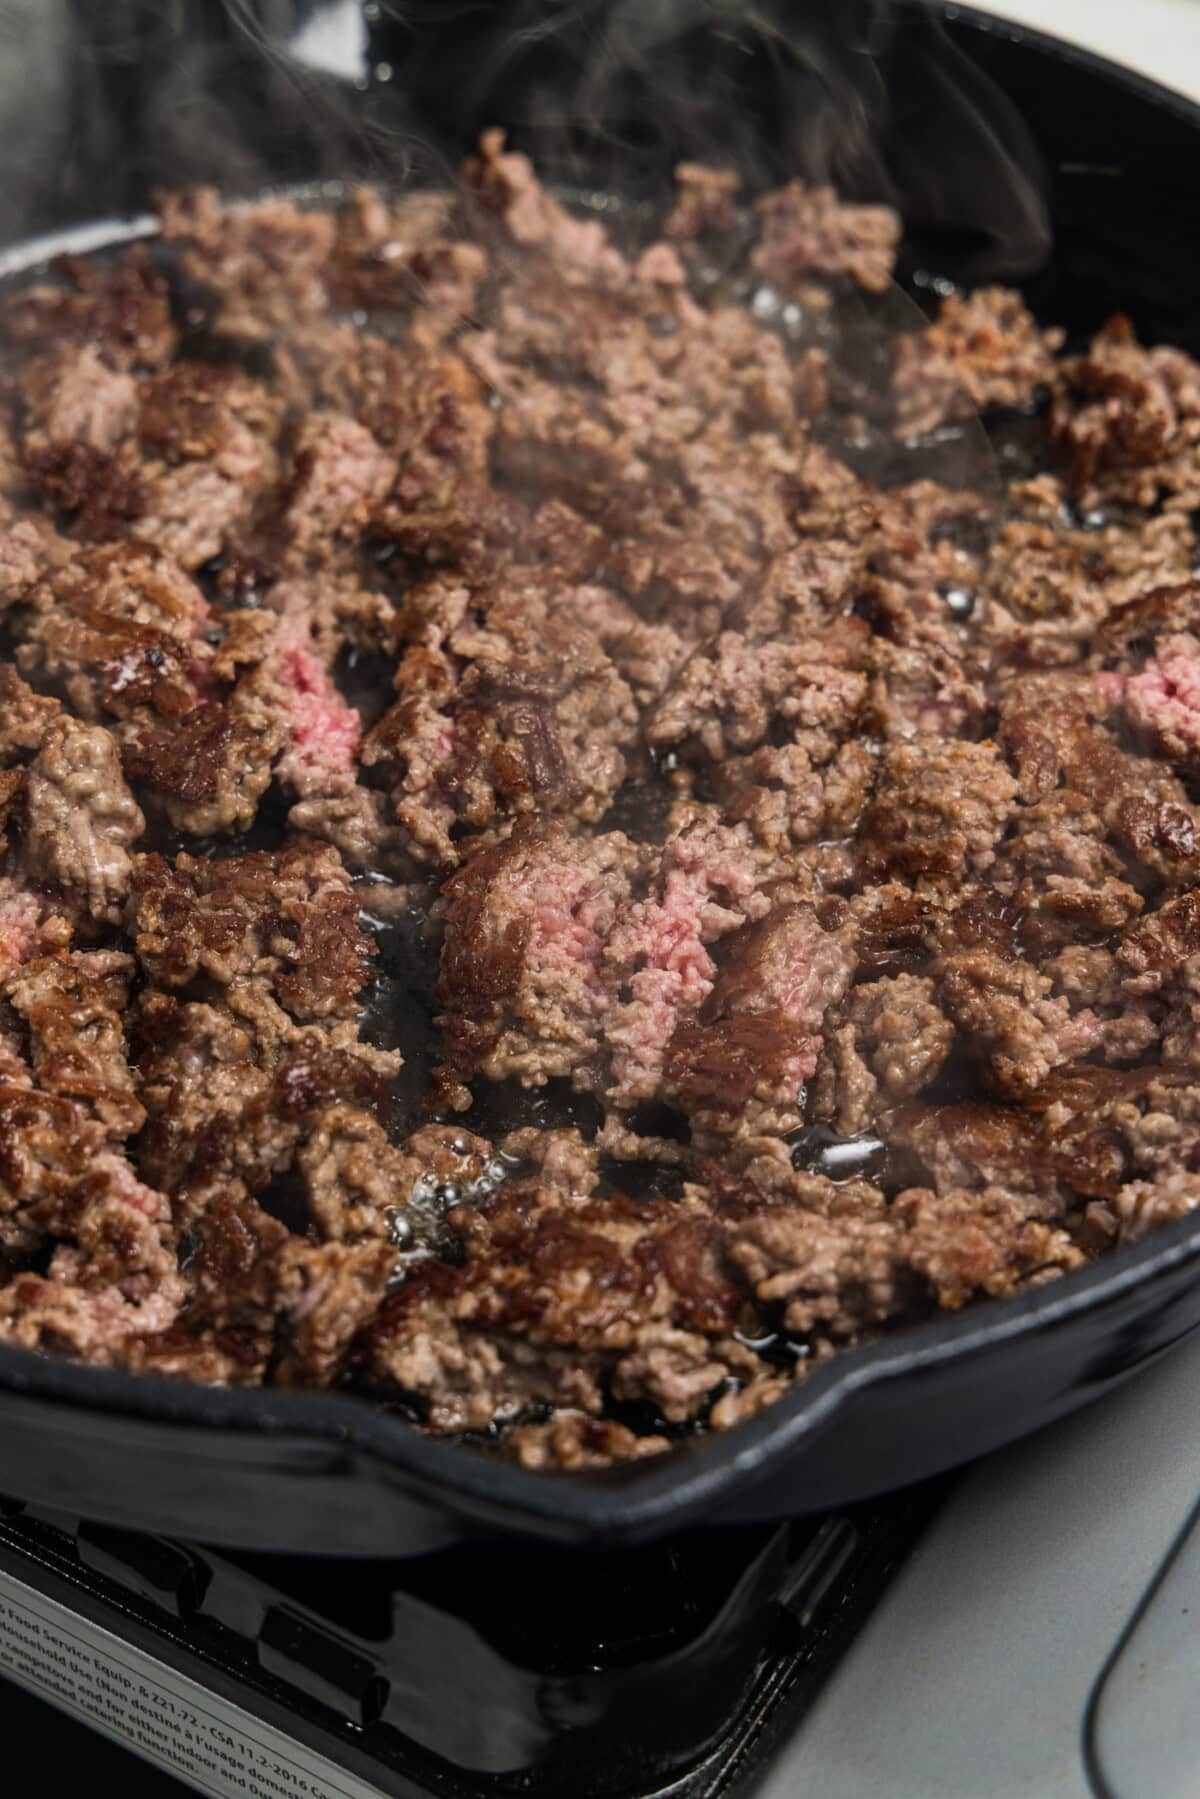
2. Add the beef in large chunks
This is the step most people get wrong (including me, for years!). Don’t dump the whole pound in and immediately start breaking it up with a spoon. Instead, drop the beef into the pan in several large chunks, about the size of really large meatballs. Just grab a hunk with a gloved hand and drop it in. Use the back of a spatula or wooden spoon to press each one down so it has good contact with the pan.
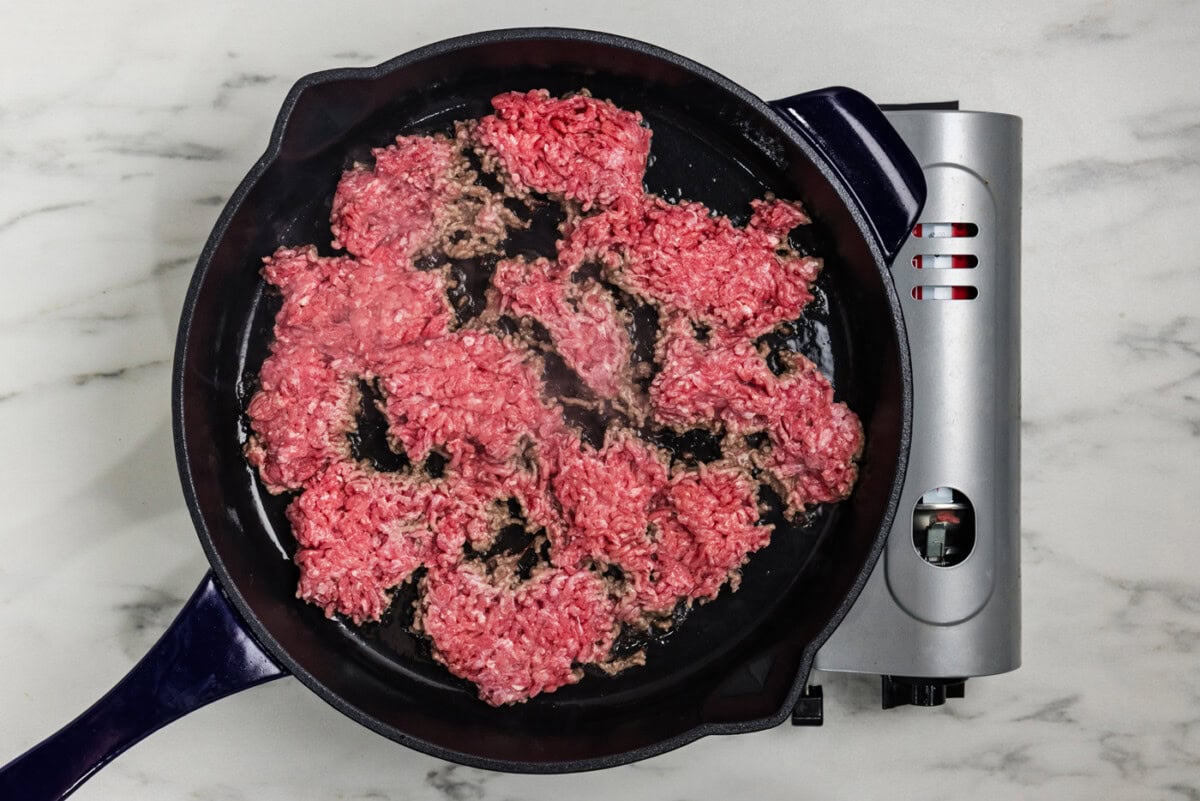
That extra surface area touching the hot pan is where the browning happens. Pre-crumbled beef has too much surface area exposed to the air, which means it cools the pan faster and steams more.
3. Let it sit
This is the secret. Don’t touch the beef. Don’t stir it. Don’t break it apart yet.
Let those chunks sit and cook, undisturbed, for 2 to 4 full minutes. Set a timer if it helps! You should hear active sizzling, that’s the sound of water evaporating off the surface. If you hear a quieter hissing or see steam, your heat is too low.
Resist the urge to peek. Each chunk needs that uninterrupted contact with the hot pan to develop a proper brown crust on the bottom. The minute you start moving it around, you reset that process. Kind of like opening the oven or crockpot lid!
4. Flip, then break apart
After 2 to 4 minutes, lift the edge of one chunk with your spatula. You’re looking for a deep brown crust on the bottom. If it’s there, flip each chunk over to brown the second side for another 2 to 3 minutes.
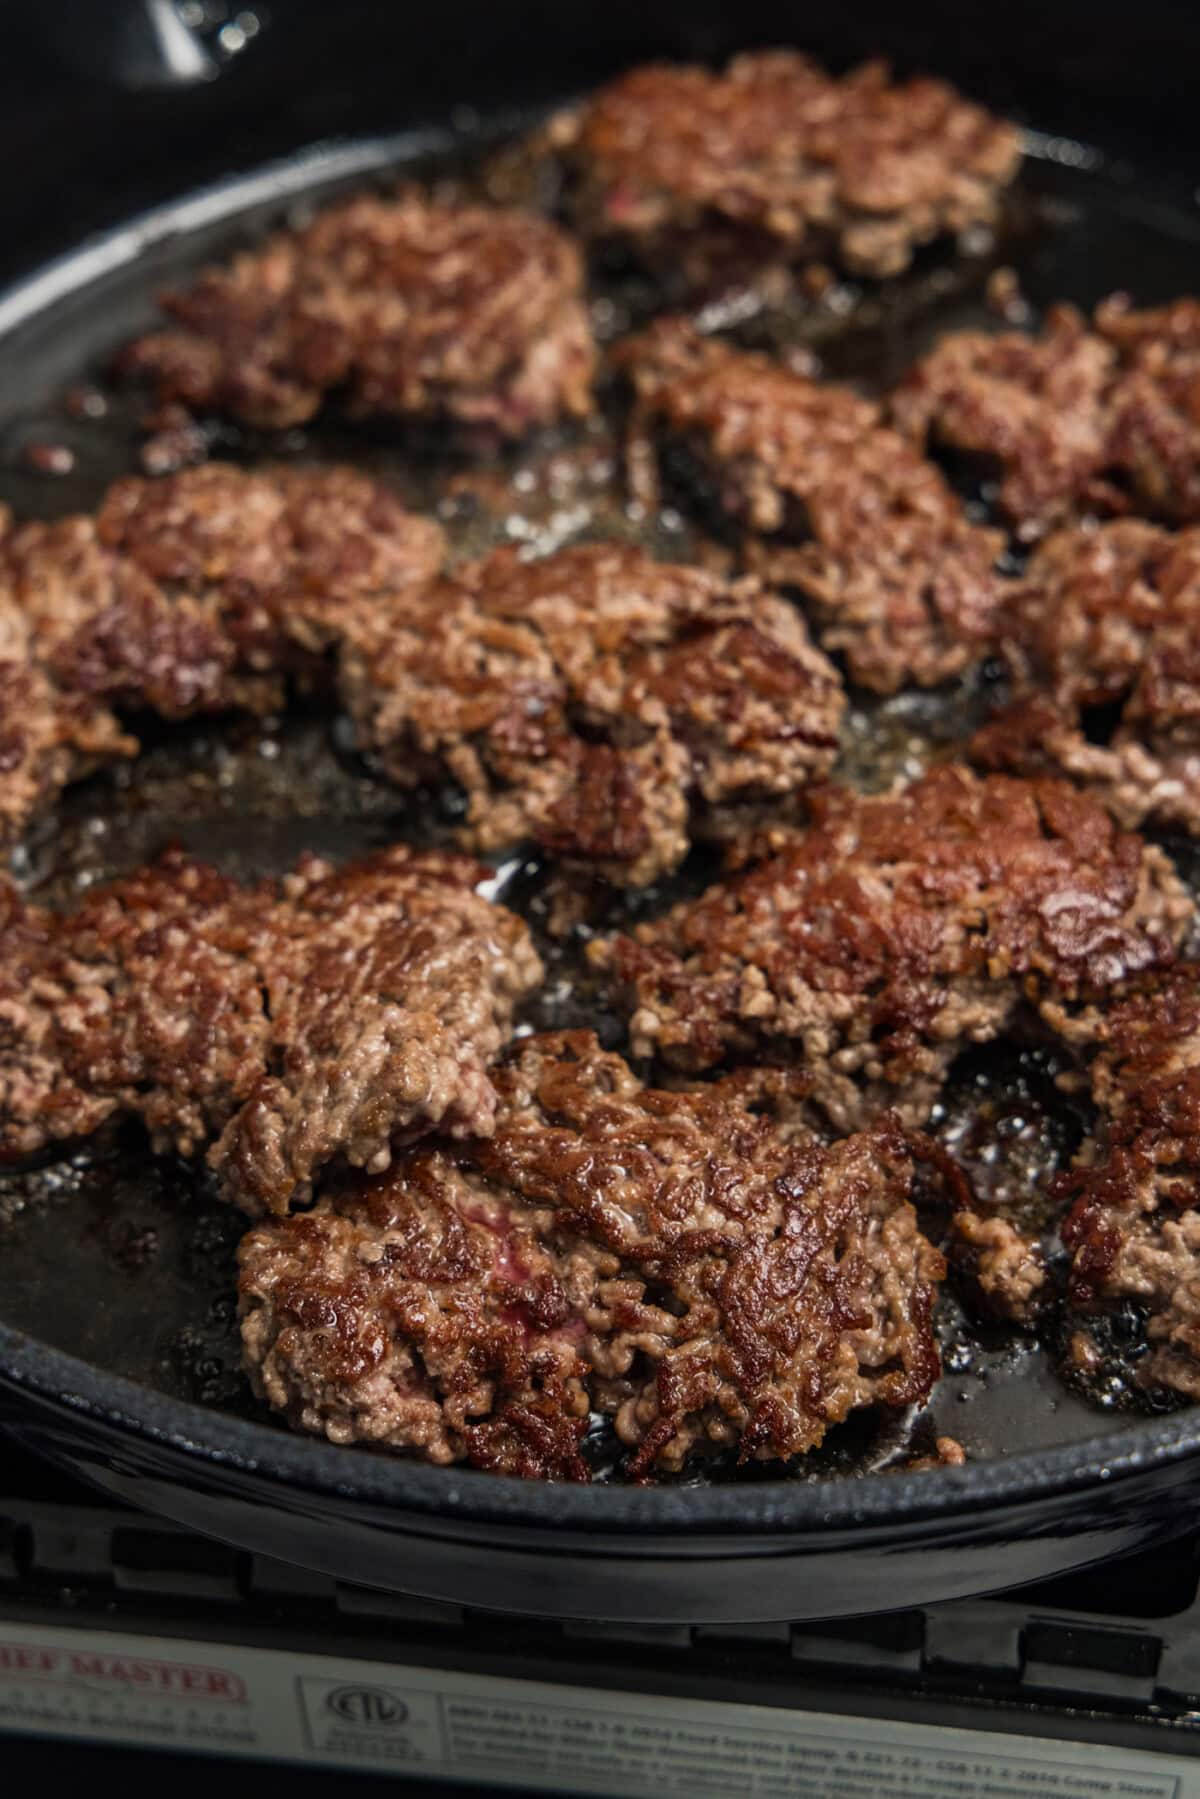
Now you can break the beef apart with a wooden spoon or a potato masher. Work it into smaller pieces, stirring just enough to expose any still-pink bits to the heat. Cook another 2 to 3 minutes until everything is cooked through, no pink remaining, 160°F internal temperature.
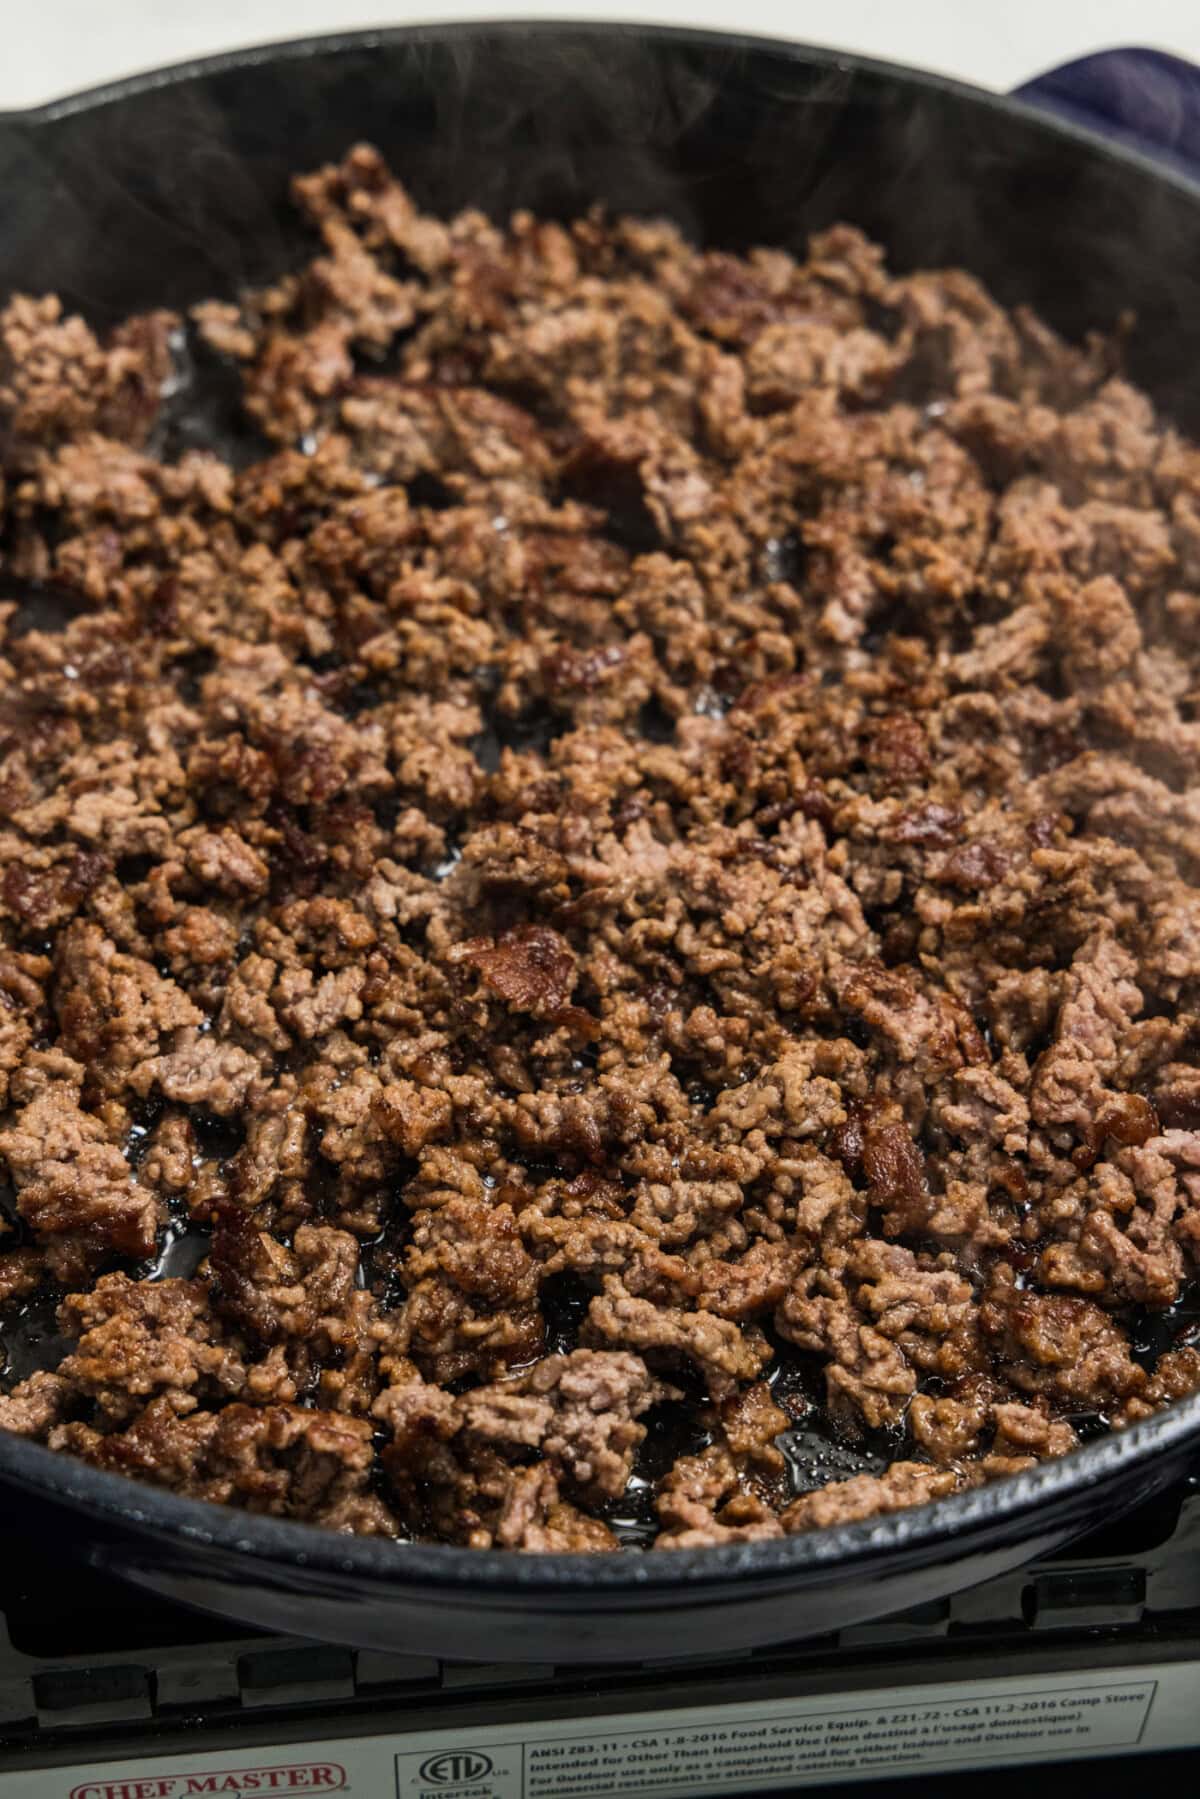
5. Season after, not before
Add salt and pepper now, once the beef is fully browned.
Here’s why timing matters: salt draws water out of meat through osmosis. If you salt before browning, all that extra water hits the pan and contributes to the steaming problem. Season at the end and you get the flavor benefit without the water issue.
Same goes for garlic, onions, and other aromatics. They release water and burn easily at the high heat you need for browning. Add them after the beef is fully browned, or sauté them separately and combine.
Common mistakes that lead to gray beef
If your beef keeps coming out gray no matter what you do, it’s almost always one of these:
Crowding the pan. A 10-inch skillet handles about a pound of beef well. Trying to brown two pounds at once turns it into a stewing operation. Use two pans, or work in batches.
Stirring constantly. Stirring keeps any one surface from getting hot enough. The beef cooks but never browns. Walk away from the pan.
Pan not hot enough. Medium-high means medium-high. If you can’t hear active sizzling when the beef hits the pan, your heat is too low.
Salting too early. Wait until after browning. Always.
Adding aromatics too soon. Onions and garlic dump water and burn at high heat. Brown the beef first, then add them.
How to drain the fat
Once the beef is fully browned, you’ll probably want to drain off most of the rendered fat. (Some recipes let you skip this; the fat adds flavor.)
Spoon-off method: Tilt the pan and use a spoon to skim the fat into a heatproof bowl or jar. Works for any amount.
Colander method: Dump the entire pan into a colander set over a heatproof bowl. Best for very fatty beef or when you want every bit of fat gone. You can also use a fat separator for this.
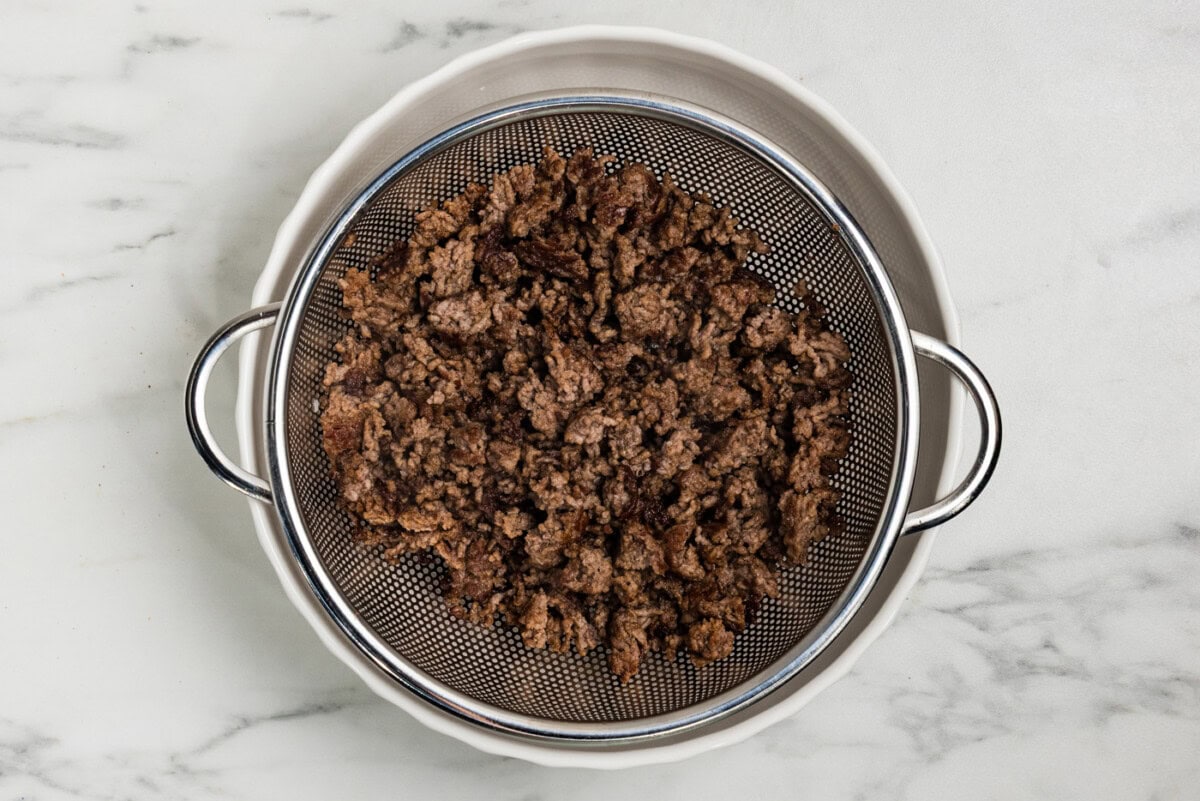
Paper towel blot: For especially greasy beef, after draining, blot the meat with a paper towel. Removes the last layer of fat that clings to the meat.
One non-negotiable: never pour beef fat down the drain. It solidifies as it cools and will absolutely clog your pipes. Let the fat cool, then scrape it into the trash, or save it in a jar in the fridge for cooking potatoes, eggs, or roasting vegetables. My mother used to keep an empty vegetable can in the freezer and keep adding hot grease to that. When it was full and frozen, she would throw it away.
Storing browned ground beef
If you’re getting ahead for the week, browned ground beef keeps beautifully:
- Fridge: 3 to 4 days in an airtight container.
- Freezer: 3 to 4 months. The trick is to portion it into 1-pound amounts in freezer bags, then flatten the bags so they freeze flat and thaw fast. Label with the date.
A freezer stash of pre-browned beef is a serious weeknight time-saver, it’s one of my favorite weeknight shortcuts.
Frequently Asked Questions
Not really, at least not properly. The outer layer of the frozen block thaws into water before it has a chance to brown, and that water cools the pan and steams the rest of the beef as you scrape it off. You’ll get cooked ground beef this way, but not the deep caramelized crust the technique is designed to produce. If you’re in a real pinch and need to use frozen beef immediately, it’ll work for recipes where the beef gets mixed into a sauce or casserole and other flavors carry the dish (chili, sloppy joes, taco filling). For anything where you want the meaty depth to shine through, take the extra time to thaw it first. Even 30 minutes in cold water makes a noticeable difference.
When looking at it, no pink should be visible when you break the largest piece open. For certainty, an instant-read thermometer should hit 160°F.
No. Rinsing washes away all the flavor you just spent time developing. Draining the fat off accomplishes what people think rinsing does, without throwing away the good stuff.
Steaming, not browning. Walk through the checklist: pan hot enough, beef in large chunks not crumbled, left undisturbed for 3 to 4 minutes before stirring, no salt added until the end. One of those is almost always the culprit.
Yes, but you can’t really shortcut the technique. Browning is a direct-pan-contact process, and trying to do 2 or 3 pounds at once just crowds the pan and gives you steamed beef. For a big batch, use two skillets at the same time, or work through your beef in 1-pound batches back-to-back in the same pan. It takes a little longer, but you actually get browned beef instead of cooked-gray beef. The whole point of the technique falls apart at scale otherwise. If you just want to cook the ground beef, you can use the oven for big batches. Spread 2 to 3 pounds on a rimmed sheet pan, bake at 400°F for 15 to 20 minutes (breaking it apart halfway through), and you’ll get evenly browned beef without the crowded-pan problem. Drain and portion for the freezer.
That’s the technique! Once you brown ground beef this way, you’ll notice the difference in every recipe you make with it. Sloppy Joes have more body, casseroles taste deeper, and a proper Italian lasagna has that rich, meaty backbone the sauce is supposed to provide.
Try the technique the next time you cook ground beef, then let me know in the comments how it changed your recipe. Need some recipe inspiration to test this on? Browse my favorite ground beef dinners and pick one for this week! 🍔

- 50+ Budget-Friendly Ground Beef Meals to Feed a Family - July 24, 2026
- Strawberry Spinach Salad with Balsamic - July 23, 2026
- Pineapple Salsa - July 16, 2026


Shirley says
I used to end up with grayish brown ground beef. I discovered by accident the right way to brown it. I stopped adding too much meat to the skillet and started using high heat. The flavor is so much better now.
Amanda Davis says
Yes, precisely! :)
Mike says
That’s a great, factual explanation! Thank you so much.
Amanda Davis says
You’re very welcome!
C.J. says
I quit buying pre ground meat, beef especially as they grind ice with it! I pick out roasts and have the meat dept grind it. Crazy how there isn’t the excess liquid in the pan that has to drained off and discarded.
Marty says
Does this technique work with other ground meat and poultry?
Amanda Davis says
Yes!
Marian Piehler says
Aha! So that’s what has been happening to my blah ground beef! Sure makes a lot of sense. I’ll check it out with my next batch to be browned. Thanks for the clue.
Amanda Davis says
You’re welcome!
Ole says
“That’s when the proteins and sugars in the beef react with the heat to create hundreds of new flavor compounds.”
There is NO Sugars in Meat ;)
Melinda says
Meat contains small amounts of glucose, released through the hydrolysis of glycogen, and ribose/deoxyribose which are released from hydrolysis of nucleic acids. When meat is subjected to high temperatures, as in grilling and roasting, some of the surface water evaporates thereby increasing the “effective” concentration of sugars.
Amanda Davis says
Although meat is primarily protein and fat, it contains tiny amounts of naturally occurring “reducing sugars” and other carbohydrate compounds. When heated to high temperatures, these molecules interact with amino acids to drive the Maillard reaction. Hope that helps!