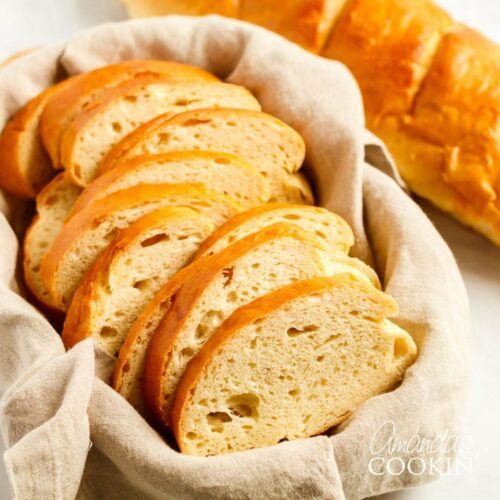
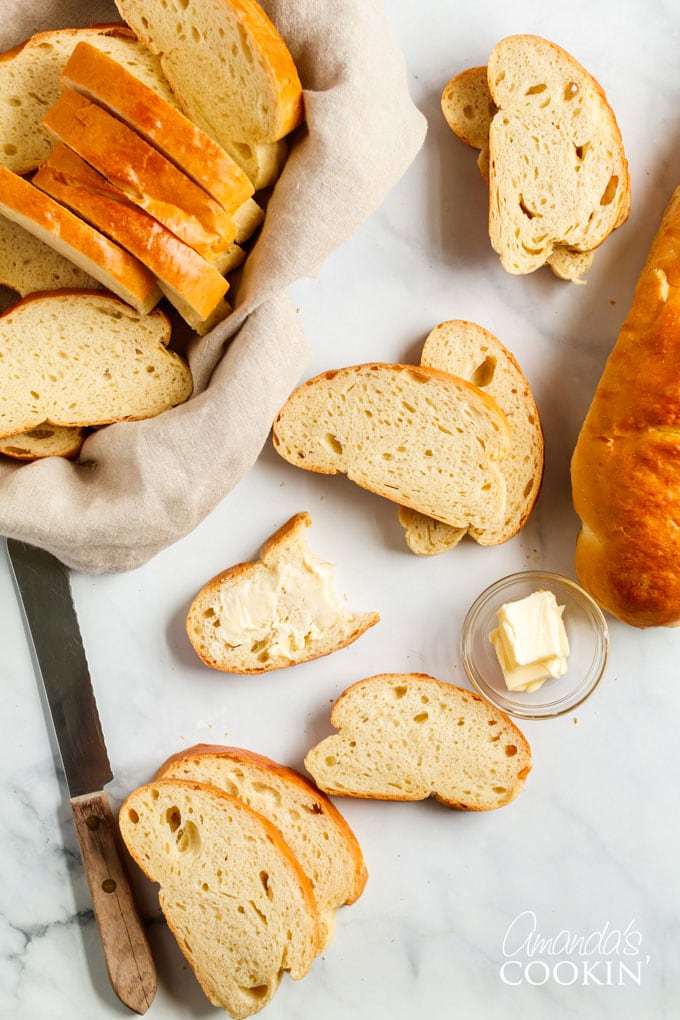
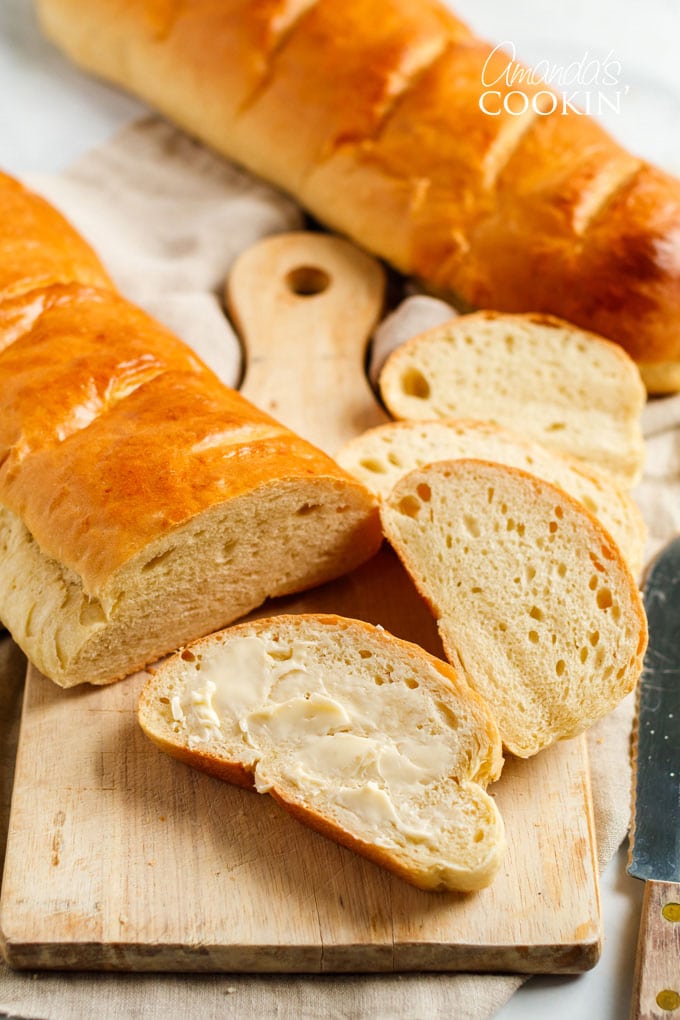
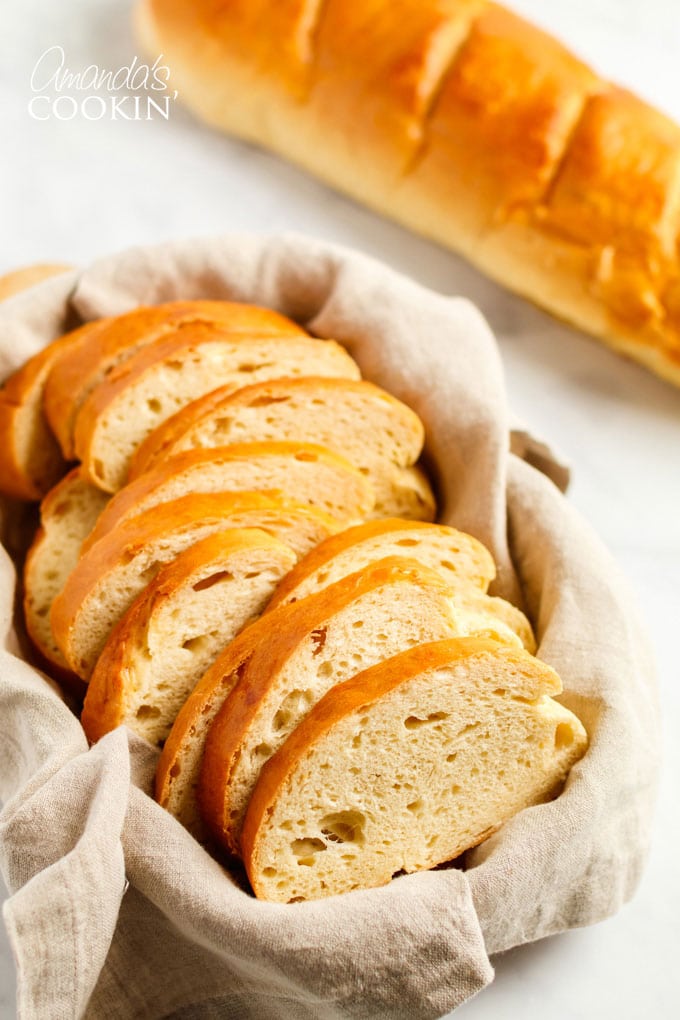
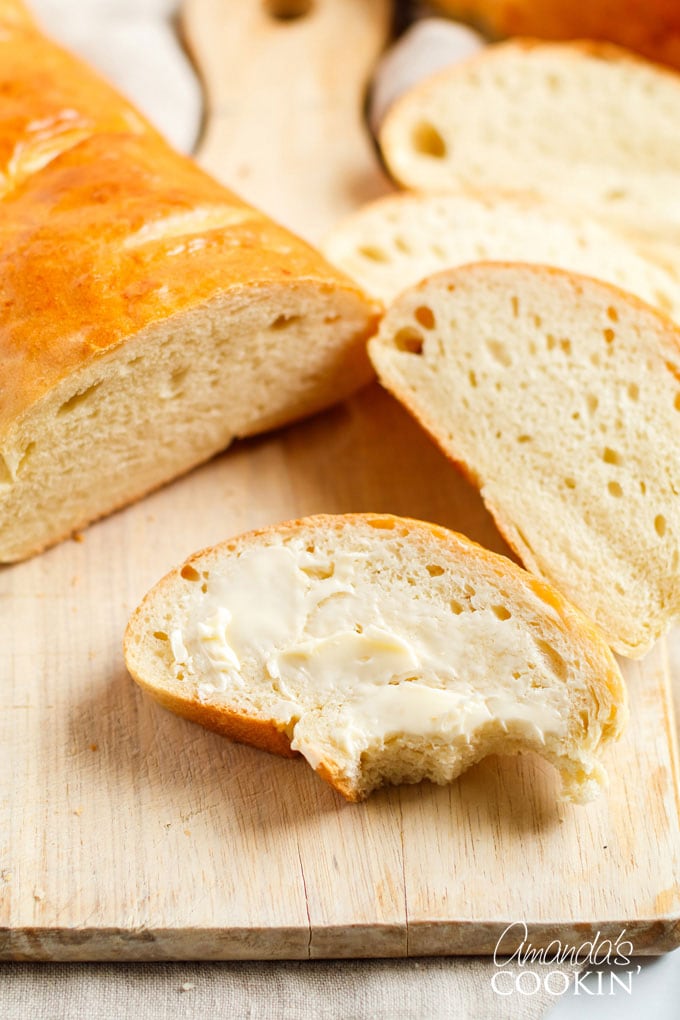
Homemade Italian bread is actually very easy to make and tastes delicious! While you could buy a loaf of Italian bread from the grocery store, baking bread is fun and satisfying. Warm, toasty bread from the oven is pure comfort food.
I love my 1963 homemade white bread for sandwiches and everything peasant bread for snacking, but this Italian loaf is perfect with a bowl of spaghetti, or alongside a plate of my crockpot roast beef!
Italian Bread Recipe
There’s a definite difference between French bread and Italian bread. Most of the general population either doesn’t know or simply doesn’t care, but there are differences nonetheless.
Basically though, French bread only uses flour, yeast, salt, and water. In fact, French law states that added oils or fats are prohibited. A French loaf is usually long and thin, while an Italian loaf is shorter and wider.
Expert Tips & FAQs
In this section I like to provide tips and recommendations about the different ingredients used. I also try to answer questions about substitutions. You will find the full list of ingredients with measurements in the printable recipe card at the end of this post.
- You can use the packets of active dry yeast available at any grocery store. I bake a lot of bread, so I prefer to by SAF instant yeast in larger packages.
- When a bread recipe calls for warm water, the temperature should be around 110 degrees F. If the water is too hot it will kill the yeast, and too cold will delay the rise process.
- You’ll also use hot water in this recipe, but since you are mixing it with other ingredients before adding the yeast mixture it will be fine. You want hot tap water, not boiling water.
- This recipe calls for vegetable oil, but olive oil can also be used.
- We are using all-purpose flour, white not wheat, to make this bread.
You can freeze the dough for up to 3 months. If kept in the fridge, the yeast will continue to grow, even if it’s slowly. This can be done for about a day, but I wouldn’t do it much longer than that. Wrap the dough tightly in plastic wrap and store in freezer bags. When ready to bake, remove from the freezer and thaw at room temperature. It will take about 4 hours to thaw. Then bake according to the recipe.
Helpful kitchen tools:
- Mixing bowls
- Stand mixer or hand mixer
- Baking sheets
- Wire cooling rack
- Pastry brush
- Rolling pin
- Bread knife
Bread Machine instructions are at the end!
How to Make Italian Bread
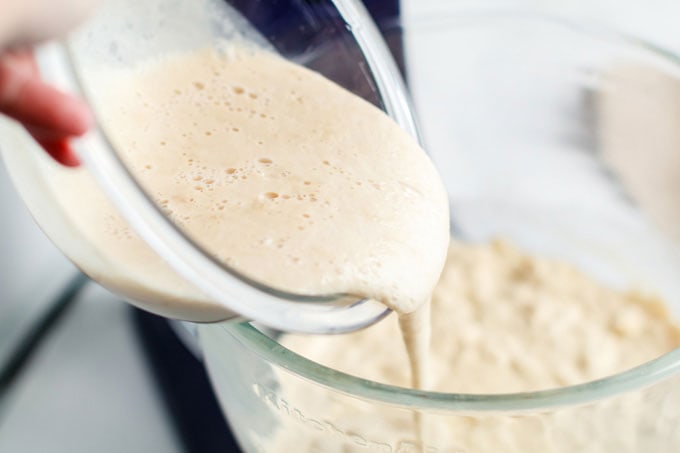
- Dissolve yeast, 1/2 cup warm water, and 1/2 teaspoon granulated sugar in a small bowl.
A NOTE ABOUT YEAST: You can use either active dry yeast or instant yeast. If you use active dry yeast it needs to be proofed in order for it to be reactivated. Instant dry yeast doesn’t need proofing. Active dry yeast must be reactivated by proofing in warm water, or the bread won’t rise properly. This process is the prove that the yeast is still alive.
- In a large bowl or stand mixer, combine 2 cups hot water, 3 tablespoons granulated sugar, the salt, and the oil. Add 3 cups of flour to the mixture in this large bowl/mixer and mix well.
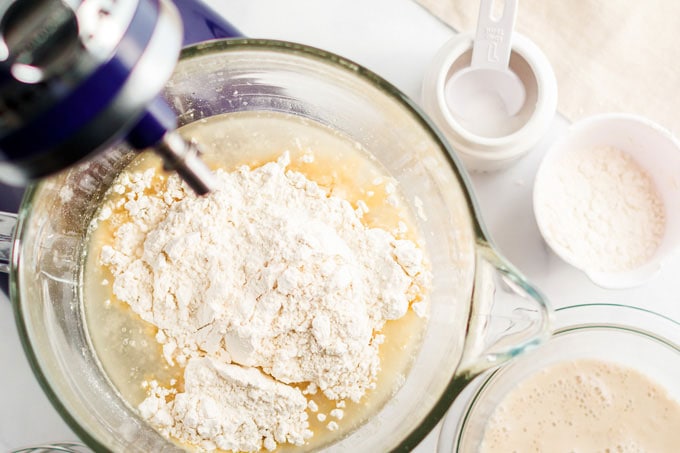
- Stir in yeast mixture.
- Add 2 – 3 cups more flour and mix until well blended. (At this point your dough will still be quite sticky).
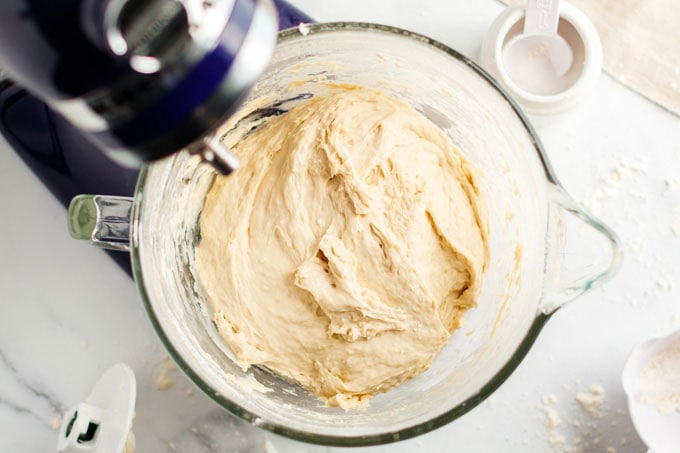
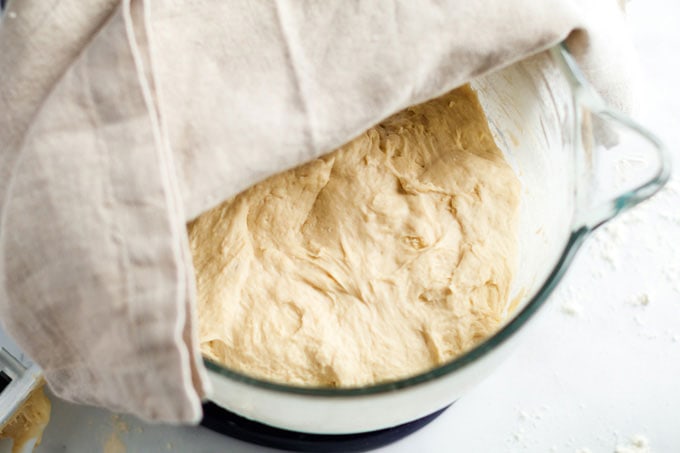
- Leave in bowl, cover with a towel and let rise for 1 hour. (If using a mixer, remove the bowl from the mixer and cover it with a towel. Otherwise your paddle attachment or dough hook will get covered in dough when it rises).
- Divide dough into 2 (or 3 if you want smaller loaves) pieces.
NOTE: This dough does not require kneading.
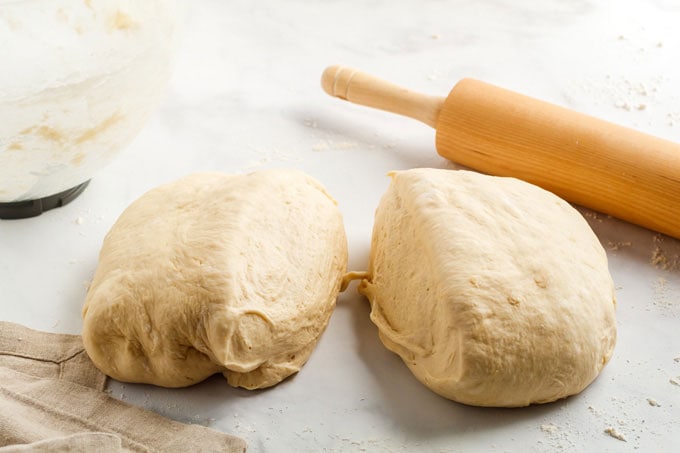
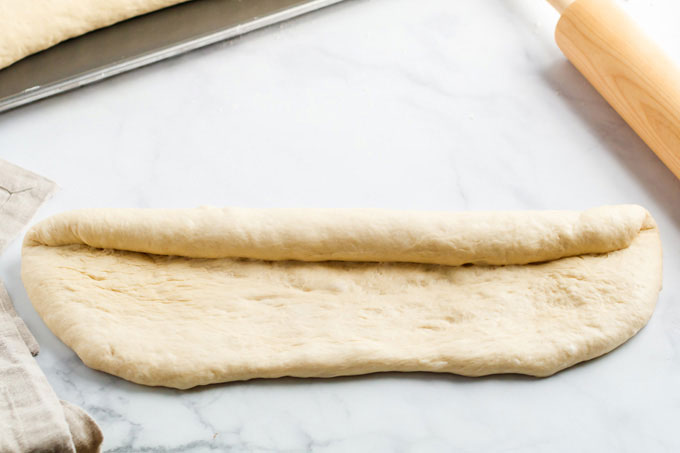
- Roll out each piece on a floured surface into the length desired then roll up length wise like a jelly roll.
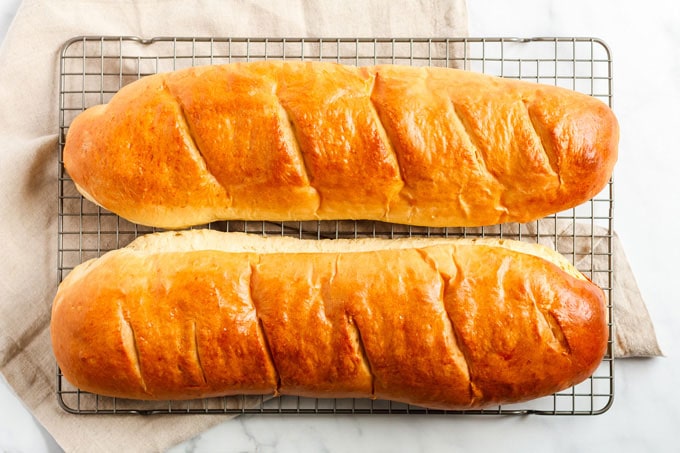
- Put on a greased cookie sheet, sealed side down, and tuck the ends under. Slash the top diagonally across the top every couple of inches with a sharp knife.
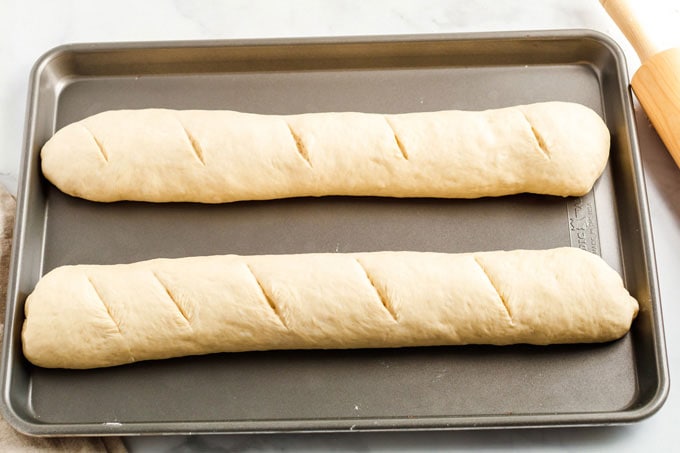
- Cover and let loaves rise 30 more minutes.

- While loaves are rising, preheat oven to 400 degrees Fahrenheit.
- Whisk the egg white and brush over the top of loaves.
- Bake for 25 – 30 minutes.
How to Make Italian Bread in a Bread Machine
Several people have asked if this Italian bread can be prepared in a bread machine. We were able to test it successfully and have provided the instructions below. Please note, the preparation of the dough is in the bread machine, but you will still remove the dough, form a loaf, and bake it in your conventional oven.
- Using the printable recipe below, cut the ingredients in half, and eliminate the water and sugar step used for proofing the yeast.
- Put 1 cup of water (110 F) and 1/4 cup oil in the bread machine bucket (make sure the paddle is on).
- Add 4 1/2 teaspoons sugar and 1 1/2 teaspoons salt.
- Gently add 3 cups flour over the water mixture so that it is all covered.
- Place 2 1/4 teaspoons (one packet) of yeast on top of flour with nothing else touching it.
- Place bucket in bread machine and enter dough cycle.
- When it beeps, take out and roll dough, adding more flour if needed.
- Roll up (follow instructions in printable recipe for forming loaf) and place on baking sheet, add slashes to top, and cover with towel to let rise (again, according to recipe).
- Brush with egg white and bake at 400 F (see recipe instructions below).
How to Enjoy this Italian Bread
There are plenty of dinners that we like to eat this homemade bread with, and they aren’t all Italian meals! I’ve been known to sop up the juices of my favorite pork sirloin roast using a hunk of this bread.
A big bowl of Italian Sausage Tomato Orzo Soup or my Cheddar Cheese Potato Soup screams for a piece of warm, buttered bread. It’s also amazing with this Zuppa Toscana for those Olive Garden fans out there! Another dinnertime favorite is this Chicken Cacciatore, and it’s great to have a hunk of bread for dipping into the sauce.
Try our new Crockpot Lasagna, it would be perfect with this bread!
Need more ideas? Find all my dinner recipes here!
What Our Readers Are Saying
Never baked bread before? Want to make sure before you invest the time and ingredients? Here’s just a small sampling of what our readers are saying about this recipe! You can find more reviews in the comments down below!
“I have made this twice and it is very tasty, good crust and soft inner not dense , very good flavor, I have been baking bread for 40 years, this is in the top five, Thanks.” ~ Thomas
“By far one of the best and easiest bread recipes I have come across!! Dough comes out perfect and is so easy to roll!! So glad I came across this recipe it’s a game changer.” ~ Tracy
“This bread was so, so delicious! I am proud of myself for going through with it. I was scared to do it and usually need video ( visual learner ) but went ahead and one of the two loaves is already gone! I wish I could attach a pic! I will make this over and over!” ~ Desiree
“I never post reviews… but after making this, I had to!!! I only had bread flour, so used that… but that was the only deviation. I followed the recipe exactly. The bread came out PERFECT! Crispy outside and moist inside. This is some of the best bread I’ve ever made. It will definitely be made again. Thank you!!” ~ Terri
“‘This is a million times better than store bought bread’
‘You have to make this every time we have pasta now’
‘Nom nom nom…’Feedback from my family after serving them this bread for dinner. Excellent recipe!” ~Dave
“OMG! I made this bread today and have to say this is the BEST bread I have ever made, and I’ve tried a lot of recipes! It was very light and fluffy yet just crispy enough on the crust. The only changes I made were I used bread flour and only used 2.5 tablespoons of the sugar instead of three. Thank you for sharing this! I am throwing away all my other bread recipes!” ~ Nadine

Homemade Italian Bread
IMPORTANT – There are often Frequently Asked Questions within the blog post that you may find helpful. Simply scroll back up to read them!
Print It Pin It Rate ItIngredients
- 1 1/2 tablespoons active dry yeast 2 packets
- 1/2 cup warm water
- 1/2 teaspoon granulated sugar
- 2 cups hot water hot to the touch, not boiling
- 3 tablespoons granulated sugar
- 1 tablespoon salt
- 1/2 cup vegetable oil
- 5-6 cups all-purpose flour add more if needed to get to a pliable dough
- 1 large egg white for brushing on loaves
Before You Begin
- If your dough is still super sticky, you can add small amounts of flour until the dough just comes together.
- You can use the packets of active dry yeast available at any grocery store. I bake a lot of bread, so I prefer to by SAF instant yeast in larger packages. If you use active dry, just follow the instructions in the recipe and let it sit for a few minutes to proof (it will get a little foamy).
- When a bread recipe calls for warm water, the temperature should be around 110 degrees F. If the water is too hot it will kill the yeast, and too cold will delay the rise process.
- Use regular white granulated sugar for this recipe.
- In a separate step, you’ll also use hot water in this recipe. Since you are mixing it with other ingredients before adding the yeast mixture it will be fine. You want hot tap water, not boiling water.
- Regular everyday table salt is used, not Kosher or sea salt.
- This recipe calls for vegetable oil, but olive oil can also be used.
- We are using all-purpose flour, white not wheat, to make this bread.
Instructions
- Dissolve yeast, 1/2 cup warm water, and 1/2 teaspoon granulated sugar in a small bowl.
- In a large bowl or stand mixer, combine 2 cups hot water, 3 tablespoons granulated sugar, the salt, and the oil. Add 3 cups of flour to the mixture in this large bowl/mixer and mix well. Stir in yeast mixture.
- Add 2 – 3 cups more flour and mix until well blended. (At this point your dough will still be quite sticky). Leave in bowl, cover with a towel and let rise for 1 hour. (If using a mixer, remove the bowl from the mixer and cover. Otherwise your paddle attachment or dough hook will get covered in dough when it rises). NO KNEADING IS REQUIRED.
- After the rise, if the dough is too sticky to handle, add more flour until its workable. For some people this can be up to a cup or more! Just don't dry out the dough. Add by quarter cupfuls until its workable.
- Divide dough into 2 (or 3 if you want smaller loaves) pieces. Roll out each piece on a floured surface into the length desired then roll up lengthwise like a jelly roll. If it's still too sticky, add more flour until it's workable but not dry.
- Put on a greased cookie sheet, sealed side down, and tuck the ends under. Slash the top diagonally across the top every couple of inches with a sharp knife.
- Cover and let loaves rise 30 more minutes.
- While loaves are rising, preheat oven to 400 degrees Fahrenheit.
- Whisk the egg white and brush over the top of loaves.
- Bake for 25 – 30 minutes.
Nutrition
This recipe was originally published here on January 28, 2009
Amanda Davis
Latest posts by Amanda Davis (see all)
- Taco Salad Flag - May 20, 2024
- Chocolate Chip Cookie Tower - May 17, 2024
- Ground Beef Casserole - May 13, 2024


Amy Atwood says
This is my family’s favorite bread recipe (and I’ve made several 😆). It’s soft on the inside, easy to make, great for garlic bread, breakfast toast, subs (chicken Phillies the other night!).
You can’t go wrong with this delicious, way better than store bought, bread!
Joyce says
So delicious and easy
Bakin13 says
Very, very sticky and messy! Did all 6 cups to start with and divided into 2 bowls to rise instead of leaving in KitchenAid mixer. Glad I did because the 2 bowls were out of room after an hour! Turned out on floured area and had to incorporate at least 1 cup more flour, maybe more to do anything else in directions. STILL could barely get sticky rolled dough off the counter onto the pan. Covered with greased cling wrap and a towel. After 2nd rise, it stuck to cling wrap and looked UGLY but I baked it anyway. I’ll admit, the taste was GREAT! It’s a hassle so I won’t make again. Note: I only did 2 tsp of salt because we’re low sodium.
Gabrielle says
Delicious bread. I just wish the recipe was in Metric not imperial measurements
Maggie says
Does anyone know how to put it into baking pans? Can I put it into metal loaf pans, just throwing them in there? Thanks!
Cas says
I baked 1 loaf in a glass meatloaf pan and do not recommend it. It stuck terribly, eventhough I greased the heck out of it. A lot of this great bread was wasted stuck to my pan, and then it was a PAIN to clean the pan. It’s just to much easier to bake it on a cooking sheet, jelly roll pan, or I’ve even used a pizza stone with great results
Wendy Kielsmeier says
I have made this recipe into loaves twice. It is fabulous. I just wondered if they would work as rolls.
Karen Kitchen says
I always make 2 smaller loaves and a batch of rolls with everything bagel seasoning on them for my grand daughter. They are excellent. This recipe is very versatile.
Caz says
I baked 1 loaf in a glass meatloaf pan and do not recommend it. It stuck terribly, eventhough I greased the heck out of it. A lot of this great bread was wasted stuck to my pan, and then it was a PAIN to clean the pan. It’s just to much easier to bake it on a cooking sheet, jelly roll pan, or I’ve even used a pizza stone with great results.
Kelley says
Excellent! I am baking this Italian loa in a shallow dutch oven, sauté pan and I put the 2 halves like half moons and as they bake they join together and then there is some lovely softer pieces. I test the loaf at fish time and leave in if not at 190 degrees. Turns out perfect every time. A nice quick recipe that I can make before I go to bed after putting the kids to bed and then we have fresh bread in the am. Thanks Amanda!