
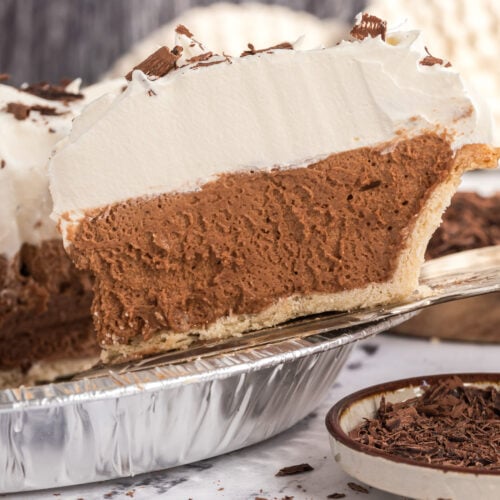
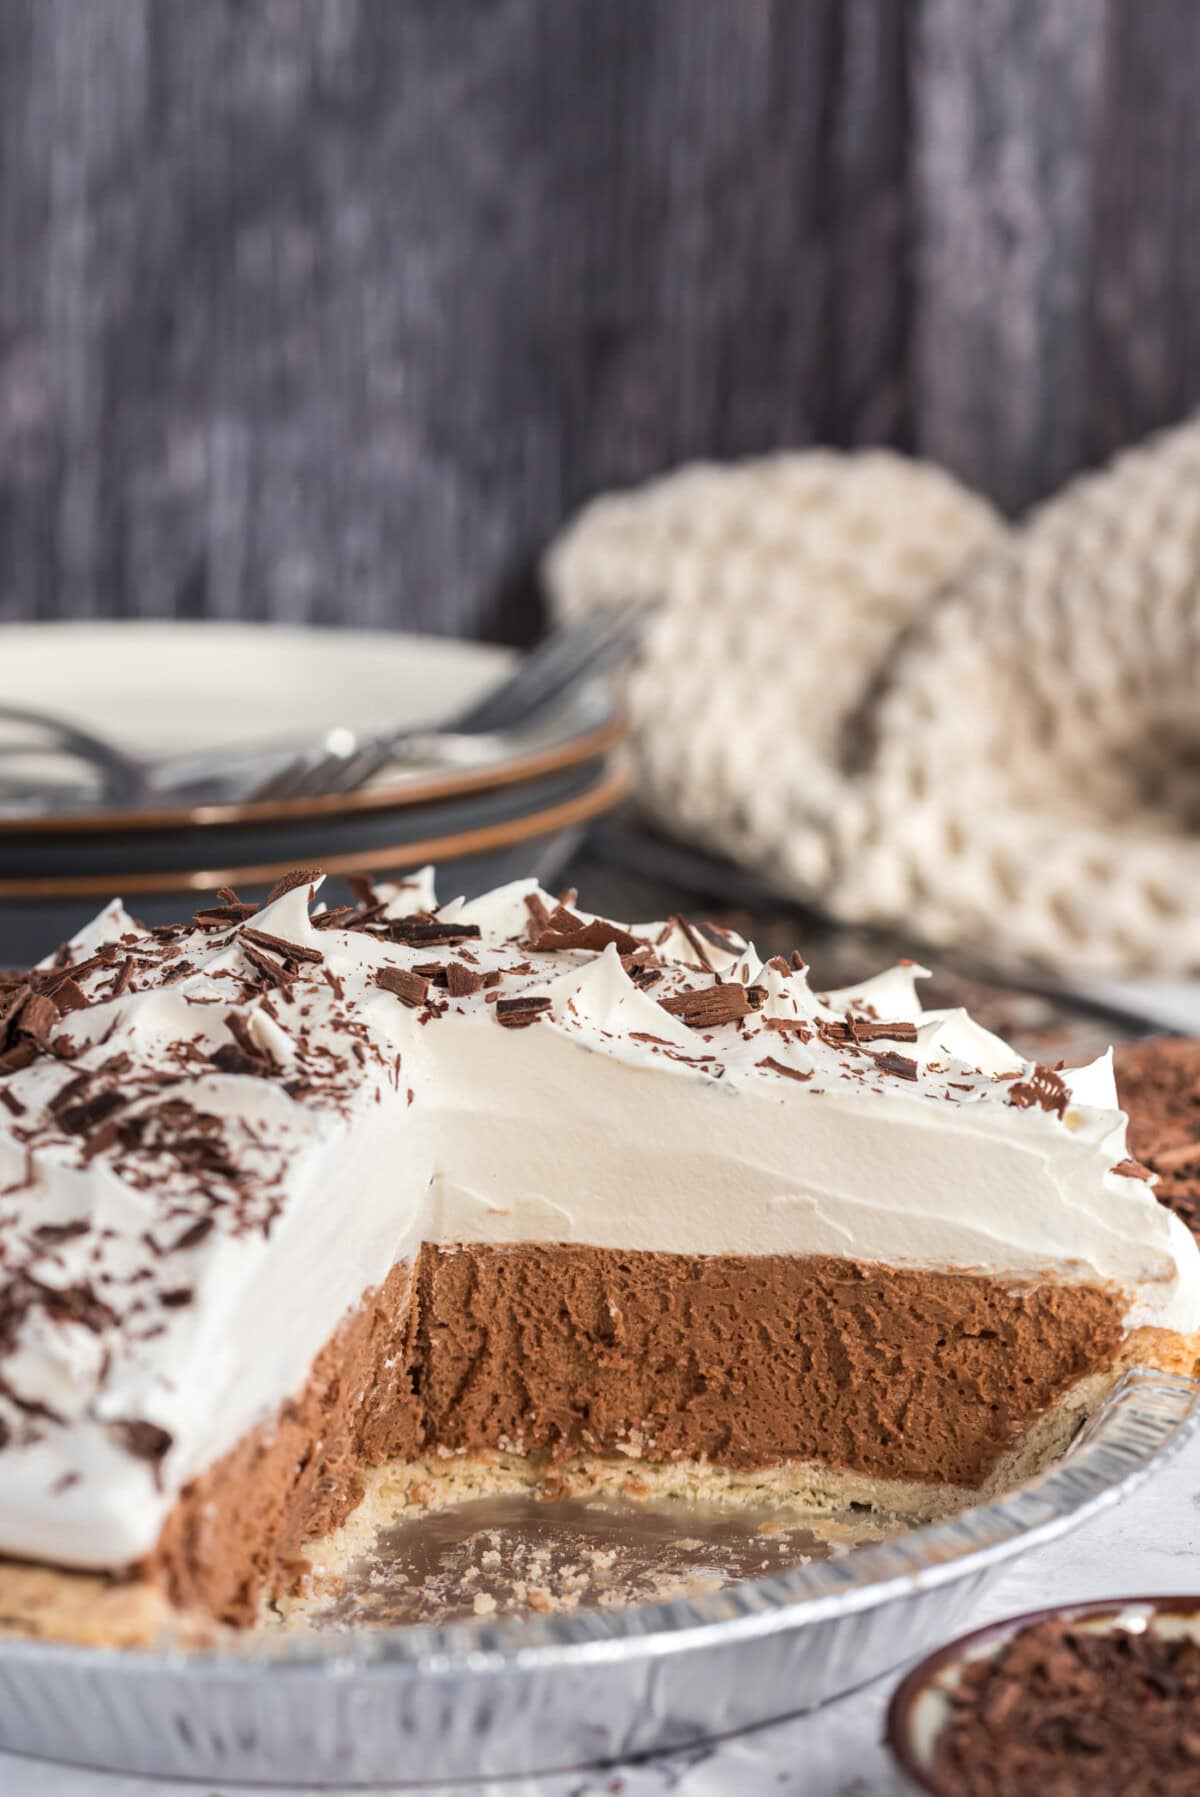
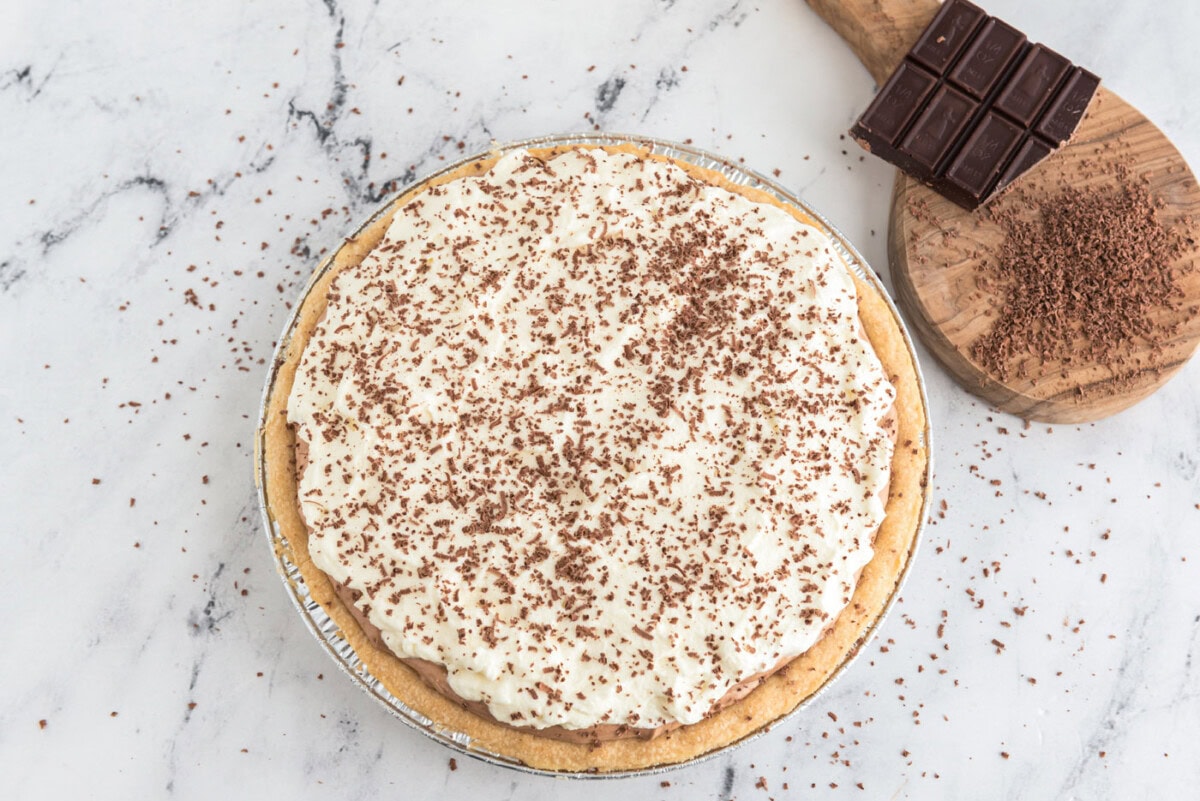
If you grew up anywhere near a Baker’s Square, you already know exactly which pie this is. The one behind the glass, dark and impossibly smooth, under a mountain of whipped cream and a scatter of chocolate shavings. This is that pie, made in your own kitchen, and it has been the most requested recipe in my house for close to 30 years.
Why this recipe works
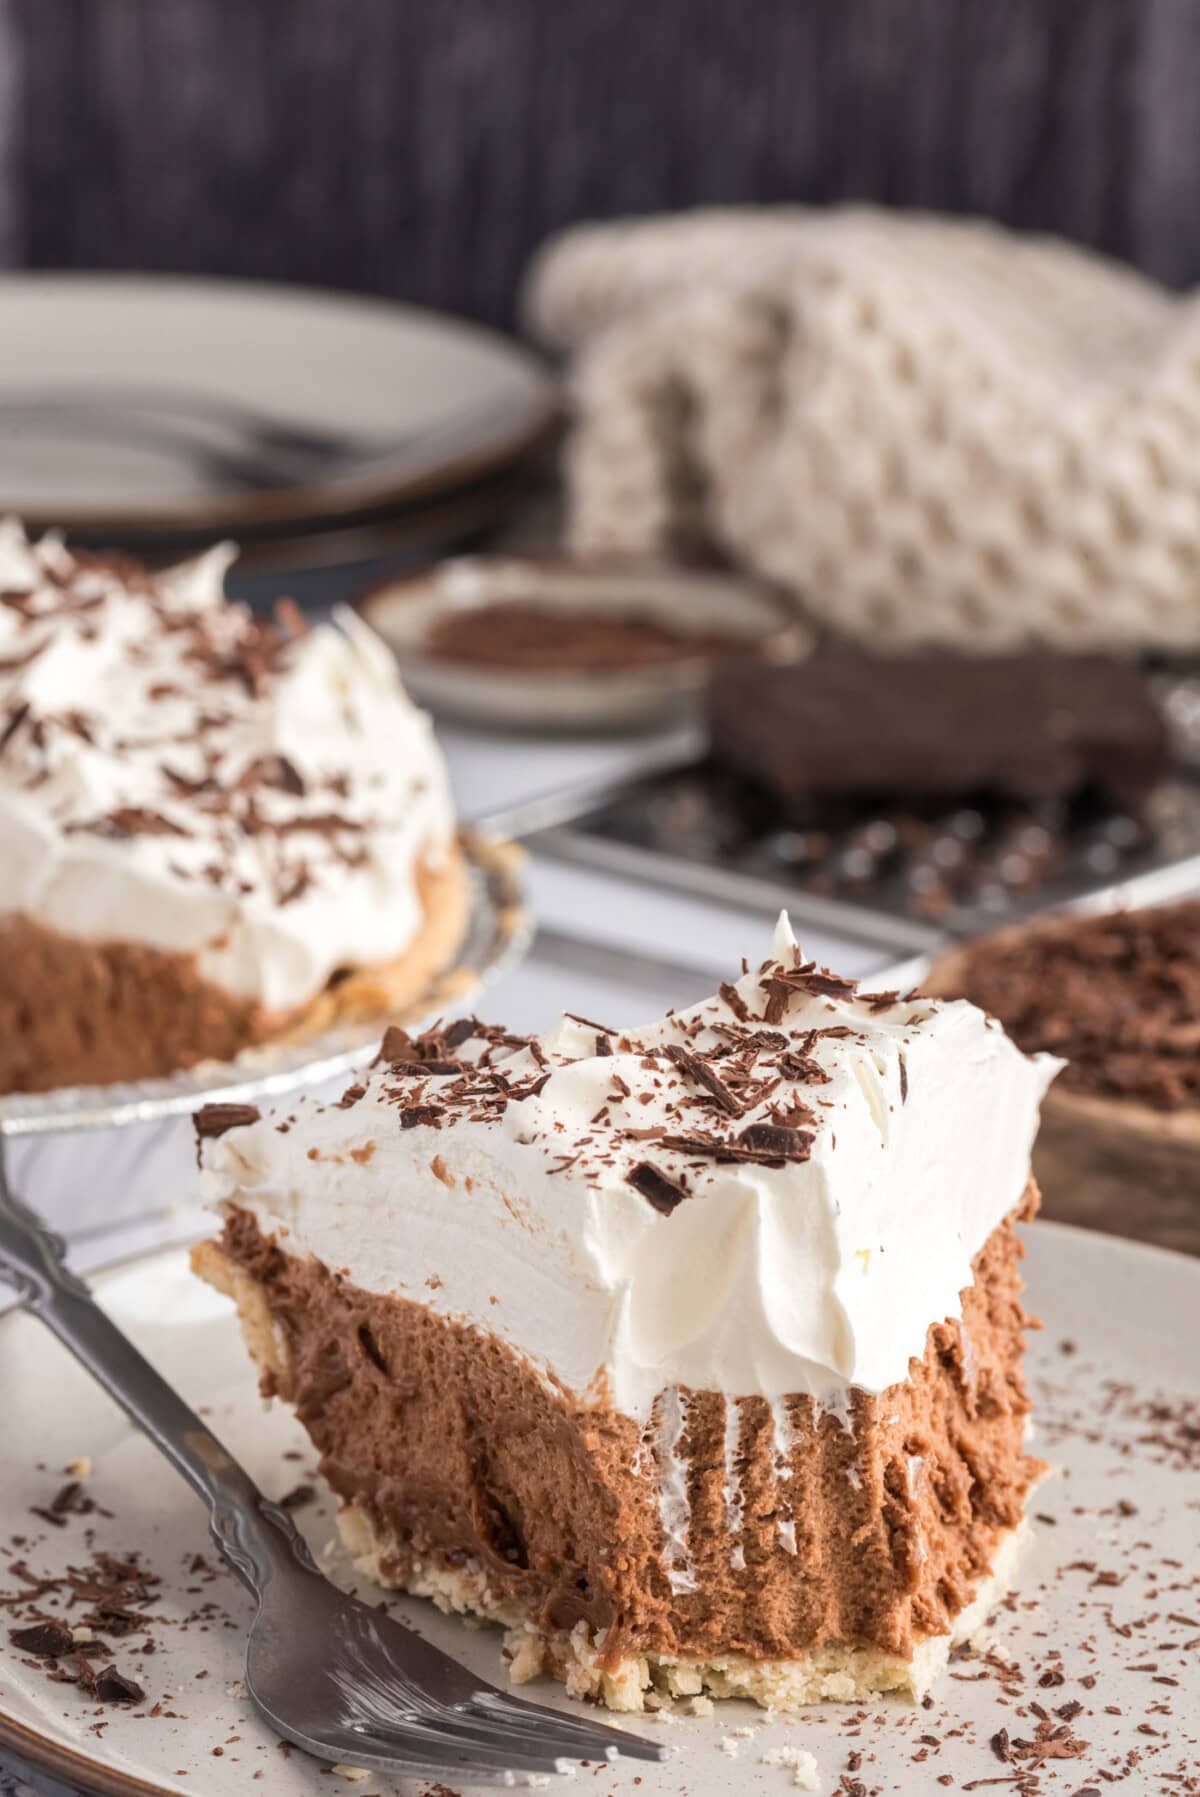
French silk pie is a no-bake chocolate mousse set in a baked crust, and the whole thing lives or dies on two numbers: how long you beat it and how long you chill it. There is no cream in the filling, no milk and no gelatin. Butter, sugar, unsweetened chocolate, vanilla and eggs, beaten long enough to turn pale and airy, then left overnight to set. That is the entire trick, and it is why this version tastes like the restaurant one instead of like chocolate pudding in a shell.
I was inspired by my absolute favorite pie growing up from Baker’s Square, back when it was still called Poppin’ Fresh, and I think this French Silk Pie recipe hits the nail on the head. Readers have told us it beats the French silk at Village Inn, Perkins and Marie Callender’s too, which makes sense, since all of those are built on the same butter and unsweetened chocolate base. There isn’t a holiday that goes by that I don’t make this pie. We love it so much we have turned it into mini French silk pies for parties and a French silk slab pie when we are feeding a crowd.
Ingredients you will need
Get all measurements, ingredients, and instructions in the printable version at the end of this post.
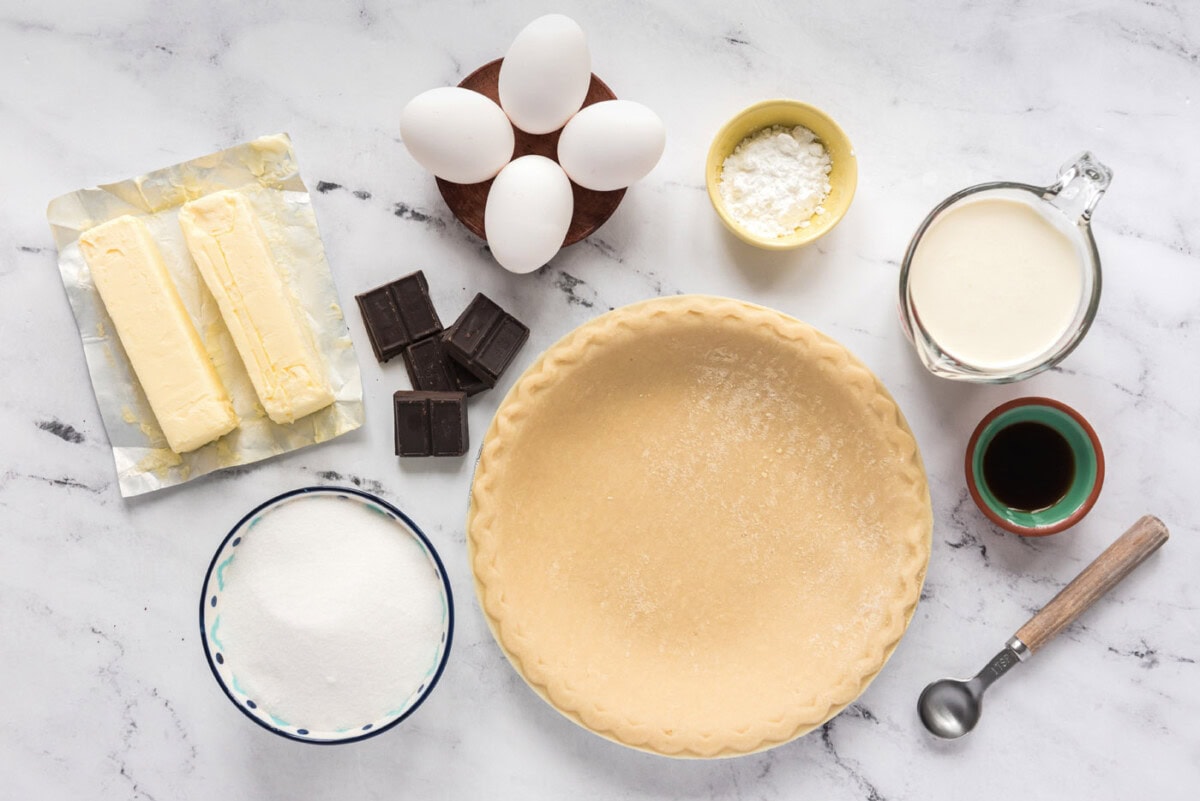
Ingredient Info and Substitution Suggestions
UNSWEETENED CHOCOLATE – This is the ingredient the whole pie is built around, so do not substitute it. The sugar in this recipe is calculated against unsweetened chocolate, which means semi-sweet or milk chocolate will make the pie excessively sweet and wash out the chocolate flavor. Melt it and let it cool completely before it goes anywhere near the mixer, because warm chocolate will seize when it meets the vanilla. If you want a deeper, more bitter pie, use 4 ounces instead of 2.
EGGS – The eggs in this pie are not cooked. If that concerns you, or if you are serving guests, use pasteurized eggs, which work identically. You can also learn how to pasteurize the eggs at home in your fridge.
BUTTER – Do not use margarine and do not melt it. There is no cream, milk or gelatin in this filling, which means the butter is the entire structure of the pie. Softened means out of the fridge for 20 to 30 minutes, not warmed. This is the single most common reason a French silk pie fails to set.
GRANULATED SUGAR – Regular granulated sugar is correct here. It will feel grainy in the bowl and that is expected. It finishes dissolving overnight in the refrigerator, which is exactly why this pie gets made the day before.
CRUST – We used a store-bought deep dish crust, baked fully according to the package, but a homemade crust always adds something. Our how to make pie crust recipe will get you there. An Oreo cookie crust is a great alternative if you want the pie a little less sweet overall, and there is a cookie crust recipe in our Bailey’s cheesecake post. Whatever you use, it needs to be fully baked and completely cool.
TOPPING – I have used both Cool Whip and homemade whipped cream over the years and both work. If you are whipping your own, heavy whipping cream is required. Half and half will not whip into anything stable.
EQUIPMENT – A stand mixer earns its keep on this recipe, since there is 17 minutes of beating time in total. A hand mixer works if you set a timer for each stage. You will also want a pie plate and a pie server, and a mandolin or vegetable peeler for the chocolate shavings on top.
Tips Before You Begin
- Make the filling first and give it time. Put it in a bowl, cover it with plastic wrap and refrigerate it before it goes into the shell. It thickens as it sits and it is easier to work with.
- Cool the chocolate. Melt the chocolate before you do anything else so it has the longest possible time to cool. Adding vanilla to warm chocolate will seize it.
- Set a timer for every beating stage. Not an estimate, an actual timer. Six to seven minutes for the butter and sugar, then a full five minutes after each addition of eggs. This is where nearly every grainy pie comes from.
- Make your pie crust. If making a crust from scratch, follow the instructions for a fully baked pie shell as this pie will not go in the oven. Let it cool completely.
- WAIT until tomorrow to eat. You can certainly cut it after several hours of chilling, but you will be glad you waited. The filling needs the time to set and any graininess you noticed in the bowl will be gone by morning.
How to Make French Silk Pie
These step by step photos and instructions are here to help you visualize how to make this recipe. You can Jump to Recipe to get the printable version of this recipe, complete with measurements and instructions at the bottom.
- Bake a homemade pie crust or use a Pillsbury refrigerated crust and make according to package directions for a fully baked crust. Set aside to cool.
- Melt the chocolate and set aside to cool completely.
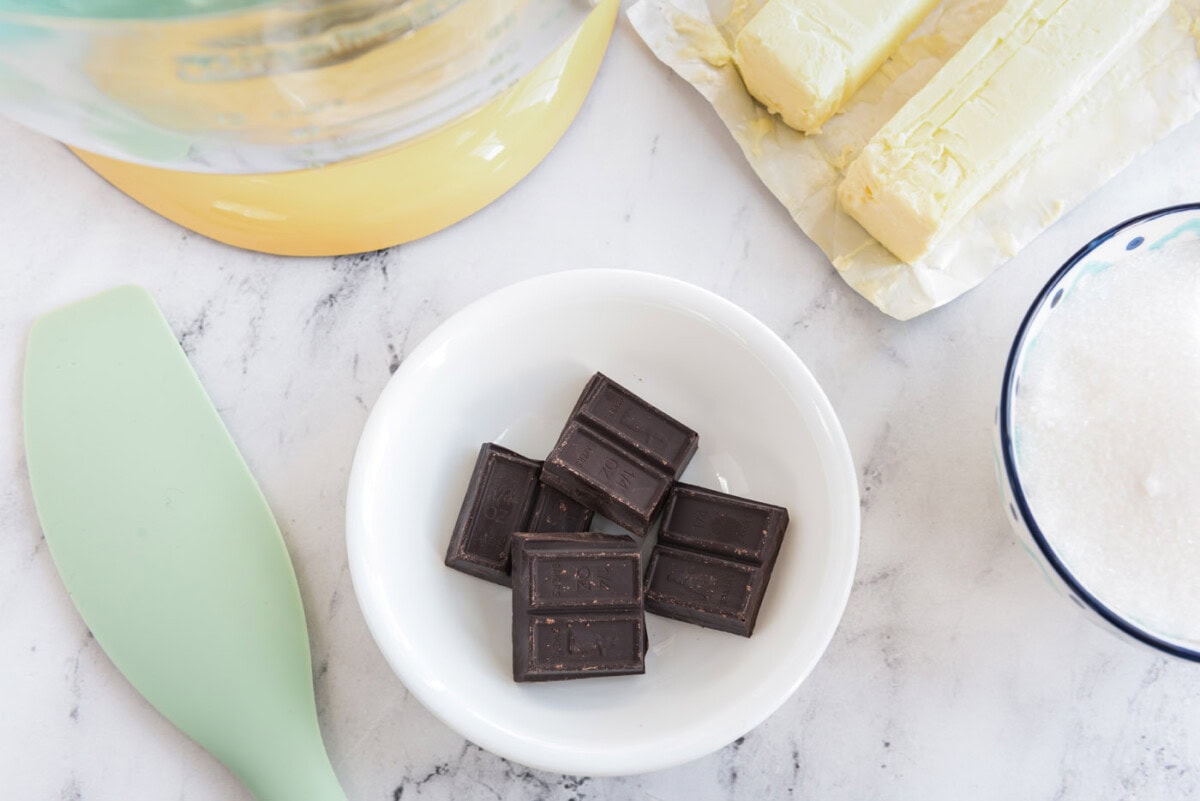
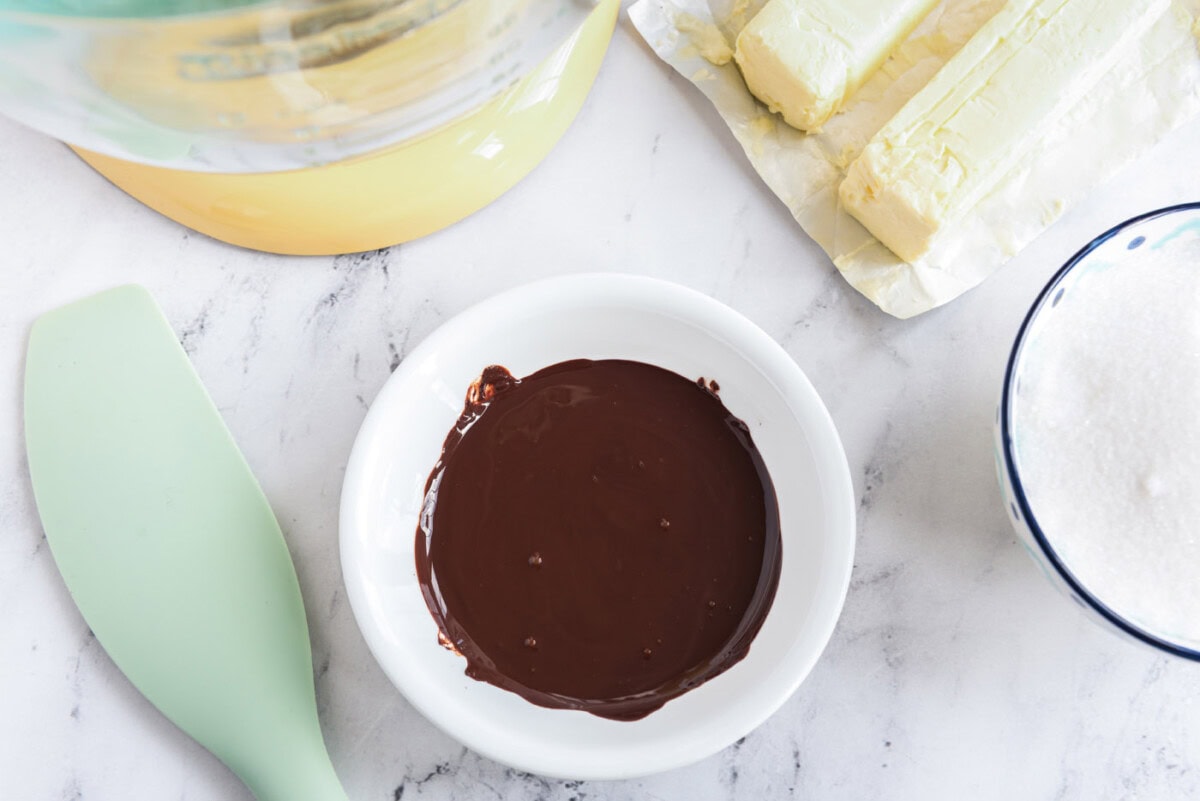
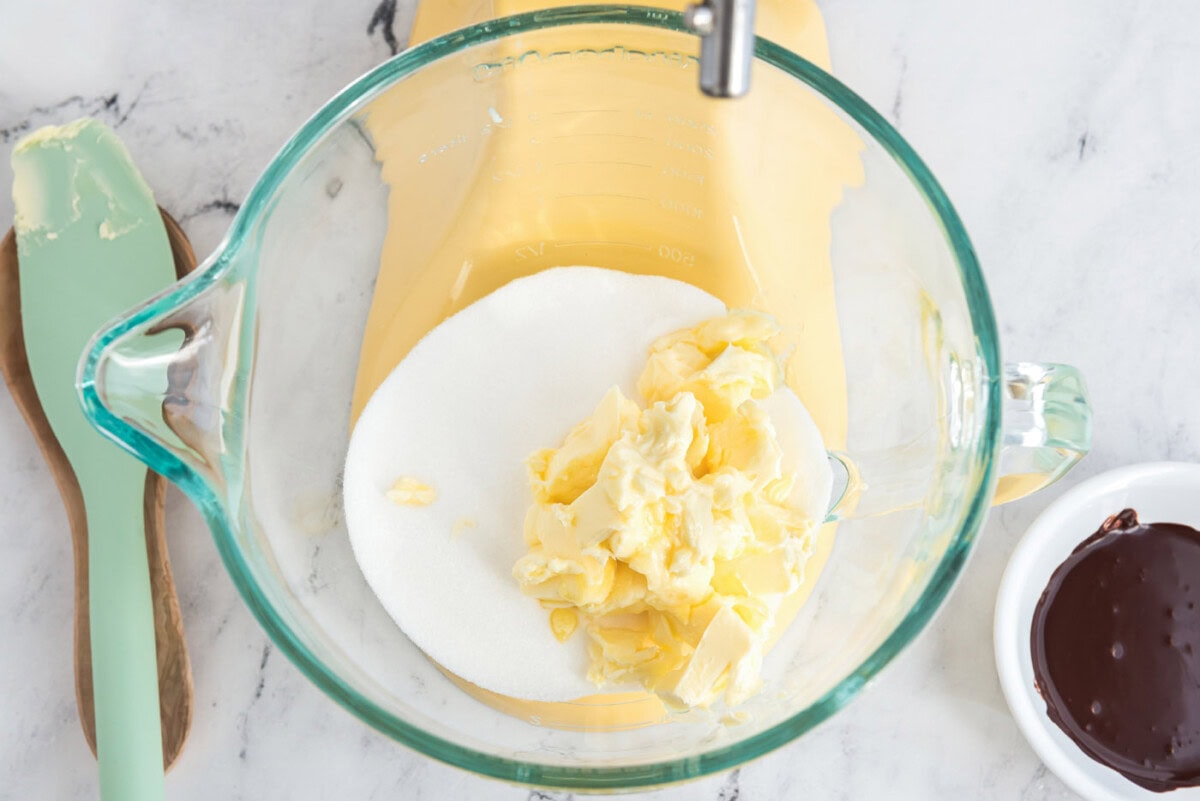
- Using a stand mixer, beat the sugar and butter on medium-high until light and fluffy, about 6-7 minutes.
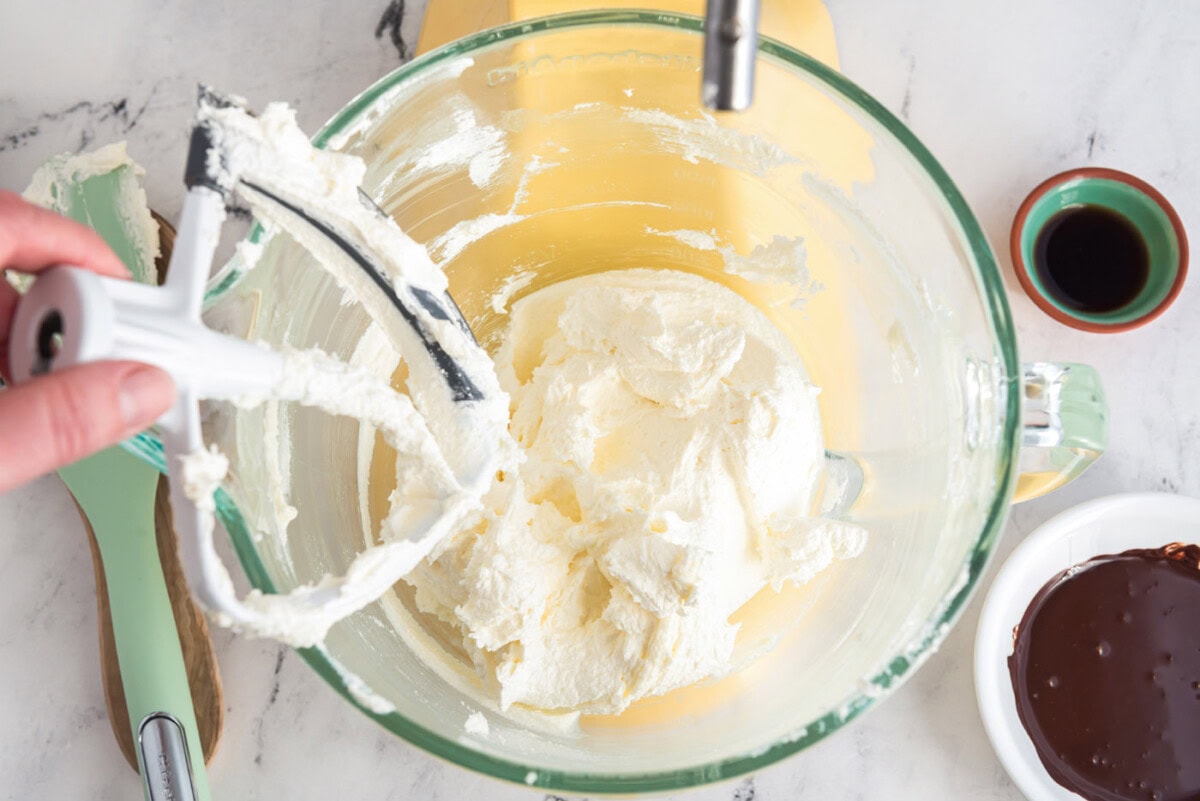
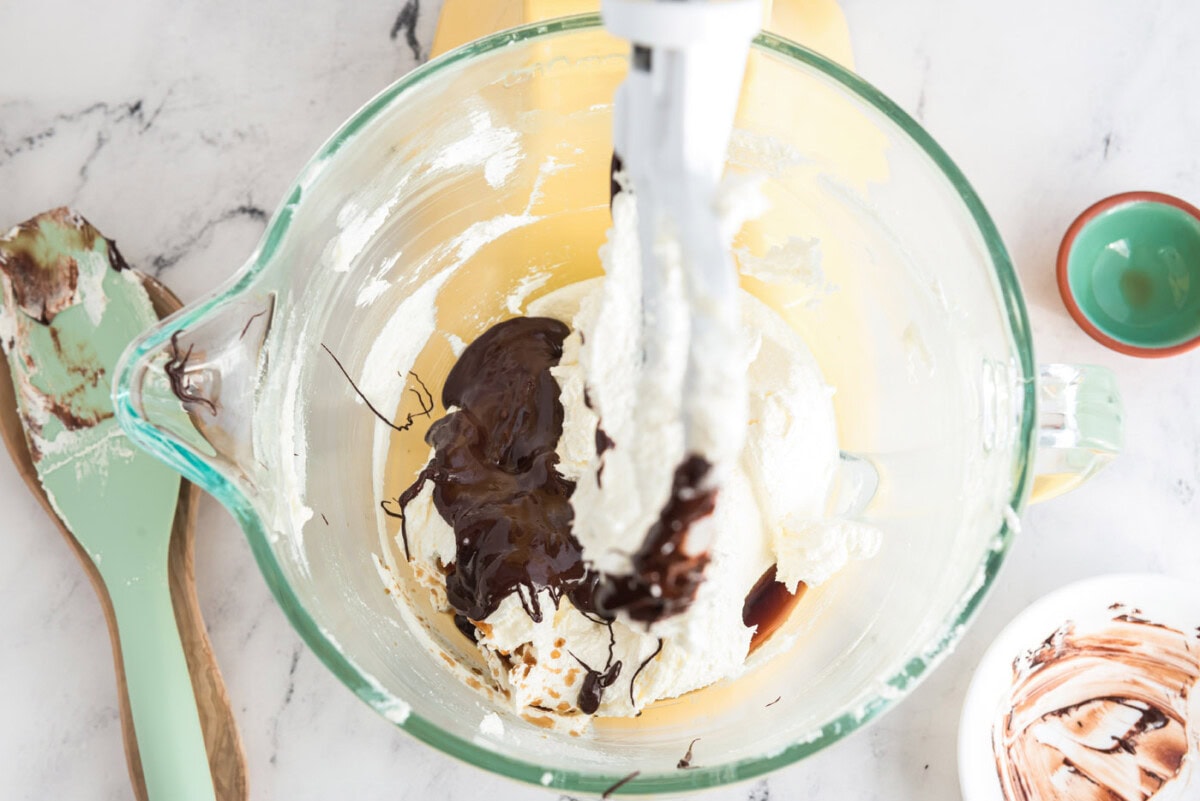
- Add cooled chocolate and vanilla and beat until incorporated.
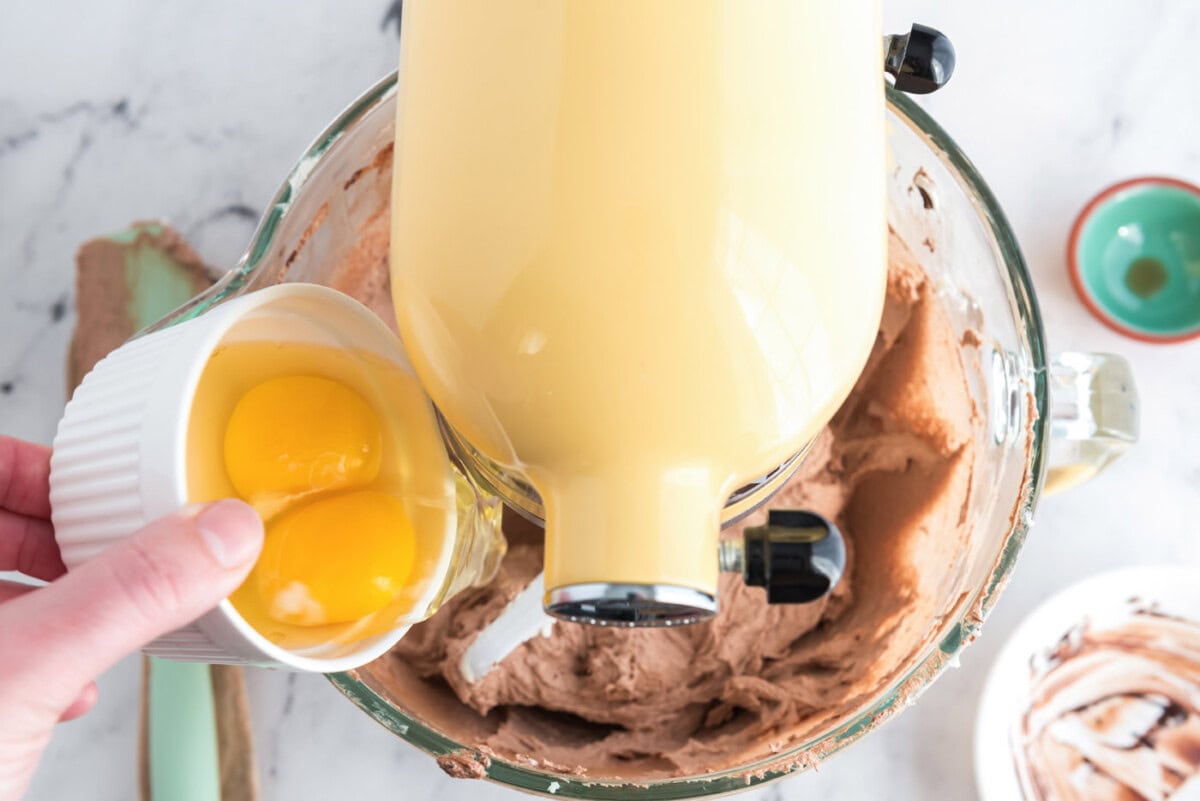
- Add eggs, two at a time, beating a full 5 minutes after each addition.
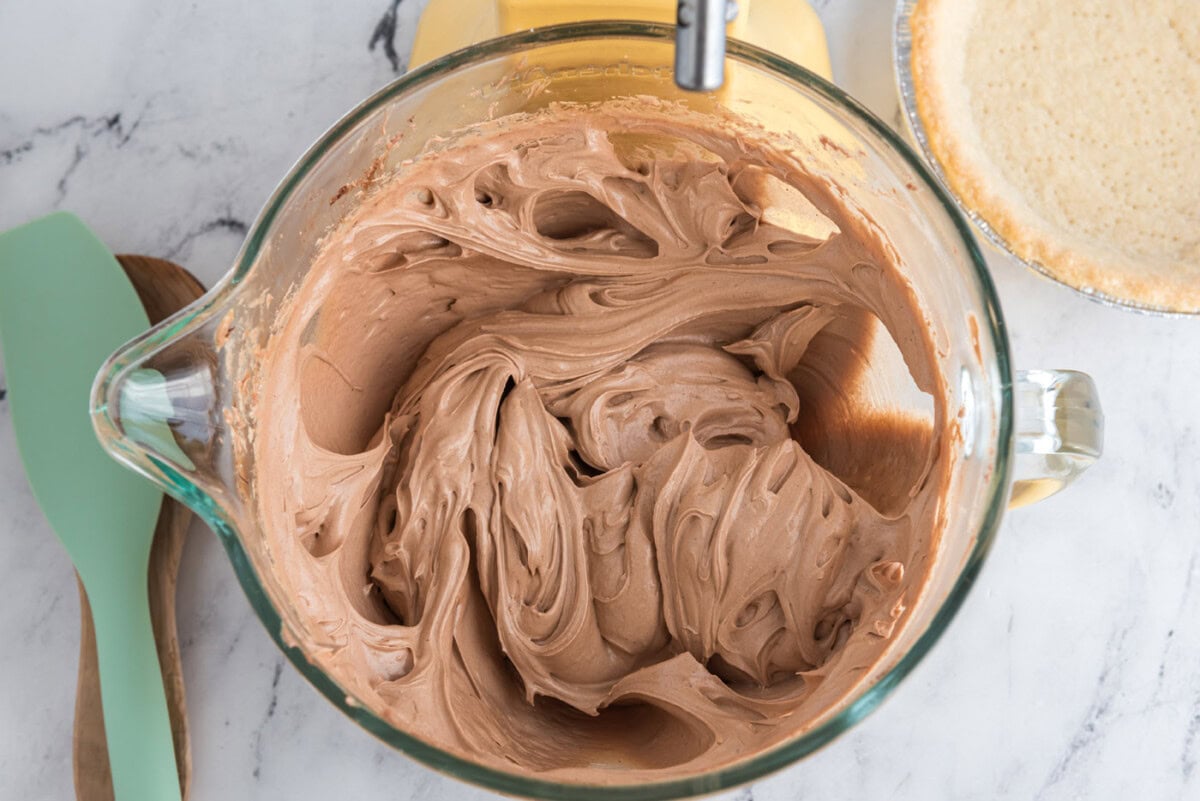
- Pour filling into cooled pie crust.
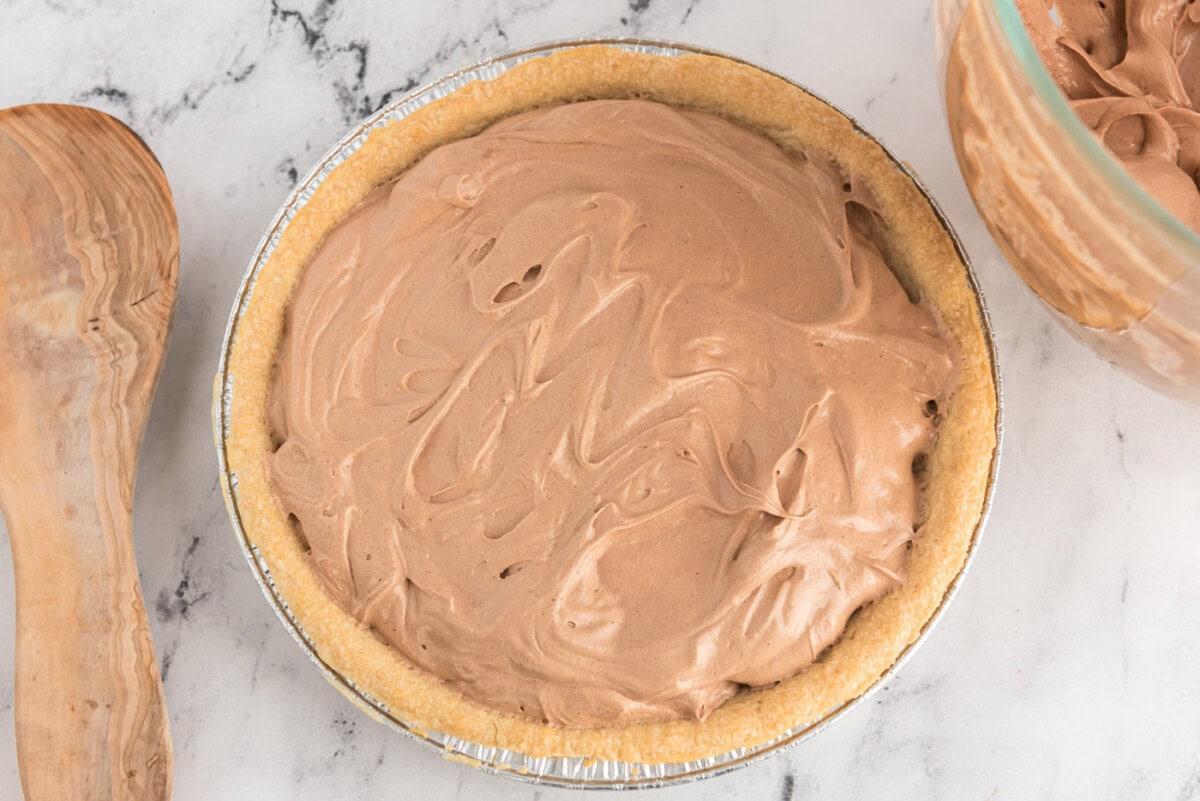
- Chill in the refrigerator for two hours then top with whipped cream. Then chill again in the refrigerator for 6 hours or overnight. You can also wait until two hours or so before serving to add the whipped cream.
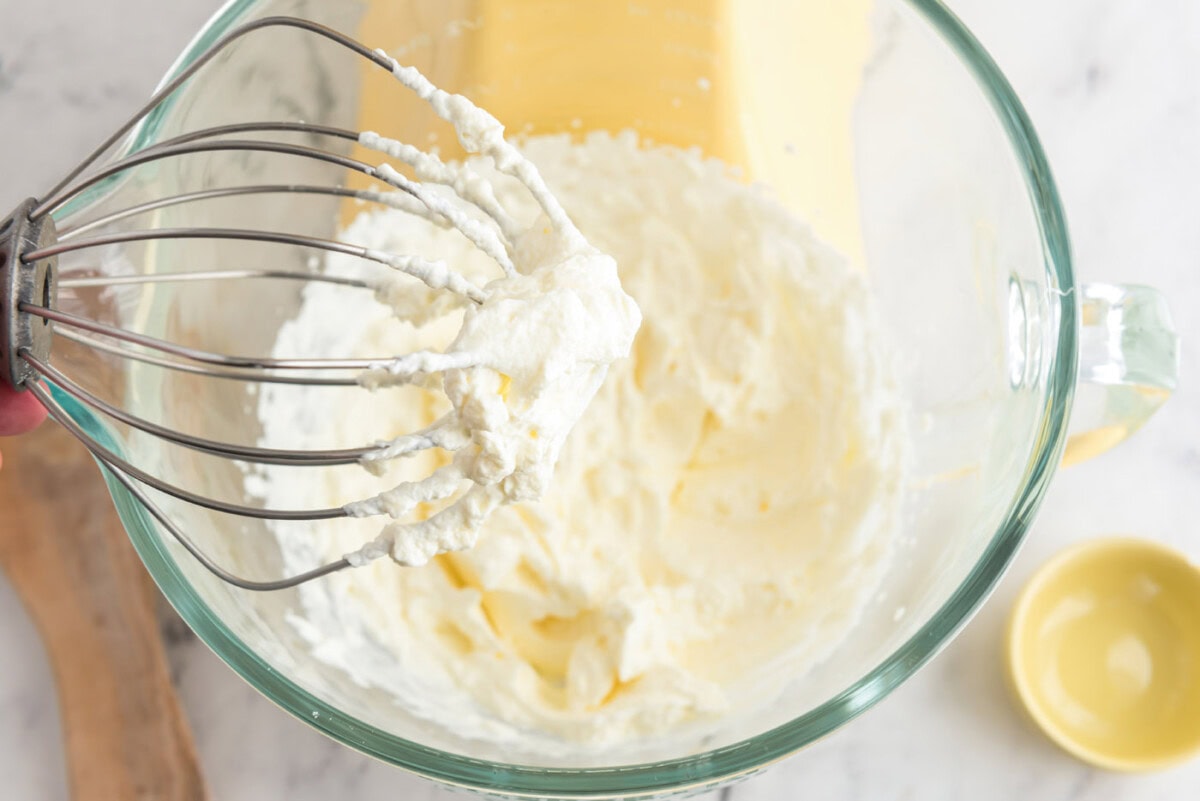
- To make the whipped topping, beat the heavy whipping cream and powdered sugar with a whisk attachment on medium-high speed until stiff peaks just begin to form. Add prepared whipped topping to top of pie.
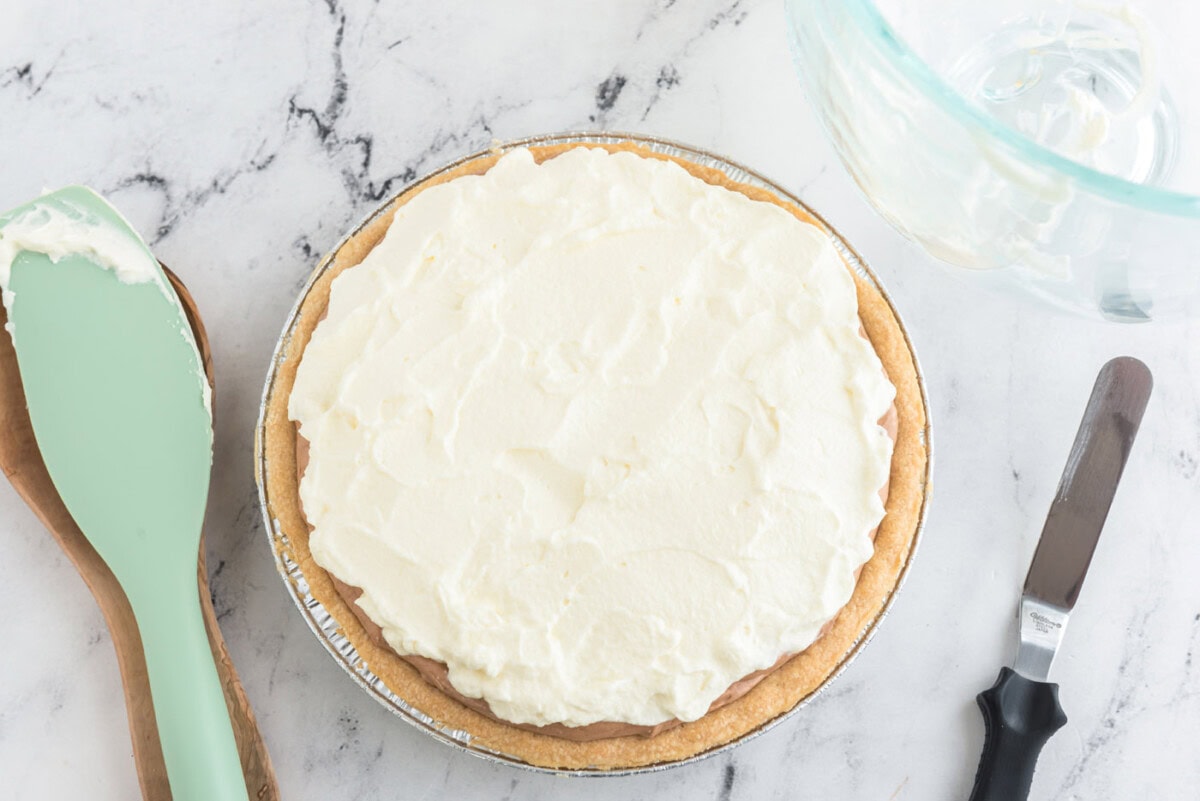
- When ready to serve, optionally garnish with shaved bittersweet chocolate.
Frequently Asked Questions & Expert Tips
French silk pie is a no-bake chocolate mousse pie set in a fully baked crust. The filling is built by creaming butter and sugar, then beating in melted unsweetened chocolate and eggs a little at a time until it turns pale, light and airy. There is no cooking, no tempering and no gelatin. The texture comes entirely from how long you beat it and how long you chill it.
Graininess is sugar that has not finished dissolving, and it is almost always a timing problem rather than a recipe problem. There are 17 minutes of total beating time built into this recipe and every minute of it matters. Beat the butter and sugar a full 6 to 7 minutes before anything else goes in, then a full 5 minutes after each addition of eggs. Even then the filling will feel slightly grainy in the bowl. That is normal. The sugar finishes dissolving overnight in the refrigerator, which is why this pie is made the day before and not the day of.
The most common cause is margarine or a spread used in place of butter. This filling has no cream, no milk and no gelatin, so butter is the entire structure of the pie. Margarine has a different fat and water balance and will not set. Melted butter causes the same problem, so the butter must be softened at room temperature for 20 to 30 minutes rather than warmed. The second cause is a short chill. The pie needs two hours before the whipped cream goes on and then six more hours or overnight after.
Use unsweetened chocolate for the filling. The sugar in this recipe is calculated against unsweetened, so swapping in semi-sweet or milk chocolate makes the pie noticeably sweeter and flattens the chocolate flavor. If you want a deeper, less sweet pie, some readers use 4 ounces of unsweetened instead of 2. Bittersweet chocolate is for the shavings on top, not the filling.
The four eggs in this pie are not cooked. If you are serving guests, anyone pregnant, or anyone with a compromised immune system, use pasteurized eggs, which are sold in most large grocery stores and behave identically here. You can also pasteurize eggs at home in your own refrigerator. If you are serving to a crowd, it is worth saying out loud that you used pasteurized eggs, because it puts people at ease before they ask.
That is what it was built to do. I grew up on the Baker’s Square version, back when it was still Poppin’ Fresh, and developed this recipe to match it. Readers have also compared it favorably to the French silk pies from Village Inn, Perkins, Marie Callender’s and Tippins, which are all built on the same butter-and-unsweetened-chocolate mousse idea rather than a pudding or cream cheese base. If you have been chasing one of those restaurant pies, this is the closest home version we have found.
Yes, and it is a good pairing if you want the pie a little less sweet overall. A store-bought chocolate cookie crust works, or you can make your own. This recipe is written for a fully baked traditional crust because that is what the restaurant version uses, but the filling does not care what it sets in as long as the crust is fully baked and completely cool.
Yes, and you should. Make it at least one day ahead and up to two days ahead. The overnight rest is not optional convenience, it is what dissolves the sugar and firms the filling. A pie eaten the same day will be softer and grainier than the same pie eaten the next morning.
Storage and Freezing Information
Store leftover pie covered with an airtight lid or wrapped in plastic wrap in the refrigerator for 4 to 5 days.
To freeze the whole pie, put it in the freezer uncovered for a few hours first, then wrap the frozen pie in plastic wrap and slide it into a freezer bag. If it will not fit, double wrap it in plastic instead. To freeze slices, cut the pie and lay the slices on a waxed paper lined cookie sheet without touching, freeze for a few hours, then wrap each slice individually and bag them.
To thaw, remove the plastic wrap immediately so condensation does not settle on the surface. Thaw at room temperature if you plan to serve it soon, or in the refrigerator if you have a full day.
For make ahead, this pie should be made at least one day in advance and can be made up to two days ahead. That is the recommendation, not just a convenience.
Serving Suggestions
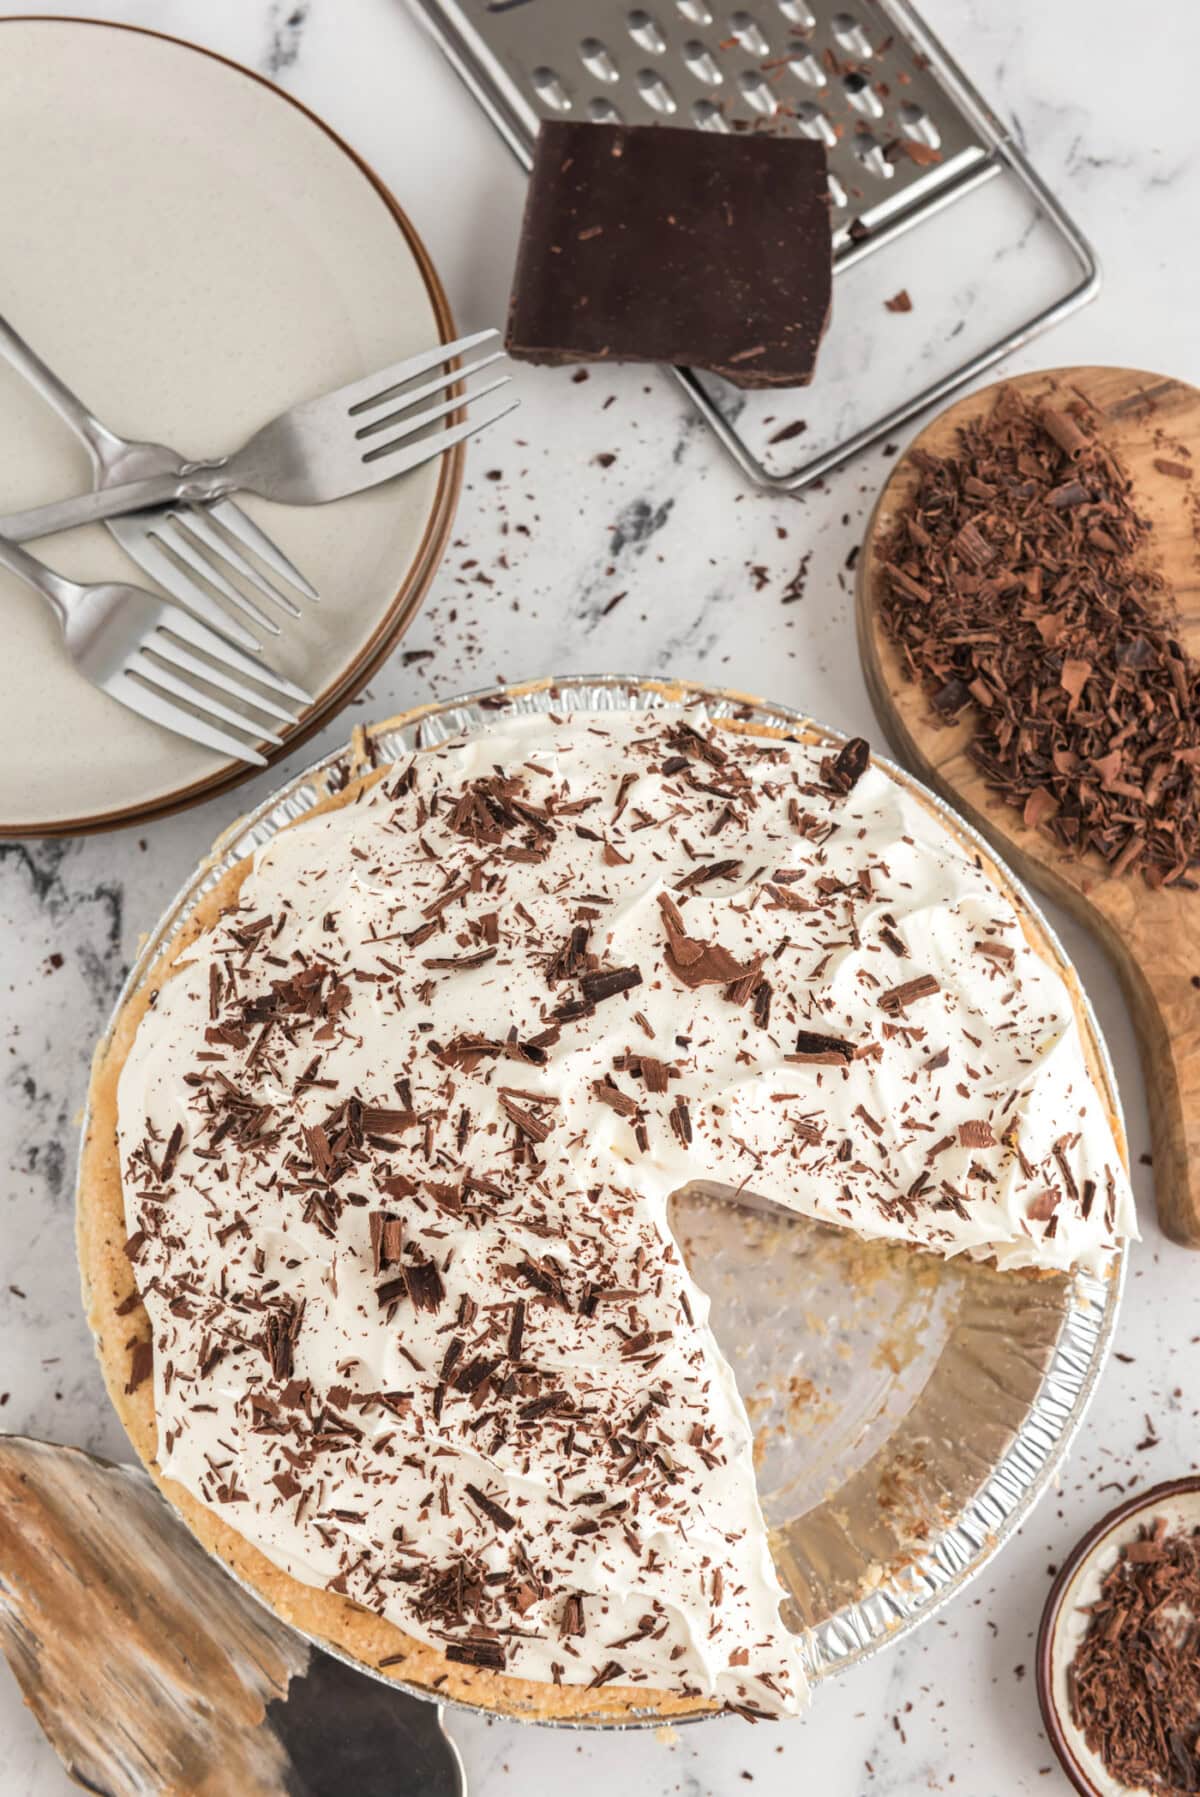
Serve it cold, straight from the refrigerator, with bittersweet chocolate shaved over the top with a vegetable peeler or a mandolin right before it goes to the table. A pie this rich cuts best with a warm knife wiped between slices, and the portions can be smaller than you think.
This is a Thanksgiving and Christmas pie in our house, and it holds its own on a dessert table next to lighter things. If you are building a spread, our Pies and Tarts collection has fruit and cream options that balance it out, and the rest of our Thanksgiving recipes will fill in around it. For a party where you want the same flavor in a format people can pick up, make mini French silk pies instead, and for a crowd, the French silk slab pie feeds far more from the same filling. Coffee is the right drink alongside it, and it is one of the few desserts I would not put ice cream next to.
More Chocolate Pies and No Bake Desserts
- Reese’s Pie
- Chocolate Peanut Butter Pie
- Chocolate Mousse
- No Bake Chocolate Cheesecake
- French Silk Slab Pie
- Mini French Silk Pies
I love to bake and cook and share my kitchen experience with all of you! Remembering to come back each day can be tough, that’s why I offer a convenient newsletter every time a new recipe posts. Simply subscribe and start receiving your free daily recipes!
French Silk Pie
IMPORTANT – There are often Frequently Asked Questions within the blog post that you may find helpful. Simply scroll back up to read them!
Print It Rate ItIngredients
- 6 ounce deep dish frozen pie crust baked according to package
- 1 cup unsalted butter softened
- 1 ½ cups granulated sugar
- 2 ounces unsweetened chocolate melted and cooled COMPLETELY
- 2 teaspoons vanilla
- 4 large eggs
- 8 ounces heavy whipping cream or 8 ounce tub Cool Whip
- 1 Tablespoon powdered sugar
Things You’ll Need
Before You Begin
- We highly recommend making this pie a day ahead.
- The eggs in this recipe are not cooked. If that concerns you, you can use pasteurized eggs or learn how to pasteurize the eggs in your fridge.
- Do NOT use margarine, I have not tested this pie using margarine. Do NOT melt the butter. The butter should be softened, which means removing it from the fridge and letting it sit at room temp about 20-30 minutes.
- Make your pie crust first. If making a crust from scratch, follow the instructions for a fully baked pie shell as this pie will not go in the oven. Let it cool completely.
- We like to chill the pie for two hours before topping with whipped cream, but it isn’t imperative. You can also wait to add the whipped topping until an hour or two before serving, either way will work.
- I have used both Cool Whip and homemade whipped cream in the past when making this pie. It’s up to you on what you prefer.
Instructions
- Bake a homemade pie crust or use a Pillsbury refrigerated crust and make according to package directions for a fully baked crust. Set aside to cool.
- Melt the chocolate and set aside to cool completely.
- Beat sugar and butter on medium high until light and fluffy, about 6-7 minutes.
- Add cooled chocolate and vanilla and beat until incorporated.
- Add eggs, two at a time, beating a full 5 minutes after each addition.
- Pour filling into cooled pie crust.
- Chill in the refrigerator for two hours then top with whipped cream. Then chill again in the refrigerator for 6 hours or overnight. You can also wait until two hours or so before serving to add the whipped cream.
- To make the whipped cream, beat the heavy whipping cream and powdered sugar with a whisk attachment on medium-high speed until stiff peaks just begin to form. Add prepared whipped topping to top of pie.
- When ready to serve, optionally garnish with shaved bittersweet chocolate.
Expert Tips & FAQs
- WAIT until tomorrow to eat. You can certainly eat it after it has chilled for several hours, BUT believe me when I tell you that you will be very thankful that you waited overnight. The filling needs time to set up. Any graininess you may have detected when you tasted the filling will be gone after a good night’s rest.
- Store leftover pie covered with an air-tight lid or wrapped with plastic wrap in the refrigerator for 4-5 days.
- If you want to freeze the whole pie and thaw the entire thing later, place it in the freezer for a few hours. Then remove it and wrap the frozen pie in plastic wrap. Place the wrapped pie in a freezer bag. If it won’t fit, just double-wrap it with plastic wrap instead.
- If you want to freeze slices, cut the pie into slices and place them on a waxed paper-lined cookie sheet. Place the entire thing in the freezer, making sure the slices are not touching each other. After a few hours, and the slices are frozen, remove from the freezer and wrap each one in plastic wrap. Place the wrapped slices into a freezer bag.
- To thaw them out, simply remove from the freezer and immediately remove the plastic wrap. Allow to thaw at room temperature if you plan to eat it fairly soon. You can also thaw in the refrigerator but it will take quite a bit longer – probably a day.
Nutrition
The recipes on this blog are tested with a conventional gas oven and gas stovetop. It’s important to note that some ovens, especially as they age, can cook and bake inconsistently. Using an inexpensive oven thermometer can assure you that your oven is truly heating to the proper temperature. If you use a toaster oven or countertop oven, please keep in mind that they may not distribute heat the same as a conventional full sized oven and you may need to adjust your cooking/baking times. In the case of recipes made with a pressure cooker, air fryer, slow cooker, or other appliance, a link to the appliances we use is listed within each respective recipe. For baking recipes where measurements are given by weight, please note that results may not be the same if cups are used instead, and we can’t guarantee success with that method.
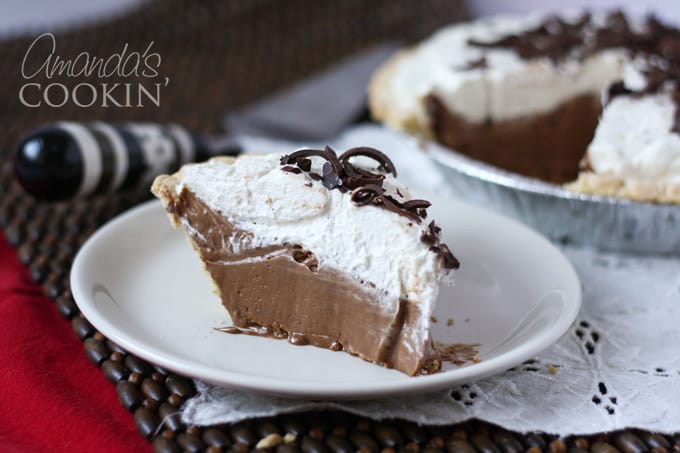
This post originally appeared on this blog on December 6, 2008 and has since been updated with new photos and expert tips. Pictured above is one of our old photos which you may recognize.

- Graveyard Taco Dip - October 13, 2026
- Halloween Pretzel Cigarettes - October 7, 2026
- Apple Cider Sangria - September 29, 2026








Elaine says
Can i make the filling and let it sit in refrigerator covered for 2 days before putting in shell? I’m going camping (in RV w/refrigerator ) and need the pie for 2 nights from now but won’t have time/space/materials to make while camping.
Amanda Formaro says
Yes absolutely! Take a sturdy whisk with you and store the filling in a large bowl. When ready uncover the filling and whisk it to loosen it up. It will have firmed up in the fridge. Then put it into the pie shell and refrigerate again.
Laurie says
So mine is totally runny. What’s the deal. Followed the instructions exactly. Help this is for my sons birthday.
Amanda Formaro says
Hi Laurie. Without being in the kitchen with you I can’t say for sure. A couple of things that could have caused the issue would have been melted butter or butter that was too soft. Another thing would be not beating the mixture as instructed (it needs the full time for each step) or the mixer was not at a high enough speed. Also, make sure the melted chocolate is completely cooled before adding it to the mixer. There’s a video in the post – hopefully that will help show what the consistency should look like.
Andrea says
I followed the instructions to a tee, and it turned out pretty good. The only thing, the sugar was super granulated still after sitting overnight in the fridge. What can I do to avoid this next time? Thank you!!
Amanda Formaro says
Hmm, definitely should not have been granulated. The only thing I can think of is that you didn’t run the mixer the full length of time or the speed wasn’t high enough.
HLS says
I used Baker’s Superfine Sugar (instead of regular granulated sugar) and it wasn’t nearly as grainy as the first time I had it. Yum!!!!!!!! This is now our favorite chocolate pie!!
Amanda Formaro says
Good to know :) However it shouldn’t have been grainy at all the next day when you eat it. So if it was, you may not have beaten it long enough. I always set a timer for each step in the recipe.
Marianna says
This is the best recipe out there!!! I recommend using Guittard dark chocolate. Also definitely ADD THE VANILLA to the butter mixture NOT TO THE MELTED CHOCOLATE!! The first time I made this I didn’t read the comments. The chocolate seized up immediately!! Ugh. Oops! Also I recommend whipped cream–Making it from scratch you can make it as sweet or not as you want. It’s so easy.
Amanda Formaro says
So glad you loved it! If the chocolate seizes it’s because it wasn’t allowed to cool. I always melt the chocolate first, before i do anything else. Adding vanilla to cooled chocolate will be fine. I missed that in the comments, so I will make a note in the post.
Also I agree about the fresh whipped cream. But fresh whipped cream does not have stabilizers, so if using fresh whipped cream don’t add it if the pie will sit in the fridge for more than a day before serving.
I love this pie!!!
McKinsey Maynard says
Fresh whipped cream can be mechanically stabilized simply by beating it slightly above med speed until almost stiff peaks, then finishing it on low for 1 min. After piping, it didn’t fall after even several days.
Amanda Formaro says
Great tip thank you!
Annette Ranae says
So I just made this…… It was fluffier with just the two eggs, then I added the last two eggs, and it got runny…. I this normal? I’m really hoping it’ll set up nicely while it chills in the fridge.
Amanda Formaro says
Hi Annette. How did it turn out? After all the eggs are in the texture should be silky looking, but I wouldn’t say runny.
Laura says
Literally making this right now. It’s for my boss, who’s last day is tomorrow and it’s his favorite pie. Now, I’m taking a chance (I NEVER bake, or, am not known for baking) but, I wanted to make two of them. Going against my better judgement I went for it and doubled the recipe in one. I’ll let you know tomorrow if I made a mistake ?
Amanda Formaro says
I hope it came out good, Laura!! Be sure to let me know :)
Ashley says
Do you have advice on melting the chocolate? And do you have a recipe for the whipped topping?
Amanda Formaro says
I just melt the chocolate in the microwave on full power for 1 minute. Then stir and continue cooking at 30 second intervals, stirring after each, until melted. For the whipped topping, pour one 8-ounce container of heavy whipping cream into an electric mixer bowl. Add a tablespoon of powdered sugar. Mix with a whisk attachment on medium high until medium peaks form.
Amanda Formaro says
I just melt the chocolate in the microwave on full power for 1 minute. Then stir and continue cooking at 30 second intervals, stirring after each, until melted. For the whipped topping, pour one 8-ounce container of heavy whipping cream into an electric mixer bowl. Add a tablespoon of powdered sugar. Mix with a whisk attachment on medium high until medium peaks form.
Rebekah Garcia says
I just wanted to say that I made this for my birthday and it turned out PERFECT! So rich and silky! Was feeling nostalgic for Baker’s Square and this hit the spot. Thanks, Amanda! <3
PAULA BROWN says
Amanda,
I’ve not made the pie yet but I will be soon. I just had to say I think you do a wonderful job of responding to the ones that don’t bother to actually read and question the raw eggs. It drives me absolutely batty that people do that
COME ON PEOPLE, READ.
Besides, there’s nothing wrong with eating raw eggs.
Amanda Formaro says
Thank you, Paula :) If you do end up making the pie, be sure to stop by and let me know how it goes!
Melissa says
I was wondering if I can use semi Sweet chocolate if would make a big difference?
Amanda Formaro says
It would made a huge difference. Semi sweet chocolate already has sugar in it, therefore it would make the pie overly sweet. I suppose you could try cutting the sugar down, but honestly I have never tried that and can’t recommend a measurement reduction for you. You are better off grabbing a $3 box of unsweetened chocolate at the grocer :)
Becca says
Even after beating the butter and sugar for 6 minutes it’s still so grainy feeling. My pie is setting in the fridge now but I’m worried about it. So the longer it sets, that graininess will go away?
Amanda Formaro says
Yes the graininess will go away, I promise! The sugar melts into the rest of the ingredients as it sits. So how was your pie?
Becky says
I grew up near poppin fresh also and wanted to treat my native-born Oregon children to French silk pie. Couldn’t believe it when I found your post. Thank you!
Amanda Formaro says
Awesome, I hope the recipe comes out good for you if you decide to give it a shot, Becky! :)
Anna says
Hi Amanda. Thank you for sharing this recipe! I’ve been looking for a strawberry french silk pie recipe with no luck, but I feel fortunate to have come across your blog. Can you suggest how I can go about altering this recipe to make it strawberry flavored instead of chocolate? Get rid of the chocolate and add strawberry extract/jam/preserves etc? I’m a newbie to baking, and I want to make this for my friend’s birthday because she had fond memories eating it from her youth. Thank you! :)
Amanda Formaro says
I have never made strawberry french silk pie nor have I ever tried it. So I wouldn’t be able to offer suggestions on making it. However, from what I’ve read, the Baker’s Square version of strawberry french silk pie is a strawberry mousse. If you would like to experiment, here is a google search of “strawberry mousse”. If you are successful, I would love to hear back from you! Please let me know how it goes :)
Wen kush says
I am going to try this one more time. Hopefully it is not soupy. Why is it not setting up. I have read the directions thoroughly and have followed it every time. Here goes……
Amanda Formaro says
Hi Wen. it should definitely not be soupy. Since I’m not with you I can only speculate what may have happened, but I’m going to guess that your butter was too soft. Your butter should be removed from the fridge about 20 minutes before placing it in the mixture. Softened means the you should be able to press your finger into the butter and a small indent will appear. But it should not be so soft that your finger plunges into the butter. If the butter is too soft, or worse melted, it changes the chemical consistency and changes the way that the butter and sugar combine. I hope that helps!
Kimberly says
My boyfriend’s mother always buys one of these types of pies from Village Inn every holiday. This Easter I decided to make one from scratch since pie making is in my blood! [My mom is an amazing pie baker and her crust recipe (from my maternal grandmother) is flawless.] The filling was so simple and tastes lovely! Thank you!
Amanda Formaro says
I’m so happy it turned out good for you, Kimberly! Thanks for sharing :)
Vera Mitchell says
I just made this pie a few hours ago and my son could not wait until tomorrow to dig in. I must say it is most amazing! Thank you so much for the recipe. I used all organic ingredients and it was like a bit of heaven :)
Vera Mitchell says
Oh and I almost always have to tweak a recipe but not this one! THAT makes me very happy!
Amanda Formaro says
That’s awesome! I’m so happy it turned out good for you, Vera! :)
Jennifer says
You can omit the chocolate and substitute peanut butter for their peanut butter silk also!!
Jessica says
YES WE ARE ALL EATING RAW EGGS AND LOVE IT!! :D
Thank you for sharing this recipe, Amanda! It’s one of my go-to desserts!
Amanda Formaro says
That’s awesome to hear, Jessica! Thank you :)
Patricia Wilson says
I have made this many times. No one has ever gotten sick. I have added mint to it also another family favorite!
Amanda Formaro says
That’s a great idea to add mint, Patricia! I will have to try that myself. I’m glad you enjoyed :)
Ashley says
What form of mint did you add and how much?
Laima says
Raw eggs? You should have specified pasteurized eggs. Never use raw eggs in an uncooked egg recipe.
Amanda Formaro says
Hi Laima, not sure if you missed if but it was clearly stated in the post and in the printable version of the recipe that you have the option to use pasteurized eggs if raw eggs bother you. In fact, I even provided a link to instructions for pasteurizing your own store bought eggs. The chance of salmonella from eggs is about 1 in 20,000. Hope you enjoy!