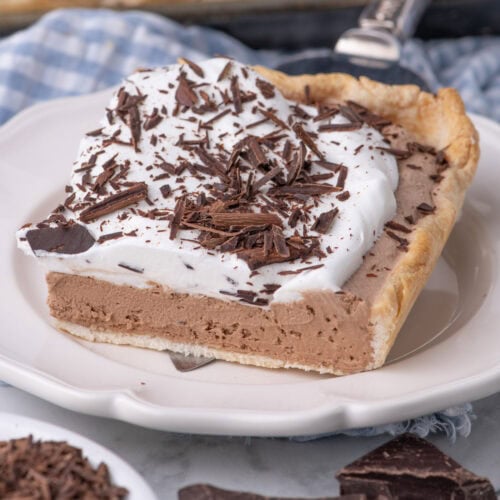
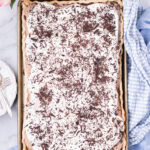
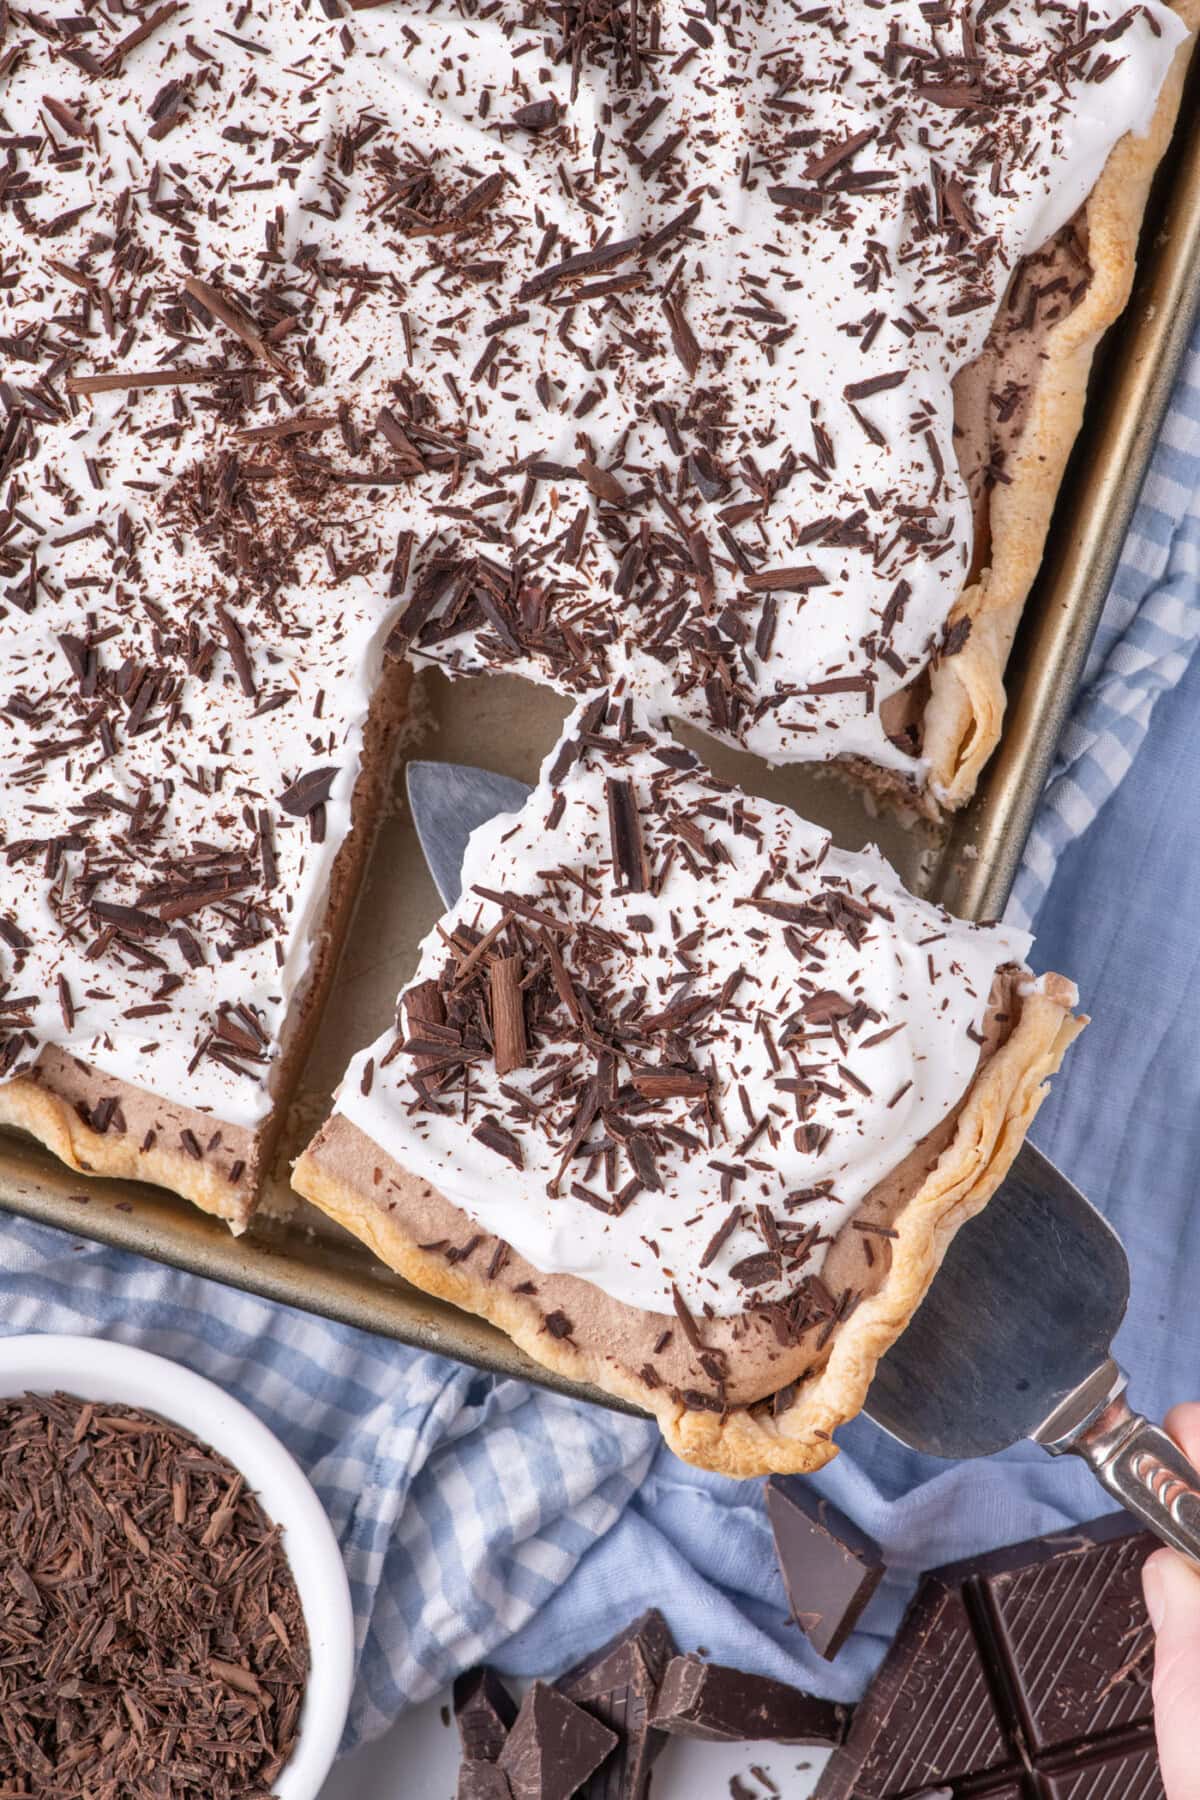
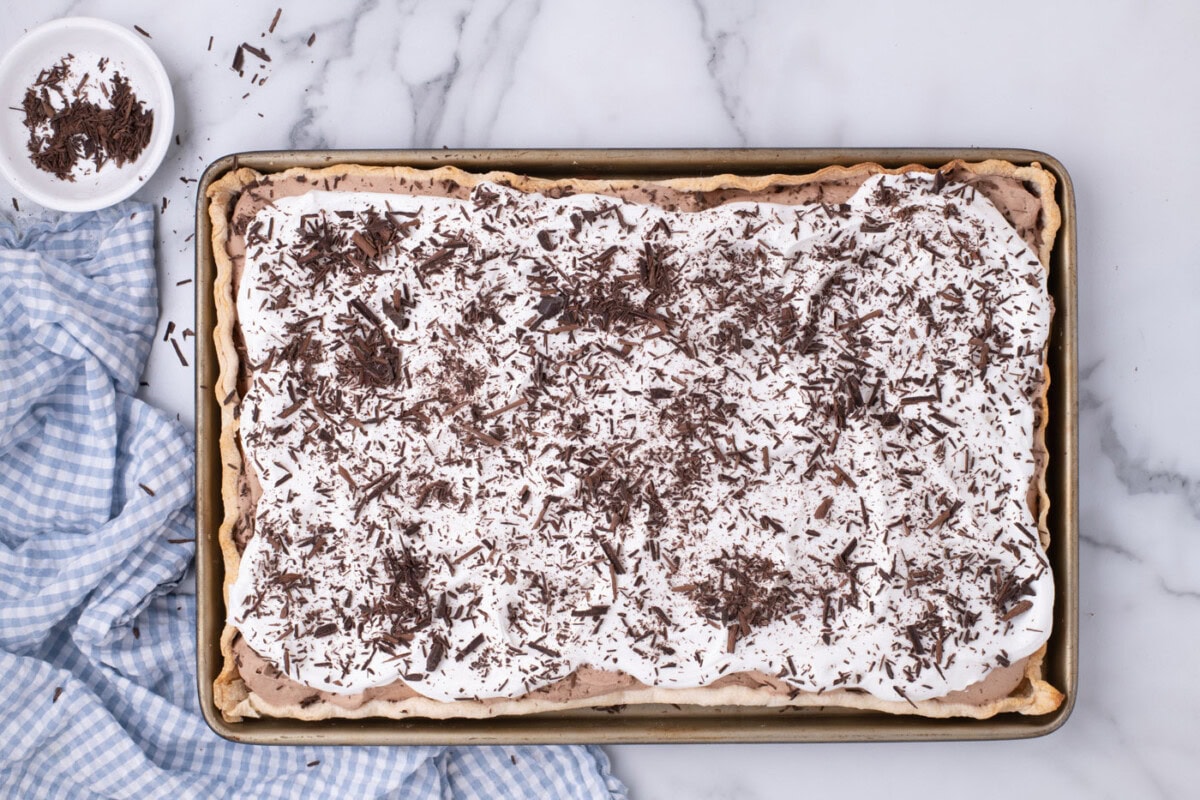
This rich, decadent French silk slab pie recipe is the epitome of a party pie. Dreamy chocolate filling with whipped topping and chocolate shavings layered in a sheet pan!
Why this recipe works
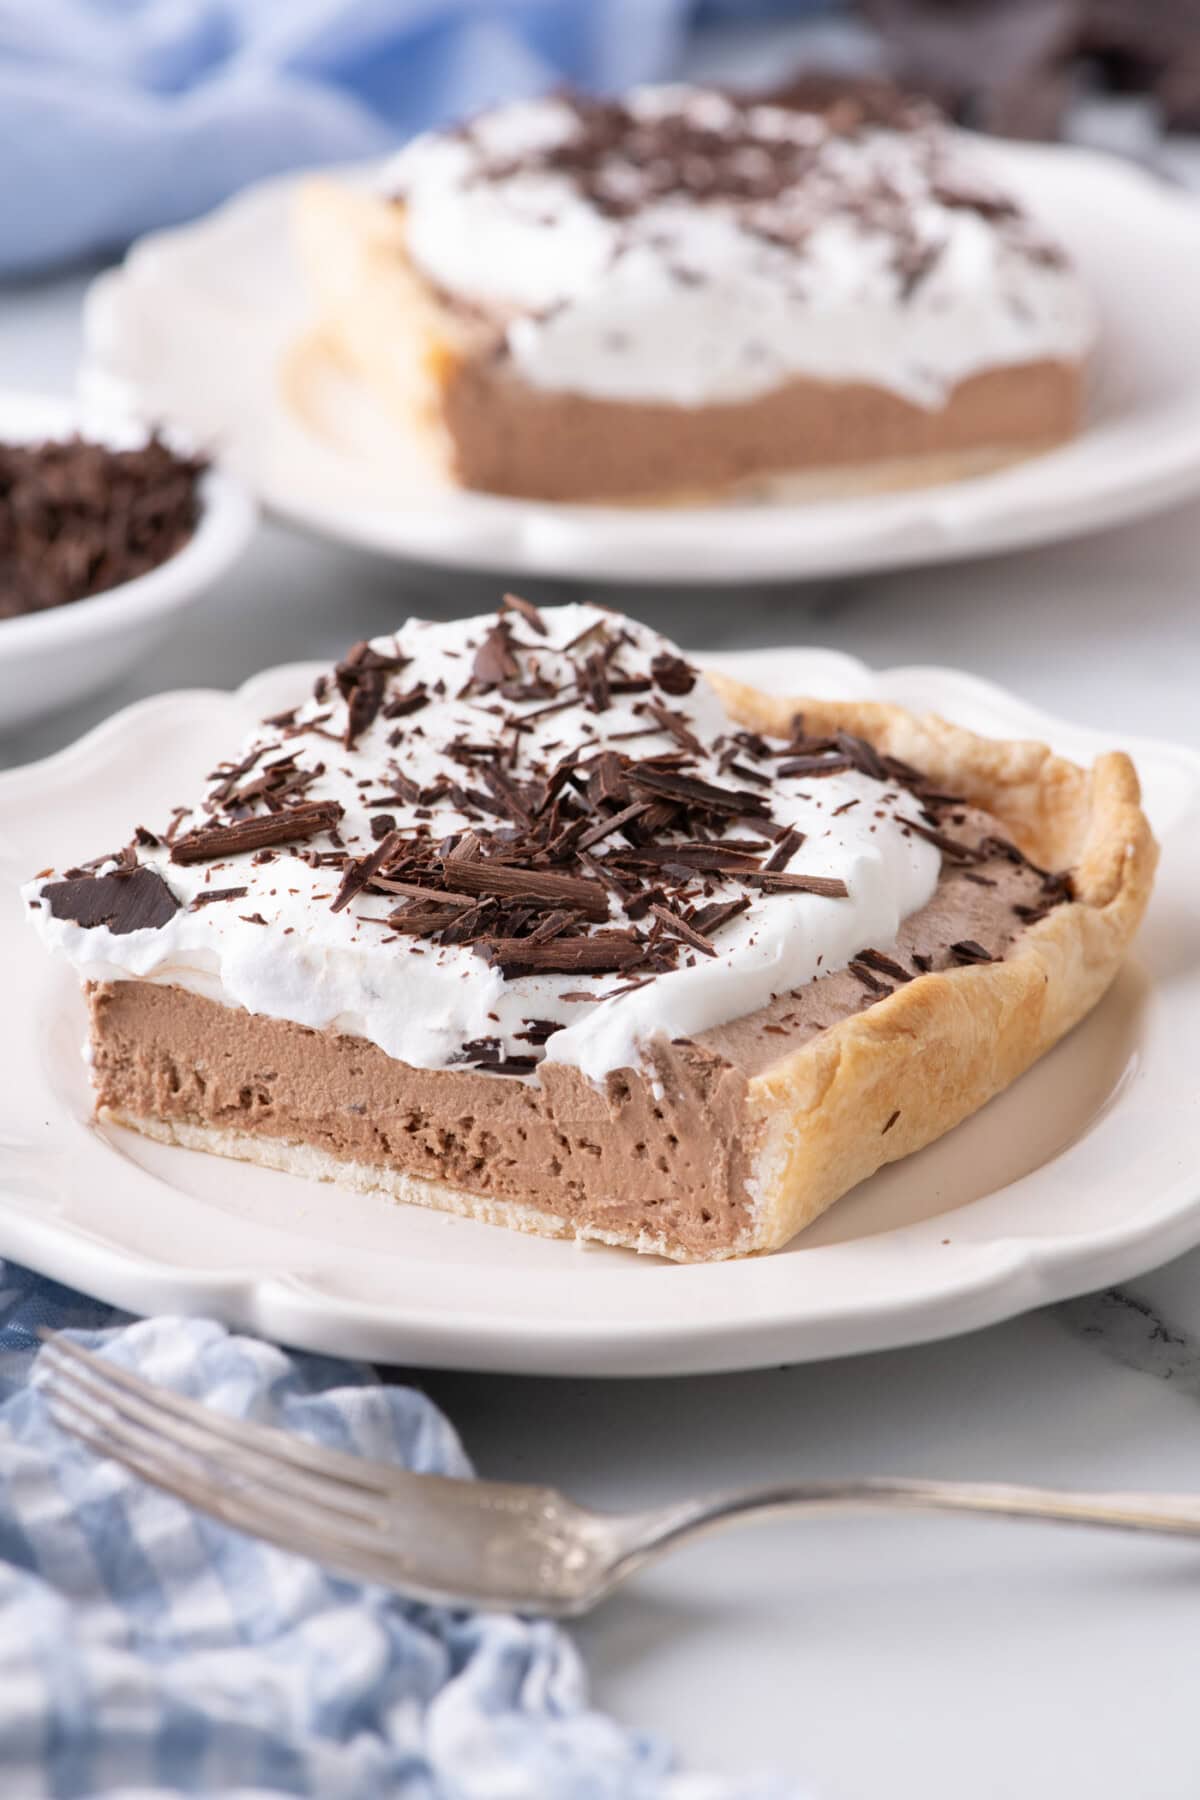
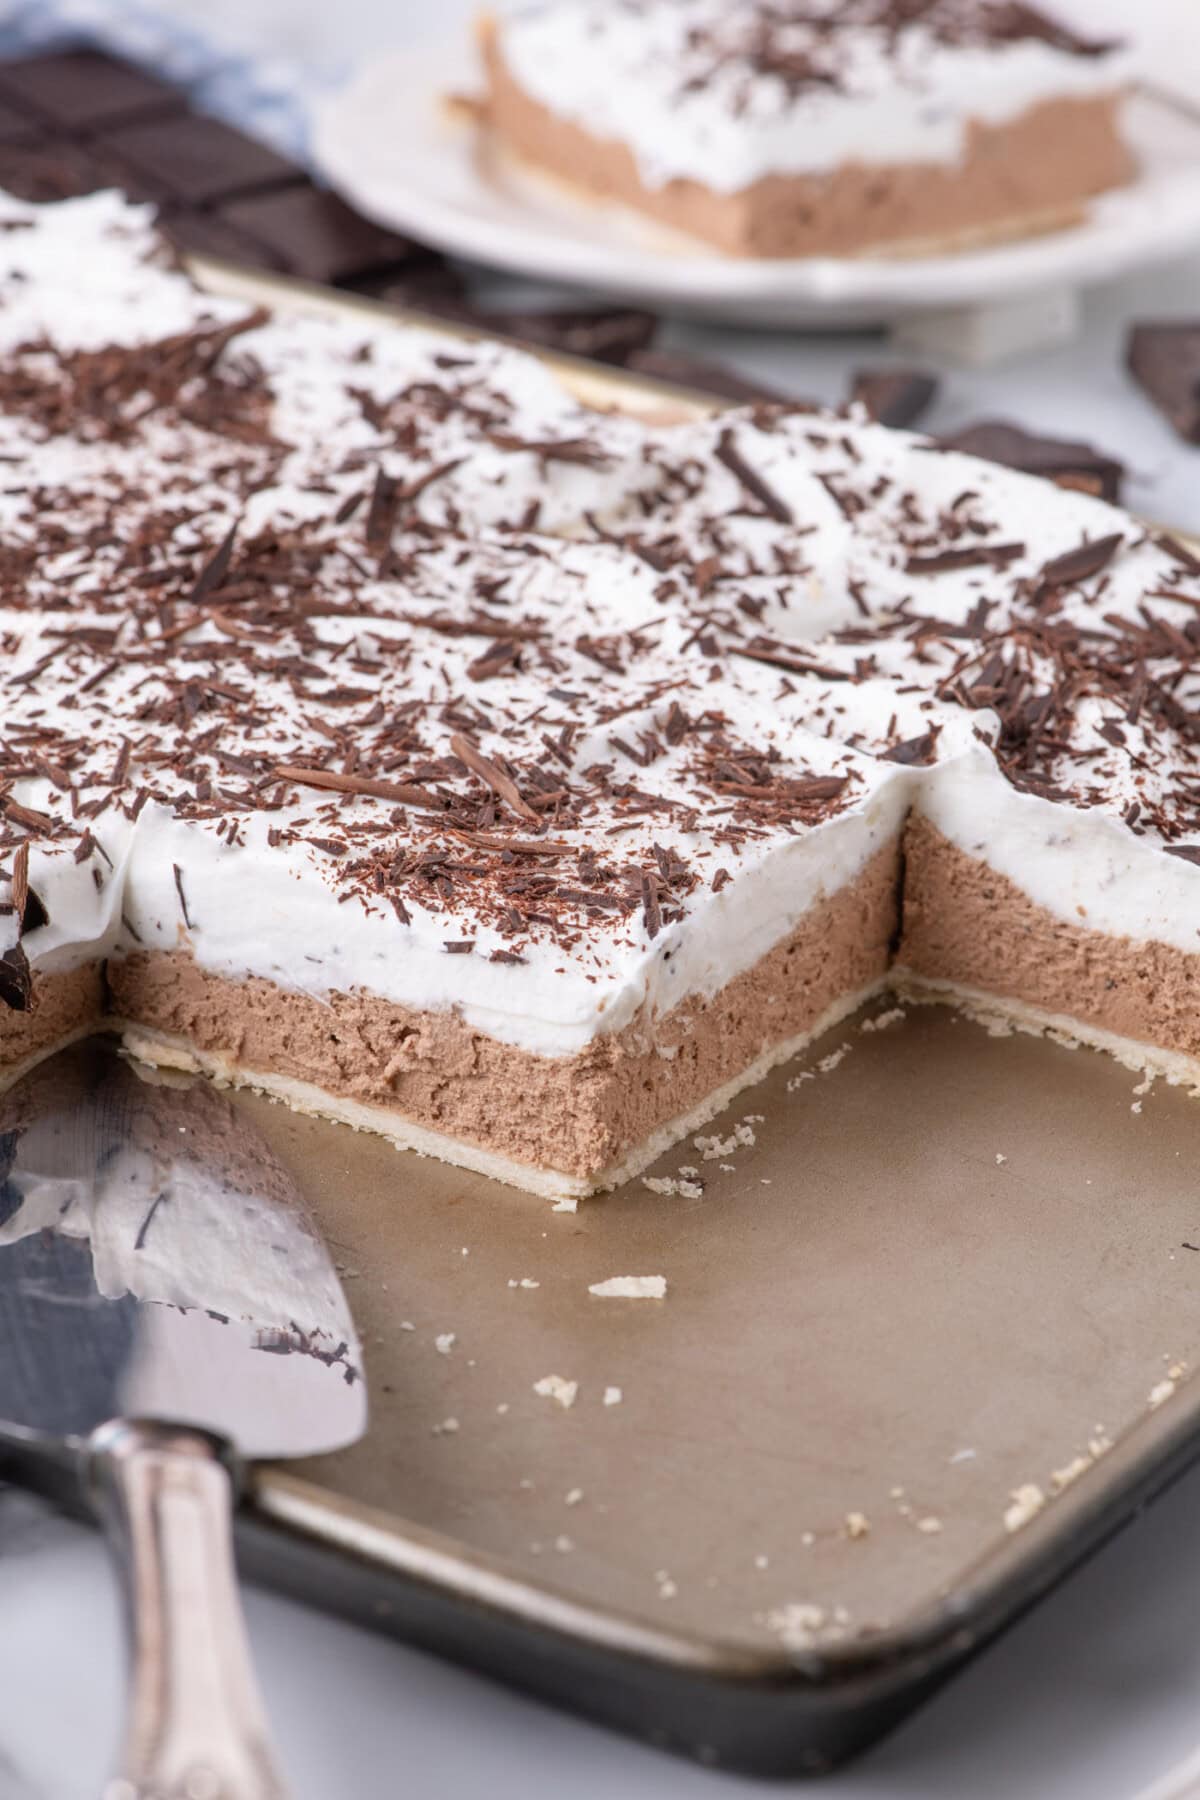
Pure chocolate bliss is the best way to describe this French silk slab pie. Topped with heaps of whipped cream, it’s almost as if you’re biting into a cloud of silky, dreamy chocolate.
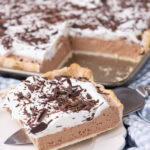
French silk pie is an absolute legend in my household. That creamy, rich chocolate pie is a tradition around here. This gorgeous French silk slab pie steps in when we have a large crowd to feed. It’s basically the party version of our regular pie, with more manageable portions for get-togethers. But you can always make individual servings too with our mini French silk pies, either way, I wouldn’t expect to have any leftovers!
Ingredients you will need
Get all measurements, ingredients, and instructions in the printable version at the end of this post.

Ingredient Info and Substitution Suggestions
CHOCOLATE – The melted unsweetened chocolate should be cool when adding it to the butter/sugar mixture, but still pourable. If it has started to solidify, place the bowl in warm water, and stir until soft again. I usually melt the chocolate first so it’s cool by the time I need to add it to the filling in the mixer. If you add vanilla to hot or warm melted chocolate it may seize up.
EGGS – Make sure the eggs are at room temperature, you can speed up the process by letting them sit in a bowl of warm water (not hot water) if needed. If cold eggs are added to the chocolate mixture, it could solidify the chocolate causing the filling to become grainy. The eggs in this recipe are not cooked. If that concerns you, you can use pasteurized eggs or learn how to pasteurize the eggs in your fridge.
BUTTER – The butter should be softened, which means removing it from the fridge and letting it sit at room temperature for about 20-30 minutes.
CRUST – We used two refrigerated pie crusts, the Pillsbury Ready-To-Bake crusts to be exact. If you really want to go the extra mile, homemade pie crust can be substituted. Or, you can just as easily make it with a chocolate Oreo cookie crust.
How to Make French Silk Slab Pie
These step by step photos and instructions are here to help you visualize how to make this recipe. You can Jump to Recipe to get the printable version of this recipe, complete with measurements and instructions at the bottom.
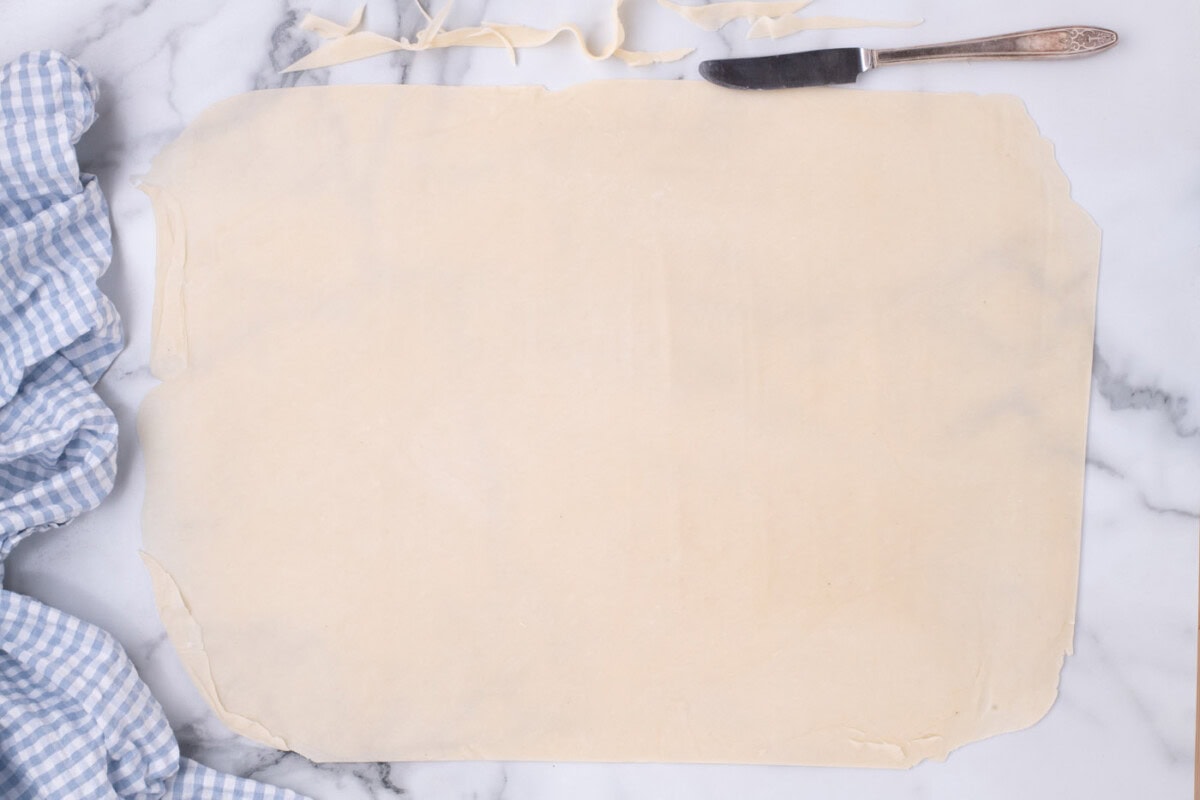
- Place both pie dough circles on top of each other and roll them out to form a rough rectangular shape.
- Trim excess dough along the edges and fill in any gaps with the scraps to form a rectangular shape 2 inches larger (in length and width) than the jelly roll pan.
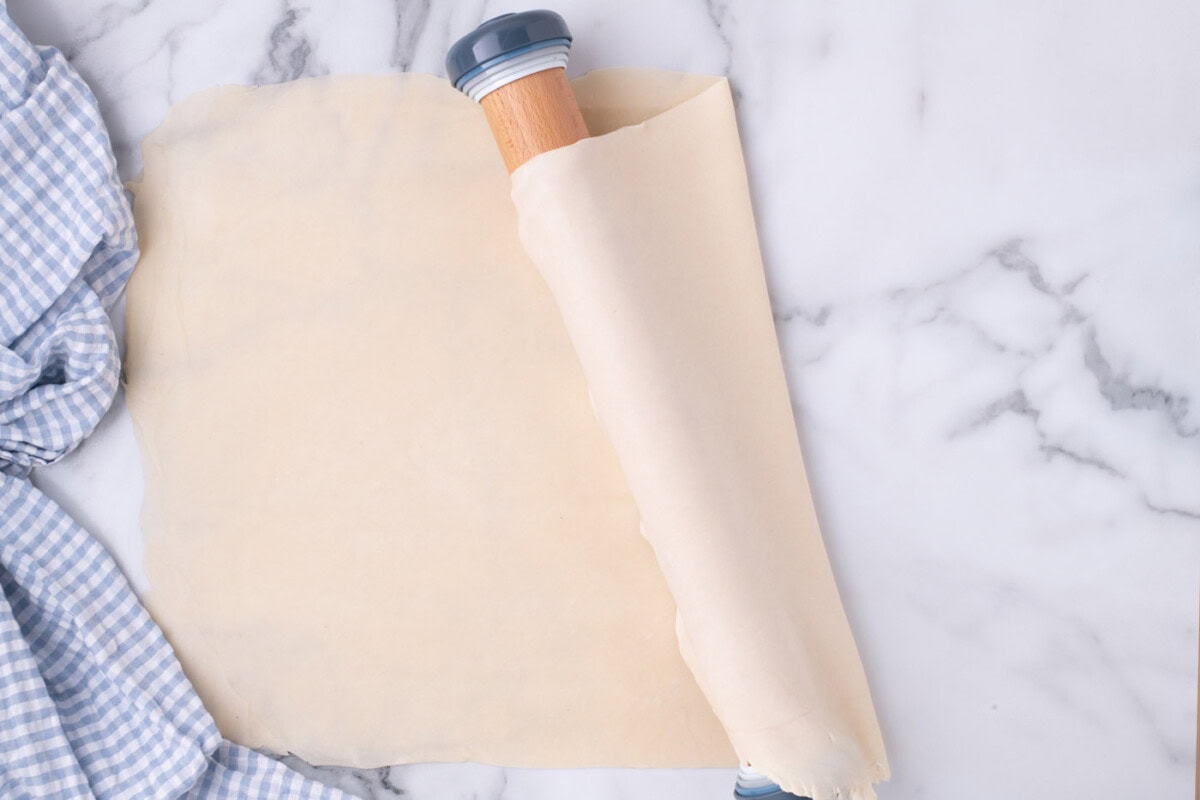
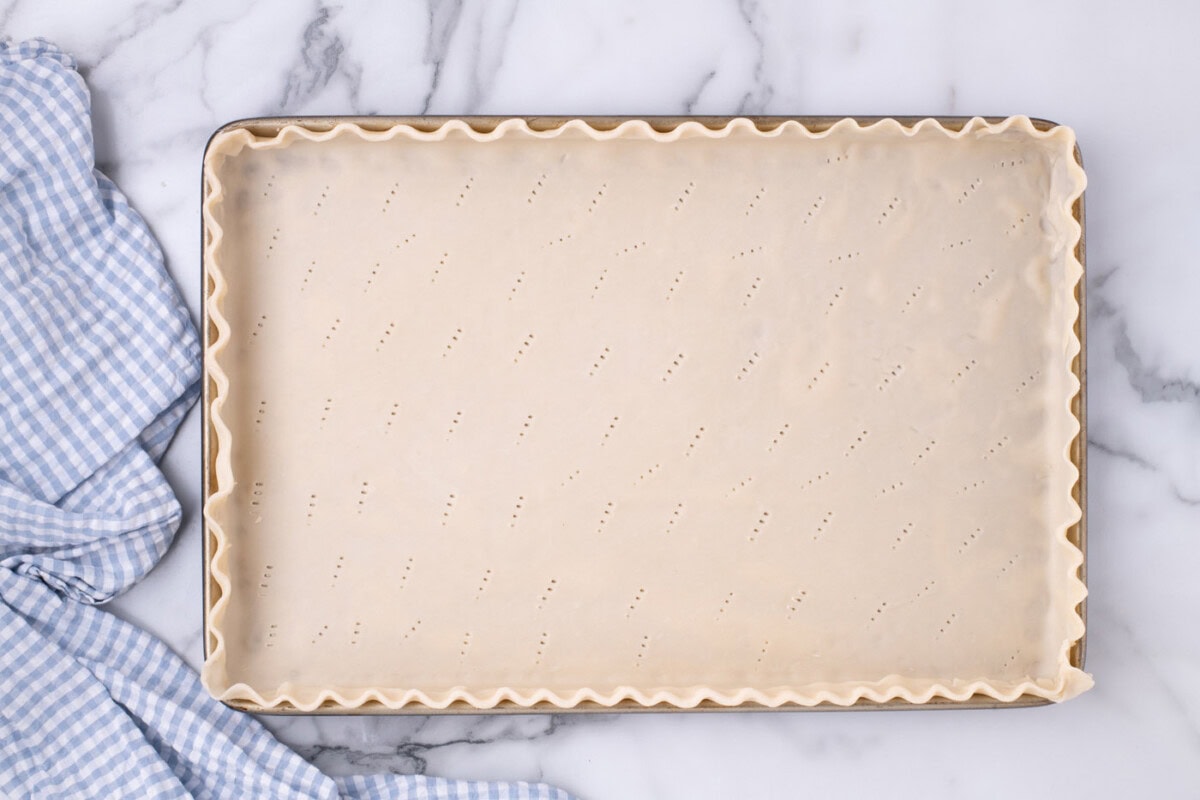
- Drape the pie dough over the rolling pin and transfer it to the pan, lightly pressing it into place in the corners and sides.
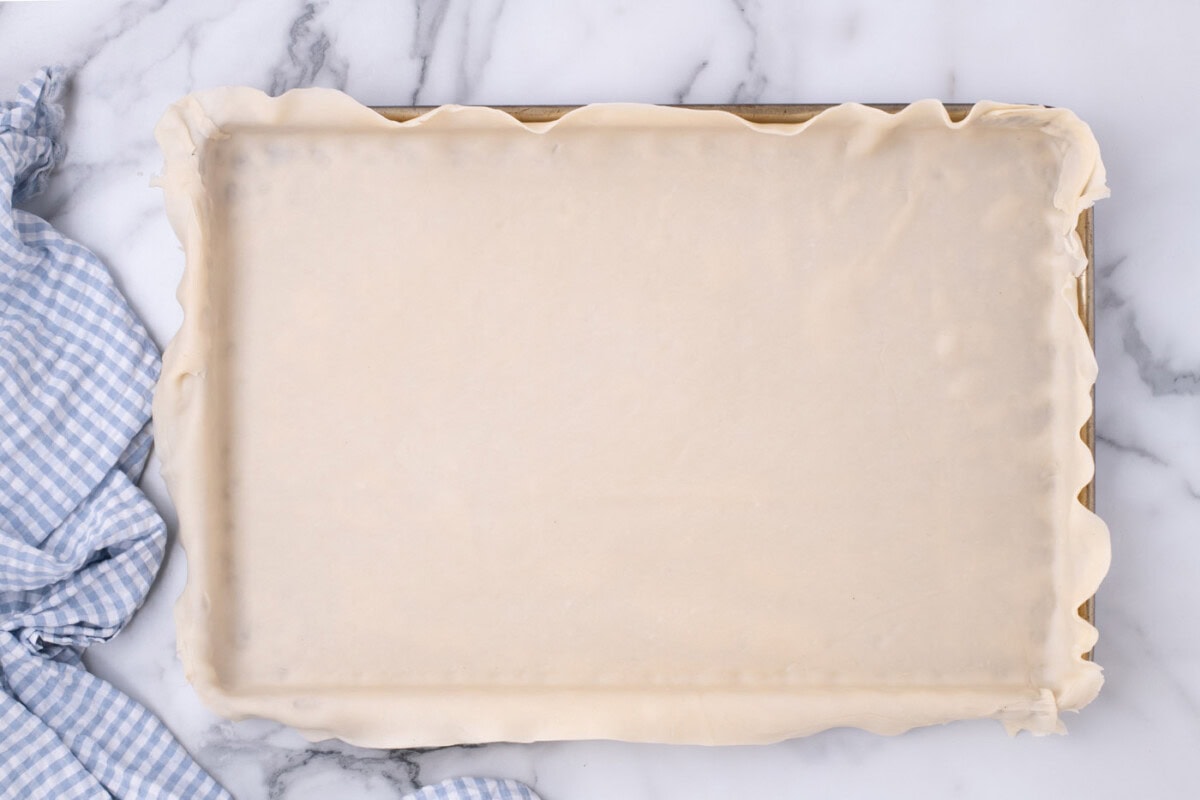
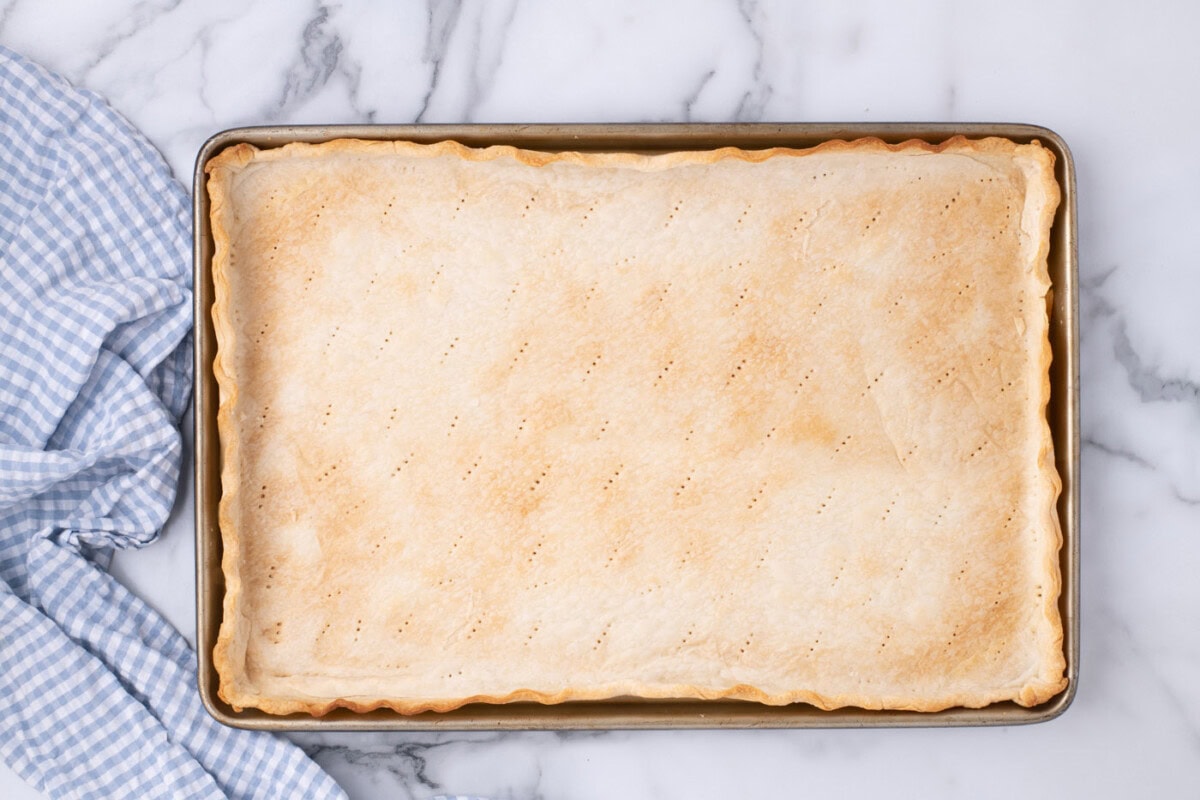
- Fold any excess dough back over onto itself and prick the bottom with a fork. If you want to create a fluted edge, pinch along the outer edges of the dough with your thumb and two index fingers.
- Preheat the oven to 450°F.
- Place the pie dough in the freezer to firm up for 20 minutes while you prepare the filling.
To Make the Filling
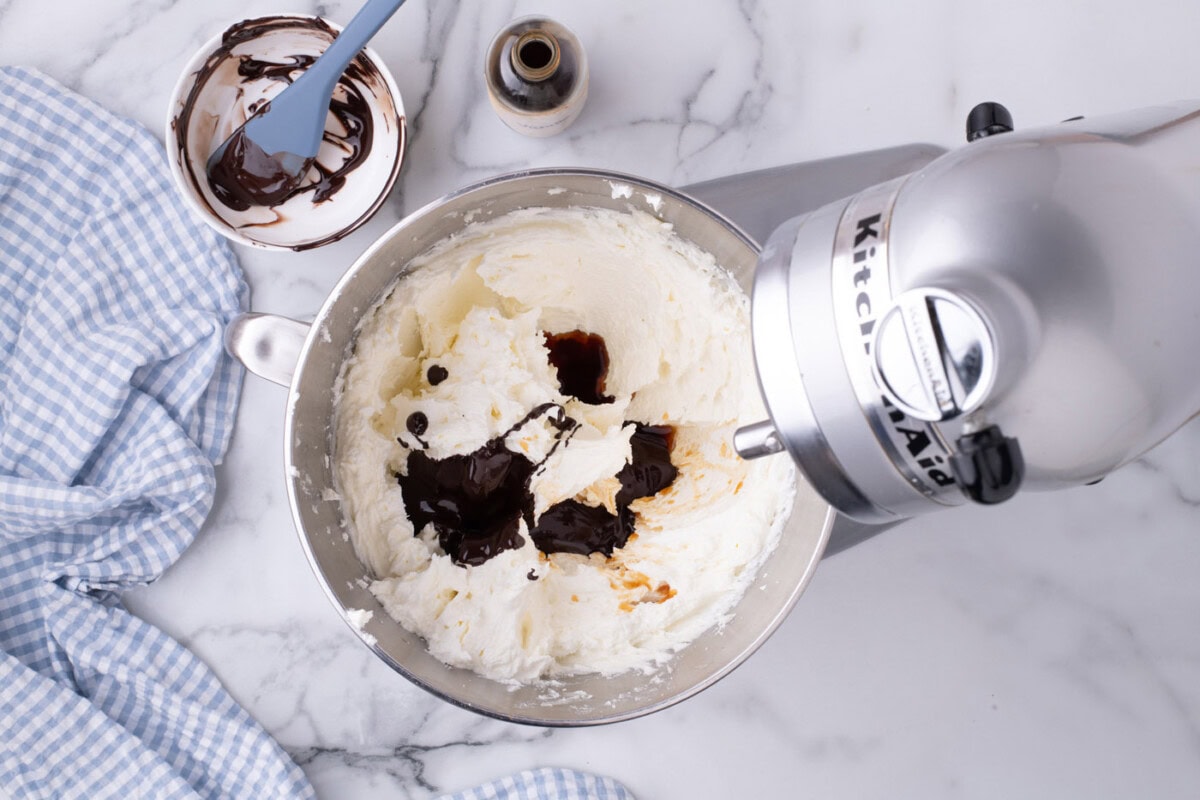
- In the bowl of a stand-up mixer with the whisk attachment, beat the butter and sugar at high speed for about 6-7 minutes or until pale in color and very fluffy (it should almost have the color and texture of whipped cream). Scrape down the sides of the bowl with a soft silicone spatula.
- Add the cooled melted chocolate and vanilla extract and continue beating until combined. Scrape down the sides of the bowl as needed.
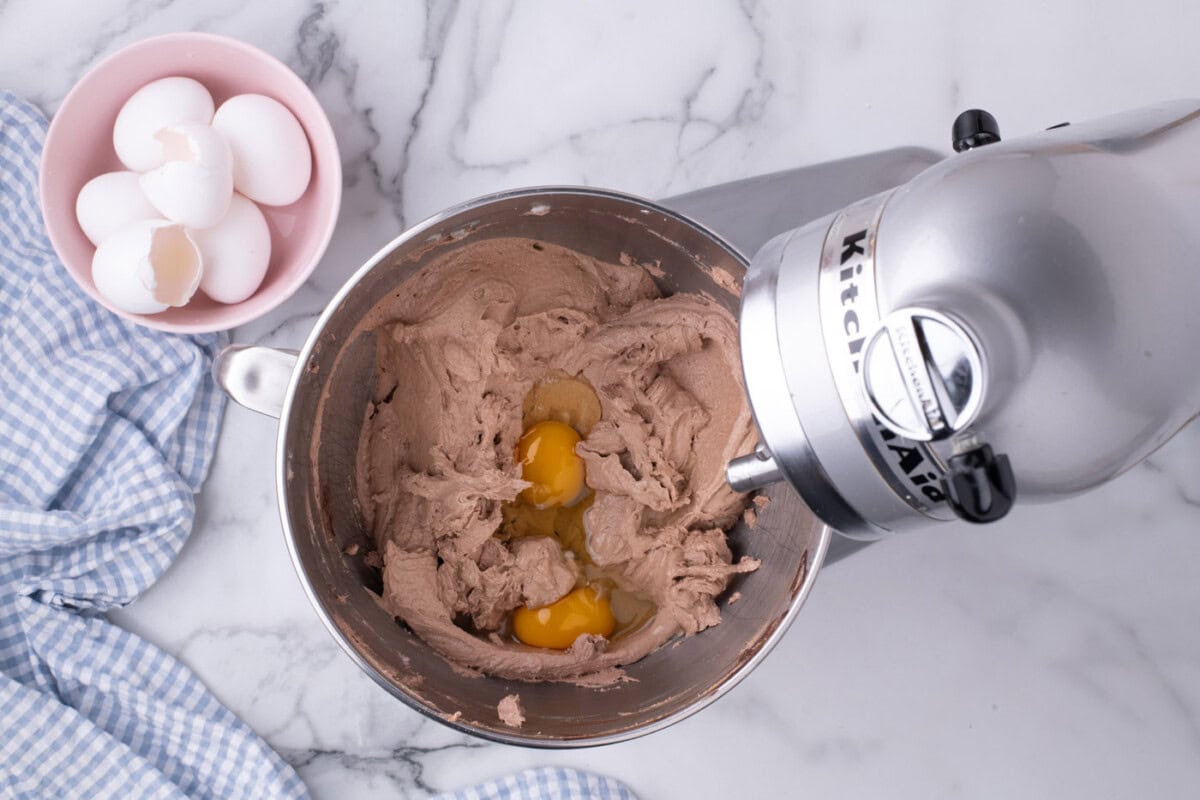
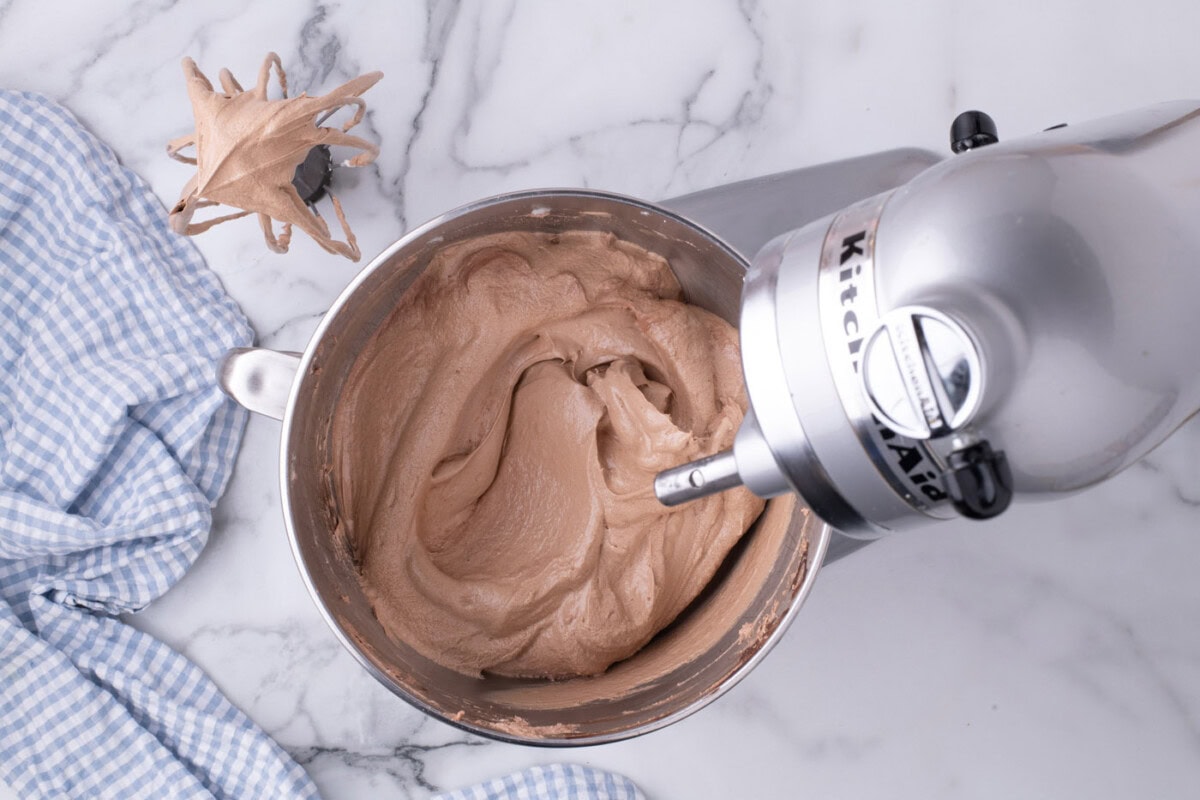
- Reduce the mixer to medium-high and add the eggs, two at a time, beating for 5 minutes after adding each set. The mixture should be smooth and voluminous.
Assembling the Slab Pie
- Remove the pie crust from the freezer, line it with crumpled parchment paper, and fill it with pie weights, or dried beans.
EXPERT TIP – Crumpling the parchment paper allows it to fit better into the corners of the pan.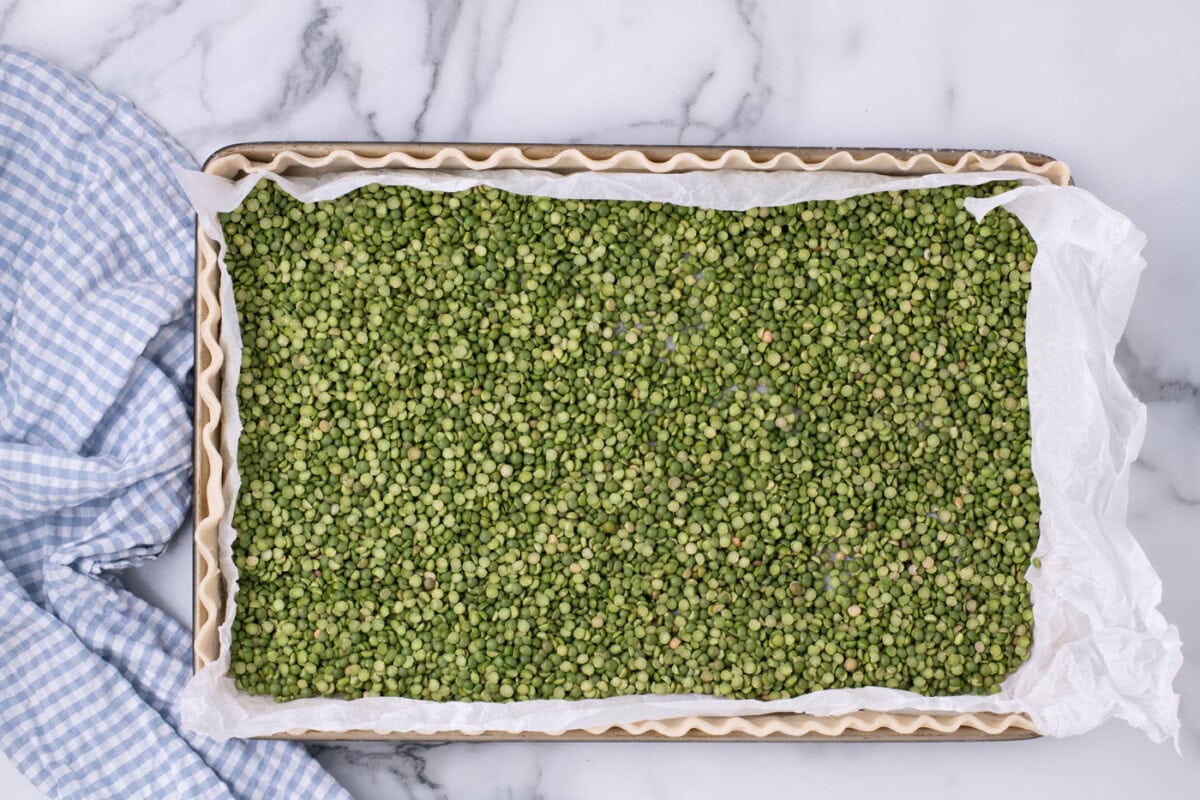
- Bake the pie crust until the edges turn golden (about 8-10 minutes). Remove the pie weights and parchment and continue baking until the base is cooked through (about 5 minutes). Set aside to cool.
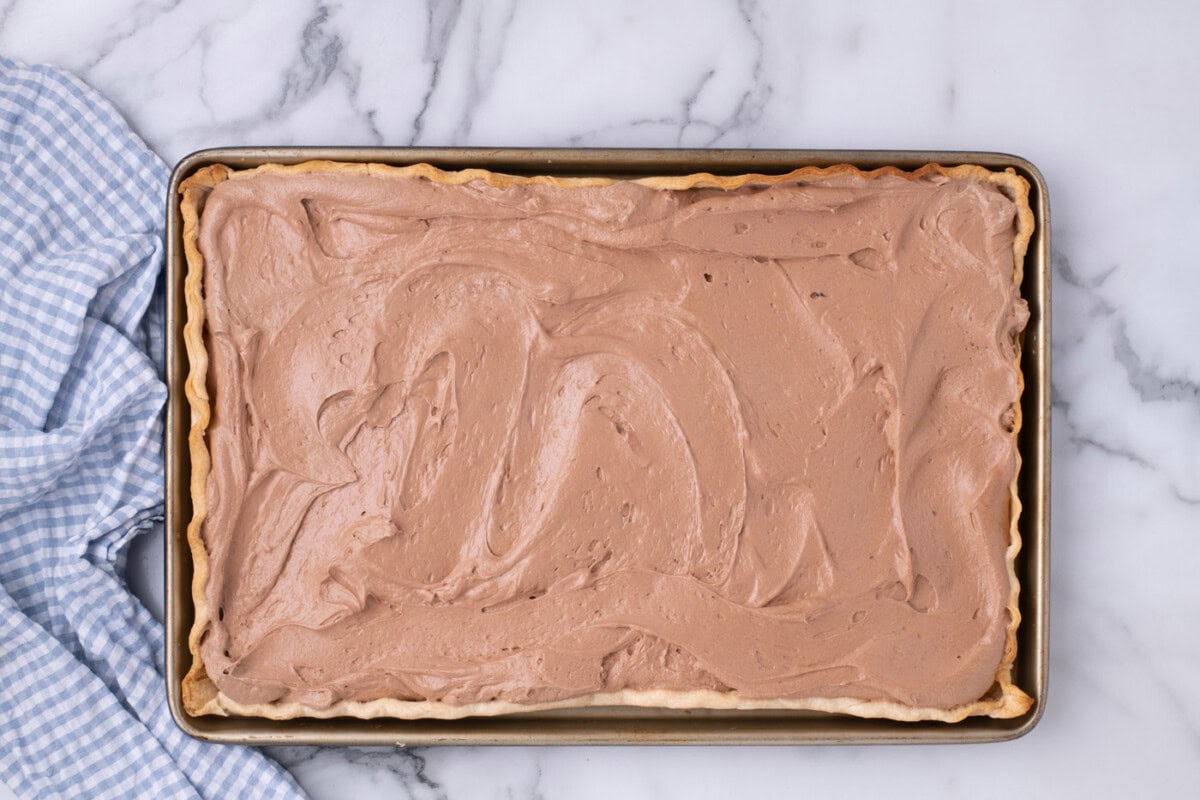
- Spoon the chocolate filling into the cooled pie crust and even out the top with an offset spatula. Then, place the pie in the refrigerator to cool (and allow the chocolate to set) for at least 2 hours or optimally for 12-24 hours.
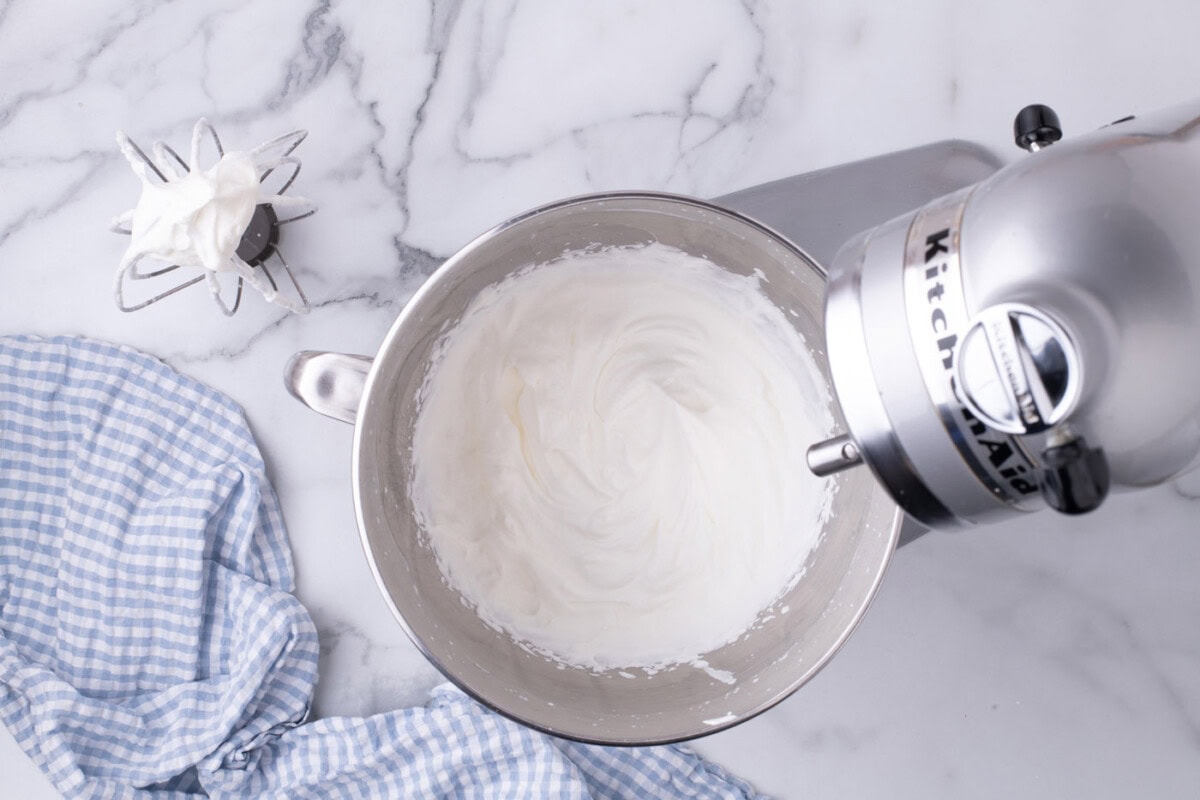
- To prepare the whipped cream topping, place the chilled heavy cream in the bowl of the stand-up mixer and beat on low speed until frothy with bubbles.
- Add the powdered sugar, increase the speed to high, and continue beating until soft peaks begin to form. Then reduce the speed to medium high and continue beating for 10-15 seconds until stiff peaks begin to form. Do not continue beating any longer, otherwise the whipped cream will begin to separate.
- Dollop the whipped cream over the chocolate layer and sprinkle with shaved chocolate.
Frequently Asked Questions & Expert Tips
Yes, absolutely. In fact, I highly recommend making it a day ahead of time. This way the pie has plenty of time to set up in the refrigerator. Hold off on the whipped topping until just before serving so it does not weep as it sits in the fridge. The pie can be prepared up to 2 days in advance if you need even more time.
Your pie filling may look grainy when mixing in the bowl, simply beat it for several minutes until light and fluffy, about 6-7 minutes. The cause of graininess in your French silk pie filling is due to the sugar granules, which will melt while chilling overnight in the refrigerator. That is why I suggest making it a day in advance!
Any leftovers should be placed in a single layer in an airtight container. The pie is best eaten within 3 days so the crust doesn’t get too soggy or the whipped cream begins to weep.
If you want to freeze your slab pie, cut it into slices and place them on a waxed paper-lined cookie sheet. Flash freeze until solid. After a few hours, and the slices are frozen, remove from the freezer and wrap each one in plastic wrap. Place the wrapped slices into a freezer bag. To thaw, remove the slice from the plastic wrap and allow it to thaw at room temperature if you plan to eat it fairly soon. You can also thaw in the refrigerator but it will take quite a bit longer – probably a day.
Serving Suggestions
Serve your French silk slab pie chilled with chocolate shavings as the finishing touch. As mentioned before, this is a great option for holidays (so you don’t have to make two or three pies), or for parties when you’re baking for a crowd!
More Slab Pie Recipes
I love to bake and cook and share my kitchen experience with all of you! Remembering to come back each day can be tough, that’s why I offer a convenient newsletter every time a new recipe posts. Simply subscribe and start receiving your free daily recipes!

French Silk Slab Pie
IMPORTANT – There are often Frequently Asked Questions within the blog post that you may find helpful. Simply scroll back up to read them!
Print It Pin It Rate ItIngredients
- 14.1 ounce refrigerated pie crusts two 7.05 ounce crusts. We used Pillsbury
- 1 ½ cups unsalted butter softened. 339g
- 2 ¼ cup granulated sugar 446g
- 3 ounces unsweetened chocolate melted and cooled. 85g
- 3 teaspoons pure vanilla extract
- 6 large eggs at room temperature
- 2 ½ cups heavy whipping cream chilled. 568mL
- 2 ½ Tablespoons powdered sugar
Garnish
- 1 ounce unsweetened chocolate shaved
Things You’ll Need
- Stand mixer or hand mixer
- Pie weights or dried beans
Before You Begin
- I highly recommend making this pie a day ahead of time. This way the pie has plenty of time to set up in the refrigerator. Hold off on the whipped topping until just before serving so it does not weep as it sits in the fridge. The pie can be prepared up to 2 days in advance if you need even more time.
- Your pie filling may look grainy when mixing in the bowl, simply beat it for several minutes until light and fluffy, about 6-7 minutes. The cause of graininess in your French silk pie filling is due to the sugar granules, which will melt while chilling overnight in the refrigerator. That is why I suggest making it a day in advance!
- The melted unsweetened chocolate should be cool when adding it to the butter/sugar mixture, but still pourable. If it has started to solidify, place the bowl in warm water, and stir until soft again. I usually melt the chocolate first so it’s cool by the time I need to add it to the filling in the mixer. If you add vanilla to hot or warm melted chocolate it may seize up.
- Make sure the eggs are at room temperature, you can speed up the process by letting them sit in a bowl of warm water (not hot water) if needed. If cold eggs are added to the chocolate mixture, it could solidify the chocolate causing the filling to become grainy.
- The butter should be softened, which means removing it from the fridge and letting it sit at room temperature for about 20-30 minutes.
- We used two refrigerated pie crusts, the Pillsbury Ready-To-Bake crusts to be exact.
Instructions
- Place both pie dough circles on top of each other and roll them out to form a rough rectangular shape.14.1 ounce refrigerated pie crusts
- Trim excess dough along the edges and fill in any gaps with the scraps to form a rectangular shape 2 inches larger (in length and width) than the jelly roll pan.
- Drape the pie dough over the rolling pin and transfer it to the pan, lightly pressing it into place in the corners and sides.
- Fold any excess dough back over onto itself and prick the bottom with a fork.If you want to create a fluted edge, pinch along the outer edges of the dough with your thumb and two index fingers.
- Preheat the oven to 450°F.
- Place the pie dough in the freezer to firm up for 20 minutes while you prepare the filling.
To Make the Filling
- In the bowl of a stand-up mixer with the whisk attachment, beat the butter and sugar at high speed for about 6-7 minutes or until pale in color and very fluffy (it should almost have the color and texture of whipped cream). Scrape down the sides of the bowl with a soft silicone spatula.1 1/2 cups unsalted butter, 2 1/4 cup granulated sugar
- Add the cooled melted chocolate and vanilla extract and continue beating until combined. Scrape down the sides of the bowl as needed.3 ounces unsweetened chocolate, 3 teaspoons pure vanilla extract
- Reduce the mixer to medium-high, and add the eggs, two at a time, beating for 5 minutes after adding each set. The mixture should be smooth and voluminous.6 large eggs
- Remove the pie crust from the freezer, line it with crumpled parchment paper, and fill it with pie weights, or dried beans.
- Bake the pie crust until the edges turn golden (about 8-10 minutes). Remove the pie weights and parchment and continue baking until the base is cooked through (about 5 minutes). Set aside to cool.
- Spoon the chocolate filling into the cooled pie crust and even out the top with an offset spatula. Then, place the pie in the refrigerator to cool (and allow the chocolate to set) for at least 2 hours or optimally for 12-24 hours.
To Make the Whipped Topping
- To prepare the whipped cream topping, place the chilled heavy cream in the bowl of the stand-up mixer and beat on low speed until frothy with bubbles.2 1/2 cups heavy whipping cream
- Add the powdered sugar, increase the speed to high, and continue beating until soft peaks begin to form. Then reduce the speed to medium high and continue beating for 10-15 seconds until stiff peaks begin to form. Do not continue beating any longer, otherwise the whipped cream will begin to separate.2 1/2 Tablespoons powdered sugar
- Dollop the whipped cream over the chocolate layer and sprinkle with shaved chocolate.1 ounce unsweetened chocolate
Expert Tips & FAQs
- Any leftovers should be placed in a single layer in an airtight container. The pie is best eaten within 3 days so the crust doesn’t get too soggy or the whipped cream begins to weep.
- If you want to freeze your slab pie, cut it into slices and place them on a waxed paper-lined cookie sheet. Flash freeze until solid. After a few hours, and the slices are frozen, remove from the freezer and wrap each one in plastic wrap. Place the wrapped slices into a freezer bag. To thaw, remove the slice from the plastic wrap and allow it to thaw at room temperature if you plan to eat it fairly soon. You can also thaw in the refrigerator but it will take quite a bit longer – probably a day.
Nutrition
The recipes on this blog are tested with a conventional gas oven and gas stovetop. It’s important to note that some ovens, especially as they age, can cook and bake inconsistently. Using an inexpensive oven thermometer can assure you that your oven is truly heating to the proper temperature. If you use a toaster oven or countertop oven, please keep in mind that they may not distribute heat the same as a conventional full sized oven and you may need to adjust your cooking/baking times. In the case of recipes made with a pressure cooker, air fryer, slow cooker, or other appliance, a link to the appliances we use is listed within each respective recipe. For baking recipes where measurements are given by weight, please note that results may not be the same if cups are used instead, and we can’t guarantee success with that method.

- Pecan Pie Bars - November 5, 2025
- Mummy Pops - October 23, 2025
- Chicken Parmesan Meatballs - May 27, 2025


Pam says
It seems I am missing when to cook the filling?
Amanda Davis says
The filling is not cooked.