Who doesn’t love piping hot dinner rolls straight from the oven with a dollop of creamy, melting butter? You’ve probably seen, and maybe even tried my favorite dinner roll recipe, the easy pull apart dinner rolls. I’ve made them dozens of times and have even par-baked and frozen them for a quick roll for those last minute dinners.
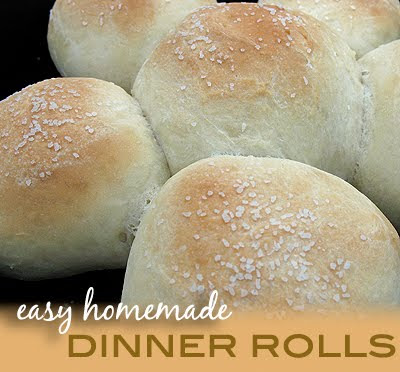
The pull apart dinners rolls are truly fabulous, very soft and easy to make. However, the added time to break the dough down into smaller pieces to create that pull apart affect does add some time to the prep. This is a perfect solution, cutting the prep time by rolling the dough into one large dinner roll instead of 3 pieces that combine.
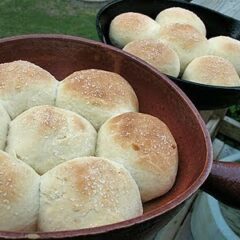
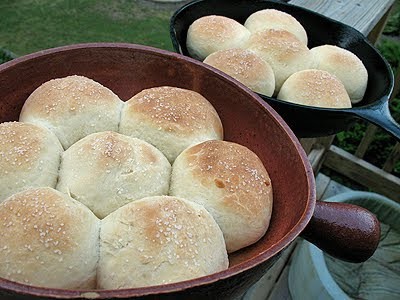
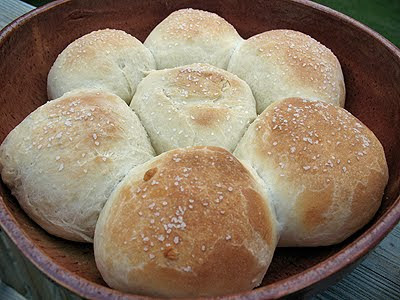
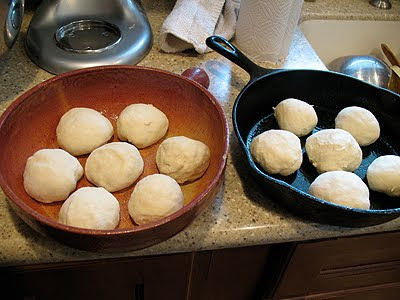
I baked mine in my cast iron skillet and a cool, homemade stoneware bowl I picked up at a thrift store. You could make these just as easily in a 13×9 baking pan or your favorite casserole or lasagna dish.
The recipe is the same, just the method is slightly adapted. You can par-bake these too, and I’ll tell you how in the recipe below.
Easy Homemade Dinner Rolls
slightly adapted from pull apart dinner rolls
1 package quick-acting active dry yeast (or 2 1/4 tsp bulk quick acting yeast, I use SAF instant)
1 1/3 cup milk (105 to 115F degrees)
3 to 3 1/2 cups flour or whole wheat flour
3 tablespoons extra virgin olive oil
1 tablespoon sugar
1 teaspoon salt
1 tablespoon melted butter
coarse salt
Dissolve yeast in warm milk with sugar in electric mixer bowl. Stir in 1 cup flour, oil, and salt. Beat until smooth. Stir in enough remaining flour, scraping dough from side of bowl, until soft dough forms (mine always requires all the flour, your climate may act differently). Cover and let rise in warm place until double, about 45 minutes.
Preheat oven to 400 degrees F. Punch down dough in center and fold over a few times. Prep two cast iron skillets or stoneware bakers, or a 13×9 baking dish with non-stick cooking spray. Separate dough into 12 pieces and roll into balls, pinching the dough together with your fingers at the bottom. Place rolls into baking dish, leaving about 1/2″ space between each. Brush with melted butter; sprinkle with coarse salt.
Bake until crust is light golden brown, about 15-20 minutes. Immediately remove from pan. Store loosely covered.
TO PAR-BAKE
Par-baking means that you are partially baking your bread and then freezing it to finish off later. Par-baking kills the yeast and creates the structure for the starches and proteins. This means it’s essentially baked on the inside, but it hasn’t developed that lovely golden crust on the outside yet. Par-baking allows you to bake bread or rolls to about 80% and then transport or save it to finish baking later.
When par-baking your rolls, you want them to have developed structure, meaning that your dough should feel firm to the touch, but they should not have browned yet. To par-bake these rolls, skip the step of brushing them with butter and adding the salt. That should be done once you remove them from the freezer.
Bake them in a preheated 400 F oven, only shorten the baking time to about 9 minutes or so. Of course, you may need to adjust your time as oven temps and climate conditions vary. Just keep an eye on them and remove them from the oven before they brown.
Allow them to cool a bit in the pan, about 20 minutes, then remove to a plate or sheet pan that will fit in the freezer. Place in the freezer, none of the rolls touching each other, and allow them to get hard, about 2 hours. Remove from the freezer and pop them into a zipper freezer bag, put back in the freezer until you are ready to bake them.
PAR-BAKING BUT NOT FREEZING
You can par-bake your rolls in the morning to have later that night. This can be ideal for someone who wants to make rolls for a family gathering or party, but wants to skip the hassle of prepping and baking at someone else’s house. Simply par-bake as instructed above, however instead of placing rolls in the freezer, just place them in the refrigerator until you are ready to leave. Transport in a covered container, then bake as described below, but you may need to cut the baking time a little because they are not frozen.
TO BAKE PAR-BAKED FROZEN ROLLS
Remove desired number of rolls from freezer bag, do not thaw. Spray a baking pan with cooking spray, then brush each roll with melted butter and sprinkle with course salt. Bake in preheated 400 F oven for 12 minutes, or until browned.
Easy Homemade Dinner Rolls
IMPORTANT - There are often Frequently Asked Questions within the blog post that you may find helpful. Simply scroll back up to read them!
Print It Rate ItIngredients
- 1 package quick-acting active dry yeast or 2 1/4 tsp bulk quick acting yeast, I use SAF instant
- 1 ⅓ cup milk 105 to 115F degrees
- 3 to 3 ½ cups flour or whole wheat flour
- 3 tablespoons extra virgin olive oil
- 1 tablespoon sugar
- 1 teaspoon salt
- 1 tablespoon melted butter
- coarse salt
Instructions
- Dissolve yeast in warm milk with sugar in electric mixer bowl. Stir in 1 cup flour, oil, and salt. Beat until smooth. Stir in enough remaining flour, scraping dough from side of bowl, until soft dough forms (mine always requires all the flour, your climate may act differently). Cover and let rise in warm place until double, about 45 minutes.
- Preheat oven to 400 degrees F. Punch down dough in center and fold over a few times. Prep two cast iron skillets or stoneware bakers, or a 13x9 baking dish with non-stick cooking spray. Separate dough into 12 pieces and roll into balls, pinching the dough together with your fingers at the bottom. Place rolls into baking dish, leaving about 1/2" space between each. Brush with melted butter; sprinkle with coarse salt.
- Bake until crust is light golden brown, about 15-20 minutes. Immediately remove from pan. Store loosely covered.
Par-Bake
- Par-baking means that you are partially baking your bread and then freezing it to finish off later. Par-baking kills the yeast and creates the structure for the starches and proteins. This means it's essentially baked on the inside, but it hasn't developed that lovely golden crust on the outside yet. Par-baking allows you to bake bread or rolls to about 80% and then transport or save it to finish baking later.
- When par-baking your rolls, you want them to have developed structure, meaning that your dough should feel firm to the touch, but they should not have browned yet. To par-bake these rolls, skip the step of brushing them with butter and adding the salt. That should be done once you remove them from the freezer.
- Bake them in a preheated 400 F oven, only shorten the baking time to about 9 minutes or so. Of course, you may need to adjust your time as oven temps and climate conditions vary. Just keep an eye on them and remove them from the oven before they brown.
- Allow them to cool a bit in the pan, about 20 minutes, then remove to a plate or sheet pan that will fit in the freezer. Place in the freezer, none of the rolls touching each other, and allow them to get hard, about 2 hours. Remove from the freezer and pop them into a zipper freezer bag, put back in the freezer until you are ready to bake them.
Par-Baking but not Freezing
- You can par-bake your rolls in the morning to have later that night. This can be ideal for someone who wants to make rolls for a family gathering or party, but wants to skip the hassle of prepping and baking at someone else's house. Simply par-bake as instructed above, however instead of placing rolls in the freezer, just place them in the refrigerator until you are ready to leave. Transport in a covered container, then bake as described below, but you may need to cut the baking time a little because they are not frozen.
Bake Par-Baked Frozen Rolls
- Remove desired number of rolls from freezer bag, do not thaw. Spray a baking pan with cooking spray, then brush each roll with melted butter and sprinkle with course salt. Bake in preheated 400 F oven for 12 minutes, or until browned.
Nutrition
More on Amanda’s Cookin’ you might like:
Partybrot – German party bread
Quick orange rolls
Simple one hour homemade bread
Homemade French bread
Homemade Amish white bread
Homemade multi-grain bread
Bretzel rolls – pretzel sandwich rolls
Homemade Italian bread
From other great cooking blogs:
Homemade Ramp and Cheddar Cheese Dinner Rolls – from If Music be the Food of Love, Play On
Buttered rosemary rolls – from The Pioneer Woman
Sweet potato buttermilk rolls – from Pinch My Salt
Poppy seed yeast rolls – from Salad in a Jar
Parker house rolls – from One perfect Bite
Amanda Davis
Latest posts by Amanda Davis (see all)
- Keto Peanut Butter Cookies - January 9, 2025
- Cloud Bread - January 6, 2025
- Shrimp Tacos - January 2, 2025



MN says
Wanting to make these as slider sandwiches that pull apart. I also want to par bake them, can they be frozen as a while sheet pan and be touching and then baked?
Amanda Davis says
In theory that should work but we haven’t tested it. This recipe evolved from my pull apart dinner rolls https://amandascookin.com/homemade-pull-apart-dinner-rolls/ which are a family favorite. I have not tried par baking them, however, in theory it should work!
Sharry says
This is my go to recipe for quick dinner folls. My whole family love them!
Starla says
Hi:)
Just tried these 6 years after this post.
These are amazing! My husband absolutely loves good dinner rolls. I’ve been on a search for years for the perfect recipe. This is it! Looking forward to this Thanksgiving so they can be added asa new tradition. Thanks SO much!!
Amanda Formaro says
Yay so glad you like them! This same dough is what I use in my pull apart dinner rolls, and those are OUR favorites :) https://amandascookin.com/homemade-pull-apart-dinner-rolls/
Maureen says
I made these for a ladies luncheon last weekend. I never got to try one as word spread about how good they were. Am making them now so my husband and I can find out how good everyone else said they were :-)
Amanda Formaro says
That’s awesome Maureen! I hope you liked them!