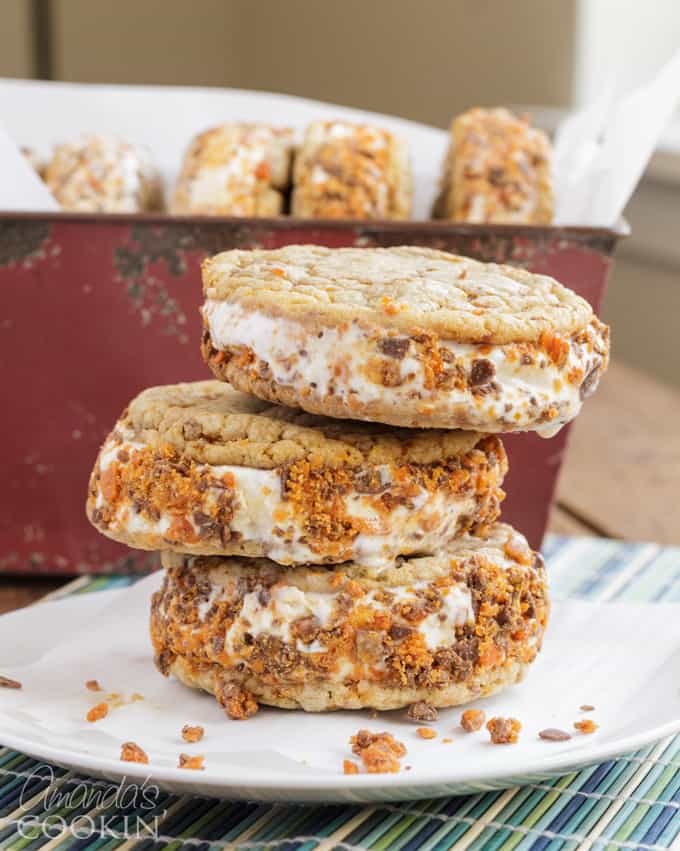
Ice cream gets a double whammy of honor during the month of July. Not only is it National Ice Cream Month, but July 16th is National Ice Cream Day! In celebration, I have partnered with Breyers and Mirum to show you just how fun and creative you can be with your ice cream. Behold – Butterfinger Ice Cream Sandwiches!
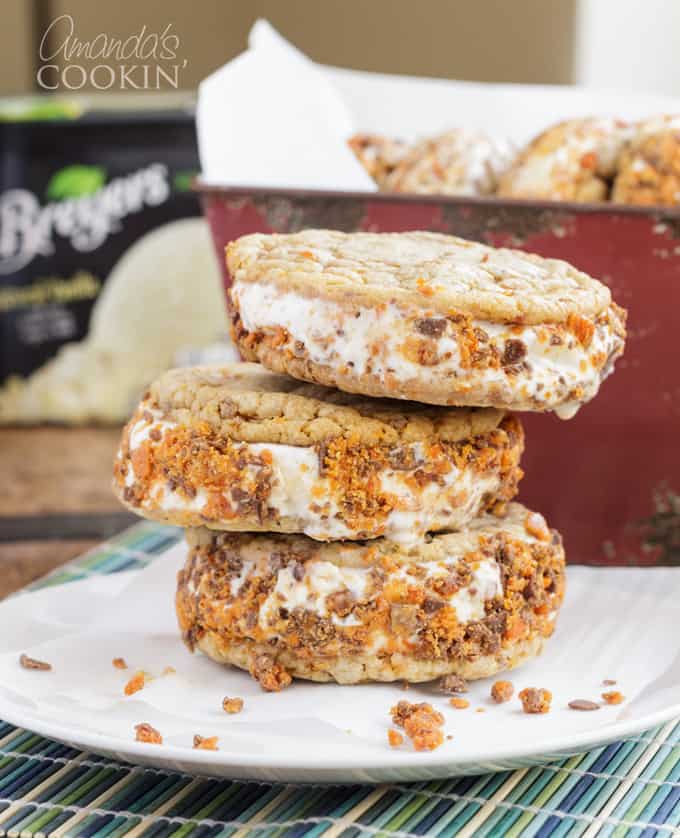
Butterfinger Ice Cream Sandwiches
That’s right… Butterfinger. Butterfinger ice cream sandwiches. You Butterfinger fans are drooling already, I can tell. There are plenty of chocolate chip ice cream sandwiches out there, and I’ve heard that the chocolate chips can be a bit of a bear to bite through when frozen.
So when I was at Walmart getting my supplies, I found Butterfinger Baking Bits and knew exactly what direction this recipe was going.

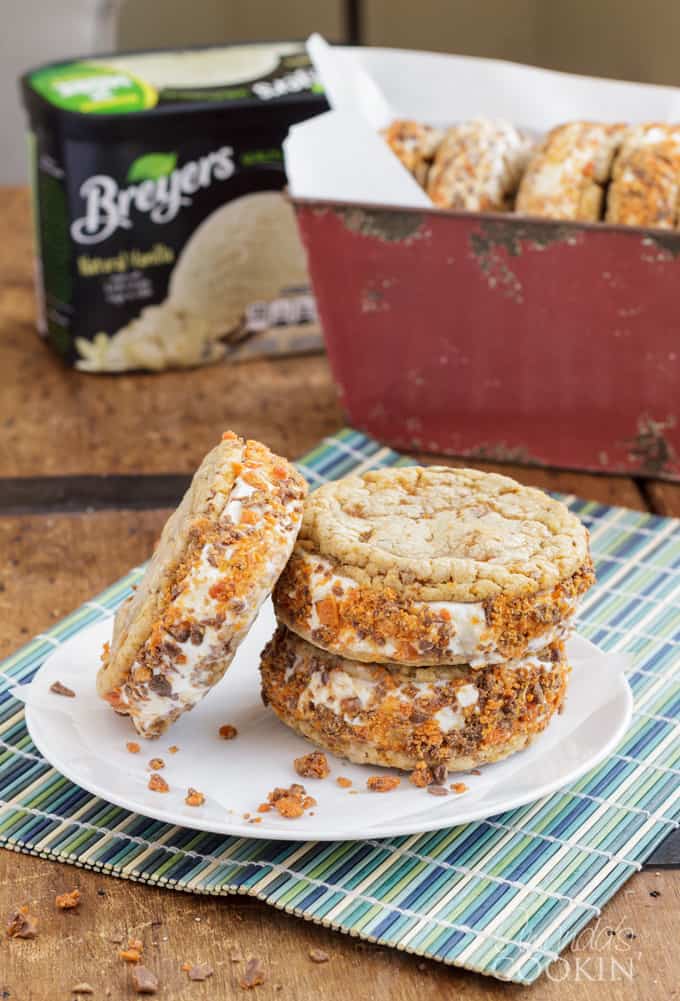
I don’t know about you, but Breyers ice cream is my favorite. It’s always creamy and delicious because it’s made with fresh cream and milk and everything is non-GMO. I love a big scoop of in my homemade slushies, which are always popular in the summer.
If I’m hanging out with just the grown ups, I always add a generous scoop to these root beer float cocktails! These ice cream sandwiches are not just for National Ice Cream Month, they would be perfect for a summer get together, a birthday party or even a family reunion.
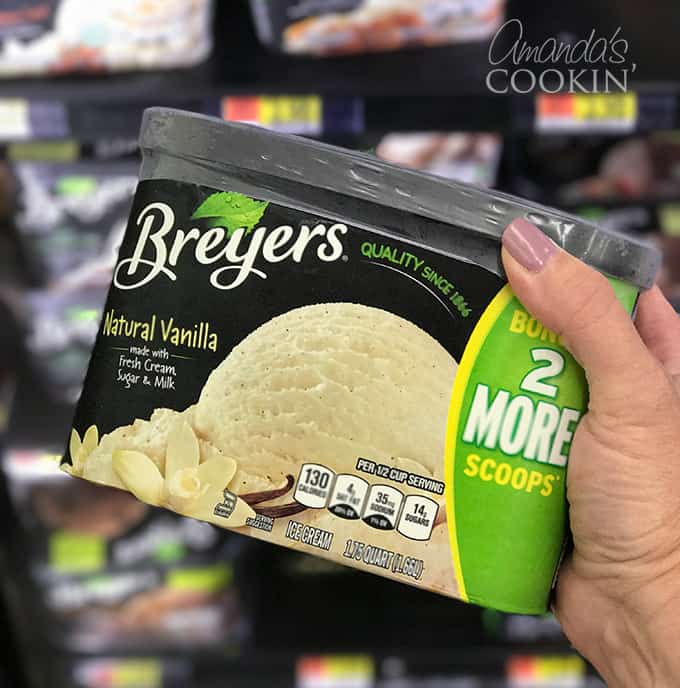
Oh yes, they melt… fast! So these aren’t going to a picnic with you, but if you’re having a backyard barbecue they are ideal. Pull these ice cream treats out of the freezer 5-10 minutes before serving then hand them out. Outside. Where the ice cream can drip all over little Johnny’s face… and the grass.
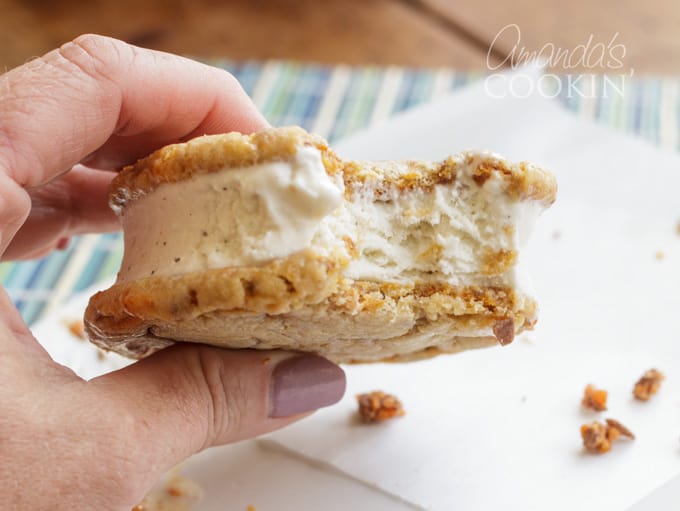
In fact, there’s a right way to eat these Butterfinger ice cream sandwiches. First, you want to lick all the goodies off of the ice cream and get your first taste of Butterfinger. The cookies will take a bit to soften, so keep licking at that dreamy Natural Vanilla ice cream until you can begin to nibble the edges of the cookies.
Eventually, you’ll be able to take a bite, but I think it’s more fun just to nibble all the edges until the ice cream gets melty again, then lick all the way around. Rinse and repeat!
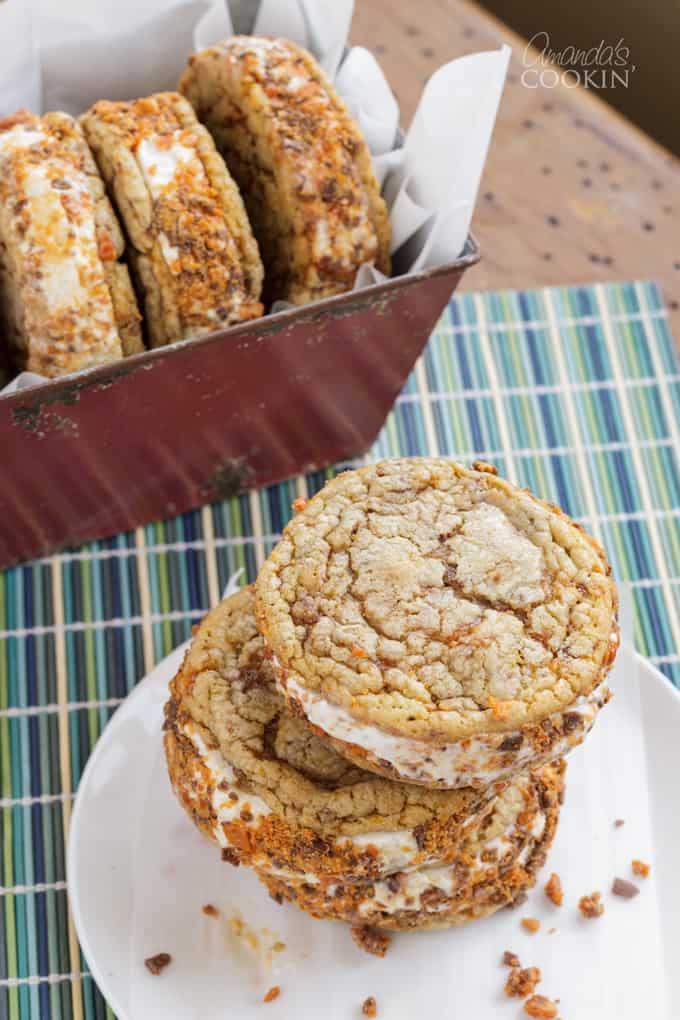
How to make Butterfinger Ice Cream Sandwiches
First of all, you’ll need to make cookies. I highly recommend using my favorite chocolate chip cookie recipe, which is what I did. You can use your own, but you’ll probably need to double it and make jumbo cookies.
My recipe already takes all of that into account. Just follow the recipe except you’ll want to substitute 1 1/2 bags (15 ounces) of Butterfinger Baking Bits for the chocolate chips/chunks. For your conveinece I have gone ahead and included this recipe with chocolate chip adjustments in the printable version below.
Here’s what you need:
- My big, soft chocolate chip cookie recipe
- 2 (10-ounce) bags of Butterfinger Baking Bits, divided
- 2 (1.5-quart) containers of Breyers Natural Vanilla Ice Cream
Helpful kitchen tools:
- Jelly roll pan
- Ice cream scoop
- Parchment paper
- Mixing bowl
- Wooden spoon
- Large circular cookie cutter
- Knife for chopping
- Spatula
- Cutting board
Take the 2 cartons of ice cream out of the freezer to let it soften a bit. Meanwhile, mix up your cookie dough, using 15 ounces of the Butterfinger Baking Bits. Reserve the other 5 ounces for rolling your finished ice cream sandwiches in.
Line the jelly roll pan with parchment paper overlapping all sides. Place the softened ice cream into a large bowl and stir it up like you used to when you were a kid.
Pour that softened bowl of ice cream into the lined pan and spread, spread, spread until it’s even. Place that pan in the freezer until the ice cream firms back up, about 2 hours.
Baking & Making Tips:
- If you don’t have a kitchen scale, it’s a really good investment and they are quite inexpensive. I have an Ozeri kitchen scale that runs about $15. I use mine all the time and weigh just about everything. It’s the best way to divide food evenly!
- You’ll notice this in the video above… I highly recommend weighing your cookie dough when you’re done mixing it. Then divide that total in ounces by 36. When you measure out the dough and use the same weight for each cookie ball, you will be rewarded with 36 perfectly round beautiful cookies from this recipe. However, if you don’t weigh the dough balls out you may not have similarly sized cookies in the end. And believe me, when making ice cream sandwiches you want your cookies to be the same size.
- when you bake the cookies you want them to be soft, and slightly under-baked. I baked mine for 11 minutes and they were perfect.
- My cookie recipe yields 36 (3 1/2-inch) wide cookies so you will need a cookie cutter approximately that size to cut out the ice cream middles. You can use a cookie cutter (I linked some above for you), a biscuit cutter or even a plastic drinking glass. Heck, I used an old plastic hamburger press I’ve had around for years! it looks very similar to the one in the upper left of this picture.
Getting ready for assembly:
- All your cookies should be cooled completely before starting this process.
- Have a pan handy to transfer the finished sandwiches to.
- Pour remaining 5 ounces of Butterfinger Baking Bits onto a plate.
- Cut parchment into strips (approximately 3″ x 12″) for wrapping around your sandwiches.
- Note that depending on how fast you work, you may need to move some of the sandwiches to the freezer before finishing the others.
- Have paper towels or a damp cloth handy to wipe your sticky fingers as you work.
- Fill a medium bowl with water to dip the cookie cutter in between ice cream cuts (see below).
Assembling your Butterfinger ice cream sandwiches:
Work quickly.
- Remove pan of ice cream from the freezer and using your cookie cutter, cut out 12 circles. It helps to dip the cookie cutter into a bowl of water after each cut to keep the ice cream from sticking to the cutter.
- Use an icing spatula to remove the excess ice cream around the circles. Yes, you can eat it, I won’t tell.
- If needed, place the pan of ice cream circles back into the freezer until you are ready to assemble.
- Match up 12 pairs of cookies according to size. This should be easy if you weighed your cookie dough.
- Use a spatula to lift an ice cream circle and sandwich it between two cookies then roll the sandwich in the Butterfinger Bits.
- Wrap the outside of the sandwich with a parchment strip and place on pan destined for the freezer.
- Freeze sandwiches until firm, several hours will work, but overnight is best.
Be sure to watch the video below to see how it’s done! These delicious ice cream sandwiches are a great way to celebrate summer, family, friends and National Ice Cream Month. And be sure to stop by Walmart to pick up the supplies you need, you can get everything there. You can even order and pick it up!
How are you celebrating? Be sure to share on social media using #CelebratewithBreyers #Walmart Enjoy!

Here’s a video of the process:

Butterfinger Ice Cream Sandwiches
IMPORTANT - There are often Frequently Asked Questions within the blog post that you may find helpful. Simply scroll back up to read them!
Print It Rate ItIngredients
- 8.5 ounces cake flour 2 1/4 cups
- 8.5 ounces all purpose flour 2 cups
- 1.25 tsp baking soda
- 1.5 tsp baking powder
- 1.5 tsp Kosher salt
- 2.5 sticks unsalted butter room temperature
- 10 ounces light brown sugar 1.25 cups packed
- 8 ounces granulated white sugar 1 cup, plus 3 tablespoons
- 2 large eggs
- 2 tsp vanilla extract
- 20 ounces Butterfinger Baking Bits, divided 2 10-ounce bags
- 3 quarts Breyers Natural Vanilla Ice Cream 2 1.5-quart containers
Instructions
Bake the Cookies:
- Sift flours, baking soda, baking powder and salt into a bowl with a wire whisk. Set aside.
- In bowl of electric mixer, cream together butter and sugars until very light, about five minutes. Add eggs, one at a time, mixing well after each addition. Stir in the vanilla. With mixer on low, add dry ingredients and mix just until combined. Stir in 1 and one-half of the Butterfinger chips with rubber spatula.
- Refrigerate dough for two hours.
- When ready to bake, preheat oven to 350 degrees. Line insulated baking sheets with parchment paper and scoop dough into 36-balls using an ice cream scoop onto sheet. Bake 10-12 minutes.
- As soon as you remove the baking sheet from the oven, use a spatula to shape the outer edge of the cookies to make them nice and round and even.
- Allow cookies to cool on sheet for 5 minutes before transferring to cooling racks to cool completely.
- Take the 2 cartons of ice cream out of the freezer to let it soften a bit. Meanwhile, mix up your cookie dough, using 15 ounces of the Butterfinger Baking Bits. Reserve the other 5 ounces for rolling your finished ice cream sandwiches in.
- Line the jelly roll pan with parchment paper overlapping all sides. Place the softened ice cream into a large bowl and stir it up like you used to when you were a kid. Pour that softened bowl of ice cream into the lined pan and spread, spread, spread until it's even. Place that pan in the freezer until the ice cream firms back up, about 2 hours.
Baking & Making Tips:
- If you don't have a kitchen scale, it's a really good investment and they are quite inexpensive. I have an Ozeri kitchen scale that runs about $15. I use mine all the time and weigh just about everything. It's the best way to divide food evenly!
- You'll notice this in the video above... I highly recommend weighing your cookie dough when you're done mixing it. Then divide that total in ounces by 36. When you measure out the dough and use the same weight for each cookie ball, you will be rewarded with 36 perfectly round beautiful cookies from this recipe. However, if you don't weigh the dough balls out you may not have similarly sized cookies in the end. And believe me, when making ice cream sandwiches you want your cookies to be the same size.
- when you bake the cookies you want them to be soft, and slightly under-baked. I baked mine for 11 minutes and they were perfect.
- My cookie recipe yields 36 (3 1/2-inch) wide cookies so you will need a cookie cutter approximately that size to cut out the ice cream middles. You can use a cookie cutter (I linked some above for you), a biscuit cutter or even a plastic drinking glass. Heck, I used an old plastic hamburger press I've had around for years! it looks very similar to the one in the upper left of this picture.
Getting ready for assembly:
- All your cookies should be cooled completely before starting this process.
- Have a pan handy to transfer the finished sandwiches to.
- Pour remaining 5 ounces of Butterfinger Baking Bits onto a plate.
- Cut parchment into strips (approximately 3" x 12") for wrapping around your sandwiches.
- Note that depending on how fast you work, you may need to move some of the sandwiches to the freezer before finishing the others.
- Have paper towels or a damp cloth handy to wipe your sticky fingers as you work.
- Fill a medium bowl with water to dip the cookie cutter in between ice cream cuts (see below).
- Assembling your Butterfinger ice cream sandwiches:
Work quickly.
- Remove pan of ice cream from the freezer and using your cookie cutter, cut out 12 circles. It helps to dip the cookie cutter into a bowl of water after each cut to keep the ice cream from sticking to the cutter.
- Use an icing spatula to remove the excess ice cream around the circles. Yes, you can eat it, I won't tell.
- If needed, place the pan of ice cream circles back into the freezer until you are ready to assemble.
- Match up 12 pairs of cookies according to size. This should be easy if you weighed your cookie dough.
- Use a spatula to lift an ice cream circle and sandwich it between two cookies then roll the sandwich in the Butterfinger Bits.
- Wrap the outside of the sandwich with a parchment strip and place on pan destined for the freezer.
- Freeze sandwiches until firm, several hours will work, but overnight is best.
Nutrition
Amanda Davis
Latest posts by Amanda Davis (see all)
- Watergate Salad - November 21, 2024
- Sweet Potato Pie - November 18, 2024
- Roasted Turkey - November 14, 2024




Leave a Reply