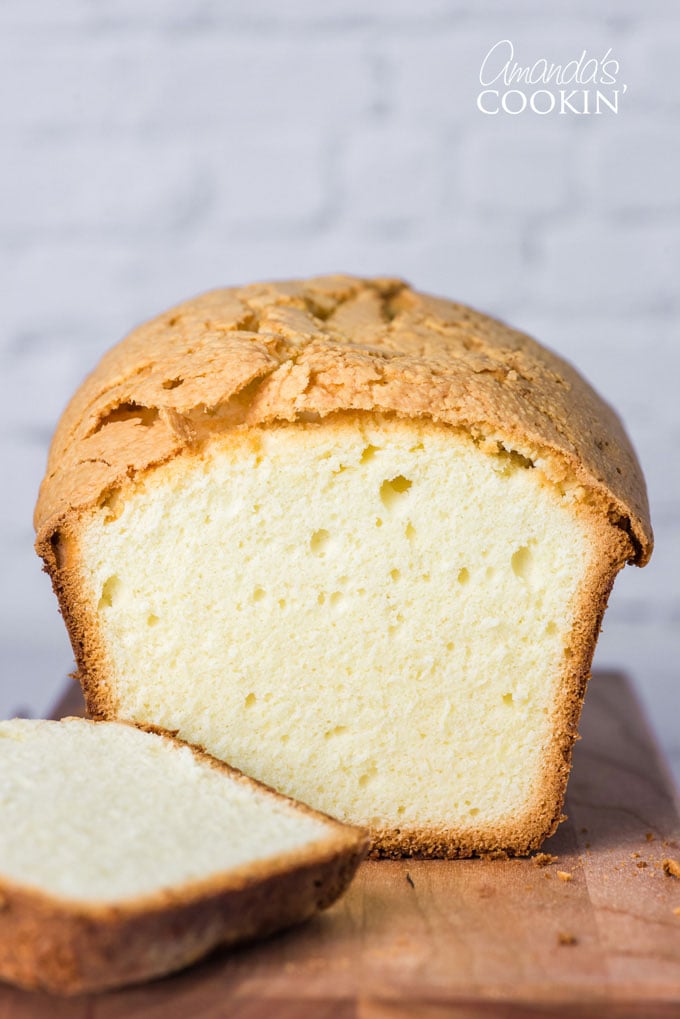
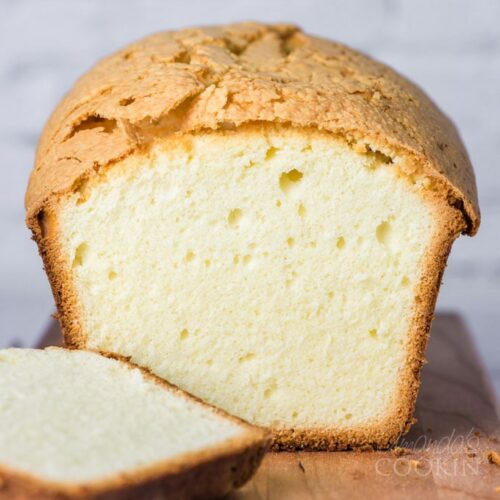
Pound cake is made from butter, eggs, flour, and sugar, and is baked in a loaf pan. Pound cake got its name from having a pound of each of these ingredients, but apparently Elvis Presley’s favorite recipe didn’t. Either way, this is the best pound we have ever made.
Whipping Cream Pound Cake Recipe
This pound cake reminds me of the Sara Lee pound cakes I ate when I was a kid. Dense but moist, sweet and a perfect crumb. My favorite way to eat it was slathered in creamy, spreadable butter or with a smear of lemon curd of homemade jam. I’ve made this countless times since I discovered it over a decade ago.
Tips for Making Homemade Pound Cake
- The trick to this batter is beating it the full length of time specified. So when it says 5 minutes, set a timer for 5 minutes.
- Be sure to sift the flours as indicated in the recipe. Sift them 3 times as directed.
- Butter should be softened to room temperature. This means take the butter out of the fridge 20 minutes before you will need it. You should be able to make a small indent in the butter, but your finger should not go “into” the butter.
- We use 8×4 sized loaf pans. If you want to make these in 9×5 loaf pans, reduce the baking time by ten minutes.
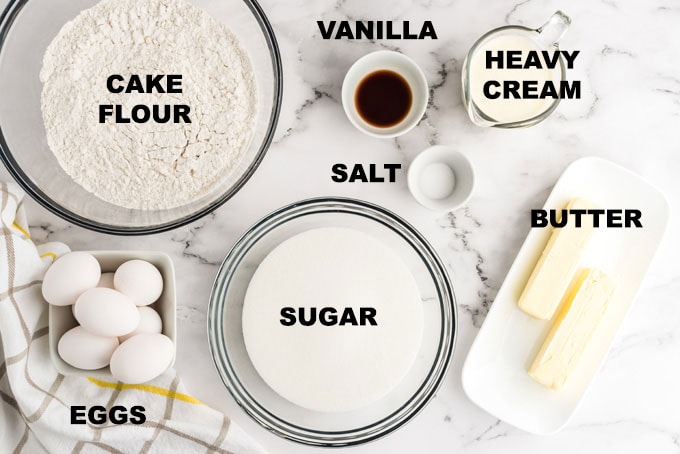
Pound cake ingredients
- I use unsalted butter whenever I bake. If you use salted butter you likely won’t notice a difference, but if you’re tastebuds are sensitive you may taste a hint of salt.
- This recipe uses sifted cake flour, which means you will sift before measuring it out.
- Other standard ingredients include table salt (which you might want to cut back if you use salted butter), granulated sugar, and large eggs.
- Use pure vanilla extract, imitation has a completely different flavor and will alter the results of this pound cake.
- The reason this pound cake is so good is because of the heavy cream. Instead of a pound of butter, cream makes up for using less butter.
Helpful baking tools
How to make Elvis Presley Whipping Cream Pound Cake
Start by positioning your oven rack in the middle position, but do not preheat your oven. Generously butter two 8×4 loaf pans and dust them with flour, knocking out any excess flour.
TIP – This cake is meant to be baked in a conventional oven. If you are baking it in a toaster oven, preheat it first.
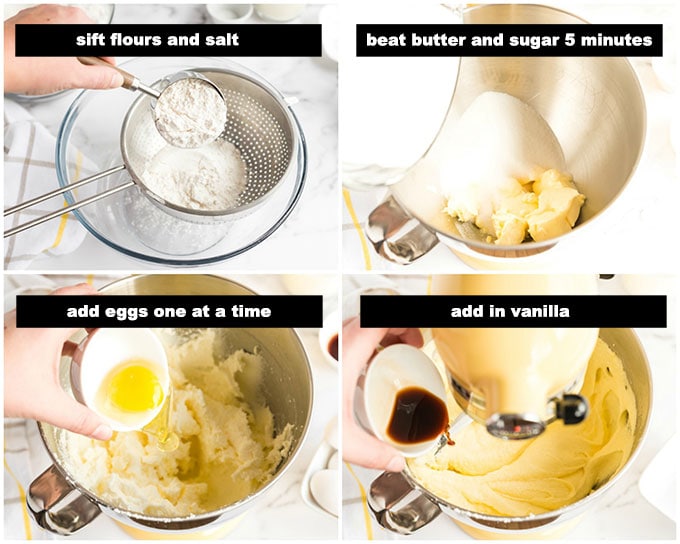
- Sift together the sifted flour and salt into a bowl. Repeat sifting into another bowl (flour will have been sifted 3 times total).
- Beat together the softened butter and granulated sugar in a large bowl with an electric mixer at medium-high speed until pale and fluffy. This will take about 5 minutes in a stand mixer fitted with paddle attachment or 6 to 8 minutes with a handheld mixer.
- Add the eggs one at a time, beating well after each addition.
- Afterward beat in vanilla.
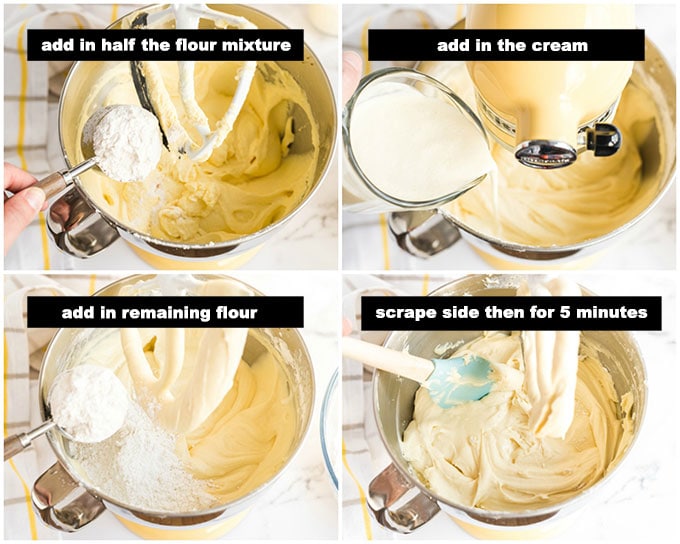
- Reduce the mixer speed to low and add half of flour, then all of the heavy cream, then the remaining flour, mixing well after each addition. Scrape down side of bowl, then beat at medium-high speed 5 minutes. Batter will become satiny and creamy.
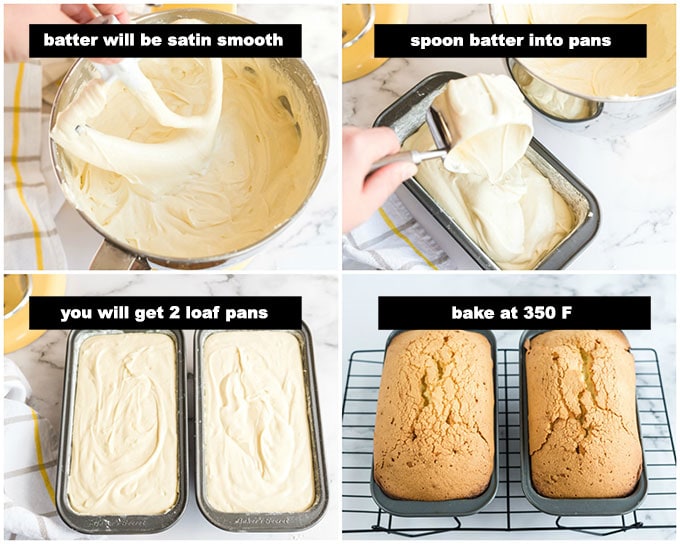
- Spoon batter into loaf pans and rap the pans against the counter once or twice to eliminate air bubbles.
- Place pans on a baking sheet and place in the cold oven and turn the oven temperature to 350°F.
- Bake until golden brown and a wooden pick or skewer inserted in middle of cake comes out with a few crumbs sticking to it, about 75-85 minutes.
- Cool pound cakes in pans on a wire rack for 30 minutes. Run a thin knife around inner and outer edges of cake, then invert rack over pan and invert cake onto rack to cool completely.
Other cake recipes you will enjoy
- Lemon Curd Poke Cake
- Pistachio Cake
- Chocolate Texas Sheet Cake
- Pound Cake Cupcakes
- Orange Poppy Seed Pound Cake
- Chocolate Pound Cake
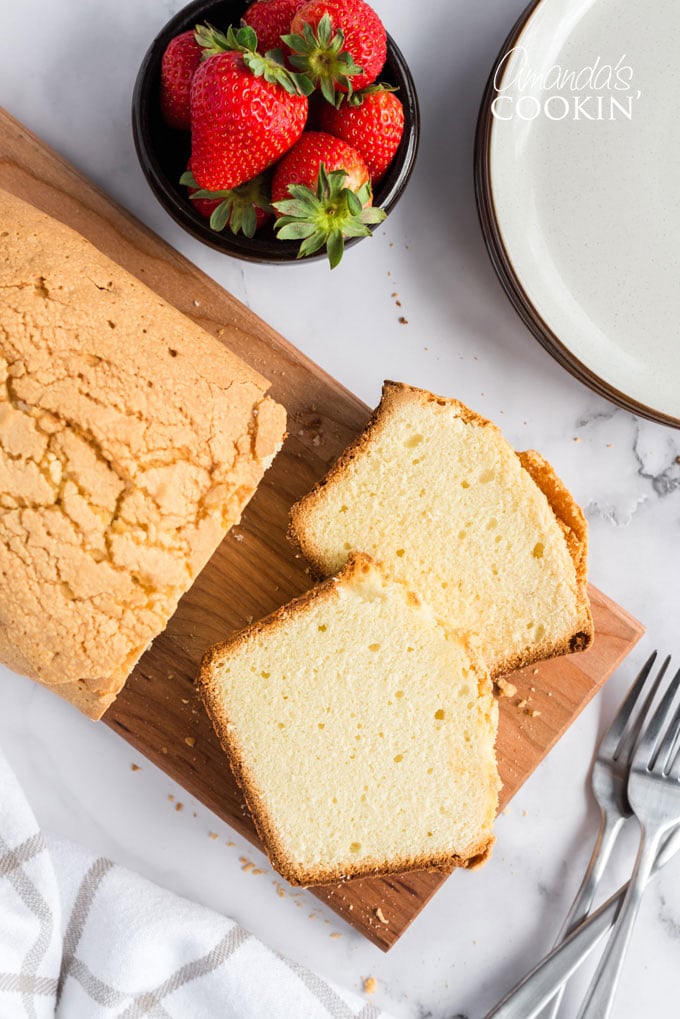
Elvis Presley's Whipping Cream Pound Cake
IMPORTANT - There are often Frequently Asked Questions within the blog post that you may find helpful. Simply scroll back up to read them!
Print It Pin It Rate ItIngredients
- 1 cup unsalted butter softened, plus additional for buttering pan
- 3 cups sifted cake flour not self-rising; sift before measuring plus additional for dusting
- ¾ teaspoon salt
- 3 cups sugar
- 7 large eggs at room temperature 30 minutes
- 2 teaspoons pure vanilla extract
- 1 cup heavy whipping cream
Things You'll Need
Before You Begin
- This recipe was developed and tested in a CONVENTIONAL oven. If you are using a toaster oven, we cannot be responsible for your results. If you are using a toaster oven, your best bet is to preheat it first.
- The trick to this batter is beating it the full length of time specified. So when it says 5 minutes, set a timer for 5 minutes.
- Be sure to sift the flours as indicated in the recipe. Sift them 3 times as directed.
- Butter should be softened to room temperature. This means take the butter out of the fridge 20 minutes before you will need it. You should be able to make a small indent in the butter, but your finger should not go "into" the butter.
- We use 8x4 sized loaf pans. If you want to make these in 9x5 loaf pans, reduce the baking time by ten minutes.
Instructions
- Put oven rack in middle position, but do not preheat oven.
- Generously butter two 8x4 loaf pans and dust with flour, knocking out excess flour. (Be sure to read NOTES if using 9x5 loaf pans)
- Sift together sifted flour and salt into a bowl. Repeat sifting into another bowl (flour will have been sifted 3 times total, once by itself and twice with the salt).
- Beat together butter and sugar in a large bowl with an electric mixer at medium-high speed until pale and fluffy, about 5 minutes in a stand mixer fitted with paddle attachment, or 6 to 8 minutes with a handheld mixer.
- Add eggs one at a time, beating well after each addition, then beat in vanilla.
- Reduce speed to low and add half of flour, then all of cream, then remaining flour, mixing well after each addition.
- Scrape down side of bowl, then beat at medium-high speed 5 minutes. Batter will become creamier and satiny.
- Spoon batter into pan and rap pan against work surface once or twice to eliminate air bubbles.
- Place pan in (cold) oven and turn oven temperature to 350°F. Bake until golden and a wooden pick or skewer inserted in middle of cake comes out with a few crumbs adhering, 75-85 minutes.
- Cool cake in pan on a rack 30 minutes. Run a thin knife around inner and outer edges of cake, then invert rack over pan and invert cake onto rack to cool completely.
Nutrition
This post originally appeared here on Aug 24, 2009.
Amanda Davis
Latest posts by Amanda Davis (see all)
- Raspberry Poke Cake - January 21, 2025
- Chocolate Covered Strawberries - January 20, 2025
- Cauliflower Pizza Crust - January 13, 2025



Laura says
The cake itself is delicious and I followed all the steps including the two 5 minute timed mixing. However my loaves came out a bit too dark and without the sugar crust. Next time I time I will bake them at 325. So disappointed the sugar crust never developed.
Alicia says
I followed the instructions and I’ve baked this pound cake several times. perfect every time. and I just started baking at 51 years old. Thia was the 3rd pound cake recipe I tried and never tried another, as it’s come out perfectly moist and crunchy” on top, think it’s what y’all may call the crumb. anyway, wonderful recipe and cold oven works perfectly too. sorry for any typos, pulling out my cakes and going to bed but I wanted to comment this time to be sure you know your recipe is foolproof and appreciated
Amanda Davis says
Thank you, so glad you enjoy it as much as we do!
Tsing says
How long should I bake, if I use the mini 5.75″by3″ loaf pans. Have you any data using the smaller loaf pans? If you do not have any data, I will experiment and let you know. Many thanks.
Amanda Davis says
We have not tested that with this recipe. However, should you decide to experiment we would love to hear your results!
Nicole says
Im desperately trying to find a lemon pound cake recipe but they all call for pudding mix, lemon extract, or sugary lemon glazes. Any tips on adding real lemon juice to this recipe?
Amanda Davis says
Our Lemon Loaf uses fresh lemon juice as well as lemon extract here https://amandascookin.com/starbucks-lemon-loaf/
Mary says
The writers statements about the cold oven start are actually telling the truth. My KitchenAid wall oven, purchased in 2016, preheats with the top element. I tried a cold oven start when I first purchased it and quickly found the top of my cake cooking. So these people are giving you accurate descriptions of what happened to their cakes. These ovens heat up quickly so yes it’s very possible the tops were burned in a short amount of time. These are not old ovens.
David Alexander says
I made this cake today and used 2 loaf pans with an 8-cup capacity. They were nearly filled with batter, and baked they were about 1/2-inch from top of pans. . I have made this cake a few times before with these pans. My point is: the instructions to use 8 x 4-inch pans, which have a 5-cup capacity, may result in the cakes overflowing.
Melvina Wade says
I just made this cake on 5/8/24 it turn out perfectly and what I mean my oven was cold when I place the cake in it even though I had to use a tube pan bcuz I didn’t have 2loaf pans bt I will make this again❤️
Down Punxx says
Dude. I just wanted to drop you a note to let you know this recipe is the greatest thing ever. I didn’t want to make an entire cake, much less two pans worth, so I reduced the recipe ingredients all by 1/3. Was able to fill up 5 Jumbo cupcake liners with about 3.7oz of cupcake batter a piece (should have been able to get 6 out, but it was a long day and I didn’t want to scrape until I was blind). Put in my cold oven, set to 350, and at 40 minutes (having reduced the time by 50%) took them out, and they passed the toothpick test, were perfectly golden brown on their little blessed dome tops, internal temp was 217. Let cook in the pan for 10 minutes, then popped them out and moved them to a rack for 30.
These were by far down and away the best cupcakes I have ever had in my entire life. Thank you for your recipe.
Amanda Davis says
What a great thing to read this morning, thanks so much!
Lynn says
Not really sure why my comment was removed, but again, you definitely want to pre-heat your oven with this recipe unless you want your cake to burn.
Amanda Davis says
Your comment wasn’t deleted, I just hadn’t approved it yet. I’m sorry your cake was burned. I hadn’t considered that people might be using a toaster oven to bake a cake. I am going to add a note that this cake was tested in a conventional oven.
Dorothy says
My toster oven often burns cakes which may be problematic if I didn’t know to set temp lower and use foil on top
They say you don’t need to do that lowering Temps on new toster oven combos but believe me you do.
RJ says
This unheated oven is BAD ADVICE. Just burned the top of my cake at only the 10min point. :(
Amanda Davis says
I’m not quite sure that I understand your comment. The instructions state to place the pans in a cold oven then turn it on to 350 F. How could it possibly have burned the top of your cake after ten minutes? The oven would have been barely made it to 350 yet, and even if it were, it’s not going to burn at 350. It sounds like you either made a mistake somewhere, or your oven temperature is not accurate. The only way this should burn after ten minutes would be if you had the oven on 550 F or Broil.
Lynn says
I had the same experience as RJ, my cake burned and I’m sure it was due to not preheating the oven
Laura says
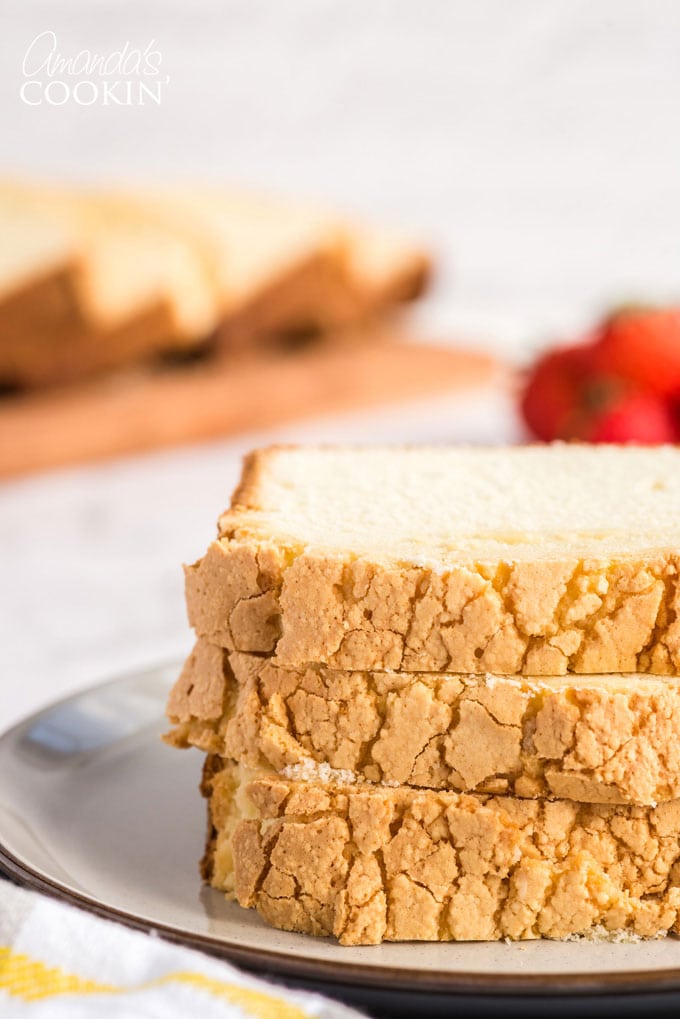
Hello….your photo shows a sugar crust on the loaves. I followed the recipe faithfully but mine never developed the crackly sugar crust. It was just a smooth normal crust. Any ideas?
Amanda Formaro says
It’s actually just the way that the batter reacts to the heat in the oven, there’s no additional topping such as sugar. Is the texture of your finished loaf tight like pound cake? Be sure you set a time for the mixing, for example in step 4 of the recipe card is says beat 5 minutes. Step 7 is similar. Be sure you are beating the batter for the full amount of time in the recipe as it beats air into the batter.
Mari says
So… what if you have an oven that MUST be preheated? That is, both of my last two ovens are designed to preheat quickly and turn on the broiler and bottom gas at full blast to preheat… which I sadly know from experience scorches the tops of cakes. Is like to make this, but I can’t start it in a cold oven…
Amanda Formaro says
The only thing I can suggest is following the recipe and place the cake in as instructed, then start your oven. I’ve never heard of an oven like you describe. Is it an older oven?
Mel says
I have not made this particular whipping cream cake, but plan to. However, I’m reading the comments and feel that people do not understand “cold oven pound cakes”. This method is old, tried and true. Some recipes actually require a cold oven start. . I have been baking for 45 years and cold oven pound cakes are my favorite. They do take longer, but this method allows pan and batter to heat slowly which gives the levening agents time to work properly before the cake sets making your cake fluffy and tall. Cold oven cakes also have a delicious, thick, golden crust on the sides and top that helps seal in the moisture while baking and keeps your cake moist for days after baking. The amount and crispness of the top crust also depends on the recipe ingredients. Some ingredients react to make a crisp, sugary top crust while others lend a softer textured top. This recipe is meant to be baked in a conventional oven and will not burn . I have never had a cold oven cake burn. If your cold oven cake is burning in a conventional oven your rack may be too high, your oven may need to be equilibrated or you need to make sure you are not using a dark finished pan. If you are having issues baking in a toaster oven, you need to refer to your oven instructions for temperature conversion instructions. All that being said, most pound cake recipes can be baked in a cold or preheated oven. If you are having trouble with this cake in a cold oven, then preheat, But don’t criticize the recipe creator for her cold oven method. It works.
Amanda Davis says
Thank you for that great explanation, I hope you enjoy the cake!
Christa says
Could you add some seedless raspberry jam to this recipe?