
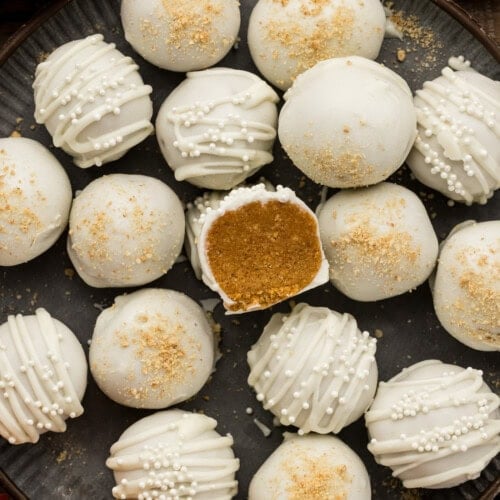
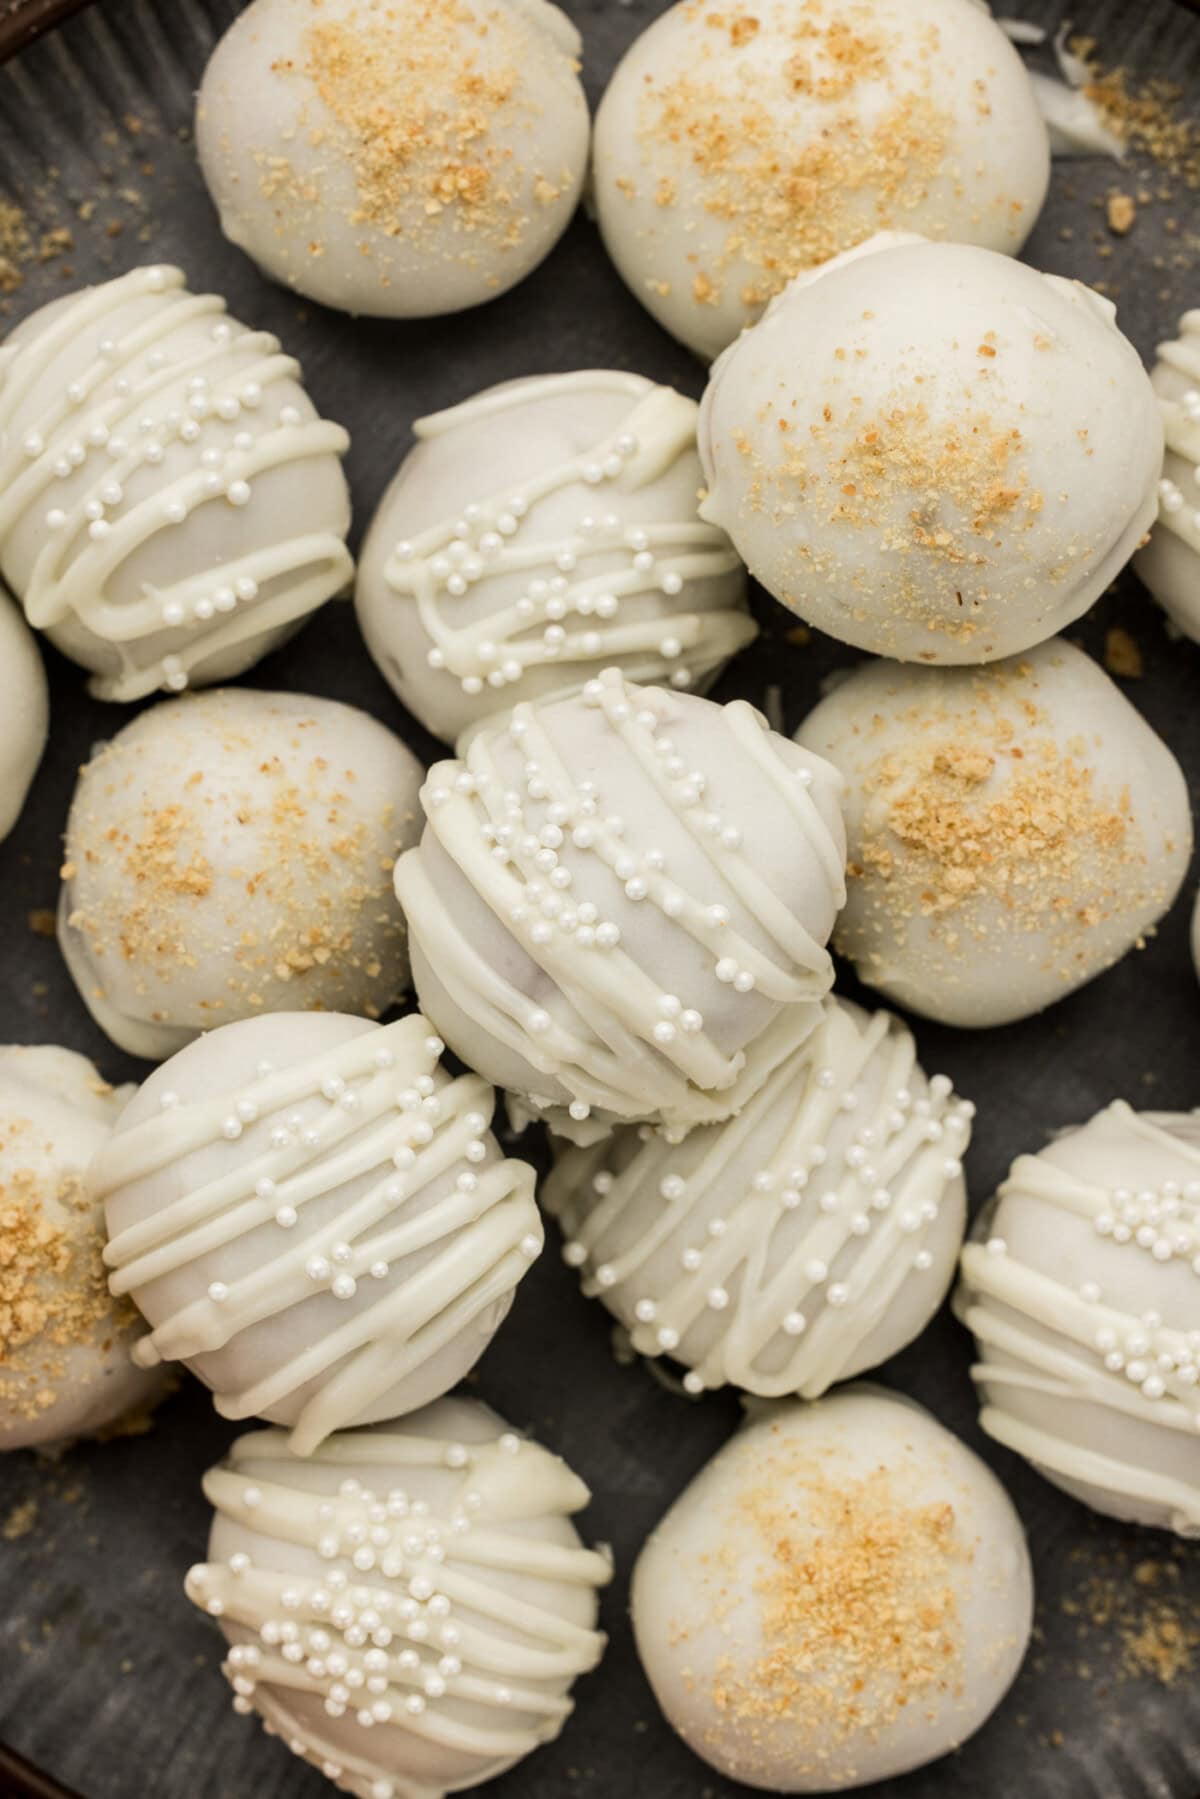
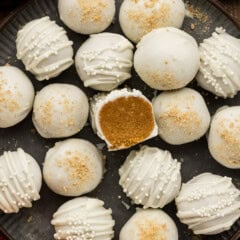
Smooth, no bake pumpkin truffles with a real pumpkin filling coated in a snappy chocolate shell. Plus, a quick step that keeps the filling from turning out sticky and hard to handle!
Why this recipe works
The secret behind making non-sticky, easy-to-roll pumpkin truffles is to blot the pumpkin. Canned pumpkin puree is roughly 90 percent water, and in a baked recipe the oven drives that moisture off. In a no bake truffle there is no oven, so all that water stays right in your filling and makes it too soft to roll. Pressing the pumpkin with a few paper towels first pulls out the extra water, which is how these come together into a dough you can actually work with. It also concentrates the pumpkin, so the flavor is pronounced instead of getting lost under graham and sugar.
I weighed everything and give you the grams, because graham cracker crumbs in particular can swing a lot depending on how fine you grind them. Proper measurements will yield beautifully rolled balls instead of ones that crumble, fall apart, or are overly sticky. Follow the weights listed for the best texture!
Truffles are one of my favorite little sweet treats to bring to parties. You can dip and decorate them however you want! Easily decorate these pumpkin truffles to fit a Halloween theme using my Halloween Oreo truffles as inspiration.
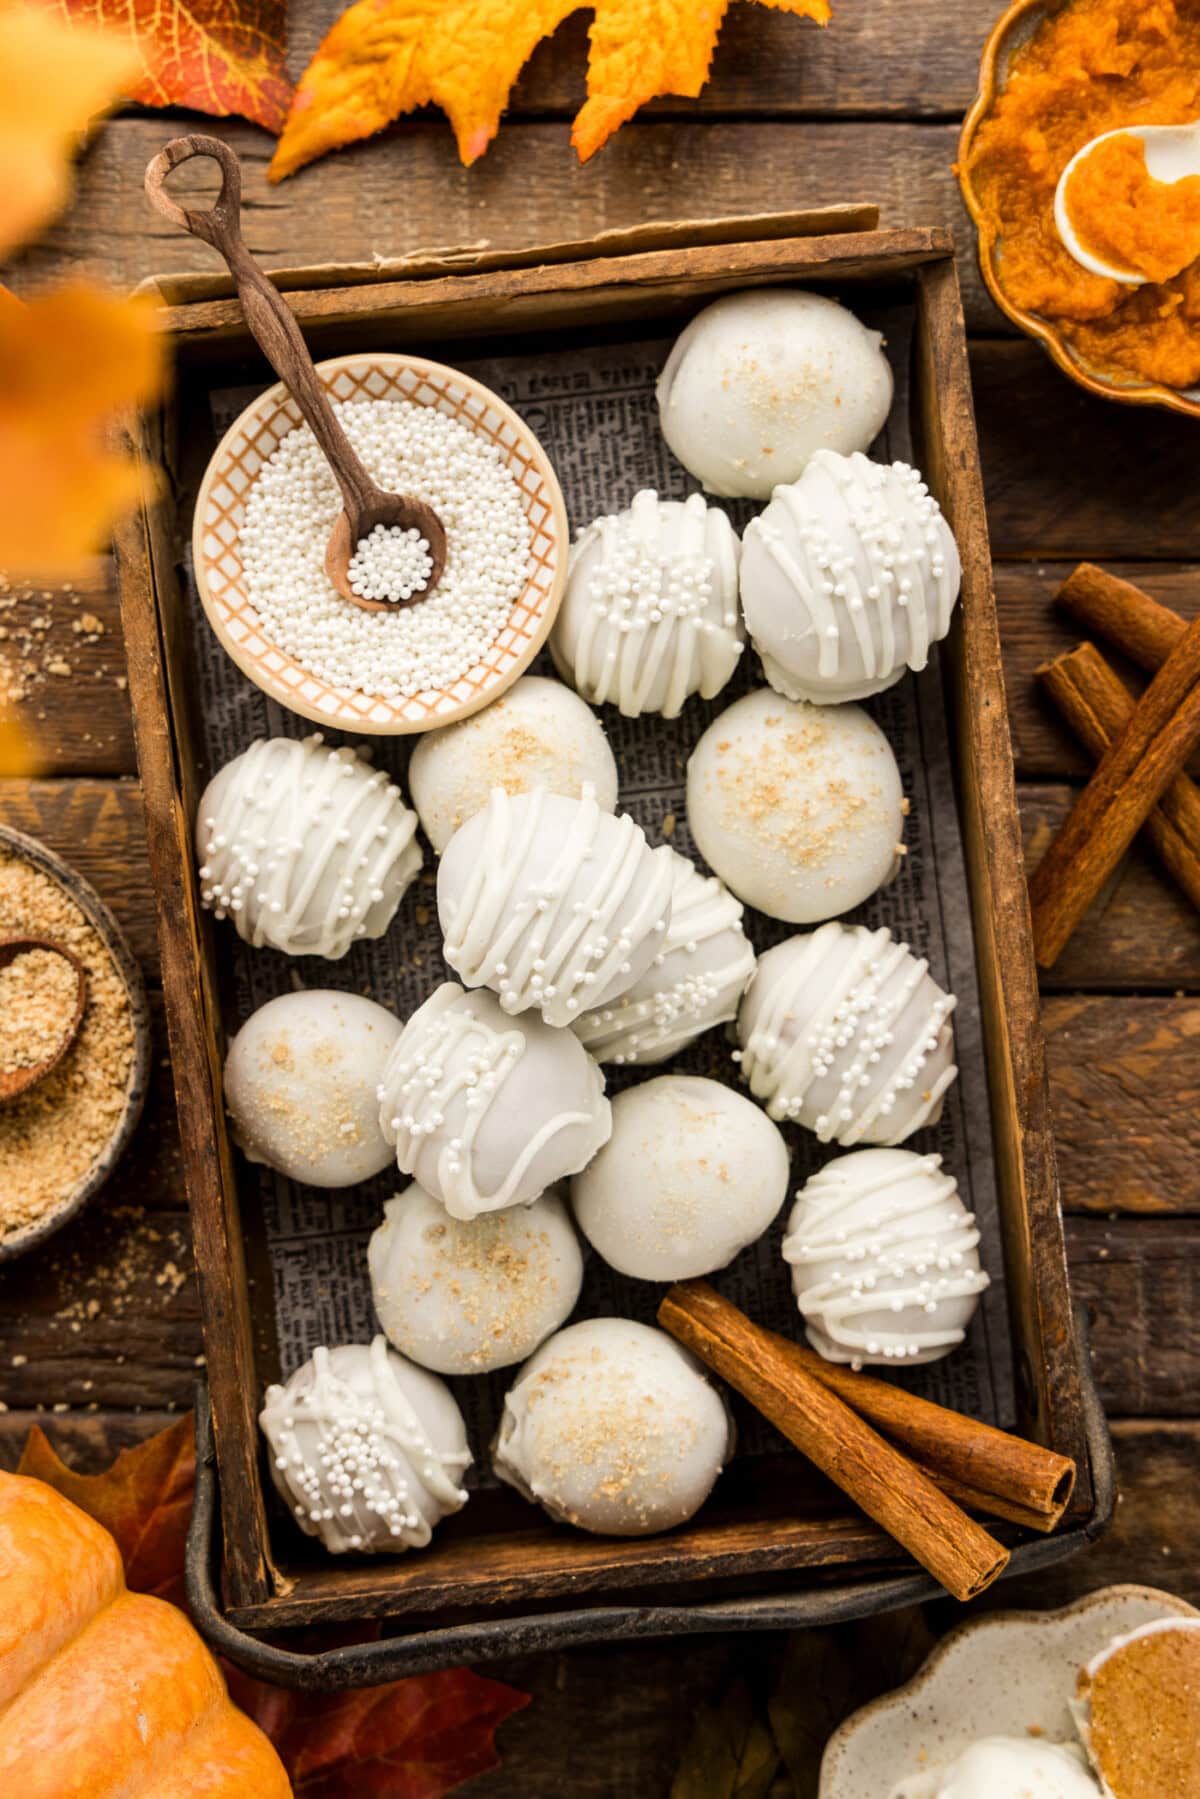
Ingredients you will need
Get all measurements, ingredients, and instructions in the printable version at the end of this post.
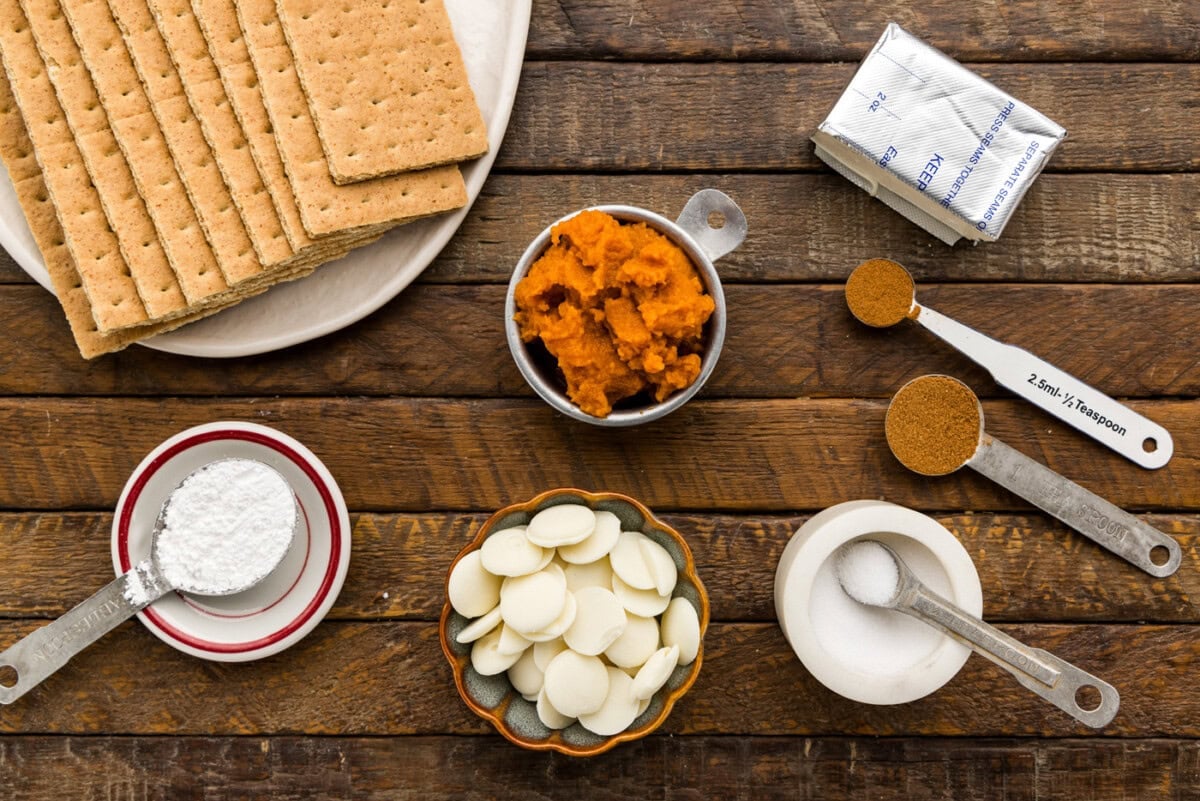
Ingredient Info and Substitution Suggestions
PUMPKIN PUREE – Use plain 100 percent canned pumpkin, not pumpkin pie filling, which is pre-sweetened and much too wet. I used Libby’s because it is thick and consistent from can to can. Homemade and some organic purees hold a lot more water, so if that is all you have, plan to blot it more.
GRAHAM CRACKER CRUMBS – The graham crumbs are the structure of the filling. You can buy pre-ground crumbs or crush whole sheets in a food processor. Ten full sheets grinds down to about 1 1/4 cups of crumbs. Crushed vanilla wafers or gingersnaps work as a substitution, but the flavor will differ.
WHITE MELTING WAFERS – White melting wafers work perfectly, no need for real white chocolate here. They melt smooth, set up reliably, and add sweetness that helps the filling firm as it chills. White chocolate chips or a chopped white chocolate bar work too, but white chocolate is fussy and can easily scorch.
CREAM CHEESE – Use full fat brick style cream cheese, softened to room temperature so it beats smooth. I would not use the spreadable tub kind, which has more liquid and will loosen your filling. To bring it to room temp quicker, slice it into cubes and let it rest on a plate for about 30 minutes.
PUMPKIN PIE SPICE – I use a bit more than most recipes because it’s easy for the pumpkin flavor to get buried, plus, we’re adding a small amount of extra cinnamon on top. If you like a slightly stronger spice profile, up the pumpkin pie spice to 1 1/2 teaspoons.
SALT – Pumpkin truffles are sweet and rich, and a little salt keeps them from tasting flat. I would not recommend leaving the salt out!
Tips to know before you start
- Blot the pumpkin. Seriously, it can make or break your truffles. Canned pumpkin is mostly water, and with no oven to cook it off, that water keeps your filling too soft to roll. Blotting takes under a minute to do and fixes this problem.
- Use full fat brick cream cheese, softened to room temperature. The spreadable tub kind has more liquid and will loosen the filling.
- Grind the graham crackers fine for the smoothest texture, and weigh your ingredients using a kitchen scale if you can. Graham crumb volume varies a lot with how fine you grind. Going off weights will keep the filling consistent.
- If you substitute the melting wafers with white chocolate chips or a chopped bar, melt them over a double boiler and turn off the heat as soon as they are about halfway melted, then stir off the heat until smooth. White chocolate scorches easily so keep an eye on it.
- Work cold. The filling rolls well when chilled and turns sticky as it warms from your hands. Keep the bowl in the fridge and roll in small batches. Wearing disposable gloves and dipping your cookie scoop in water, then shaking off the excess, between each ball keeps everything from sticking.
- Melt your coating in a deep narrow bowl or a liquid measuring cup, not a wide shallow dish, so you have enough depth to fully submerge and lift each truffle.
- These are make ahead friendly. The pumpkin flavor comes through a little more the next day!
How to Make Pumpkin Truffles
These step by step photos and instructions are here to help you visualize how to make this recipe. You can Jump to Recipe to get the printable version of this recipe, complete with measurements and instructions at the bottom.
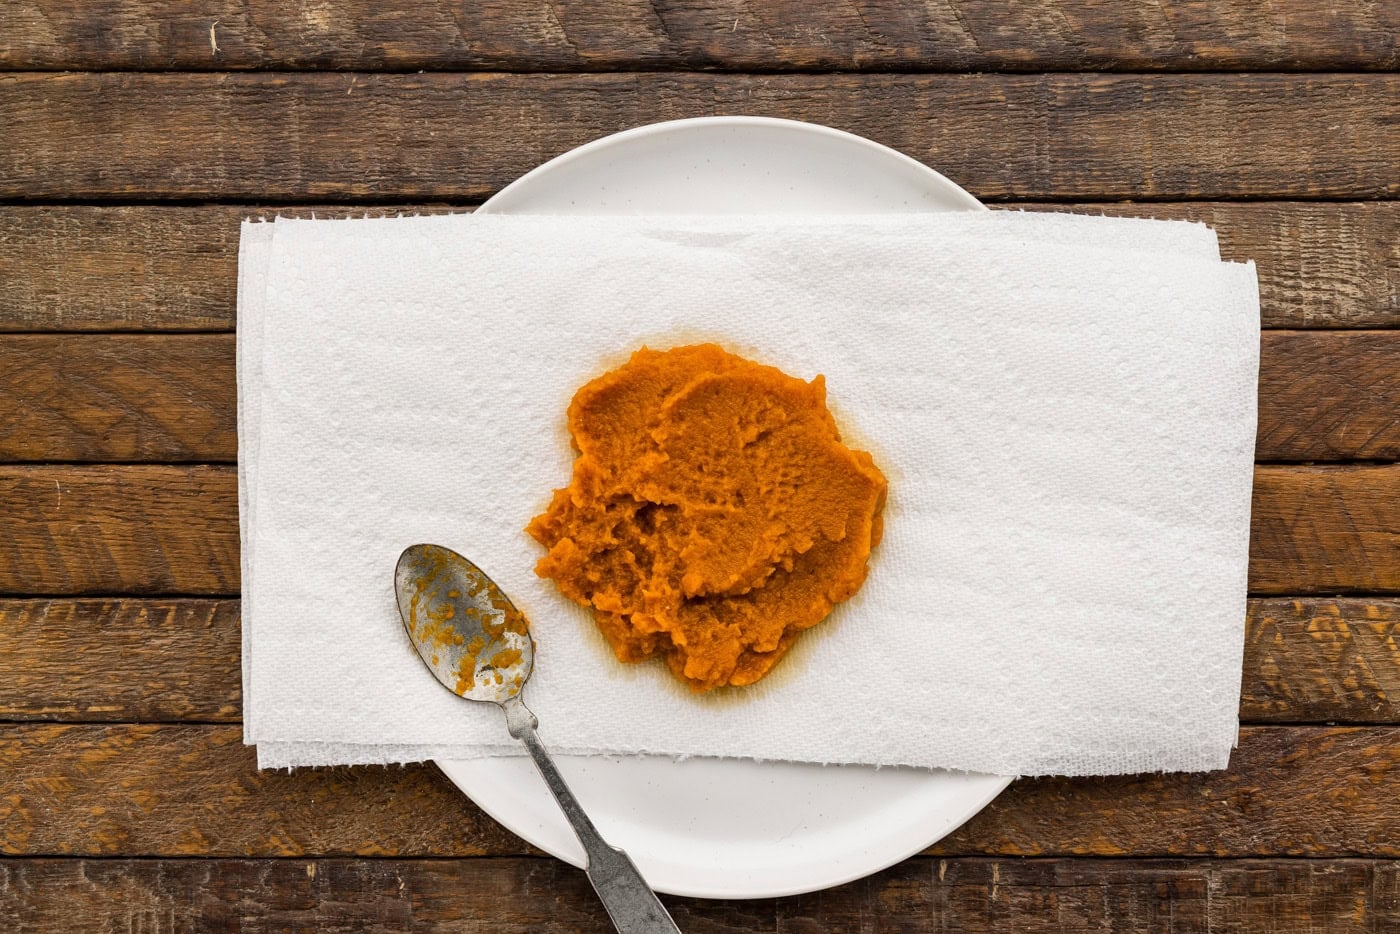
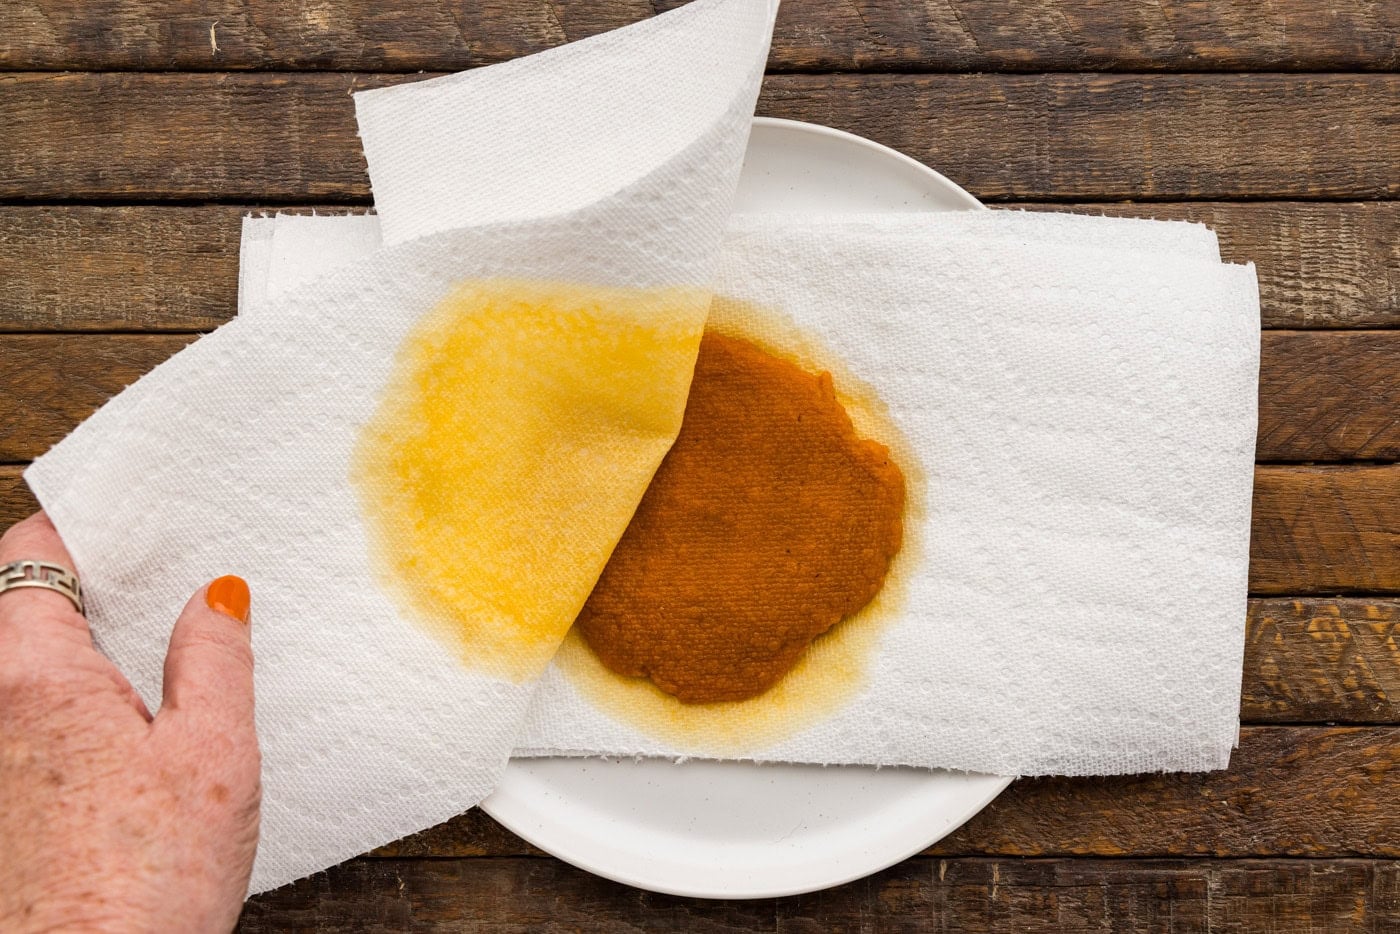
- Stack three paper towels on a plate and spread the puree into an even layer about 1/2 inch thick. Lay two more paper towels on top and press down gently with a flat palm for about 10 seconds, then peel them away. You want to end up with about 61g, roughly a third less than you started with. It should hold a soft shape rather than slumping flat.
- Melt the filling white melting wafers in a microwave safe bowl in 20 to 30 second bursts, stirring between each, until smooth. Set aside to cool slightly while you start the filling.
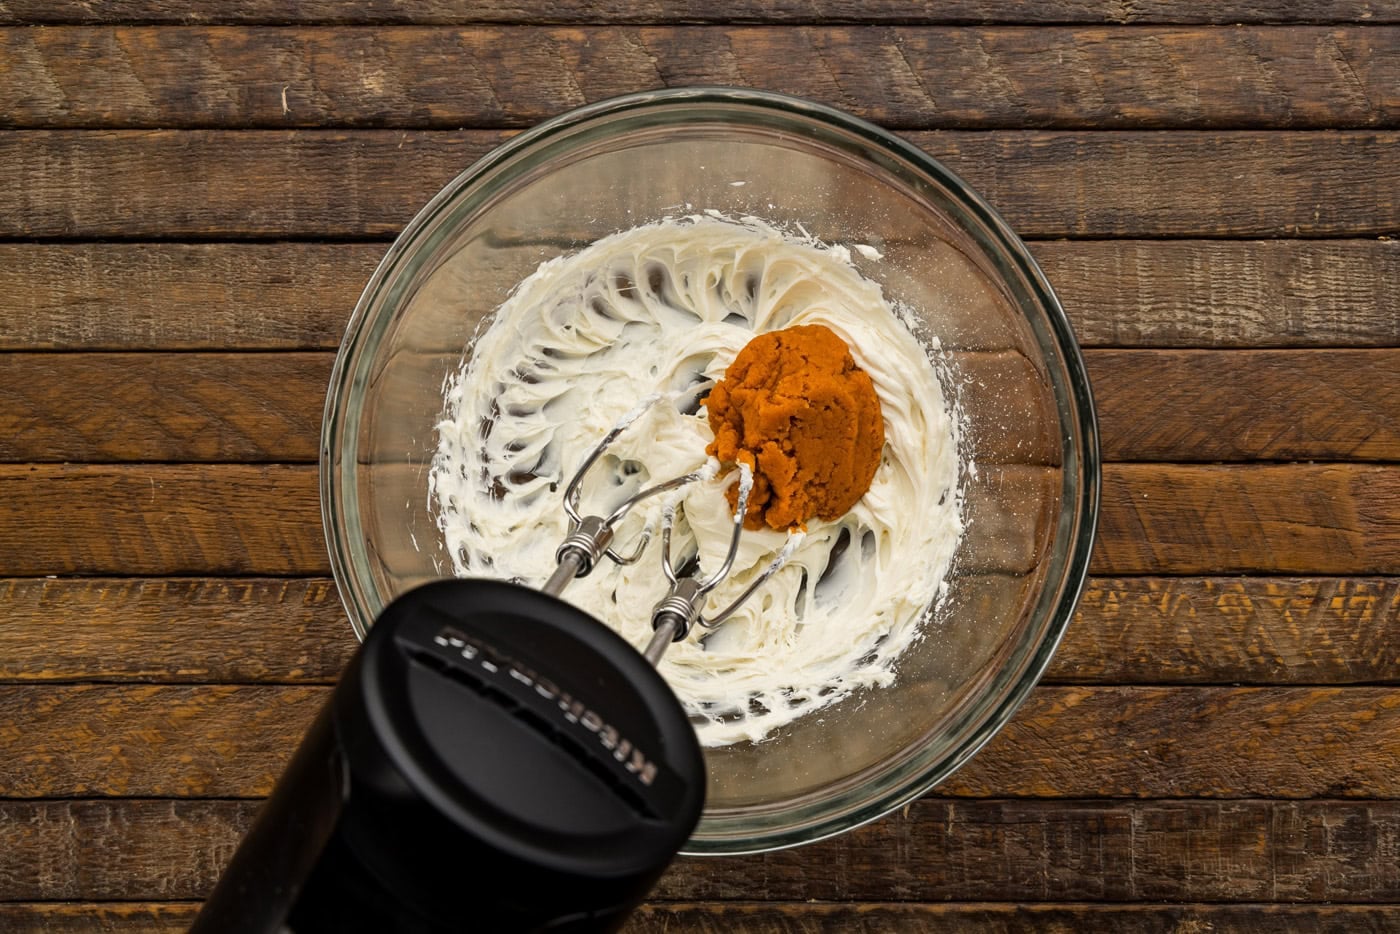
- In a medium bowl, beat the softened cream cheese and confectioners’ sugar with a hand mixer until smooth, about 2 minutes. Beat in the blotted pumpkin until fully combined.
- Add the graham cracker crumbs, pumpkin pie spice, cinnamon, and salt, then pour in the melted wafers. Beat on medium until the mixture is thick and evenly combined. It should hold its shape on the beater.
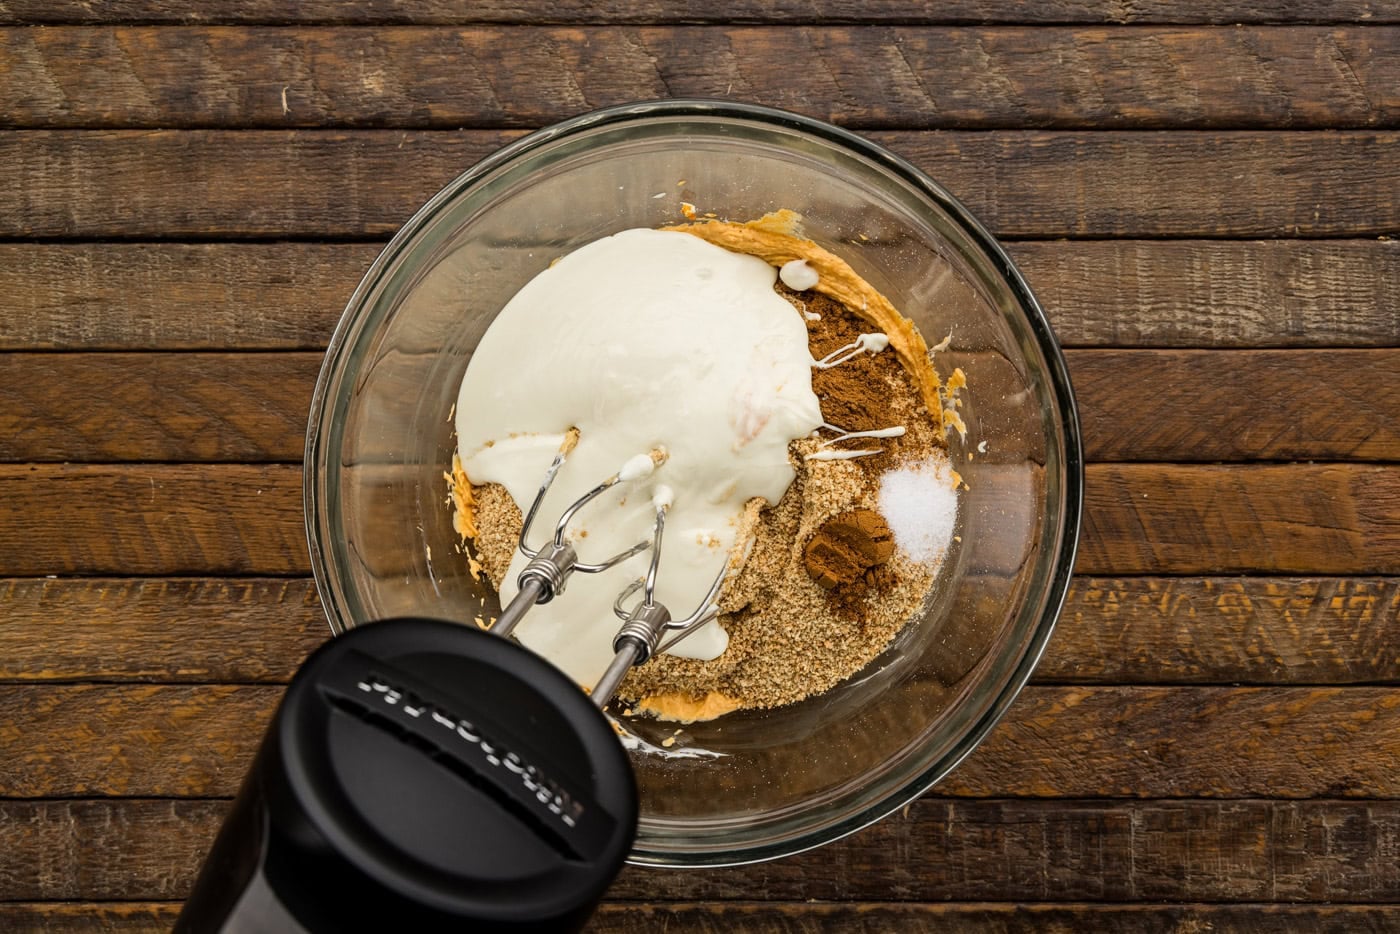
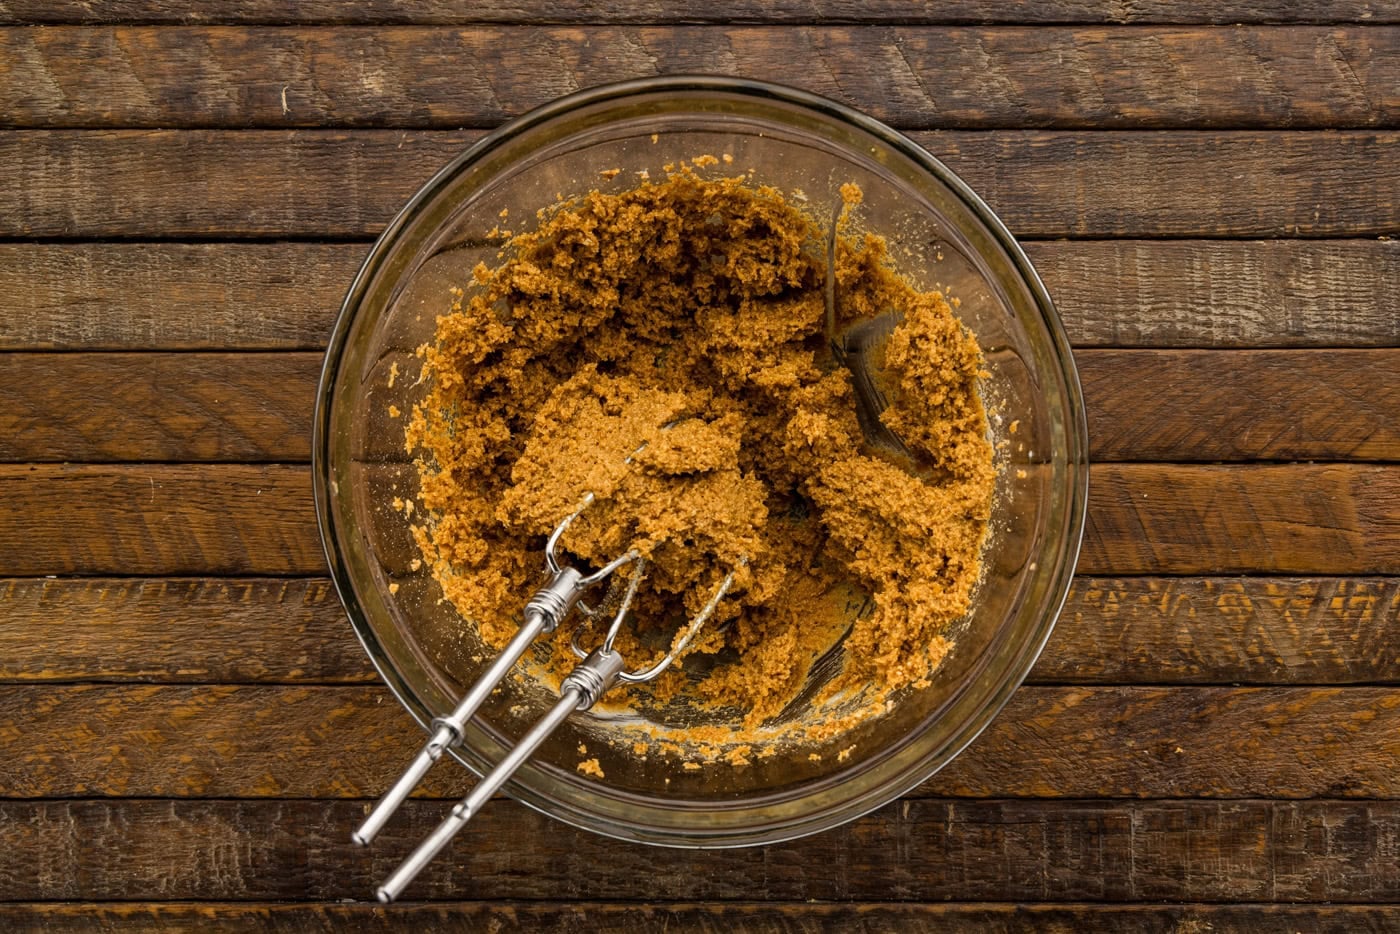
- Cover and refrigerate until firm enough to roll, about 90 minutes. You can check at 60 minutes, it may be ready.
- Line a baking sheet with parchment. Using a 1 Tablespoon cookie scoop, scoop and roll the filling into smooth balls, about 20 total. Work in small batches straight from the fridge. Wearing disposable gloves and dipping the scoop in water, then shaking off the excess, between each ball keeps the filling from sticking. If the dough warms and gets tacky, return it to the fridge for 10 minutes.
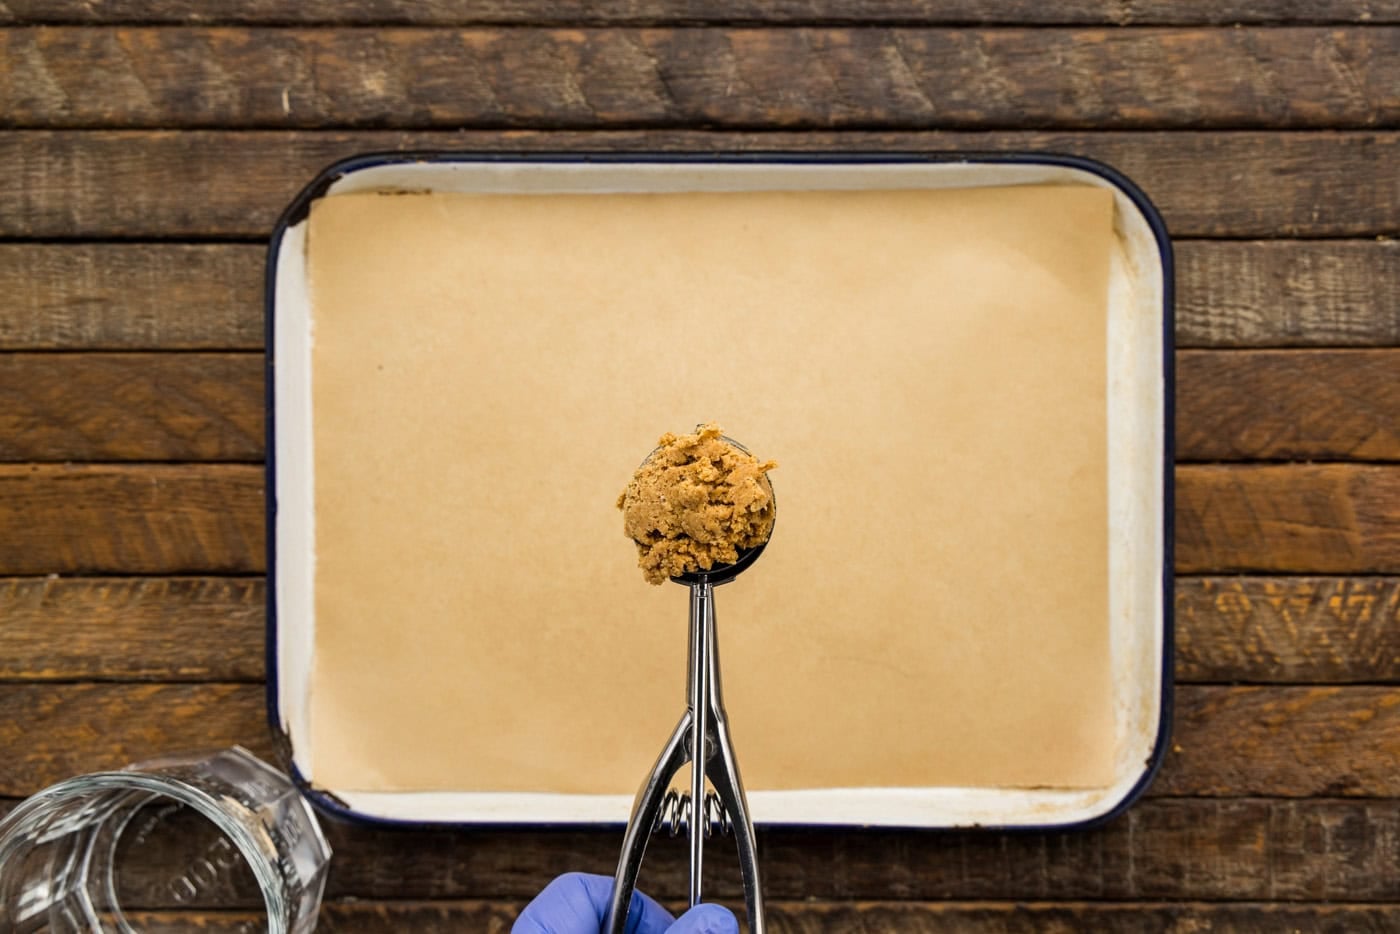
- Refrigerate the rolled balls for 30 minutes.
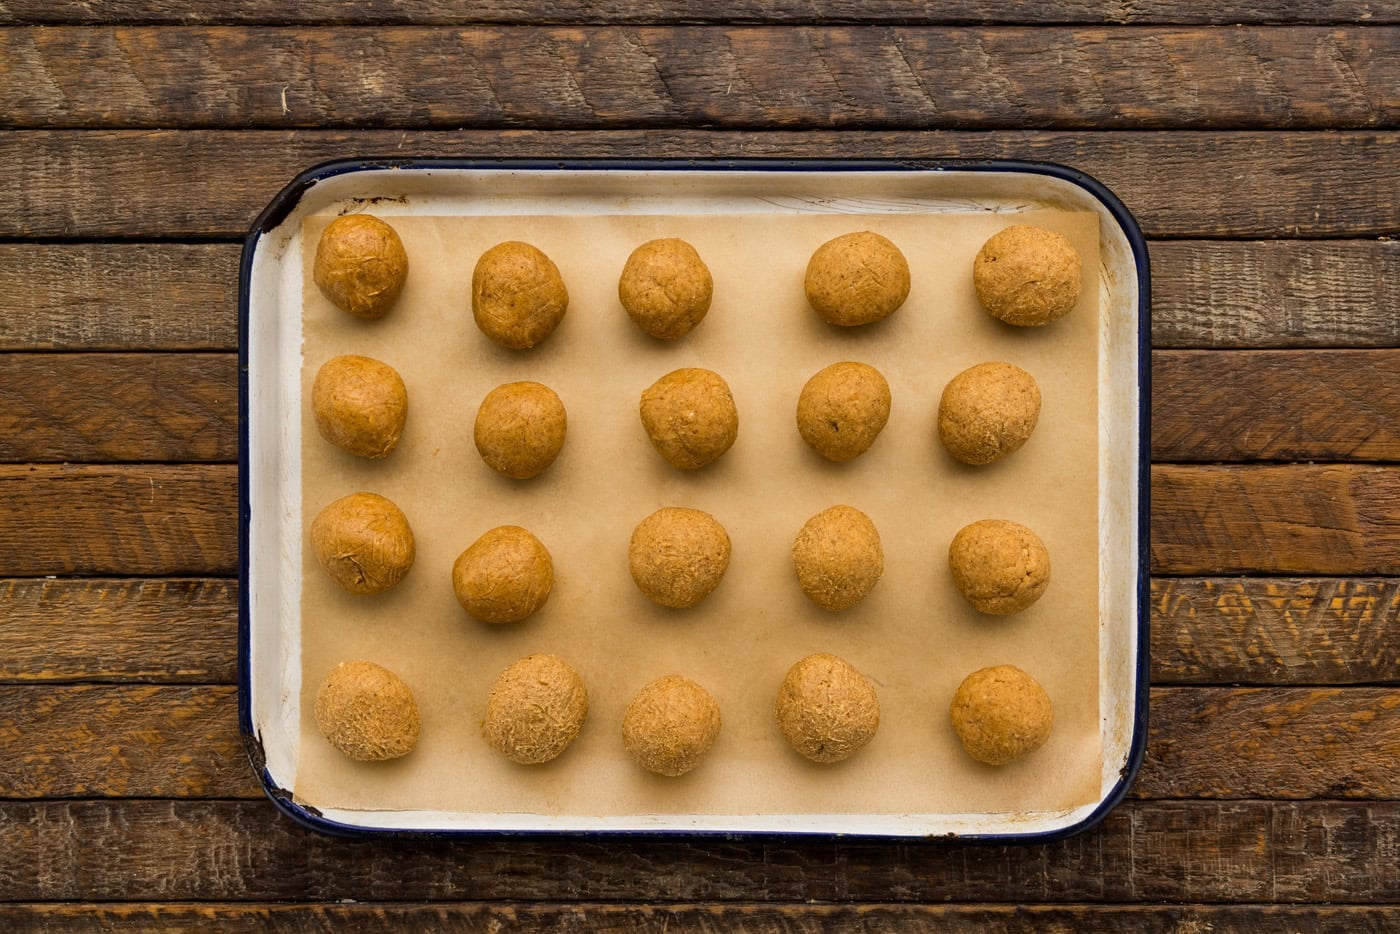
- Melt the 8 ounces of coating wafers in a deep narrow bowl in 20 to 30 second bursts, stirring between each, until smooth. Let cool for a few minutes so it is fluid but not hot.
- Drop one chilled ball into the chocolate, lift it out with a fork or dipping tool, tap off the excess against the rim, and set it back on the parchment. Using a toothpick to slide the dipped truffle off of the fork makes it a bit easier. Sprinkle a little graham cracker crumb on top before the shell sets.
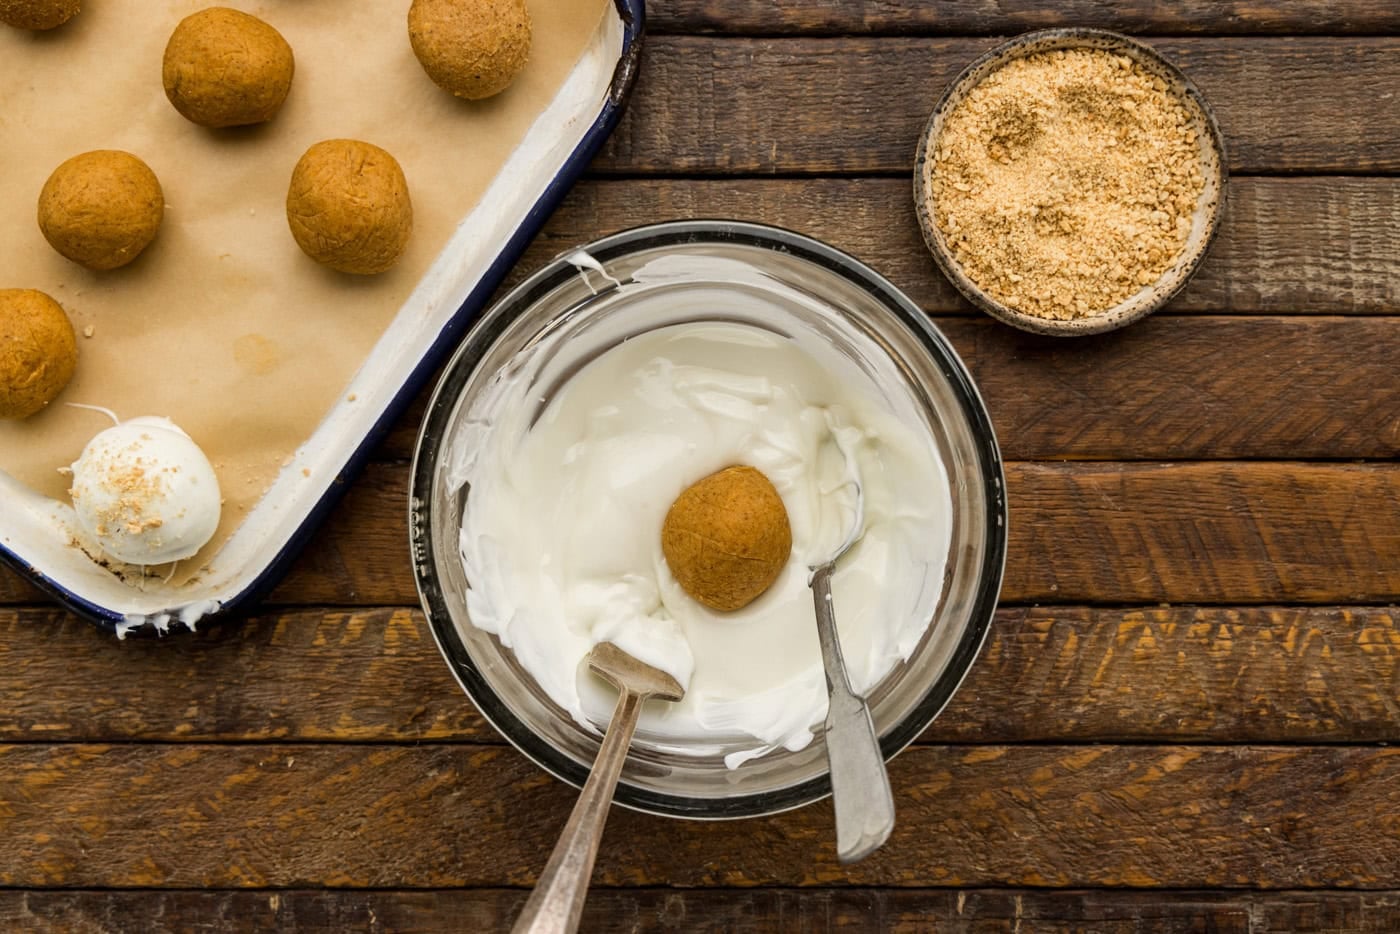
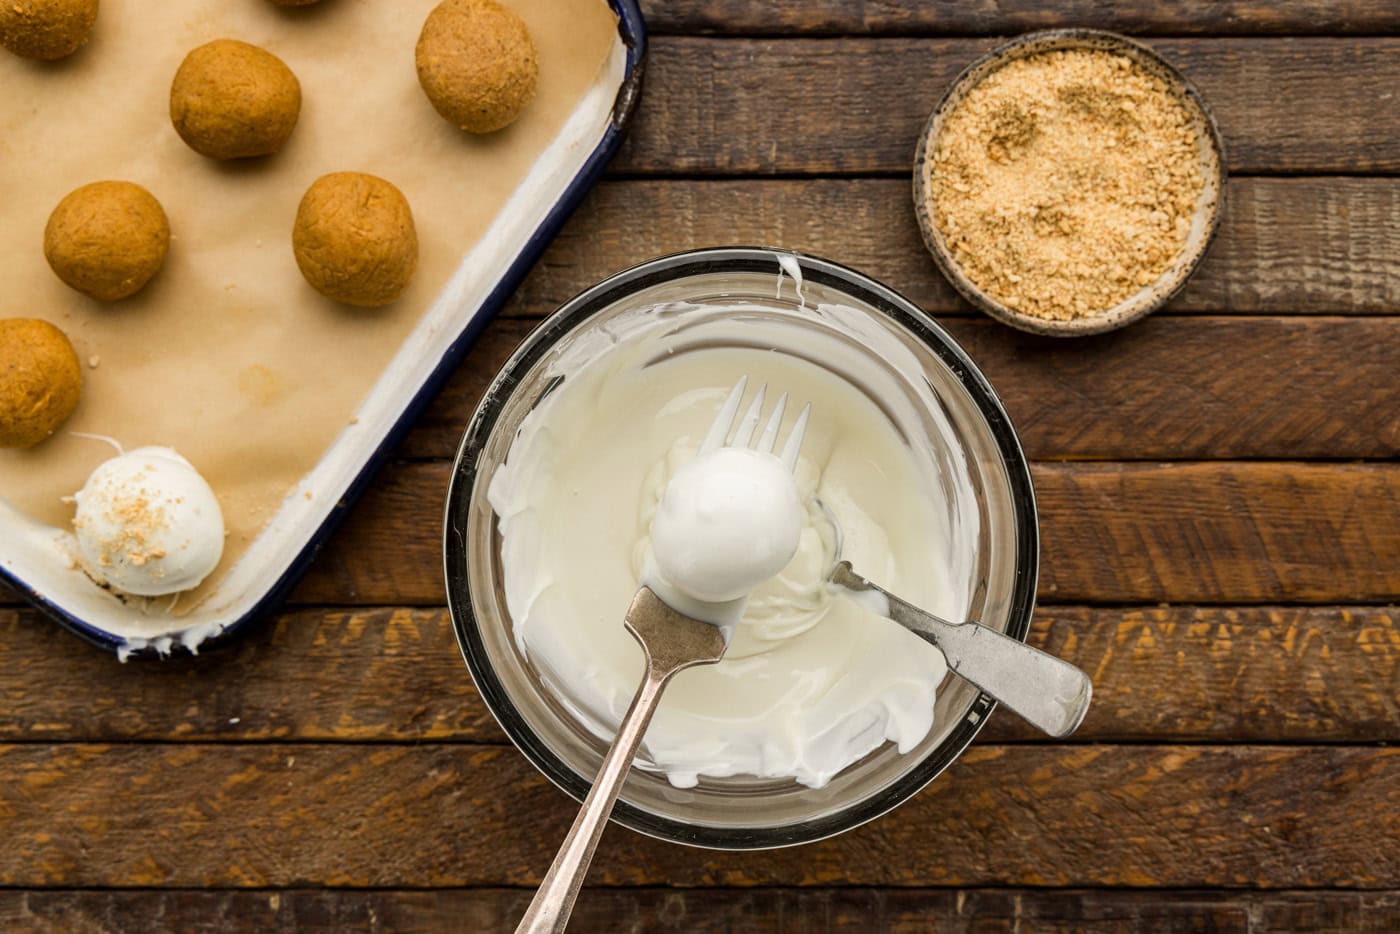
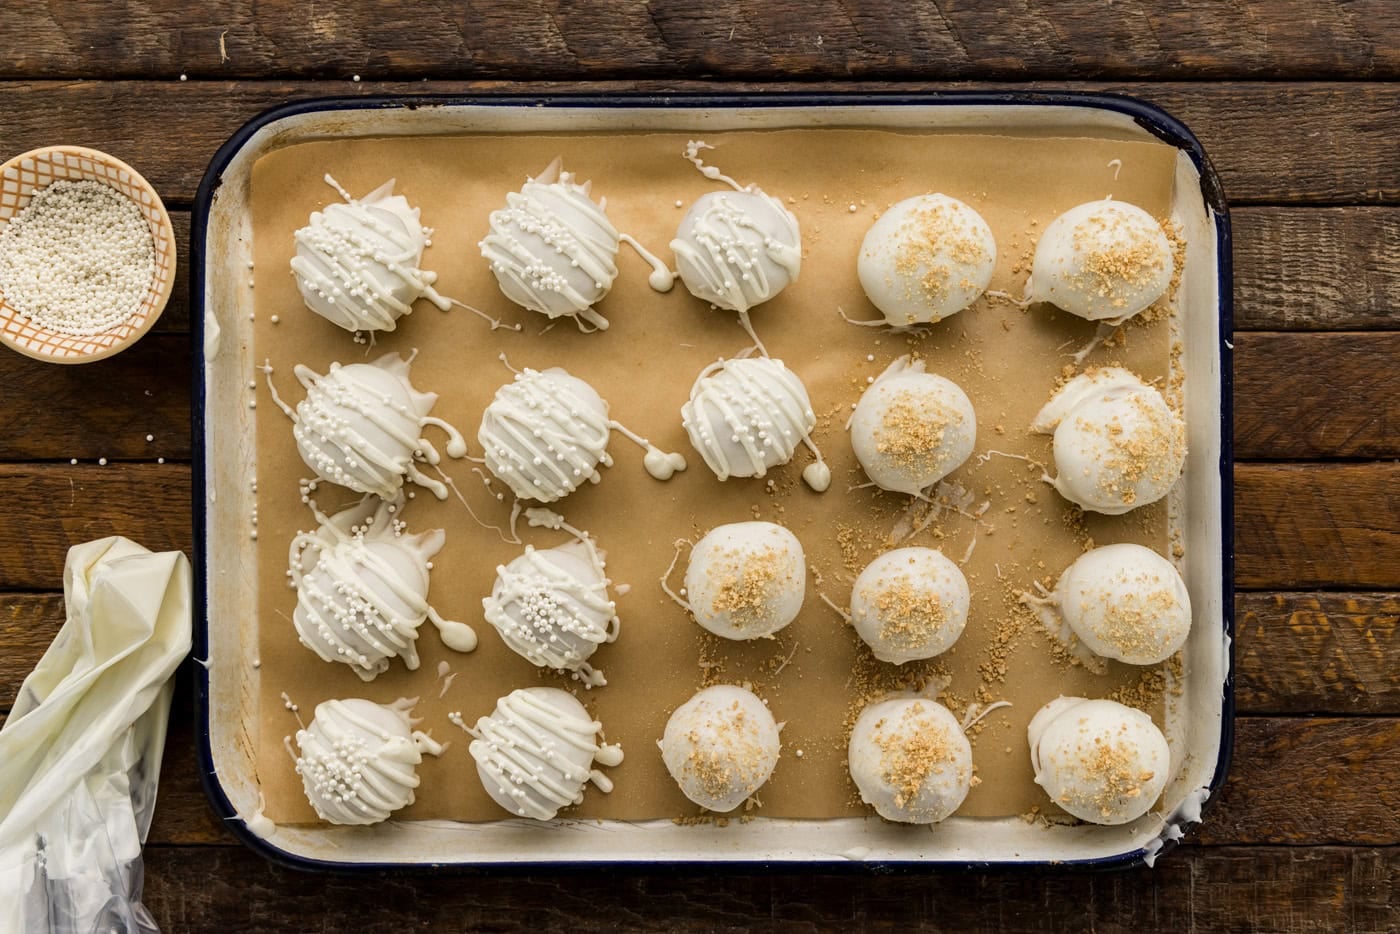
- You can optionally drizzle any remaining melted white chocolate on top of your dipped truffles. Place it in a ziptop bag and snip off the end to drizzle.
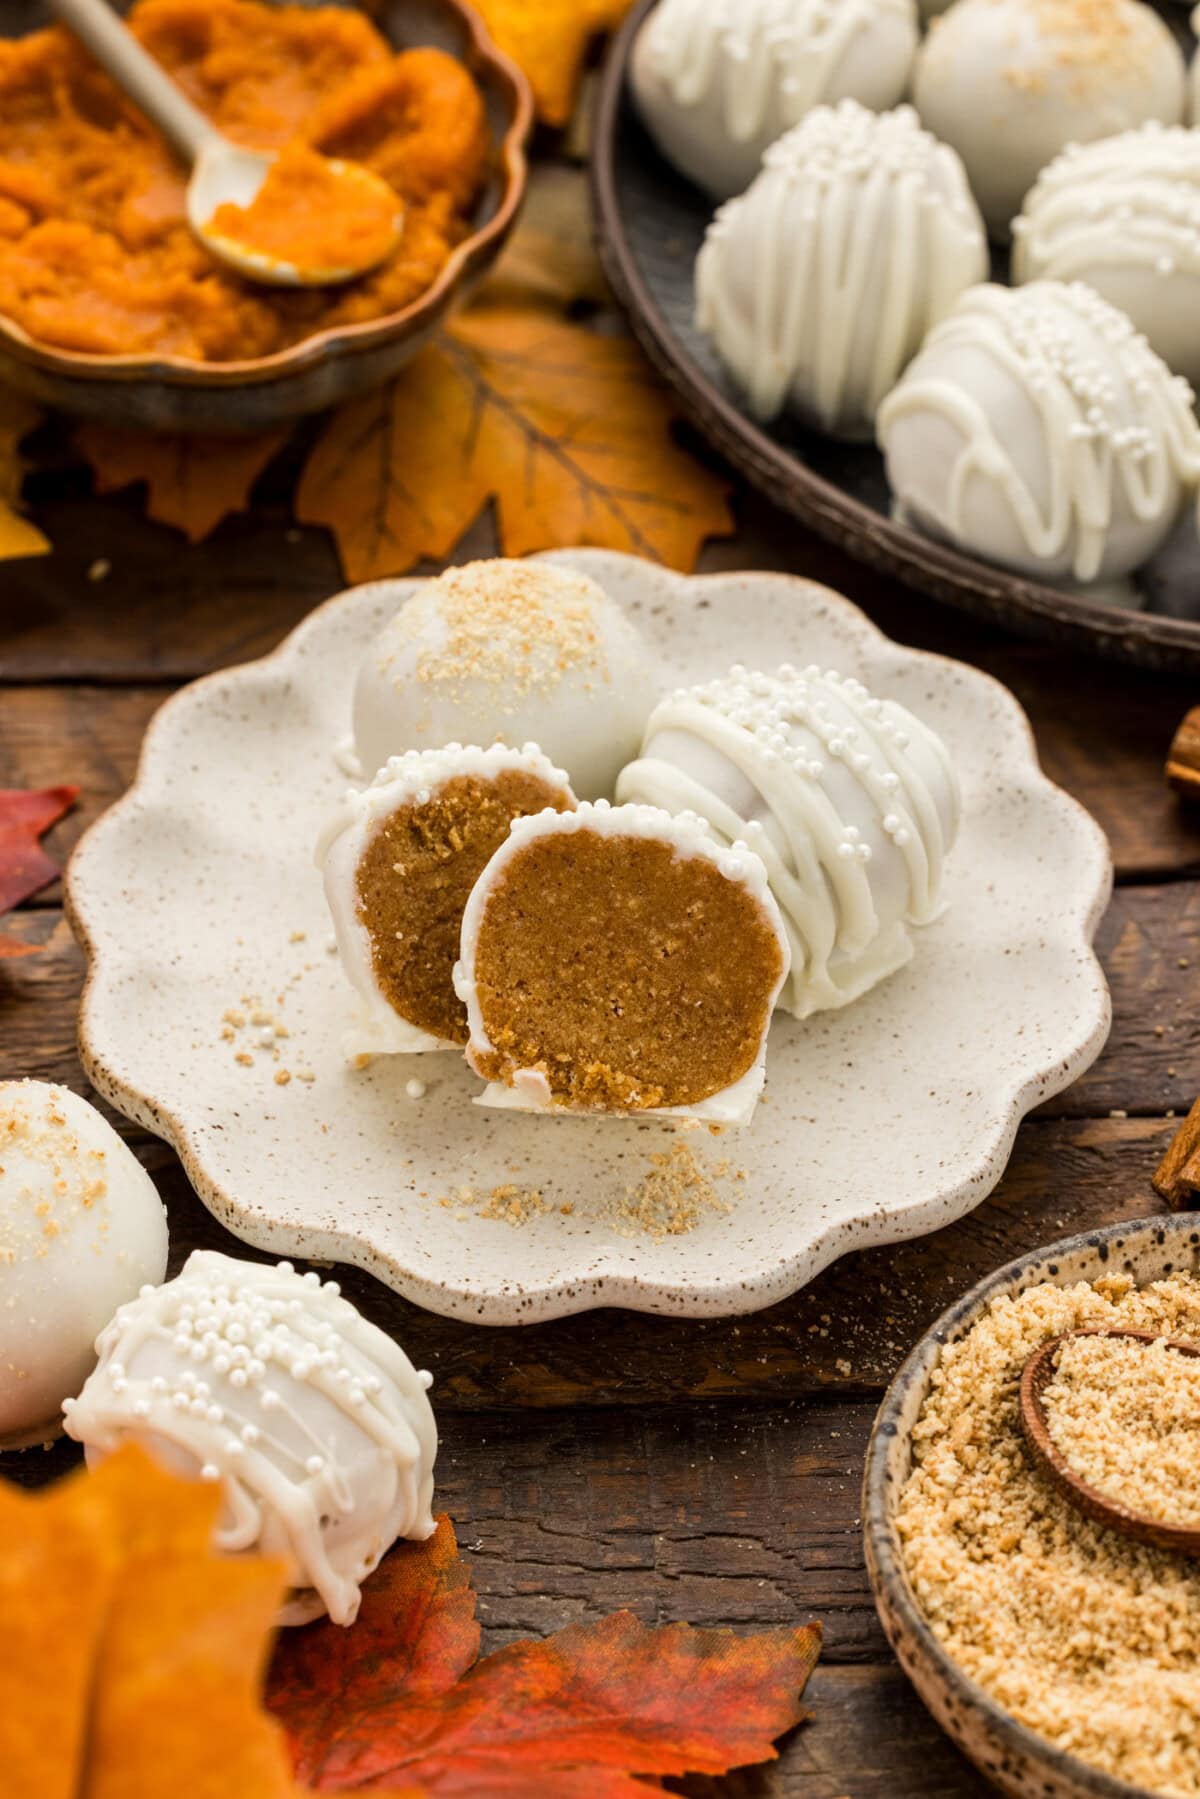
- Refrigerate until the shells are firm, about 30 minutes. Serve chilled.
Frequently Asked Questions & Expert Tips
Canned pumpkin is mostly water, and in a no bake filling there is no oven to cook that moisture off, so it stays in the dough and keeps it soft. Blotting the pumpkin first removes the extra water and fixes this before it starts. If your dough still feels tacky as you work, it is warming up from your hands. Wearing disposable gloves helps, and so does dipping your cookie scoop in water and shaking off the excess between each ball. Keep the bowl in the fridge and roll in small batches.
I would highly recommend it, yes. This step makes the biggest difference and it takes under a minute to do. Alternatively, you can drain the puree in a fine mesh strainer for about 30 minutes, though pressing with paper towels pulls more water and is a lot quicker.
I would stick with canned, and Libby’s specifically, because it is thick and consistent. Homemade and many organic purees hold much more water, which is the opposite of what you want here. If you do use one, blot it more aggressively.
I use white melting wafers, which set up reliably and do not need tempering. Semi-sweet or dark work well too and cut the sweetness if you find white chocolate too sweet. Melting wafers or bar chocolate both dip easier than chocolate chips, which are made to hold their shape and do not melt as smooth.
About 8 ounces, or one cup of melting wafers, was enough to coat my full batch. Melt it in a deep narrow bowl or a liquid measuring cup rather than a wide shallow dish. That gives you enough depth to fully submerge and lift each truffle without scraping the bottom on the last few. Any leftover melted coating keeps and can be remelted.
Storage and Freezing Information
Store finished pumpkin truffles in an airtight container kept in the refrigerator for up to one week. Because the filling is cream cheese based, they need to stay chilled.
To freeze, arrange the truffles in a single layer on a parchment lined baking sheet, not touching, and flash freeze until solid, about 2 hours. Once firm, transfer them to an airtight container or freezer bag with parchment between the layers, and freeze for up to three months. When you are ready to serve, thaw them in the refrigerator, which keeps condensation off the chocolate shell.
You can also make these ahead in stages. The rolled, undipped filling balls freeze well, so you can roll them, freeze them, and dip them closer to when you need them. Let them firm up just enough to handle before dipping.
I found the pumpkin flavor comes through a little more the day after they are made, so a batch made a day early tastes even better.
Serving Suggestions
I think these pumpkin truffles would make a sweet little edible gift for fall or Thanksgiving, wrapped in cellophane baggies or packaged in a treat box. They’d also be great for Halloween parties stacked on a dessert tray or served with some hot coffee or a pumpkin spice latte.
More Pumpkin Recipes
I love to bake and cook and share my kitchen experience with all of you! Remembering to come back each day can be tough, that’s why I offer a convenient newsletter every time a new recipe posts. Simply subscribe and start receiving your free daily recipes!
Pumpkin Truffles
IMPORTANT – There are often Frequently Asked Questions within the blog post that you may find helpful. Simply scroll back up to read them!
Print It Pin It Rate ItIngredients
Filling
- ⅓ cup canned pumpkin puree 86g, blotted to about 61g. I used Libby's
- 4 ounces white melting wafers 1/2 cup. melted
- 3 ounces full fat cream cheese 85g. brick style, softened at room temp.
- 2 Tablespoons confectioners sugar
- 10 full graham crack sheets finely ground (about 1 1/4 cups crumbs once ground / 150g)
- 1 teaspoon pumpkin pie spice
- ½ teaspoon ground cinnamon
- ¼ teaspoon table salt
Coating
- 8 ounces white melting wafers 1 cup
- 2 Tablespoons graham cracker crumbs for garnish
Before You Begin
- Blot the pumpkin. Seriously, it can make or break your truffles. Canned pumpkin is mostly water, and with no oven to cook it off, that water keeps your filling too soft to roll. Blotting takes under a minute to do and fixes this problem.
- Grind the graham crackers fine for the smoothest texture, and weigh your ingredients if you can. Graham crumb volume varies a lot with how fine you grind. Going off weights will keep the filling consistent.
- If you substitute the melting wafers with white chocolate chips or a chopped bar, melt them over a double boiler and turn off the heat as soon as they are about halfway melted, then stir off the heat until smooth. White chocolate scorches easily so keep an eye on it.
- Work cold. The filling rolls well when chilled and turns sticky as it warms from your hands. Keep the bowl in the fridge and roll in small batches. Wearing disposable gloves and dipping your cookie scoop in water, then shaking off the excess, between each ball keeps everything from sticking.
Instructions
- Stack three paper towels on a plate and spread the puree into an even layer about 1/2 inch thick. Lay two more paper towels on top and press down gently with a flat palm for about 10 seconds, then peel them away. You want to end up with about 61g, roughly a third less than you started with. It should hold a soft shape rather than slumping flat.1/3 cup canned pumpkin puree
- Melt the white melting wafers in a microwave safe bowl in 20 to 30 second bursts, stirring between each, until smooth. Set aside to cool slightly while you start the filling.4 ounces white melting wafers
- In a medium bowl, beat the softened cream cheese and confectioners' sugar with a hand mixer until smooth, about 2 minutes. Beat in the blotted pumpkin until fully combined.3 ounces full fat cream cheese, 2 Tablespoons confectioners sugar
- Add the graham cracker crumbs, pumpkin pie spice, cinnamon, and salt, then pour in the melted wafers. Beat on medium until the mixture is thick and evenly combined. It should hold its shape on the beater.10 full graham crack sheets, 1 teaspoon pumpkin pie spice, 1/2 teaspoon ground cinnamon, 1/4 teaspoon table salt
- Cover and refrigerate until firm enough to roll, about 90 minutes. You can check at 60 minutes, it may be ready.
- Line a baking sheet with parchment. Using a 1 Tablespoon cookie scoop, scoop and roll the filling into smooth balls, about 20 total. Work in small batches straight from the fridge. Wearing disposable gloves and dipping the scoop in water, then shaking off the excess, between each ball keeps the filling from sticking. If the dough warms and gets tacky, return it to the fridge for 10 minutes.
- Refrigerate the rolled balls for 30 minutes.
- Melt the coating wafers in a deep narrow bowl in 20 to 30 second bursts, stirring between each, until smooth. Let cool for a few minutes so it is fluid but not hot.8 ounces white melting wafers
- Drop one chilled ball into the chocolate, lift it out with a fork or dipping tool, tap off the excess against the rim, and set it back on the parchment. Using a toothpick to slide the dipped truffle off of the fork makes it a bit easier. Sprinkle a little graham cracker crumb on top before the shell sets.You can optionally drizzle any remaining melted white chocolate on top of your dipped truffles. Place it in a ziptop bag and snip off the end to drizzle.2 Tablespoons graham cracker crumbs
- Refrigerate until the shells are firm, about 30 minutes. Serve chilled.
Expert Tips & FAQs
- These are make ahead friendly. The pumpkin flavor comes through a little more the next day!
- Store finished pumpkin truffles in an airtight container kept in the refrigerator for up to one week. Because the filling is cream cheese based, they need to stay chilled.
- To freeze, arrange the truffles in a single layer on a parchment lined baking sheet, not touching, and flash freeze until solid, about 2 hours. Once firm, transfer them to an airtight container or freezer bag with parchment between the layers, and freeze for up to three months. When you are ready to serve, thaw them in the refrigerator, which keeps condensation off the chocolate shell.
Nutrition
The recipes on this blog are tested with a conventional gas oven and gas stovetop. It’s important to note that some ovens, especially as they age, can cook and bake inconsistently. Using an inexpensive oven thermometer can assure you that your oven is truly heating to the proper temperature. If you use a toaster oven or countertop oven, please keep in mind that they may not distribute heat the same as a conventional full sized oven and you may need to adjust your cooking/baking times. In the case of recipes made with a pressure cooker, air fryer, slow cooker, or other appliance, a link to the appliances we use is listed within each respective recipe. For baking recipes where measurements are given by weight, please note that results may not be the same if cups are used instead, and we can’t guarantee success with that method.

- Pumpkin Truffles - September 22, 2026
- Double Chocolate Zucchini Muffins - September 9, 2026
- Dill Pickle Chex Mix - August 11, 2026






Liz says
Amanda, I was wondering if straining the pumpkin purée overnight in the refrigerator, like straining yogurt, would work, as long as I get the resulting weight correct?