


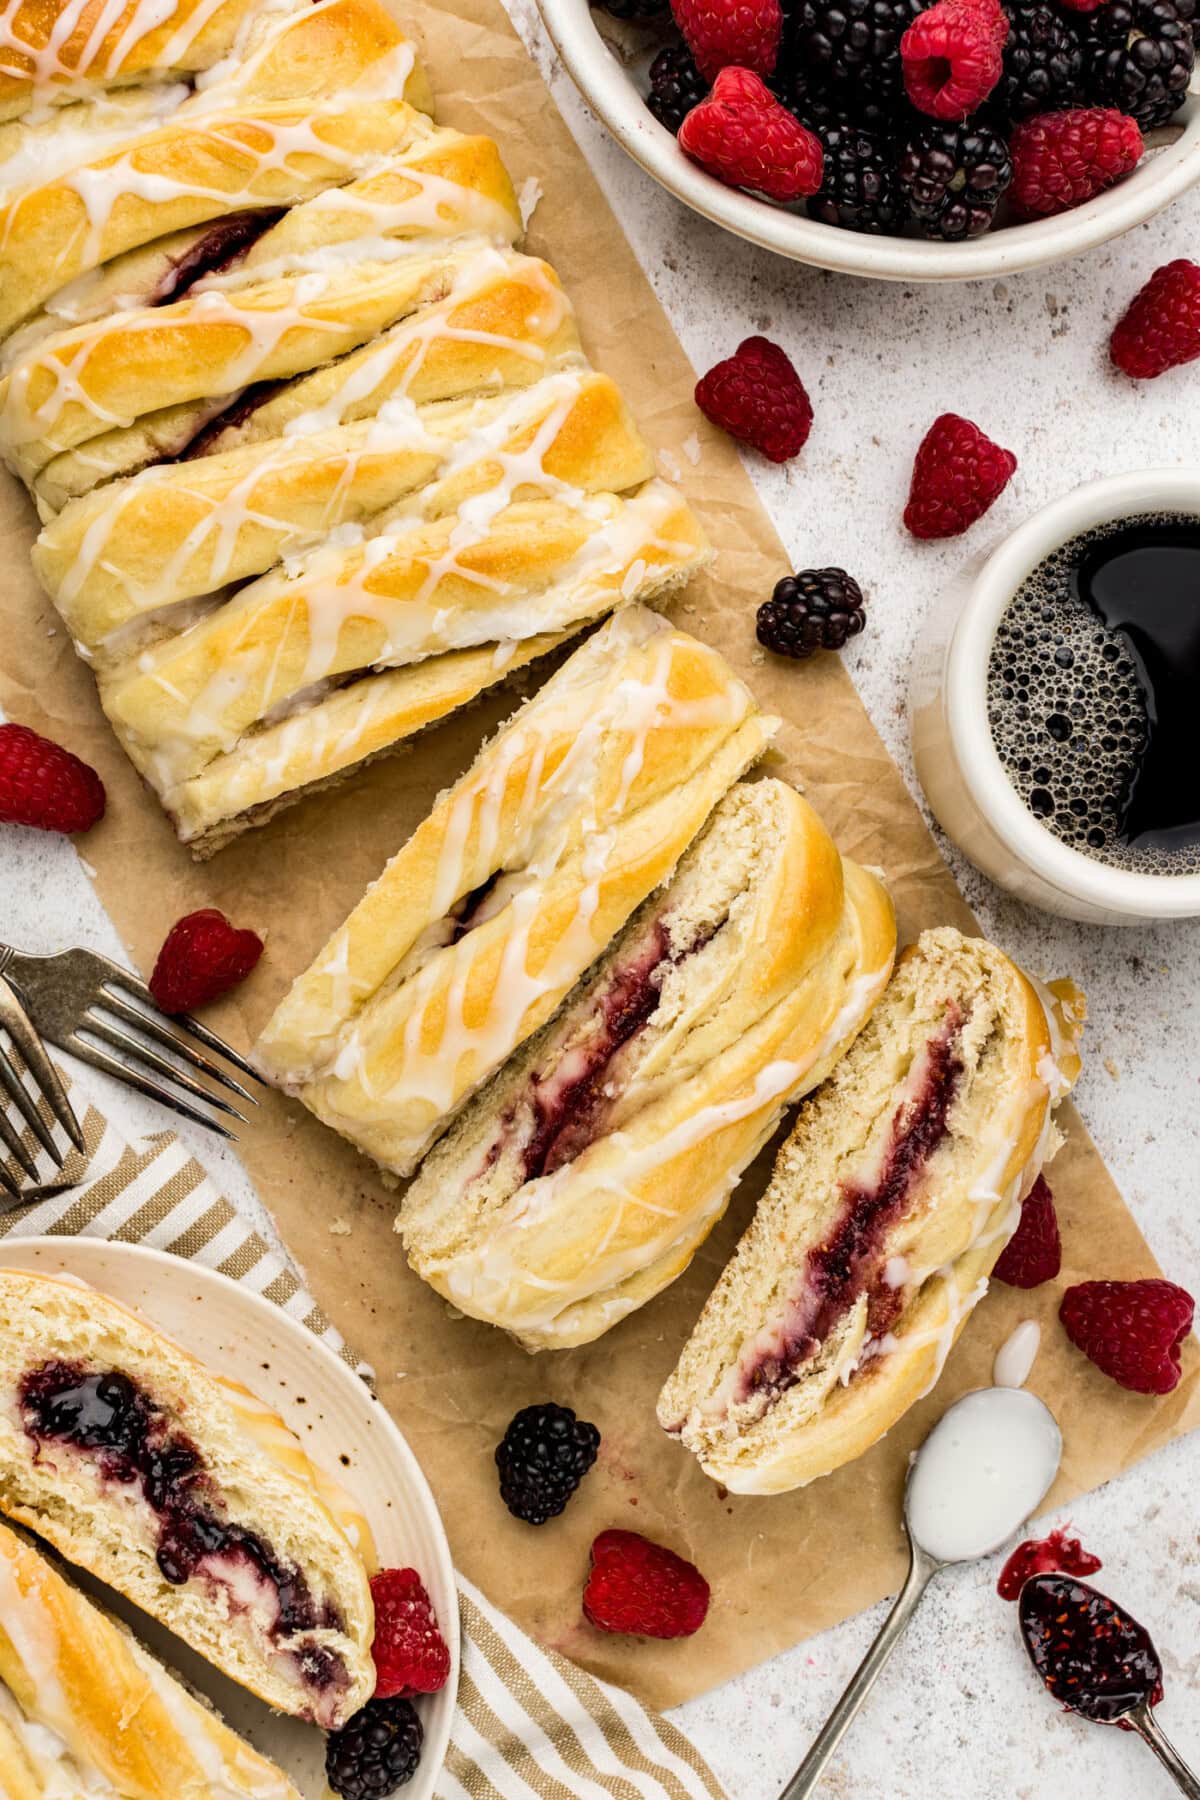
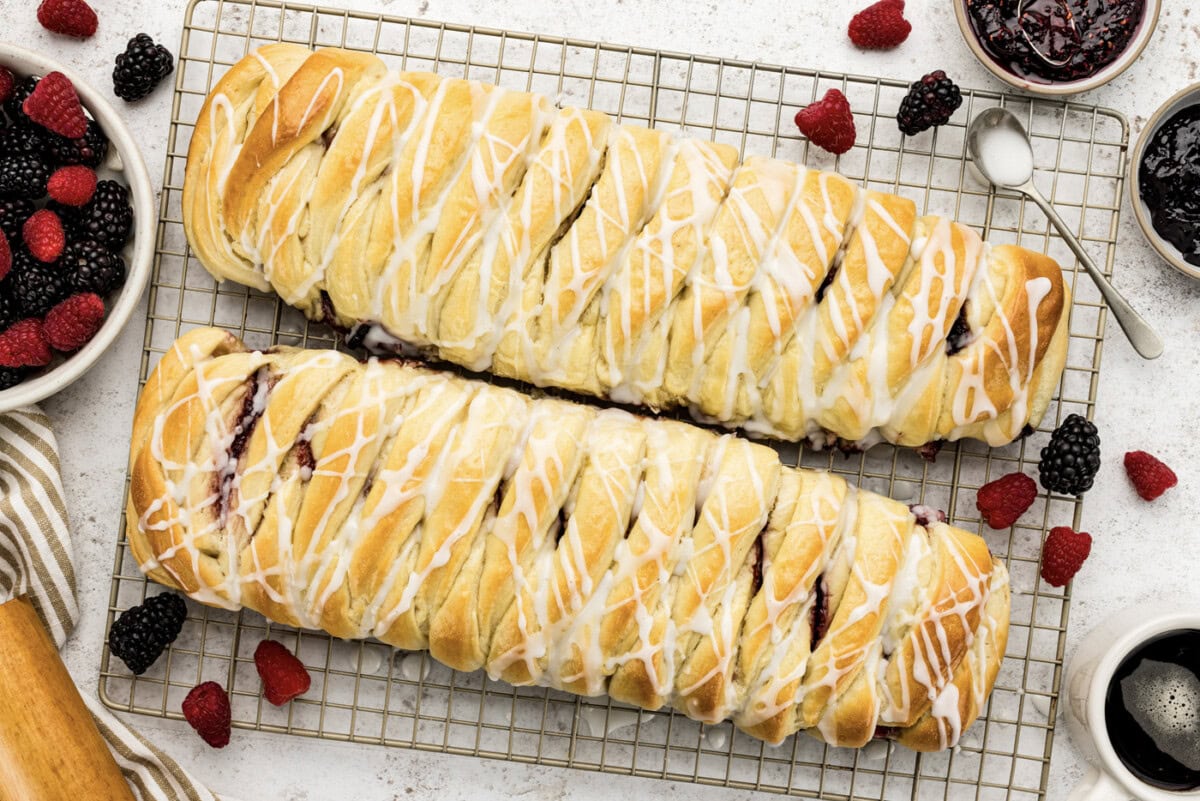
A sweet filling of jam or preserves along with rich cream cheese wrapped inside soft cakey dough ribbons makes this braided breakfast danish feel really special.
Why this recipe works
This beautiful braided breakfast danish makes enough to share with neighbors or family, though you can easily cut the recipe in half if preferred. In fact, because it makes two, I think it would make a sweet Easter or Christmas morning breakfast if you prep it the night before.
Nothing beats a homemade danish. Especially because you can customize your filling with all sorts of different jams or preserves. All the effort you put into this beauty is well worth it once you see those golden brown braids come out of the oven! It’s reminiscent of a coffee cake, with a softer, fluffier crumb as opposed to a flaky, crescent dough kind of pastry. I absolutely love it.
If you’re more inclined to something easier, you’ll probably prefer my cranberry cream cheese pastries, which use store-bought crescent dough.
Ingredients you will need
Get all measurements, ingredients, and instructions in the printable version at the end of this post.
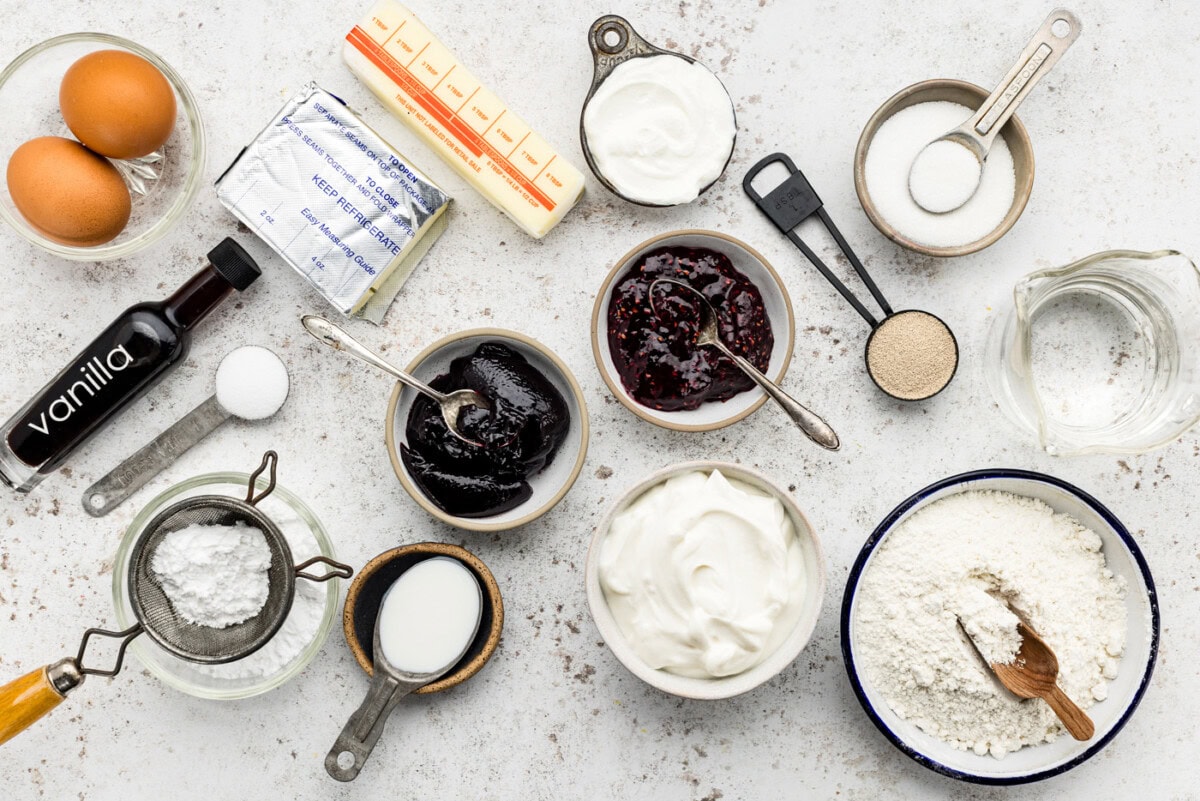
Ingredient Info and Substitution Suggestions
SPONGE – Double check that your yeast is not expired before beginning. The ideal temperature for the warm water should be between 105°F and 115°F, test the water temperature with a thermometer if needed. Anything above 120°F can easily kill your yeast. You don’t need hot water, just warm water! Use a kitchen scale to weigh your flour for the best results.
DOUGH – Allow your chilled ingredients (yogurt, butter, eggs) to come to room temperature before beginning.
FILLING – Just about any kind of fruit jams or preserves can be used here. Apple, raspberry, blackberry, strawberry, apricot, marmalade, and lemon curd are all excellent options. I even think they’d be fantastic with blueberry or cherry pie filling!
How to Make a Braided Breakfast Danish
These step by step photos and instructions are here to help you visualize how to make this recipe. You can Jump to Recipe to get the printable version of this recipe, complete with measurements and instructions at the bottom.
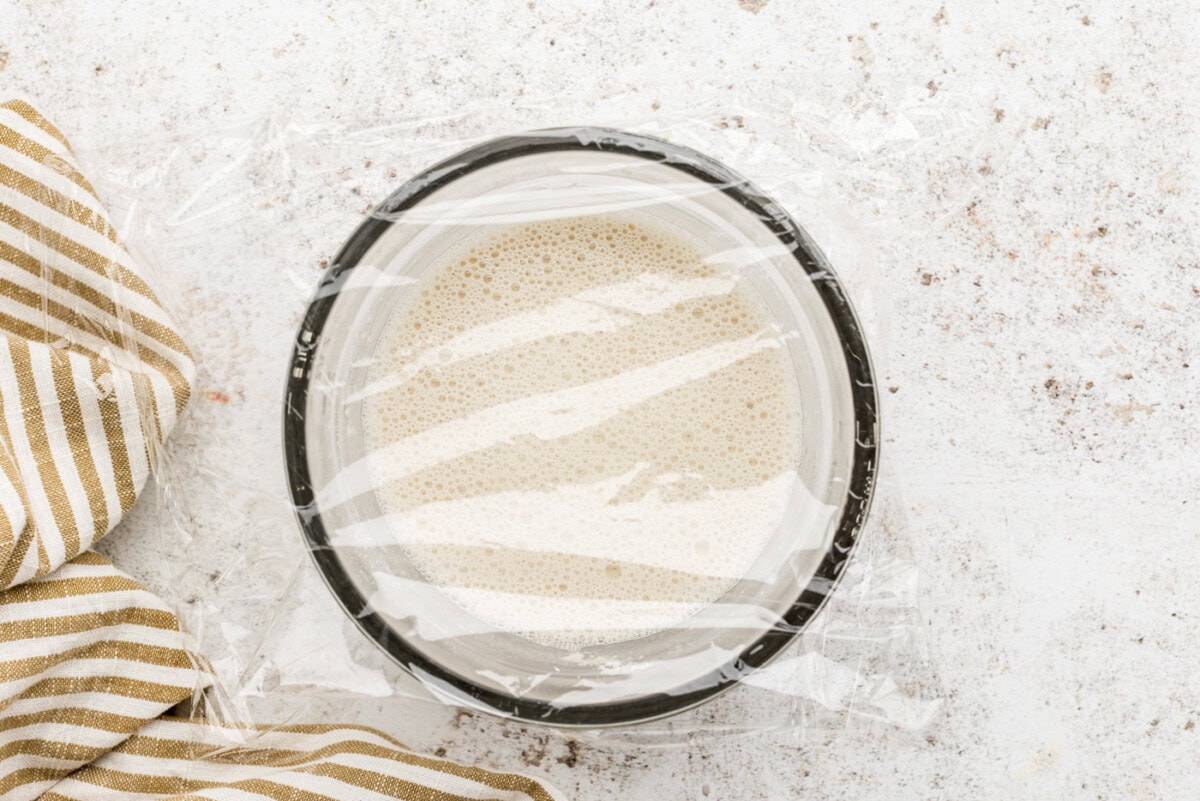
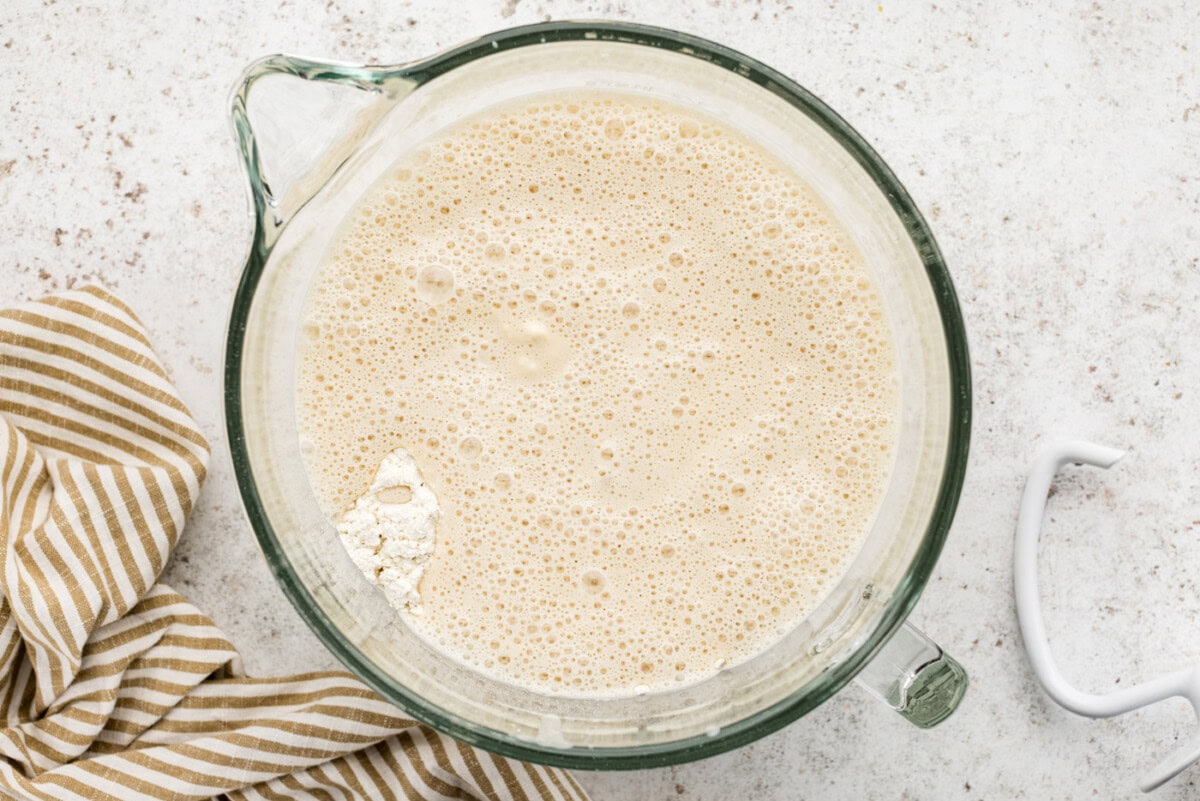
- In a small bowl, combine the sponge ingredients. Stir well to combine, loosely cover with plastic wrap, and set aside to proof for 10 to 15 minutes.
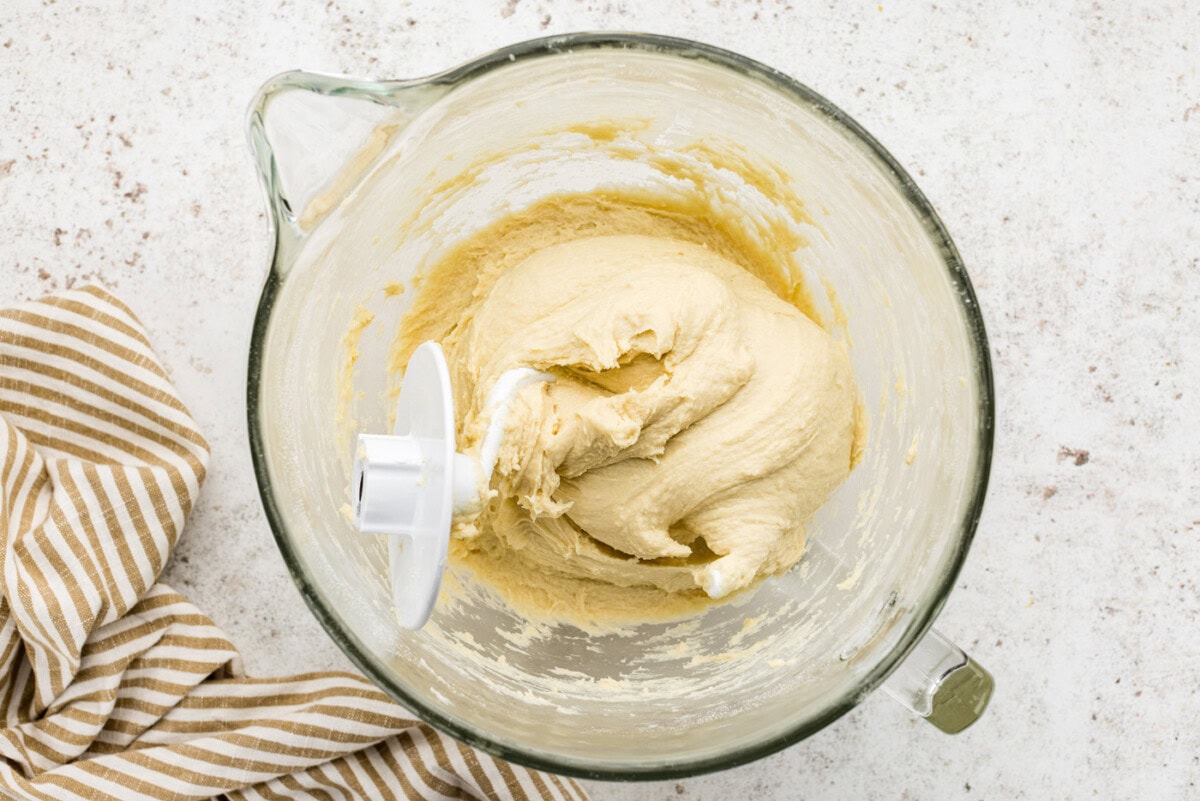
- In the bowl of your stand mixer, combine the dough ingredients with the sponge. Mix with the dough hook and knead on speed 2 until a soft, smooth dough forms, about 5 to 6 minutes.
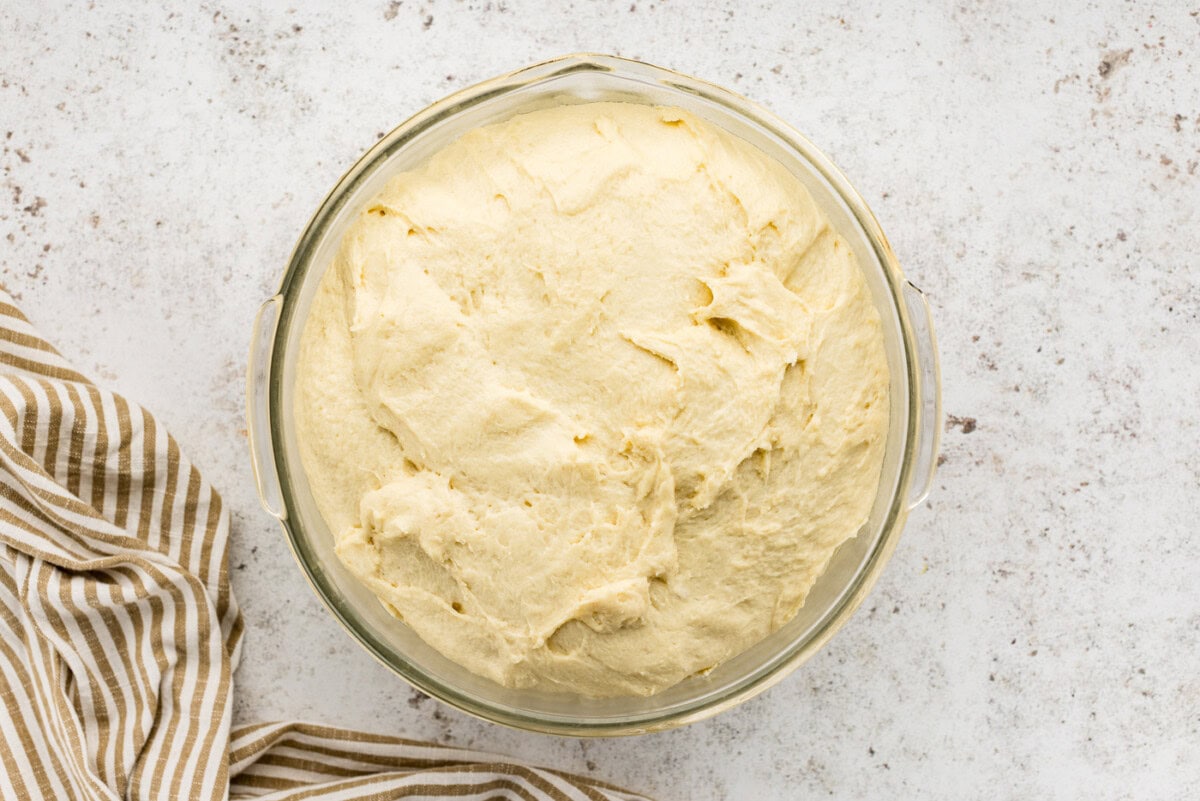
- Place the kneaded dough in a lightly greased bowl, cover with plastic wrap, and allow to rise for 60 to 90 minutes, until quite puffy and nearly doubled.
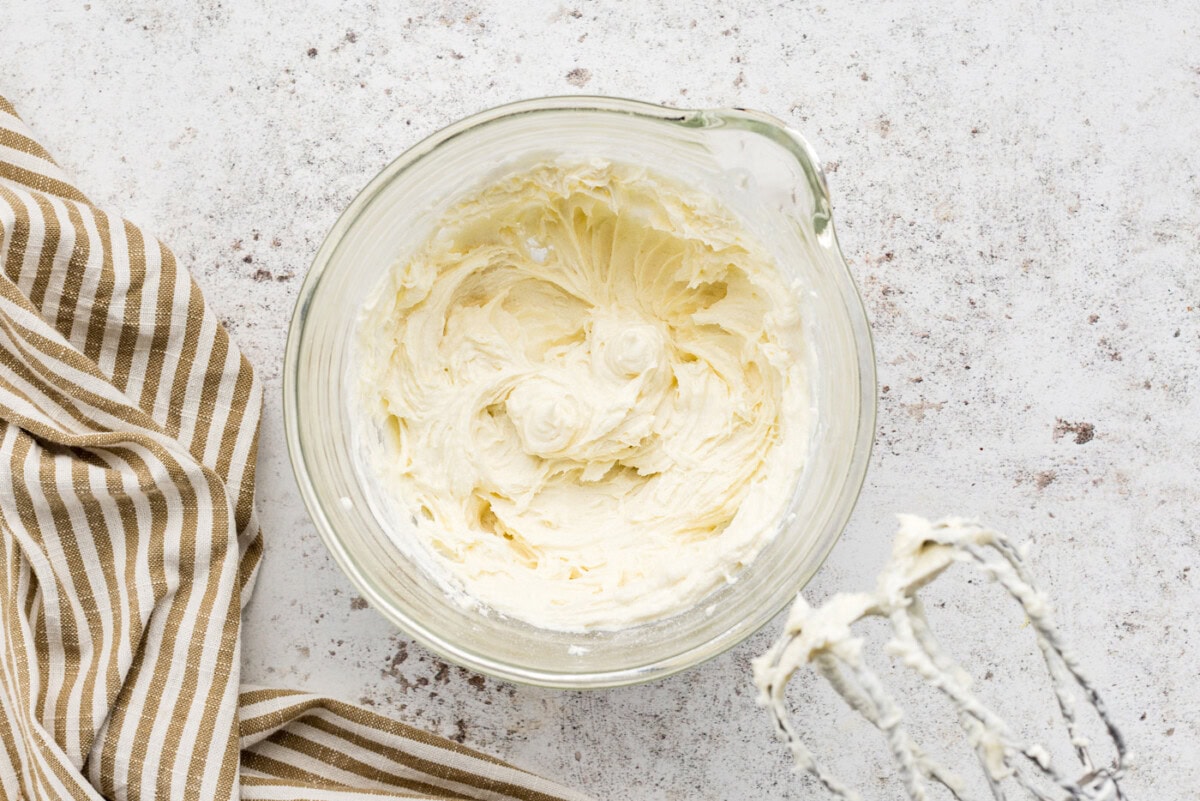
- While the dough is rising, prepare the filling. Combine all the filling ingredients (except the preserves) in a small bowl, mixing until smooth and lump-free. Reserve the filling and preserves until ready to fill the braids.
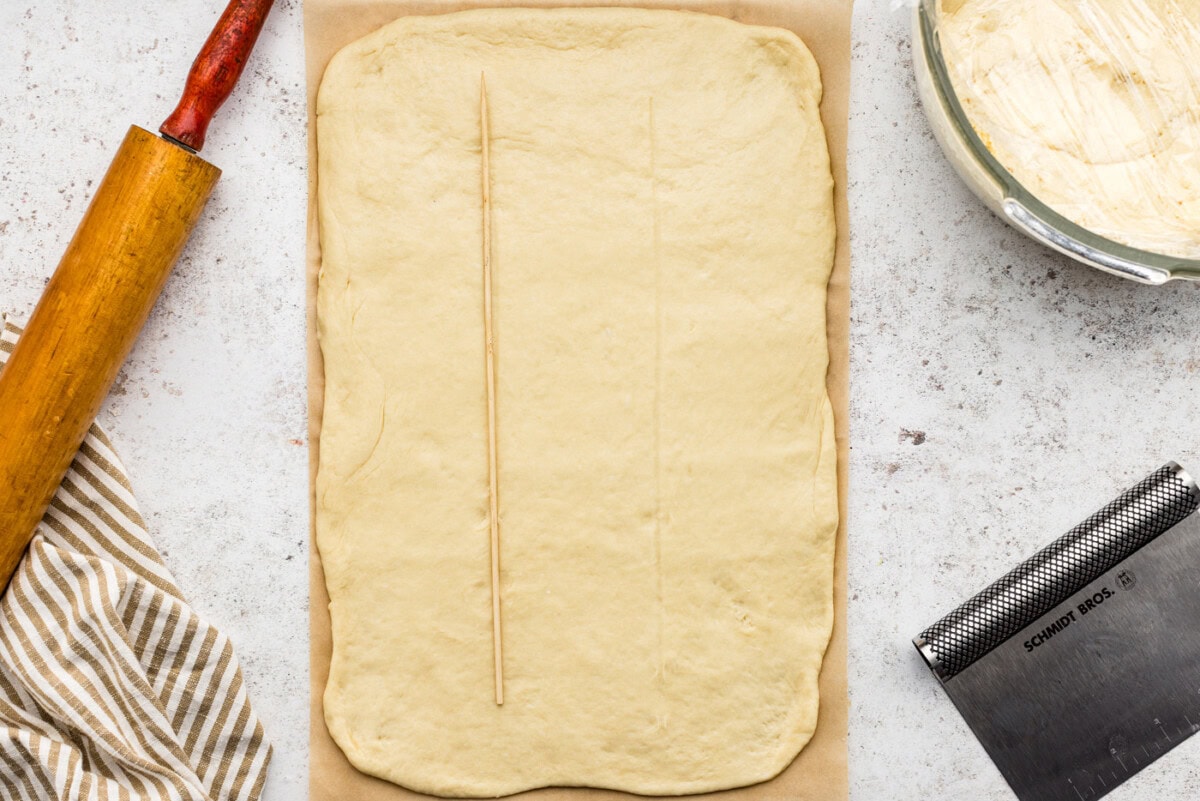
- Cut two pieces of parchment into 10″x15″ rectangles. Gently deflate the dough and divide it in half. Cover half with plastic wrap and set it aside as you roll out the first piece into a 10″ x 15″ rectangle onto one of the parchments. Rolling on parchment paper makes moving the bread to the baking sheet much, much easier.
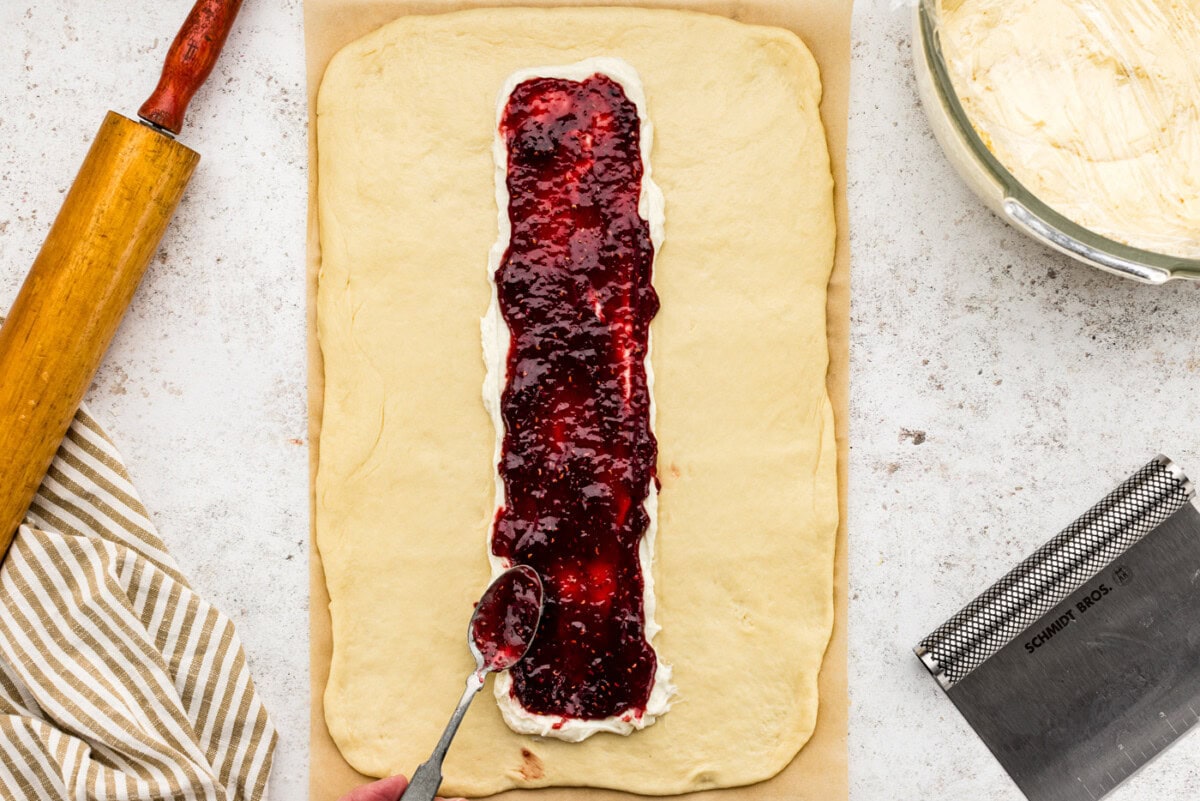
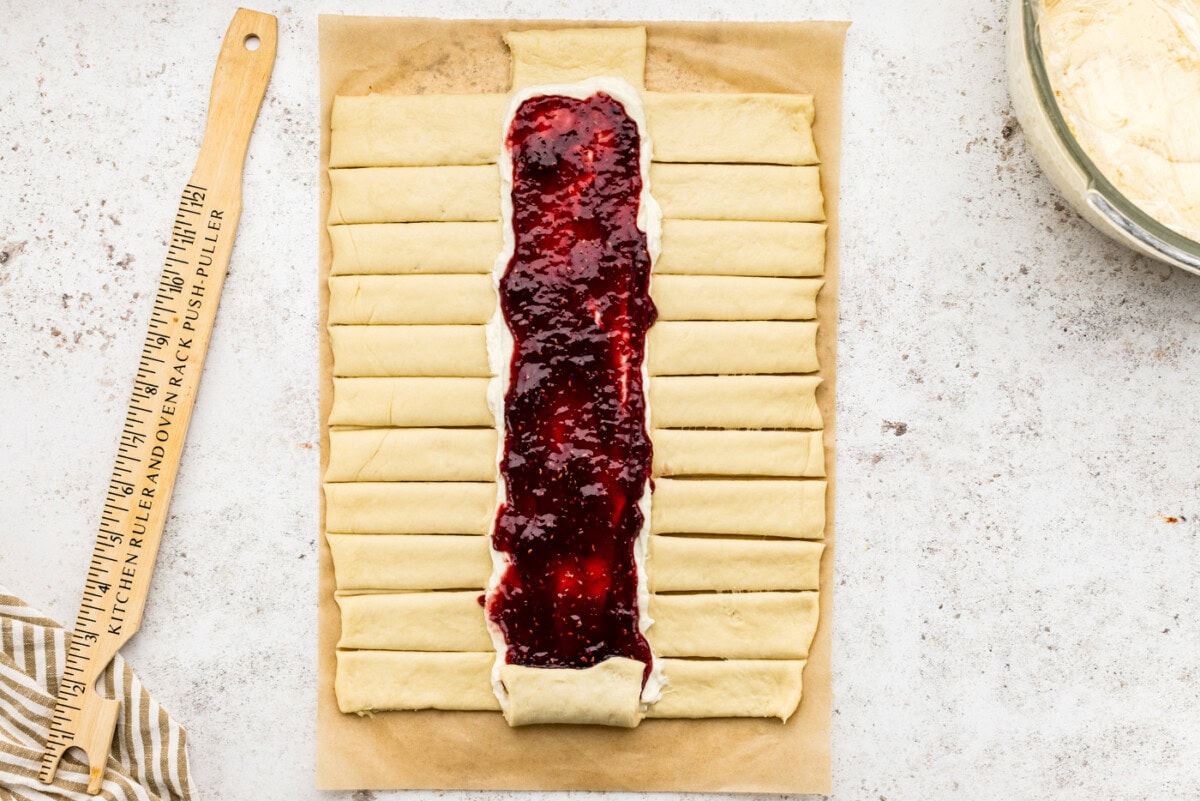
- Lightly press two lines down the dough lengthwise to divide it into 3 equal sections. Spread half the cream cheese filling down the center section, and top with half the preserves, leaving 1″ free on all sides of the filling.
To Make the Braids and Assemble
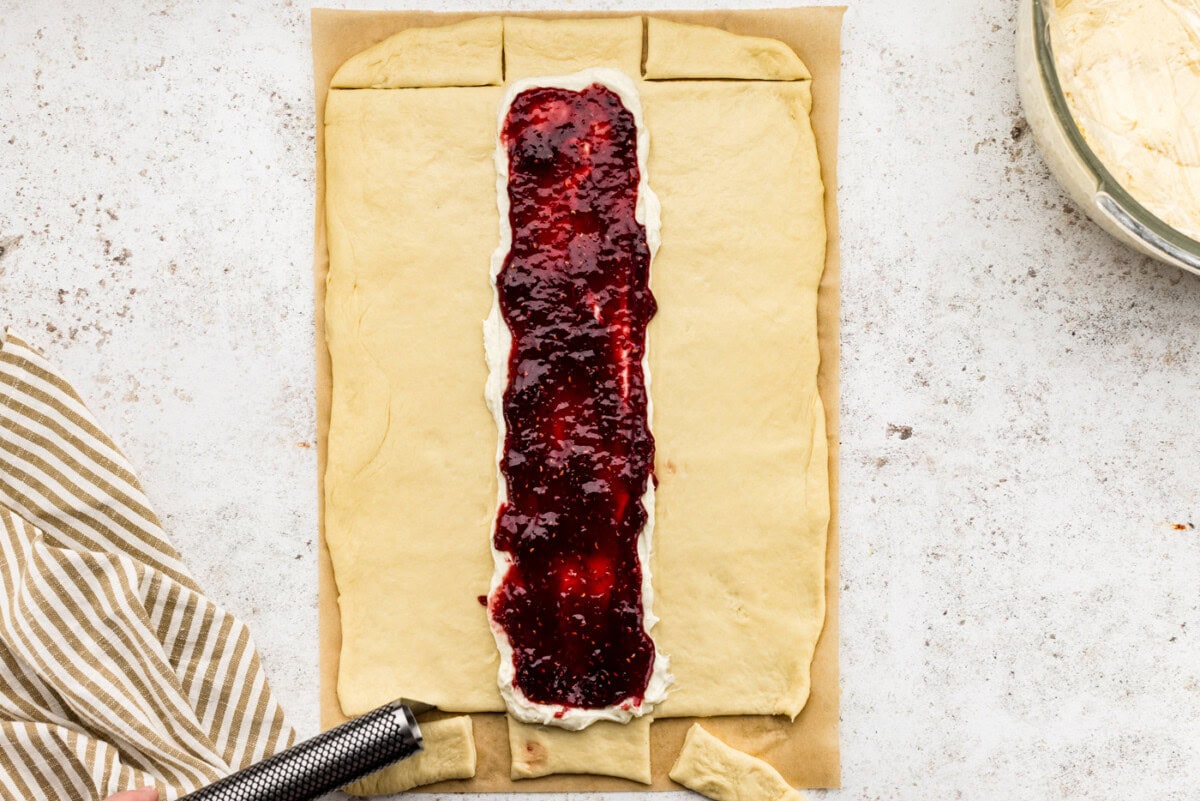
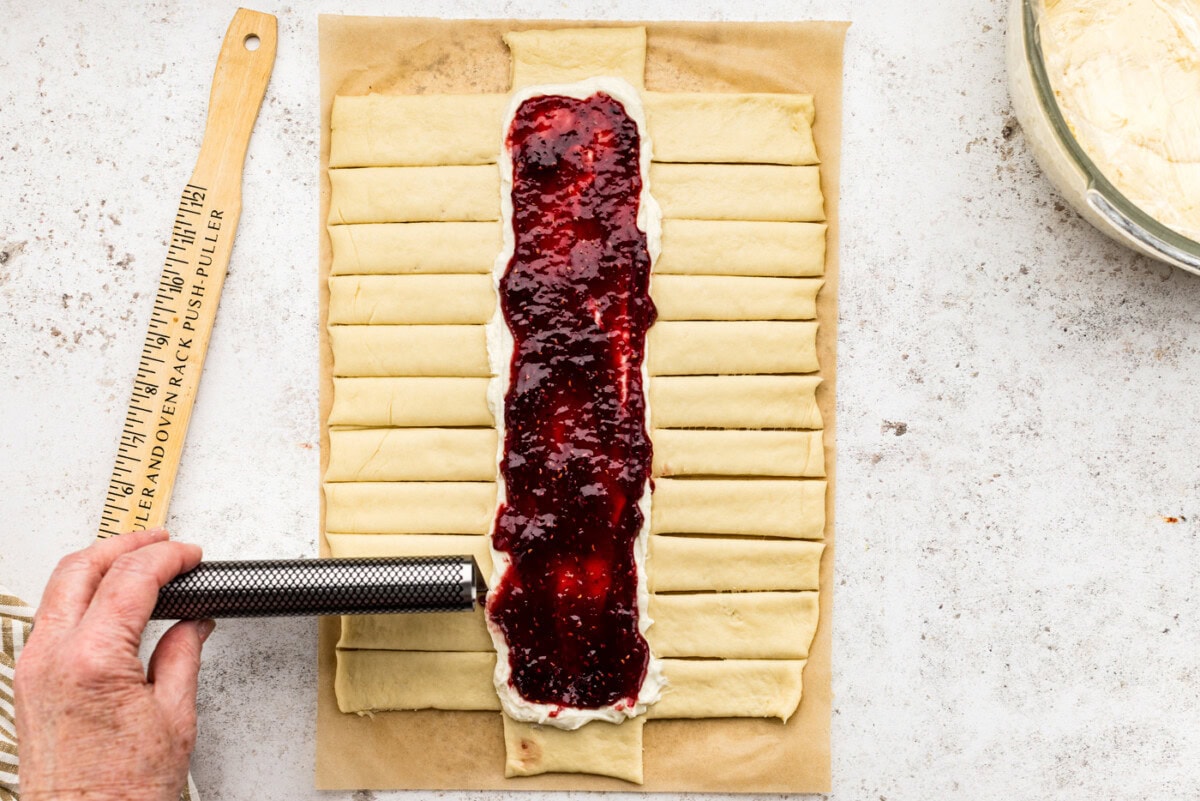
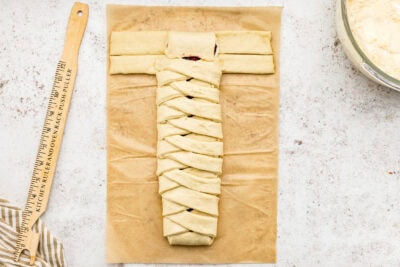
- To form the braid, begin by cutting out a 1″ triangle from each corner of the dough. Cut 1″ crosswise strips down the length of the outside sections, making sure you have the same number of strips down each side. This is easiest using a pastry cutter, though a pizza cutter or kitchen shears will also do the trick.
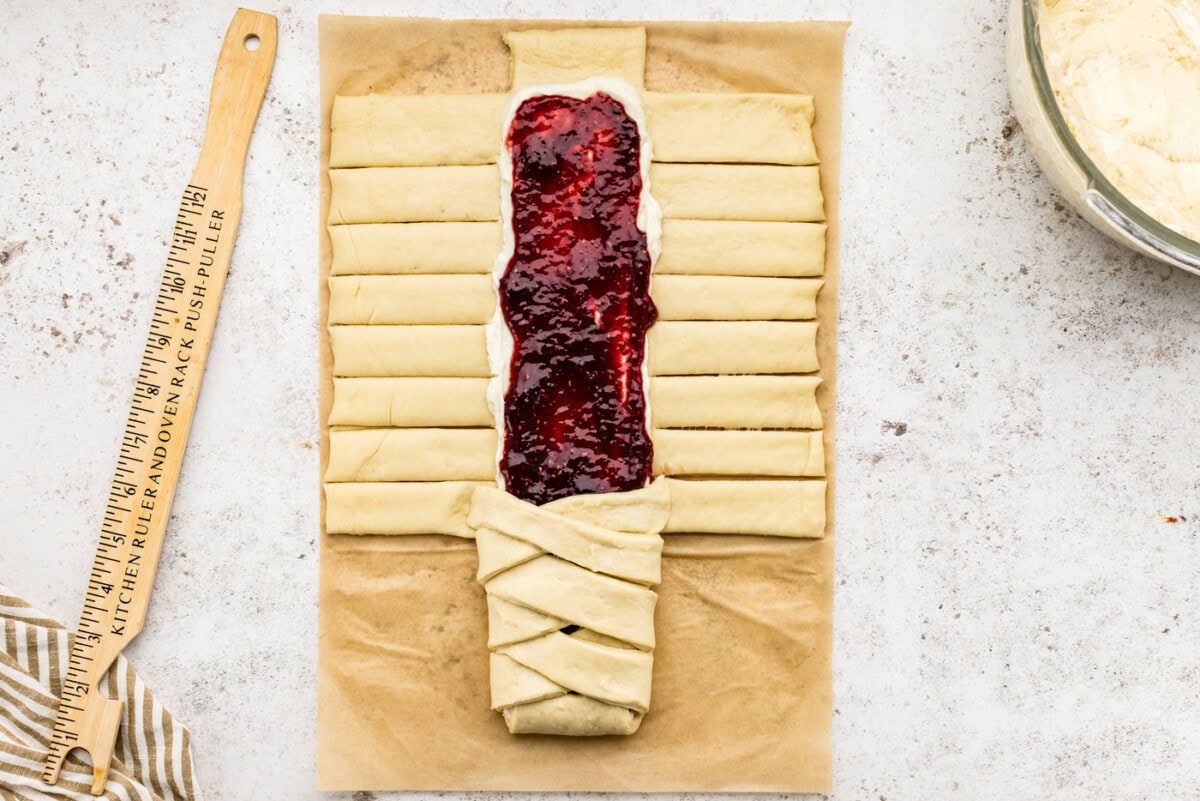
- Begin by taking one end of the center section of dough and folding it over the filling. Beginning on the left, lift the top dough strip and gently bring it across the filling diagonally. Gently press the end of the strip into the dough where it rests. Repeat on the other side with the top dough strip, so that the two strips crisscross each other. Continue down the entire braid, alternating strips to form the loaf.
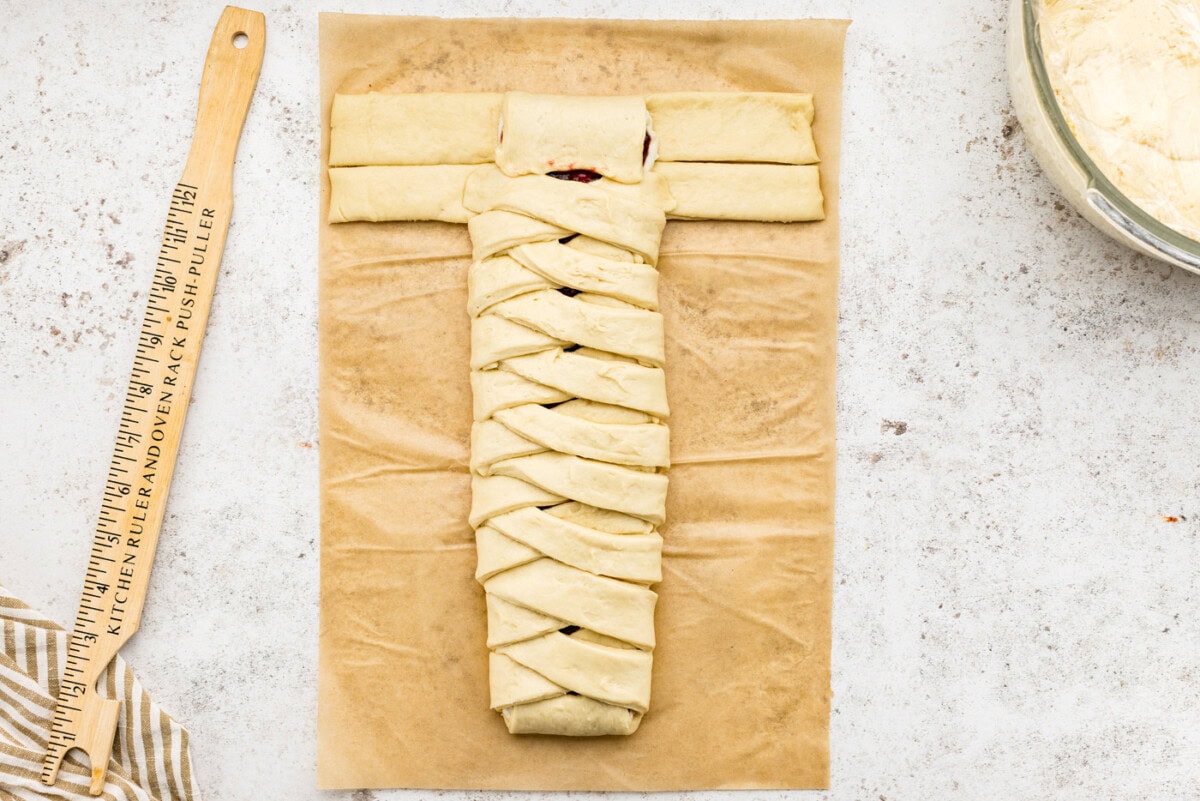
- When you’re left with the two “legs” on either side, fold up the end section of dough and criss-cross the “legs” over top, and then tuck under.
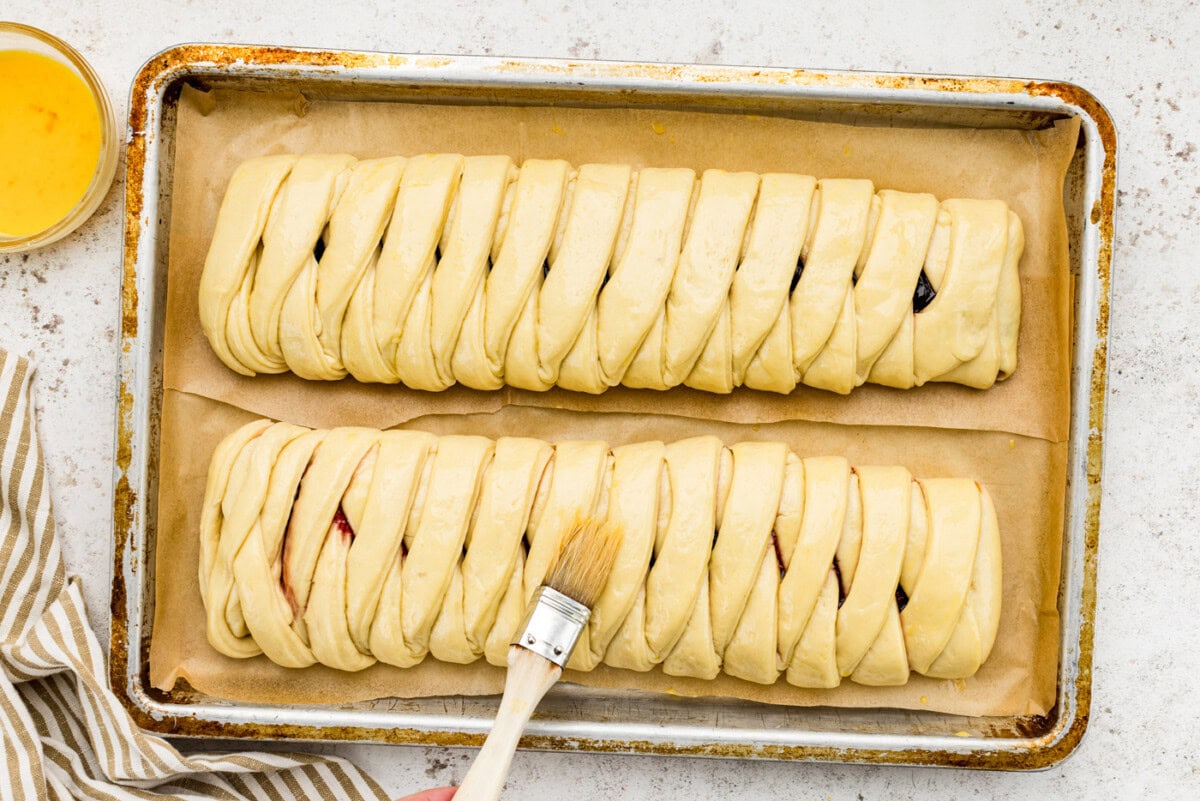
- Repeat the rolling, filling, and braiding steps for the second piece of dough, using the remaining cream cheese filling and preserves. Gently slide the loaves on the parchment onto an insulated baking sheet. You should be able to fit both loaves on one sheet, but you may need to trim the parchment. Cover the loaves with a soft cloth and let them rise for 45 to 50 minutes, or until quite puffy.
- Preheat the oven to 375°F. Brush the loaves with egg wash (one lightly beaten egg, 2 teaspoons water, and a pinch of salt) and bake for 25 to 30 minutes, or until the loaves are golden brown. Remove from the oven and cool for 15 to 20 minutes.
- To make the drizzle, slowly add small amounts of milk to the powdered sugar until you have a thick but drizzling consistency. With loaves on a cooling rack, place waxed paper underneath to catch drips, then drizzle the powdered sugar glaze back and forth across the loaves. Allow to set before serving.
Frequently Asked Questions & Expert Tips
A sponge is essentially a starter, a mixture of yeast, flour, water, and sugar. A sponge lets the yeast start working before adding it to the rest of the dough. Because this dough has eggs and butter in it, it makes for a much richer dough and also makes it a little harder for the yeast to work and do its thing. Using a sponge gives it that little bit of head start that it needs. After mixing the sponge ingredients, cover it with plastic wrap and let it work for about 15-20 minutes. It’ll get all frothy and bubbly. That’s how you know you didn’t kill your yeast!
Although this danish is best enjoyed right away, you can store your leftovers in an air-tight container kept in the refrigerator for up to 3 days. Breads of this sort tend to dry out when refrigerated, but due to the filling (cream cheese), it should be kept chilled. I would recommend allowing it to rest at room temp for around 30 minutes before eating leftovers, or pop it in a toaster oven to rewarm.
I have not tried freezing this and baking it later, though I’d imagine it would be okay. However, because this is a yeast dough, you would need to parbake it first. Parbaking means that you are partially baking the dough so it can be frozen and baked again later. Parbaking kills the yeast and sets the proteins and starches. This would need to be parbaked, frozen, then put back in the oven to be finished off. Because I have not done that with this danish, I couldn’t say for sure how long to bake it before and after. I can tell you that parbaking develops a crust, but not enough to begin browning. The browning takes place after it comes out of the freezer and is placed in the oven for its final bake.
Serving Suggestions
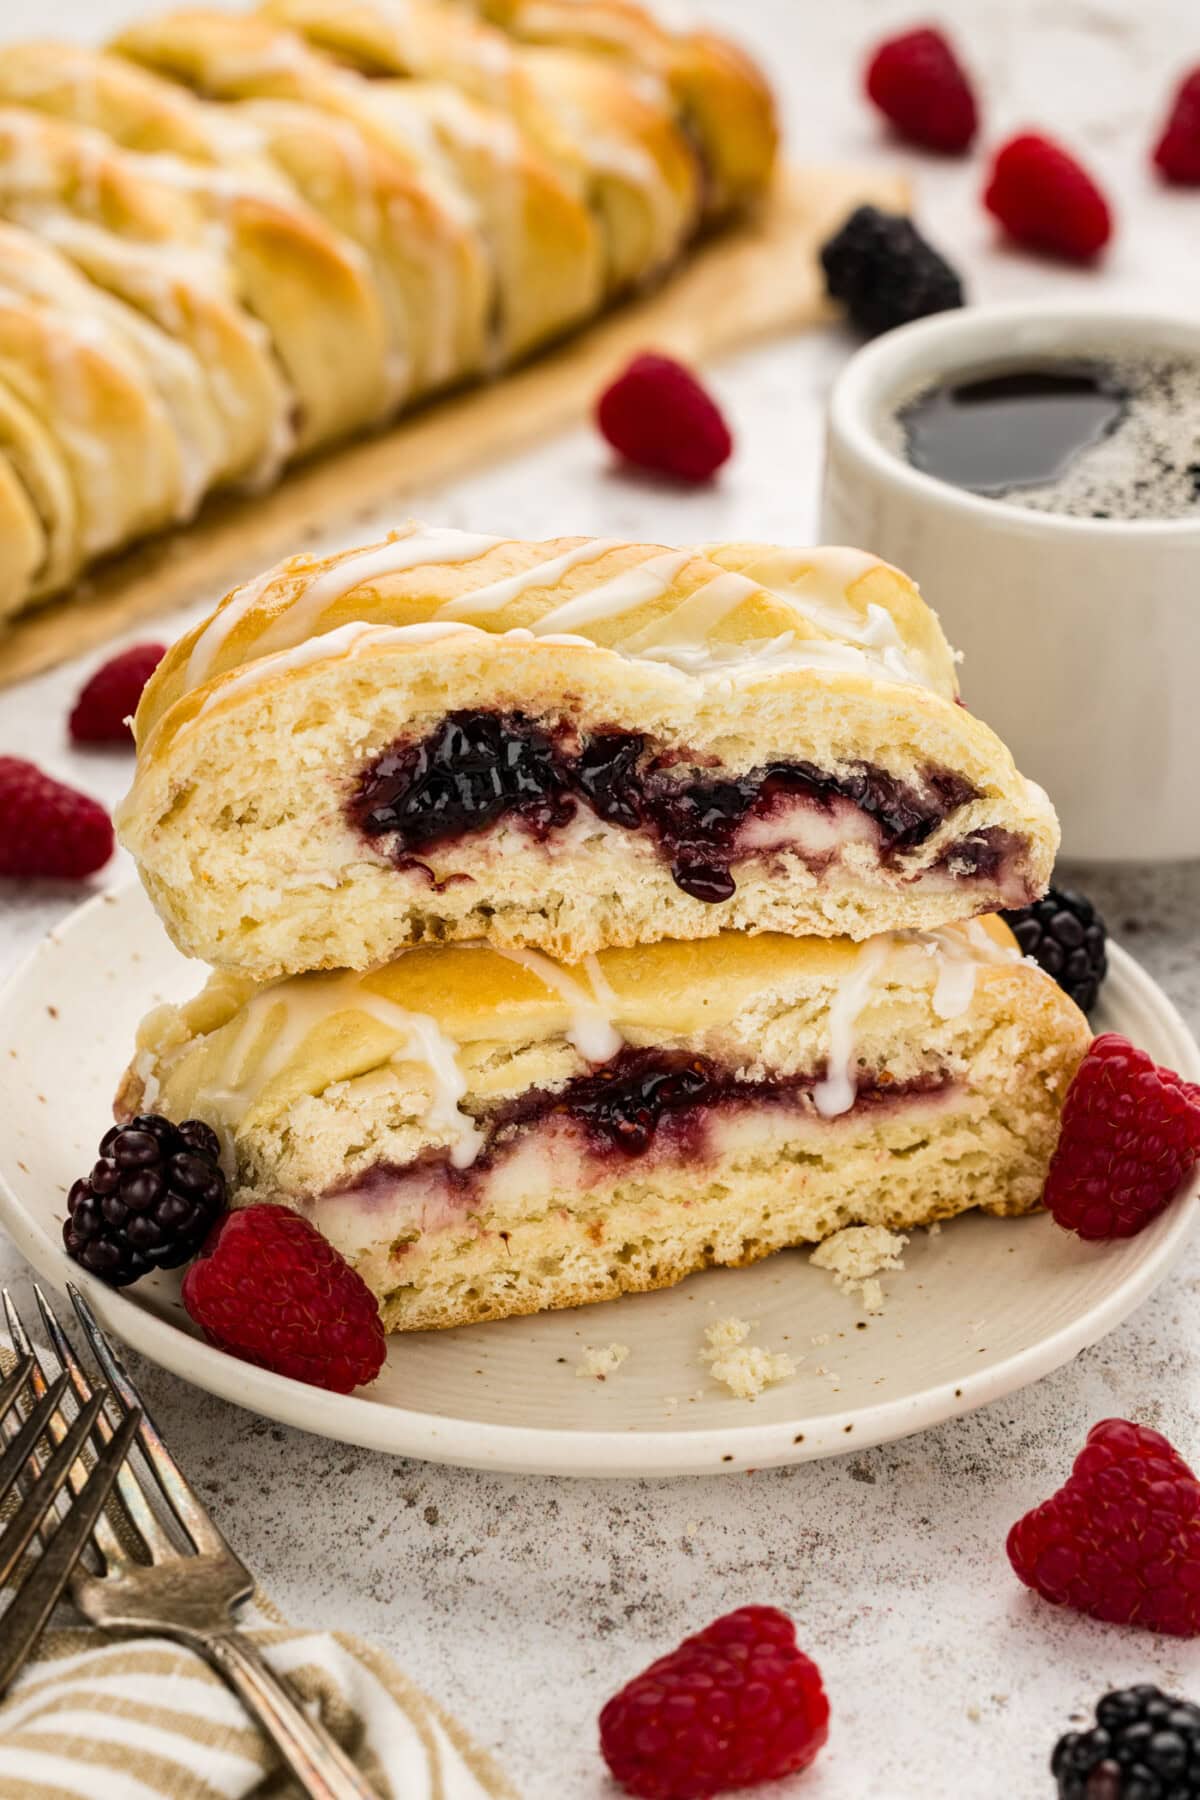
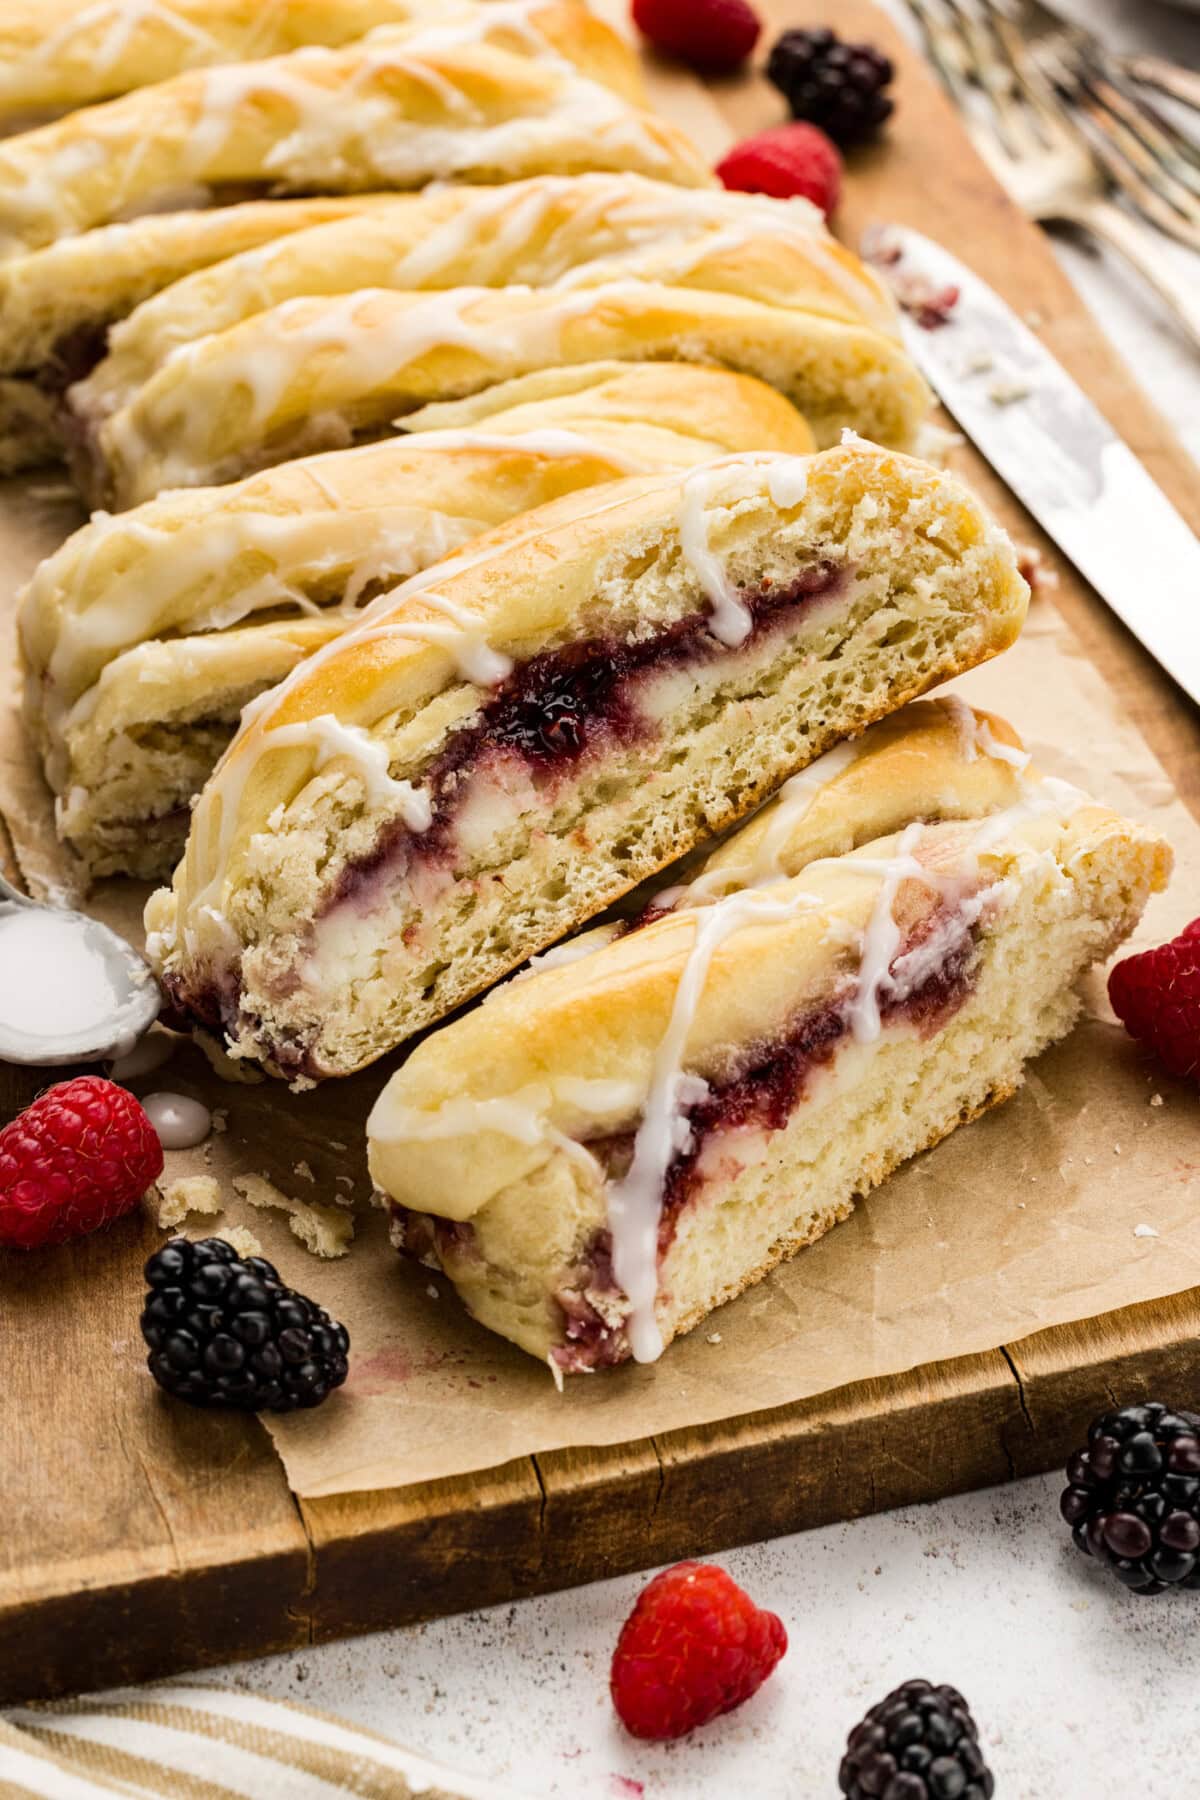
A slice of this braided breakfast danish pairs extremely well with a cup of coffee or tea. Wrap up a slice to pack into lunches or enjoy it as an after dinner sweet treat. There’s really no right or wrong way.
The powdered sugar drizzle is optional, though I highly recommend it! That final touch of sweetness makes it that much better in my opinion. Enjoy your danish warmed or at room temperature. Hope you love it!
More Breakfast Recipes
- Blackberry Scones
- Crescent Danish Wreath
- Blueberry Breakfast Cake
- Cranberry Cream Cheese Pastries
- Cherry Cream Cheese Coffee Cake
I love to bake and cook and share my kitchen experience with all of you! Remembering to come back each day can be tough, that’s why I offer a convenient newsletter every time a new recipe posts. Simply subscribe and start receiving your free daily recipes!

Braided Breakfast Danish
IMPORTANT – There are often Frequently Asked Questions within the blog post that you may find helpful. Simply scroll back up to read them!
Print It Pin It Rate ItIngredients
Sponge
- ¾ cup warm water temperature between 105-115F
- 2 teaspoons granulated sugar
- 1 Tablespoon SAF instant yeast
- 61 grams unbleached all purpose flour 1/2 cup
Dough
- All of the sponge
- ¾ cup vanilla yogurt at room temperature
- ½ cup unsalted butter softened at room temperature, 1 stick
- 2 large eggs beaten and brought to room temperature
- 113 grams granulated sugar 1/2 cup
- 2 teaspoons salt
- 2 teaspoons vanilla extract
- 629 grams unbleached all purpose flour 5 cups
Filling
- ⅔ cup cream cheese softened at room temperature
- 57 grams granulated sugar 1/4 cup
- ¼ cup sour cream room temperature
- 30 grams unbleached all purpose flour 1/4 cup
- ½ cup fruit preserves
Finishing
- egg wash for brushing braid one lightly beaten egg, 2 teaspoons water, and a pinch of salt
- 90 grams sifted powdered sugar 1 cup
- 2-3 Tablespoons milk
Things You’ll Need
- Kitchen scale for weighing ingredients
- Stand mixer with dough hook
- Pastry cutter or kitchen scissors/pizza cutter
Before You Begin
- Double check that your yeast is not expired before beginning.
- The ideal temperature for the warm water should be between 105°F and 115°F, test the water temperature with a thermometer if needed. Anything above 120°F can easily kill your yeast. You don’t need hot water, just warm water!
- Use a kitchen scale to weigh your flour for the best results.
- Allow your chilled ingredients (yogurt, butter, eggs) to come to room temperature before beginning.
- Just about any kind of fruit jams or preserves can be used here. Apple, raspberry, blackberry, strawberry, apricot, marmalade, and lemon curd are all excellent options. I even think they’d be fantastic with blueberry or cherry pie filling!
Instructions
- In a small bowl, combine the sponge ingredients. Stir well to combine, loosely cover with plastic wrap, and set aside to proof for 10 to 15 minutes.3/4 cup warm water, 2 teaspoons granulated sugar, 1 Tablespoon SAF instant yeast, 61 grams unbleached all purpose flour
- In the bowl of your stand mixer combine the dough ingredients with the sponge. Mix with the dough hook and knead on speed 2 until a soft, smooth dough forms, about 5 to 6 minutes.3/4 cup vanilla yogurt, 1/2 cup unsalted butter, 2 large eggs, 113 grams granulated sugar, 2 teaspoons salt, 2 teaspoons vanilla extract, 629 grams unbleached all purpose flour
- Place the kneaded dough in a lightly greased bowl, cover with plastic wrap, and allow to rise for 60 to 90 minutes, until quite puffy and nearly doubled.
- While the dough is rising, prepare the filling. Combine all the filling ingredients (except the preserves) in a small bowl, mixing until smooth and lump-free. Reserve the filling and preserves until ready to fill the braids.2/3 cup cream cheese, 57 grams granulated sugar, 1/4 cup sour cream, 30 grams unbleached all purpose flour
- Cut two pieces of parchment into 10"x15" rectangles. Gently deflate the dough and divide it in half. Cover half with plastic wrap and set it aside as you roll out the first piece into a 10" x 15" rectangle onto one of the parchments. Rolling on parchment paper makes moving the bread to the baking sheet much, much easier.
- Lightly press two lines down the dough lengthwise, to divide it into 3 equal sections. Spread half the cream cheese filling down the center section, and top with half the preserves, leaving 1" free on all sides of the filling.
Making the Braids and Assembling
- To form the braid, begin by cutting out a 1" triangle from each corner of the dough. Cut 1" crosswise strips down the length of the outside sections, making sure you have the same number of strips down each side.
- Begin by taking one end of the center section of dough and folding it over the filling. Beginning on the left, lift the top dough strip and gently bring it across the filling diagonally. Gently press the end of the strip into the dough where it rests. Repeat on the other side with the top dough strip, so that the two strips crisscross each other. Continue down the entire braid, alternating strips to form the loaf.
- When you're left with the two "legs" on either side, fold up the end section of dough and criss-cross the "legs" over top, and then tuck under.
- Repeat the rolling, filling, and braiding steps for the second piece of dough, using the remaining cream cheese filling and preserves. Gently slide the loaves on the parchment onto an insulated baking sheet. You should be able to fit both loaves on one sheet, but you may need to trim the parchment. Cover the loaves with a soft cloth and let them rise for 45 to 50 minutes, or until quite puffy.
- Preheat the oven to 375°F. Brush the loaves with egg wash (one lightly beaten egg, 2 teaspoons water, and a pinch of salt) and bake for 25 to 30 minutes, or until the loaves are golden brown. Remove from the oven and cool for 15 to 20 minutes.
- To make the drizzle, slowly add small amounts of milk to the powdered sugar until you have a thick but drizzling consistency. With loaves on a cooling rack, place waxed paper underneath to catch drips, then drizzle the powdered sugar glaze back and forth across the loaves. Allow to set before serving.90 grams sifted powdered sugar, 2-3 Tablespoons milk
Expert Tips & FAQs
- Although this danish is best enjoyed right away, you can store your leftovers in an air-tight container kept in the refrigerator for up to 3 days. Breads of this sort tend to dry out when refrigerated, but due to the filling (cream cheese), it should be kept chilled. I would recommend allowing it to rest at room temp for around 30 minutes before eating leftovers, or pop it in a toaster oven to rewarm.
Nutrition
The recipes on this blog are tested with a conventional gas oven and gas stovetop. It’s important to note that some ovens, especially as they age, can cook and bake inconsistently. Using an inexpensive oven thermometer can assure you that your oven is truly heating to the proper temperature. If you use a toaster oven or countertop oven, please keep in mind that they may not distribute heat the same as a conventional full sized oven and you may need to adjust your cooking/baking times. In the case of recipes made with a pressure cooker, air fryer, slow cooker, or other appliance, a link to the appliances we use is listed within each respective recipe. For baking recipes where measurements are given by weight, please note that results may not be the same if cups are used instead, and we can’t guarantee success with that method.
I originally found this Braided Lemon Bread from King Arthur, which inspired me to make my own version with fruit preserves and a powdered sugar glaze.

- Pineapple Salsa - July 16, 2026
- 26 Best Ground Beef Casseroles for Easy Family Dinners - July 8, 2026
- Strawberry Shortcake Kabobs - July 2, 2026


Leave a Reply