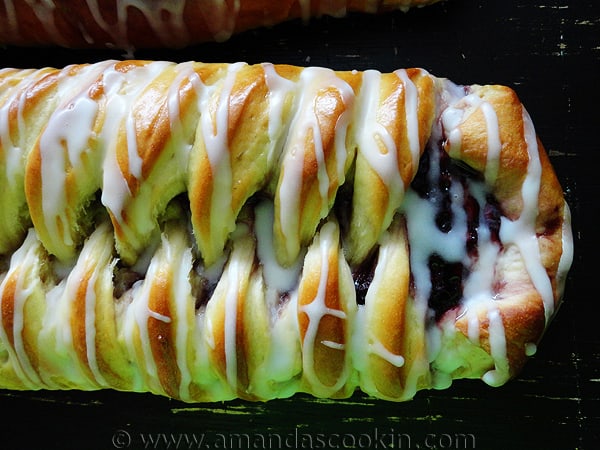
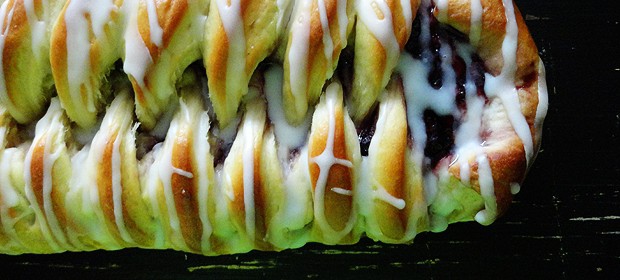
This beautiful breakfast danish is not only impressive looking, but it tastes amazing and makes enough for a couple of breakfasts or to give one to a friend. While the end result looks difficult it’s really not, and actually it’s quite fun once you get started! Admittedly I killed the yeast in my first attempt causing failure. I was a little more careful the second time and had great results as you can see above. This cream cheese and jam filled danish is absolutely delicious and beautiful to look at!
This recipe has serious wow factor. In fact, when I pulled these from the oven they were so pretty I called everyone in to have a look! Ha ha! There were oooo’s and ahhhh’ all around. :)
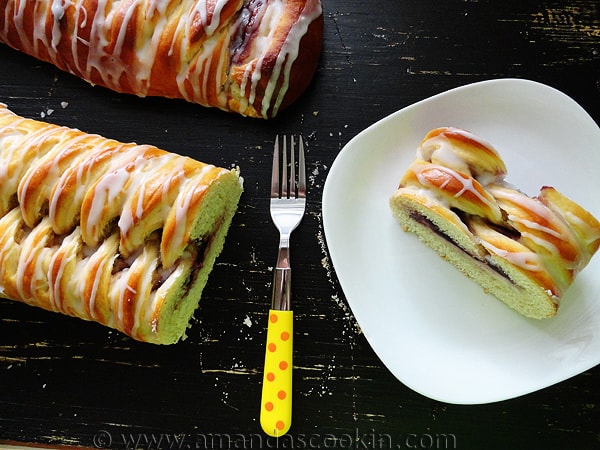 I first came across this recipe when I was browsing through my King Arthur catalog that came in the mail. The recipe can be found online as well as here -> Braided Lemon Bread (note, if you want to make the lemon curd version I omitted lemon juice from mine, so check their recipe) though I made a couple of changes to mine. I love the method and after the first attempt failed I sought out the online version and found it to be highly rated by many of their customers. That prompted me to try again.
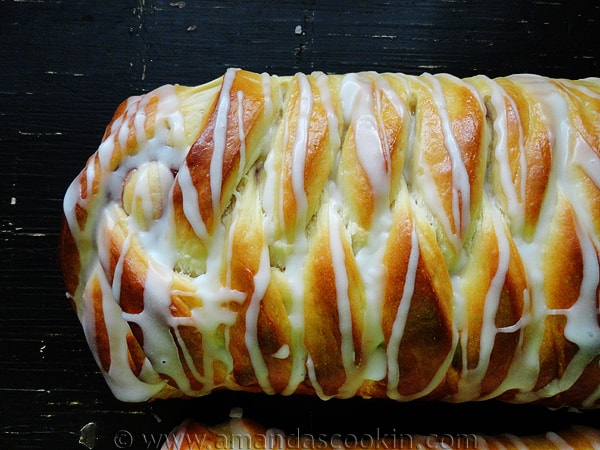 With the first attempt I rushed things a bit. I should have brought my ingredients to room temperature, but I didn’t. I heated my water too much and didn’t let it cool, hence killing my yeast. I should have stopped at the beginning when noticing my yeast didn’t really proof properly… but I didn’t. So don’t be like me, at least on that day. ;-)
 The second time around I was smarter. I brought the ingredients out and let them come to room temperature and was careful to check the sponge before continuing so I wouldn’t waste a ton of ingredients.
 What’s a sponge? It’s basically a starter, a mixture of yeast, flour, water and sugar. A sponge lets the yeast start working before adding it to the rest of the dough. Because this dough has eggs and butter in it, it makes for a much richer dough and also makes it a little harder for the yeast to work and do its thing. Using a sponge gives it that little bit of head start that it needs. After mixing the sponge ingredients, cover it with plastic wrap and let it work for about 15-20 minutes. It’ll get all frothy and bubbly. While the sponge was growing I mixed together the yogurt, eggs and vanilla, and whisked together the dry ingredients.
 In your mixer’s bowl, combine the dry ingredients, the wet ingredients and the sponge. Mix it together, I used the dough hook. After the mixing the dough is going to rise from 60-90 minutes, so this is a good time to get your filling ingredients ready.
 After the dough has risen you’ll cut it in half and then roll it out to a 10″x15″ rectangle. I found the easiest way to do this was to actually cut a piece of parchment to that size, and roll the dough out to fit. Then repeat for the other half of the dough. Lightly mark the rectangle to separate it into thirds, then spread the cream cheese mixture down the middle, followed by the preserves or lemon curd. NOTE: In the picture above I didn’t leave much room at the end – in the second batch I did and it worked much better. So moral of the story, don’t spread the filling all the way to the ends, leave about an inch of the dough showing.
 As you can see from the photo, if you do spread your filling too far, you can take the little excess pieces of dough that get cut off the ends and lengthen the dough in the middle. The braid is actually quite easy. Make your cuts (full instructions below) then pull one strand over the top, then pull from the other side, then the other side, etc, alternating all the way down. I also recommend gently pressing the end of each strip into the dough that it touches just so they don’t pop open during cooking. I did read that in someone’s comment on KAF that it did in fact happen to her.
 Now these pics are of the successful batch where I used blackberry preserves on one and black raspberry on the other. Would be great with apricot, cherry preserves, orange marmalade, lemon or lime curd, or even pie filling!
 I decided to go with a powdered sugar drizzle on mine because 1) I don’t have the pearl sugar that KAF used on theirs and 2) I think drizzle is much prettier. :) This is a delicious recipe that I will make again and again!
Braided Breakfast Danish
IMPORTANT - There are often Frequently Asked Questions within the blog post that you may find helpful. Simply scroll back up to read them!
Print It Rate ItIngredients
Sponge
- ¾ cup warm water
- 2 teaspoons sugar
- 1 tablespoon SAF instant yeast
- ½ cup unbleached all purpose flour
Dough
- All of the sponge
- ¾ cup vanilla yogurt
- ½ cup 1 stick unsalted butter, softened
- 2 large eggs beaten and brought to room temperature
- ½ cup sugar
- 2 teaspoons salt
- 2 teaspoons vanilla extract
- 5 cups unbleached all purpose flour
Filling
- ⅔ cup cream cheese softened
- ¼ cup sugar
- ¼ cup sour cream
- ¼ cup unbleached all purpose flour
- ½ cup fruit preserves
Finishing
- egg wash for brushing braid
- ½ cup sifted powdered sugar
- 1-2 tablespoons milk
Instructions
- In a small bowl, combine the sponge ingredients. Stir well to combine, loosely cover with plastic wrap, and set aside to proof for 10 to 15 minutes.
- In the bowl of your stand mixer whisk together the combine the sponge with all of the dough ingredients. Mix with the dough hook and knead on speed 2 until a soft, smooth dough forms, about 5 to 6 minutes.
- Place the kneaded dough in a lightly greased bowl, cover with plastic wrap, and allow to rise for 60 to 90 minutes, until quite puffy and nearly doubled.
- While the dough is rising, prepare the filling. Combine all the filling ingredients (except the preserves) in a small bowl, mixing until smooth and lump-free. Reserve the filling and preserves until ready to fill the braids.
- Cut two pieces of parchment into 10"x15" rectangles. Gently deflate the dough and divide it in half. Cover half with plastic wrap and set it aside as you roll out the first piece into a 10" x 15" rectangle onto one of the parchments. Rolling on parchment paper makes moving the bread to the baking sheet much, much easier. Lightly press two lines down the dough lengthwise, to divide it into 3 equal sections. Spread half the cream cheese filling down the center section, and top with half the preserves, leaving 1" free on all sides of the filling.
- To form the braid, cut 1" crosswise strips down the length of the outside sections, making sure you have the same number of strips down each side. Begin by taking one end of the center section of dough and folding it over the filling. Beginning on the left, lift the top dough strip and gently bring it across the filling diagonally and gently press the end of the strip into the dough where it rests. Repeat on the other side with the top dough strip, so that the two strips crisscross each other. Continue down the entire braid, alternating strips to form the loaf.
- Repeat the rolling, filling, and braiding steps for the second piece of dough, using the remaining cream cheese filling and preserves. Gently slide the loaves on the parchment onto an insulated baking sheet. You should be able to fit both loaves on one sheet, but may need trim the parchment. Cover the loaves with a soft cloth and let them rise for 45 to 50 minutes, or until quite puffy.
- Preheat the oven to 375°F. Brush the loaves with egg wash (one lightly beaten egg, 2 teaspoons water and a pinch of salt) and bake for 25 to 30 minutes, or until the loaves are golden brown. Remove from the oven and cool for 15 to 20 minutes.
- To make the drizzle, slowly add small amounts of milk to the powdered sugar until you have a thick but drizzling consistency. With loaves on a cooling rack, place waxed paper underneath to catch drips, then drizzles powdered sugar glaze back and forth across the loaves. Allow to set before serving.
Amanda Davis
Latest posts by Amanda Davis (see all)
- Cauliflower Pizza Crust - January 13, 2025
- Keto Peanut Butter Cookies - January 9, 2025
- Cloud Bread - January 6, 2025


nel joyner says
This is beautiful- I plan on making this- question- with the cream cheese filling- does it have to be refrigerated? or can it stay out?
Amanda Formaro says
It should be fine to stay out for the morning. I wouldn’t let it sit out all day or overnight.
Kathleen says
Hello! This looks yummy and gorgeous! I was wondering if you had ever tried freezing it and baking it later. Do you think that would turn out? Thanks!
Amanda says
Hi Kathleen :) I have not tried freezing this and baking it later. However, because this is a yeast dough, you would need to parbake it first. Parbaking means that you are partially baking the dough so it can be frozen and baked again later. Parbaking can be anywhere from 50-80% of the called for cooking time. it kills the yeast and sets the proteins and starches. For the most part the cooking is done inside, but the outside has not yet formed a crust. This would need to be parbaked, frozen, then put back in the oven to be finished off. Because I have not done that with this danish I couldn’t say for sure how long to bake it before and after. I can tell you that parbaking develops a crust, but not enough to begin browning. The browning takes place after it comes out of the freezer and is placed in the oven for its final bake.
Lauren says
The drizzle is way prettier, I agree. Thanks for the great recipe. It turned out lovely!
Culinary Cory says
Awesome braiding! It’s so pretty.
Avanika (Yumsilicious Bakes) says
I remember seeing these on KAF. They look fantastic. Bookmarked: )