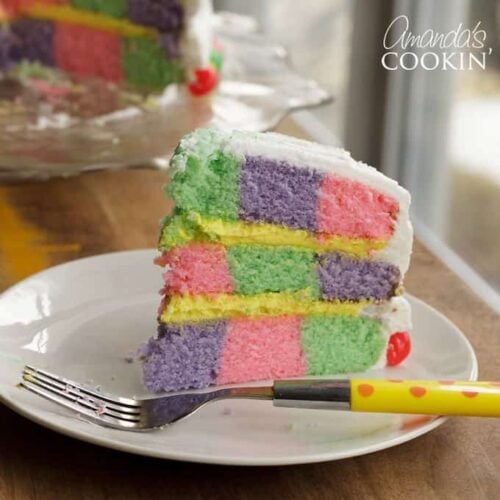
Checkerboard cake is often made with yellow cake and chocolate cake, which makes for a striking contrast. I wanted to try something different this time, I had something more colorful in mind. With Easter right around the corner, I thought this was the perfect opportunity to make a pastel checkerboard cake! You can even use the remaining batter from this recipe to make some of these adorable Easter Bunny Cupcakes!
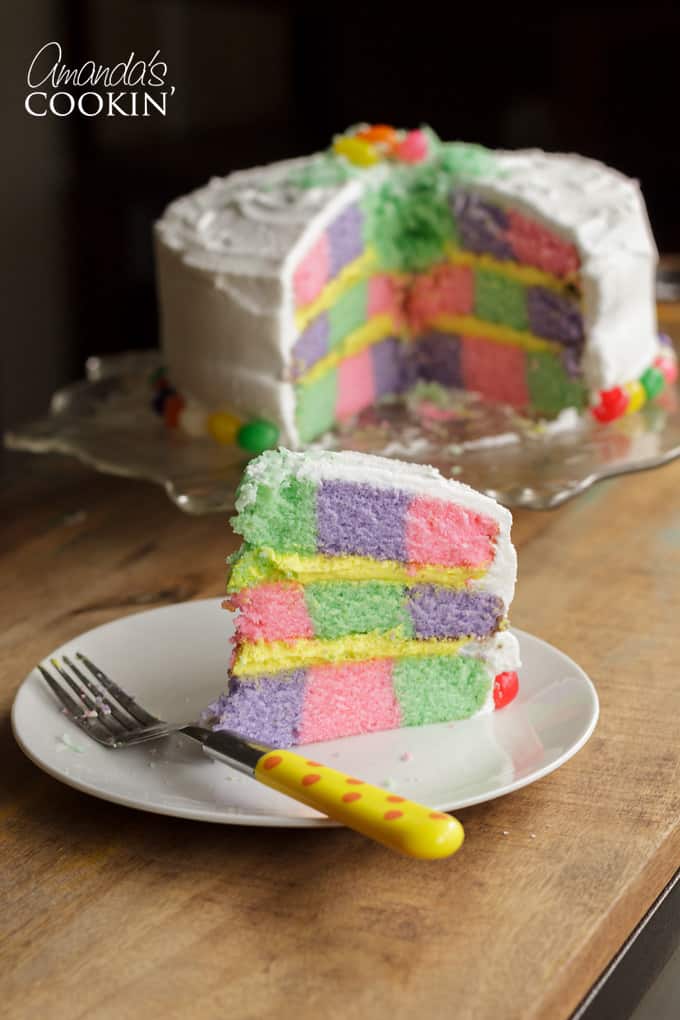
Checkerboard Cake for Easter
I actually adapted Dorie Greenspan’s recipe for Perfect Party Cake to make this colorful treat. I also used (gasp) a white frosting that uses shortening instead of butter. It’s actually a delicious frosting, but if you can’t get past the shortening, you can always use your favorite white icing or buttercream frosting. (I’m not kidding, using the shortening made the frosting taste amazing and super smooth!)
Checkerboard Cake Baking Tips:
1) I made one batch of cake batter and came up a little short. So I made another batch and poured the leftover batter into a 9″ square pan and made a square cake. I even swirled the different colors to make a marble cake! You could make cupcakes out of the rest if you like. The instructions below WILL leave you with leftover batter.
2) You can use any white cake recipe that you want, particularly if you have a favorite.
3) Important – This is a double batch cake, you might want to split the cake recipe in half and do it in two batches, as it might be too much for the mixer. It was fine in my KitchenAid but the bowl was definitely full. I wanted to give you a head’s up.
4) I used liquid measuring cups to distribute the colored batter because the pour spouts made it a bit easier. I have also seen people use decorator bags.
5) Save the egg yolks for making ice cream!
Ingredients for Checkerboard Cake
- 4 1/2 cups cake flour
- 2 tablespoon baking powder
- 1 teaspoon salt
- 2 1/2 cups buttermilk
- 8 large egg whites
- 3 cups sugar
- 4 teaspoons grated lemon zest
- 2 sticks (16 tablespoons) unsalted butter, at room temperature
- 1 teaspoon pure lemon extract
White Frosting
- 1 cup vegetable shortening (not butter flavored)
- 4 1/2 cups sifted powdered sugar
- 4 tablespoons milk
- 1 1/2 teaspoons clear vanilla
- 1/2 teaspoon lemon extract
Helpful Kitchen Tools
YOU CAN FIND THE PRINTABLE VERSION OF THIS RECIPE AT THE END OF THIS POST
Getting Ready:
Center a rack in the oven and preheat the oven to 350 degrees F. Butter three 9-inch round cake pans (these come in the Checkerboard Pan Set) and line the bottom of each with a round parchment or wax paper. Place the checkerboard cake insert into one of the pans and set aside.
Directions for the Cake:
- In a large bowl, whisk together the flour, baking powder, and salt.
- In a separate bowl, whisk together the buttermilk and egg whites.
- Put the sugar and lemon zest into your mixer’s bowl or another large bowl and rub them together with your fingers until the sugar is moist and fragrant. Add the butter, and working with the paddle attachment, or with a hand mixer, beat at medium speed for a full 3 minutes, until the butter and sugar are very light.
- Beat in the extract, then add one-third of the flour mixture, still beating on medium speed. Beat in half of the milk-egg mixture, then beat in half of the remaining dry ingredients until incorporated. Add the rest of the milk and eggs, beating until the batter is homogeneous, then add the last of the dry ingredients. Finally, give the batter a good 2-minute beating to ensure that it is thoroughly mixed and well aerated.
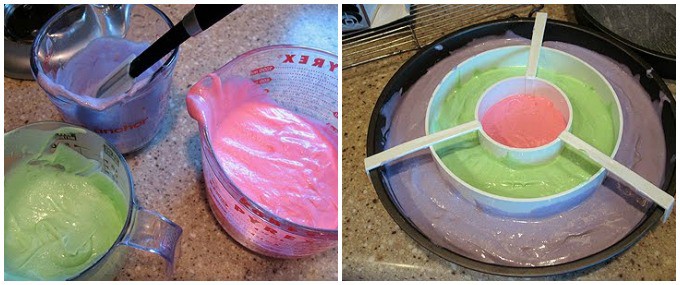
- Separate the batter evenly into three separate bowls. To add paste food coloring, take a small amount (smaller than a pea, it doesn’t take much!) and whisk it into the white batter. Repeat for the other two batches. I used pink, purple, and green.
- Starting with the pan that has the checkerboard insert, fill the center hole halfway with pink batter. Fill the center ring halfway with green and the outer ring halfway with purple. Carefully loosen the insert’s “legs” from the side of the pan and lift the insert straight up into the air. Rinse and dry the insert and place it into the next pan.
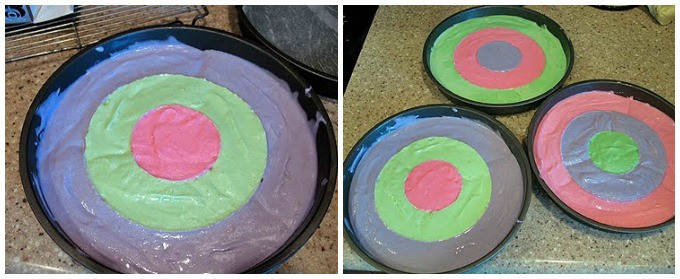
- In keeping with your pattern flow (pink, green, purple, etc) fill the center hole halfway with green, the second ring with purple, and the outer ring with pink. For the last pan, continuing the pattern, purple in the center, then pink, then green.
- Bake for 25-35 minutes, checking after 25, or until the cakes are springy to the touch- a thin knife inserted into the centers should come out clean. Transfer the cakes to cooling racks and cool for about 5 minutes, then run a knife around the sides of the cakes, unmold them and peel off the paper liners. Invert and cool to room temperature right side up. (The cooled cake layers can be wrapped airtight and stored at room temperature overnight or frozen for up to 2 months.)
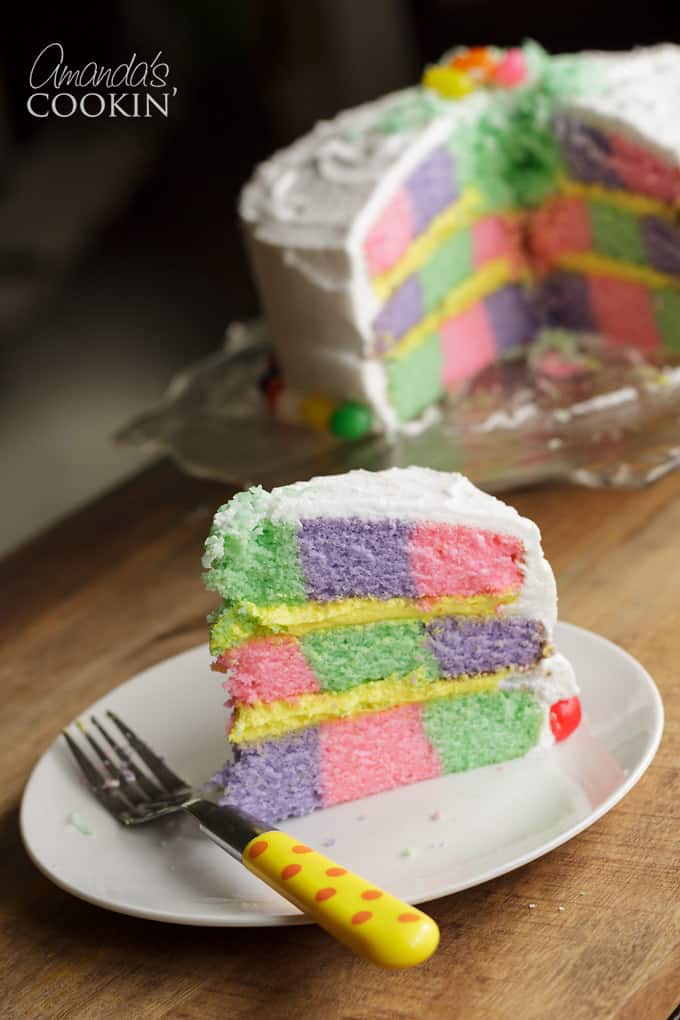
I used paste food coloring to tint the batters and frosting, and a checkerboard baking set to create the cake. However, if you don’t want to buy a pan, this tutorial will show you how to make a checkerboard cake without it.
Frosting
Instructions for the frosting are in the printer friendly version of the recipe below.
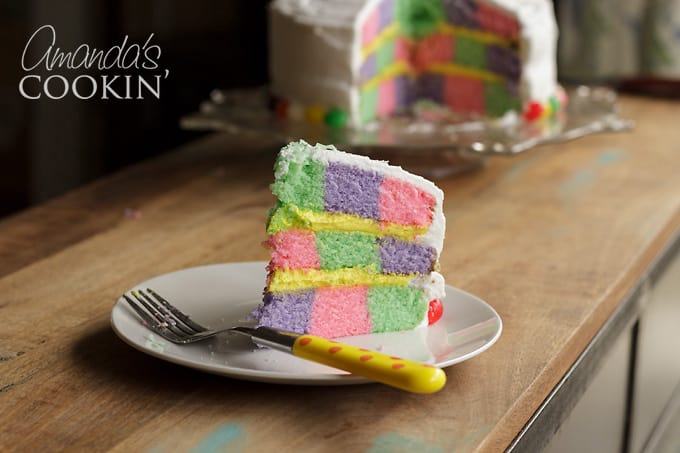
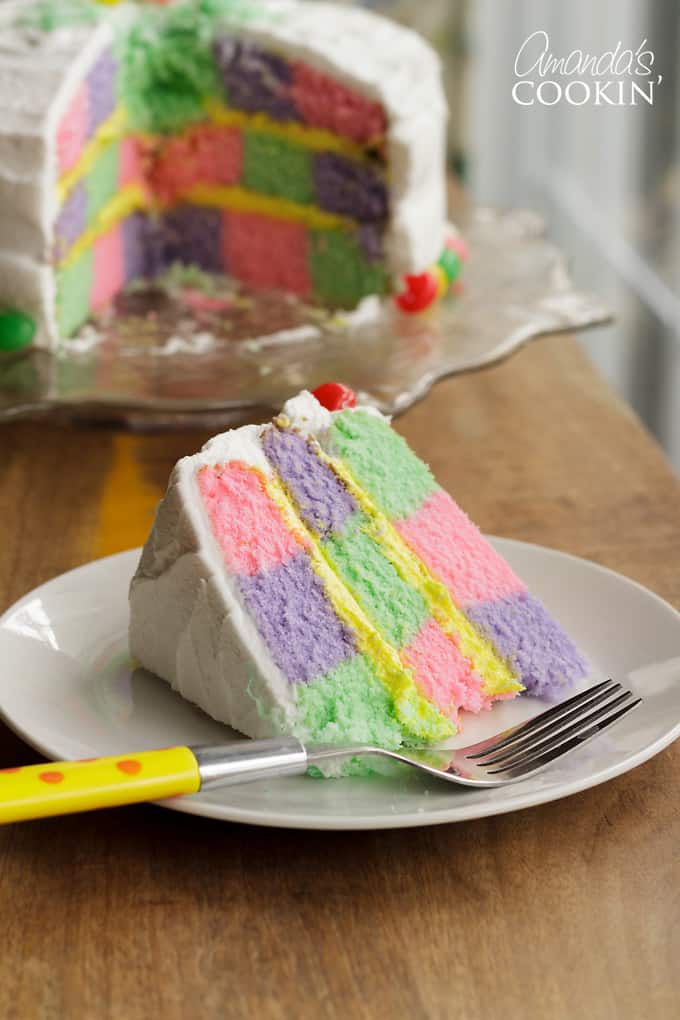
Didn’t it turn out beautifully? The end result is worth every second you’ll spend on this recipe! It’s definitely one that people will be impressed by, I hope you have a blast making this Checkerboard Cake!
Looking for more delicious Easter treats?
- Try our colorful Frosted Sugar Cookie Bars that taste just like Lofthouse cookies!
- Don’t miss these adorable Rice Krispie Nests.
- Here’s a Carrot Cake Trifle that’s perfect for Easter dessert.
- We have too many to list here, so be sure to check out all of our Easter recipe ideas!
Checkerboard Cake for Easter
IMPORTANT - There are often Frequently Asked Questions within the blog post that you may find helpful. Simply scroll back up to read them!
Print It Rate ItIngredients
Ingredients:
- 4 ½ cups cake flour
- 2 tablespoons baking powder
- 1 teaspoon salt
- 2 ½ cups buttermilk
- 8 large egg whites
- 3 cups sugar
- 4 teaspoons grated lemon zest
- 16 tbsp unsalted butter 2 sticks, at room temperature
- 1 teaspoon pure lemon extract
White Frosting:
- 1 cup vegetable shortening not butter flavored
- 4 ½ cups powdered sugar sifted
- 4 tablespoons milk
- 1 ½ teaspoons clear vanilla
- ½ teaspoon lemon extract
Garnish:
- 1 cup Jelly beans
- ½ cup shredded coconut
- 1 drop green food coloring
Before You Begin
Instructions
- Preheat oven to 350 F.
- Butter three 9 inch round cake pans (these come in the Checkerboard Pan Set) and line the bottom of each with a round of parchment paper. Place the checkerboard cake insert into one of the pans and set aside.
Making the Cake:
- In a large bowl, whisk together the flour, baking powder, and salt.
- In a separate bowl, whisk together the buttermilk and egg whites.
- Put the sugar and lemon zest into your mixer's bowl or another large bowl and rub them together with your fingers until the sugar is moist and fragrant. Add the butter, and working with the paddle attachment, or with a hand mixer, beat at medium speed for a full 3 minutes, until the butter and sugar are very light.
- Beat in the extract, then add one-third of the flour mixture, still beating on medium speed. Beat in half of the milk-egg mixture, then beat in half of the remaining dry ingredients until incorporated. Add the rest of the milk and eggs, beating until the batter is homogeneous, then add the last of the dry ingredients. Finally, give the batter a good 2-minute beating to ensure that it is thoroughly mixed and well aerated.
- Separate the batter evenly into three separate bowls. To add paste food coloring, take a small amount (smaller than a pea, it doesn't take much!) and whisk it into the white batter. Repeat for the other two batches. I used pink, purple, and green.
- Starting with the pan that has the checkerboard insert, fill the center hole halfway with pink batter. Fill the center ring halfway with green and the outer ring halfway with purple. Carefully loosen the insert's "legs" from the side of the pan and lift the insert straight up into the air. Rinse and dry the insert and place it into the next pan.
- In keeping with your pattern flow (pink, green, purple, etc) fill the center hole halfway with green, the second ring with purple, and the outer ring with pink. For the last pan, continuing the pattern, purple in the center, then pink, then green.
- Bake for 25-35 minutes, checking after 25, or until the cakes are springy to the touch- a thin knife inserted into the centers should come out clean. Transfer the cakes to cooling racks and cool for about 5 minutes, then run a knife around the sides of the cakes, unmold them and peel off the paper liners. Invert and cool to room temperature right side up. (The cooled cake layers can be wrapped airtight and stored at room temperature overnight or frozen for up to 2 months.)
To Make the Frosting:
- Beat shortening and extracts until creamy, about 1-2 minutes on medium speed. Slowly add 2 cups of the powdered sugar, then 2 tablespoons of milk, 2 more cups of powdered sugar, then the remaining milk and any additional powdered sugar that may be needed.
- Put 1/3 of the frosting into a separate bowl and tint it with a small amount of yellow paste food coloring. Frost in between the layers yellow and the sides and top of cake white.
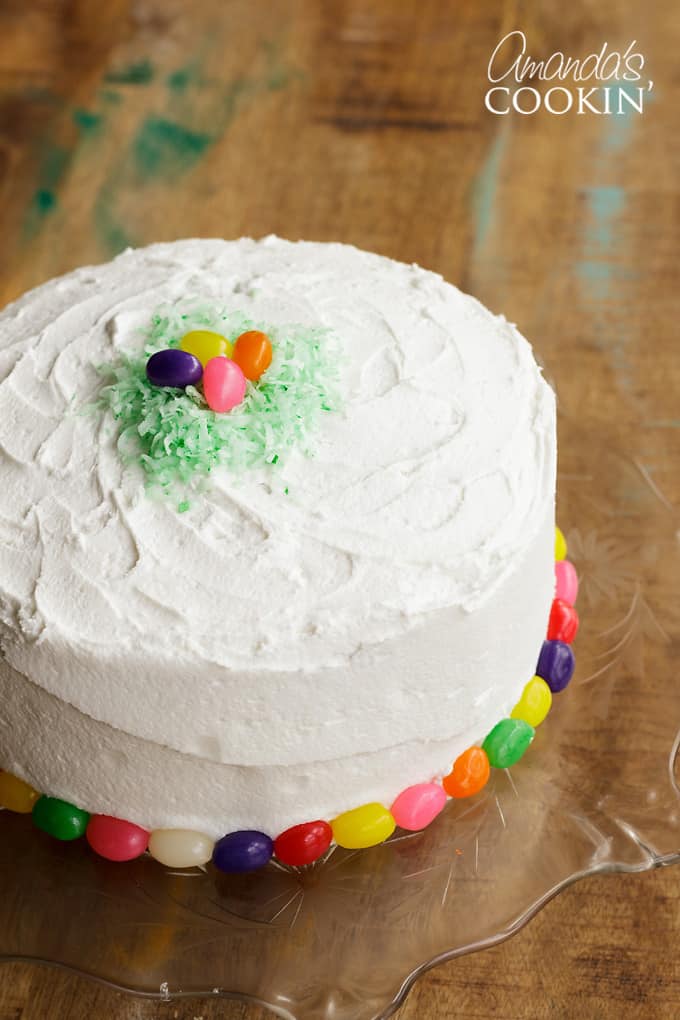
- Mix coconut with one drop of green food coloring. Place tinted coconut on top of the cake and add a few jelly beans. Decorate the outside bottom edge of the cake with jelly beans.
Nutrition
This post was originally published on March 23, 2010.
Amanda Davis
Latest posts by Amanda Davis (see all)
- Raspberry Poke Cake - January 21, 2025
- Chocolate Covered Strawberries - January 20, 2025
- Cauliflower Pizza Crust - January 13, 2025


Mae says
Thank you for the check board cake I made it this mother’s day for myself it’s a beautiful cake recipe and very good tasting cake BLESS. May 1, 2022
lori says
Hi! our family has a tradition – going back at least 60 years (maybe longer!) – of having checkerboard cakes! I still have my mother’s checkerboard cake forms and have shared them with my daughter numerous times. Ours is a birthday tradition and we also use it for special occasions. Typically, we’ve used white/yellow cake mix and chocolate cake mix (both have to be the same brand and line to work without ‘slumping”), we’ve also used the regular food coloring (since gel wasn’t invented that long ago!) and never had a problem with the “chemistry”, basically just make sure you use the same brand (like “Super Moist” or what ever, if you don’t make it from scratch). The reveal is the most exciting part – especially for the grand kids AND their color choices! in between the layers, we typically use pudding … gotta have an excuse to eat it fast!
Thanks for reminding me of this wonderful tradition!
Amanda Formaro says
That sounds like a wonderful tradition, Lori! :) I would have loved to see the reveal as a kid as well, how fun!
Me says
Not sure how this page managed to hack into my facebook and post a link to this whilst I was at work but thanks for that, nice one.
Amanda Formaro says
I didn’t hack into your Facebook. Likely one of your friends shared the post and you saw it in your Facebook feed.
Francesca says
Amanda, my compliments! this cake is amazing! and what a hard work!
Amanda Formaro says
Thanks so much Francesca!
Priscilla Halcomb says
Amanda, this is an awesome idea! I’m am printing this off right now. I have an original ring of my grandmother’s from the 30’s. I’ve had these cakes since childhood and never thought about a pastel one. Thanks, Priscilla
Amanda says
You’re welcome Priscilla, and how cool you have a set that’s almost 100 years old!!
Colleen Avitia says
Can you use just regular food coloring or does it have to be the food color paste?
Thanks
Amanda says
Hi Colleen :) There are two problems with using regular food coloring instead of the paste/gel. 1) it’s liquid so it will thin the batter, changing the consistency and the batter, hence the chemistry when your cake is baking, and 2) you would have to use quite a bit of the liquid to achieve the same vibrant color results.
The gel/paste food colorings are available at WalMart near the Wilton stuff, which is usually by the crafts and party items. They are a little over a dollar a piece and you will find yourself using them all the time. :)
Miz Helen says
Congratulations Amanda,
You have been featured on Full Plate Thursday and The Menu this week, enjoy!
Miz Helen
Donna says
OHHHH! That is just A-DOR-ABLE!! All of those colors just made me smile:) Great job:)
SmileMonsters says
Looks awesome! I'd love for you to come link up at Fun For Kids Friday.
http://smilemonsters.blogspot.com/2011/04/fun-for-kids-friday_21.html
Jo @ SmileMonsters
Trisha says
Very pretty … It must be taking some amount of patience though!
Lisa says
That is the prettiest checkerboard cake I have ever seen. I love the Easter color scheme. I'd like to invite you to stop by and link it up to this weekend's Sweets for a Saturday. http://sweet-as-sugar-cookies.blogspot.com
Allison @ Alli 'n Son says
What a great idea! So cute.
I would be honored if you shared this on my Sweet Tooth Friday linky. I hope to see you there. http://alli-n-son.com/2011/04/21/quick-no-rise-chocolate-cinnamon-rolls/
Miz Helen says
Hi Amanda,
This is a beautiful Easter Cake. You presented it very nicely with a great tutorial. You made it look easy. It really looks delicious. Thank you so much for sharing with Full Plate Thursday and hope to see you next week! Have a wonderful week end!
Sweet Peas and Bumblebees says
So Cute & Yummy!!
I would love it if you would link this up at our What I Made Wednesday Linky Party!!
Alisa
Sweet Peas and Bumblebees
sweetpeasandbb.blogspot.com
AliLilly says
This is adorable!! I love it! Now I gotta go find one of those checker board thing-a-mah-bobs! :)
Stephanie Lynn @Under the Table and Dreaming says
Hi Amanda! Thanks so much for linking to the sunday showcase – I greatly appreciate it. I have featured this today. Hope you have a fabulous holiday! Thanks again ~ Stephanie Lynn
Little Brick Ranch says
This looks almost too good to eat and would sooo be perfect for my Foodie Friday linky party – stop by this week and link up!
If you have a sec, feel free to pop over now to enter my GIVEAWAY!