If you know me, you know I’m crafty. I even have a separate blog just for my crafts. Halloween does something to me creatively each year. I don’t know what it is about Halloween, but I go on a crafting craze! Lately I am completely obsessed with making monsters. So when the fun folks over at General Mills offered up a challenge to several food bloggers I jumped at the chance! The challenge was to make a festively sweet treat for Halloween using some of their cereals. I knew right away what I would be making!
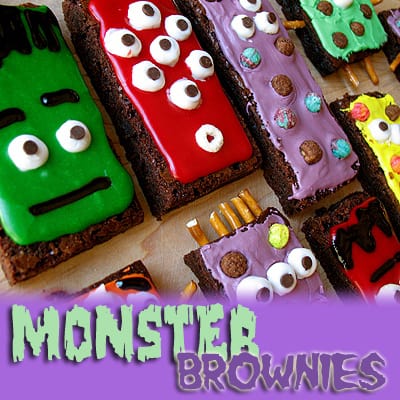
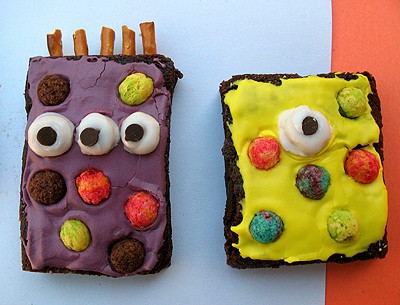
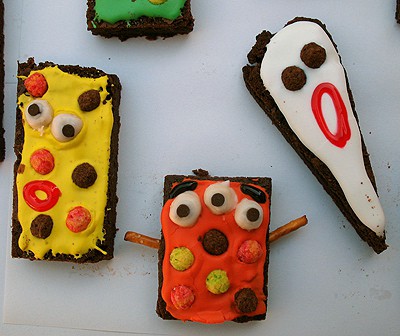
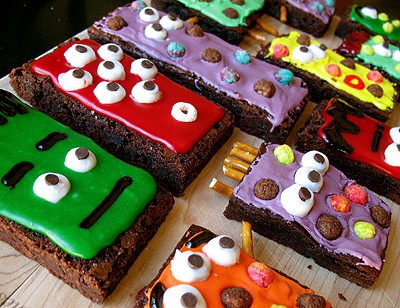
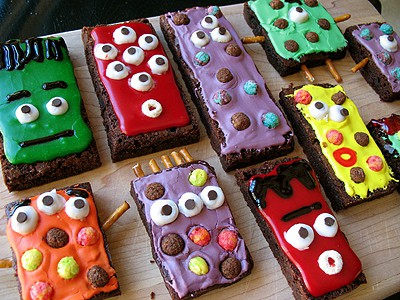
I give you Brownie Monster Treats! Because decorating these treats can be time consuming, I chose to use a boxed brownie mix. You can certainly use your favorite recipe or do the same. I used three cereals: Trix, Cheerios and Cocoa Puffs. To make things easier on myself and to make this kid friendly, I also used Betty Crocker decorating cookie icing.
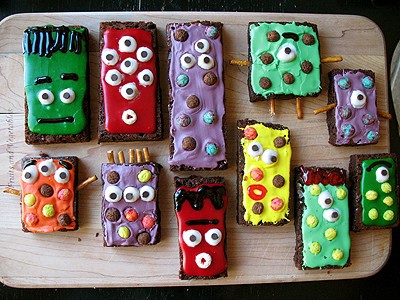
Pretty cool stuff, Royal Icing in a bag! They sell all the colors I needed, but my rinky dink grocery store only had red, green and white, so I used some gel food coloring to get what I wanted. The icing from the bag dried much smoother, so I would definitely recommend buying the colors you want over mixing it yourself.
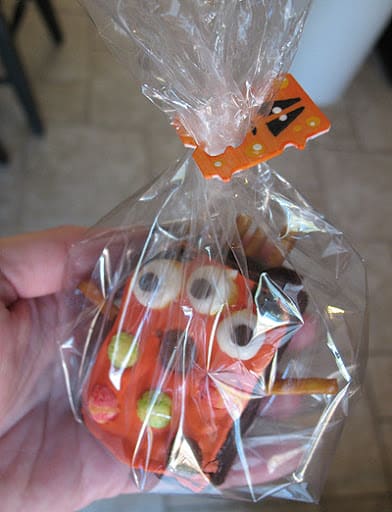
Here’s something fun too. Because this is Royal icing, that means the frosting is dry (unless you use the gel like I did, that never dries LOL) so you can package them in cellophane gift baggies. While you are at it, be sure to make some bread tag monsters to close the treat bags with!
So now, on with the show!
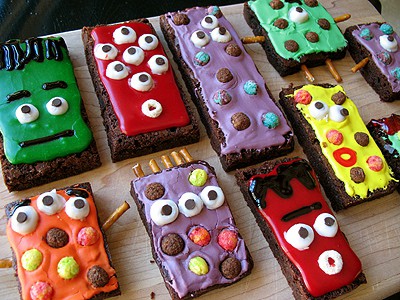
Monster Brownie Treats
Boxed brownie mix
Betty Crocker Cookie Icing in desired colors
Cheerios, Cocoa Puffs, and Trix cereals
Mini chocolate chips
Pretzel sticks
Red and black decorator gel
1/4 cup powdered sugar
milk
First prepare your brownies and allow them to cool. I refrigerated mine so that I could get nice clean cuts. When your brownies are ready to be cut, cut off the edges and eat them :) (you could share too, just sayin’) and cut the brownies into different sized rectangles and squares. I cut some of the odd shaped leftovers into triangles too.

Make the Eyes
It’s important to do this step first to allow adequate time for the glaze to dry. To make the eyes you’ll need any variety of Cheerios, some mini chocolate chips, powdered sugar and a little milk. Place the powdered sugar into a small bowl. Using a spoon, stir in some milk, a little bit at a time, until the consistency is good enough for dipping. Start with about a teaspoon and add a couple drops at a time until you get it where you want it.

Drop a few Cheerios into the glaze coating the cereal. Use a spoon to lift the cereal out of the glaze and place on a wax paper lined cookie sheet.

Place a mini chocolate chip, upside down, in the center of each glazed Cheerio. Gently press the mini chip to set. Set aside.

Icing Colors
You could certainly use your own recipe for Royal icing, I have one myself as well. However, because this is such a great recipe for kids to get involved in, using these prepackaged icings is an excellent alternative. They are available in all of the colors that I used by my store only had a few. Therefore, I added some gel food coloring to mix up my colors. This icing is great, squeezes right out of the tube and onto the brownie, love it!

If you have to mix, like I did, you might find the easiest way to apply the mixed icing is with a new paintbrush.

Decorating
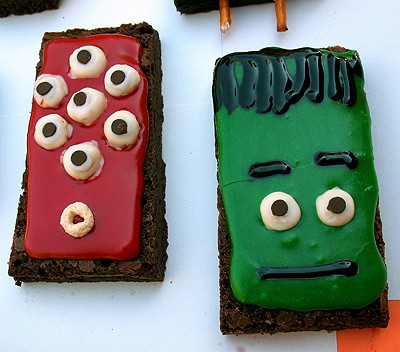
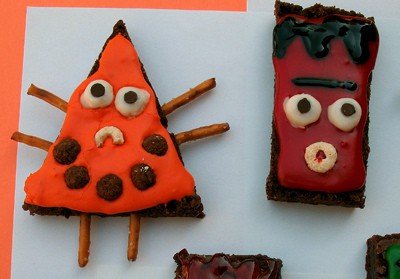
Gently press Trix and Cocoa Puffs cereals into the frosted brownies for the monsters’ polka dots. Lift the eyes from the waxed paper using a toothpick and gently press onto the frosted brownie. You can use pretzel sticks for arms and legs, and add eyebrows, mouths and hair using decorator gel.
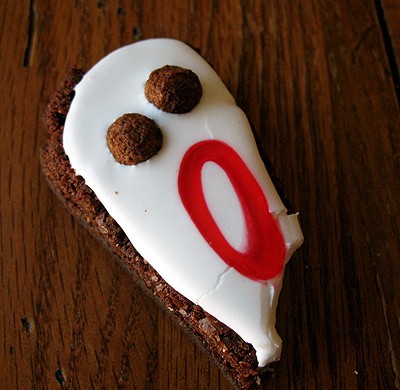
Then you eat them! Nom.
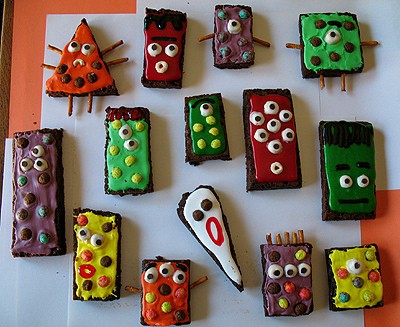
Here are some close ups to give you some monsterous ideas for decorating :)
More Halloween Recipes
- Ghost Brownies
- Mummy Meatloaf
- Witch Finger Cookies
- Halloween Candy Apples
- Marshmallow Frankensteins
- Jalapeno Popper Mummies
- Spider Web Taco Dip
Monster Brownies
IMPORTANT - There are often Frequently Asked Questions within the blog post that you may find helpful. Simply scroll back up to read them!
Print It Rate ItIngredients
- Boxed brownie mix
- Betty Crocker Cookie Icing in desired colors
- Cheerios Cocoa Puffs, and Trix cereals
- Mini chocolate chips
- Pretzel sticks
- Red and black decorator gel
- ¼ cup powdered sugar
- milk
Instructions
- First prepare your brownies and allow them to cool. I refrigerated mine so that I could get nice clean cuts. When your brownies are ready to be cut, cut off the edges and eat them :) (you could share too, just sayin') and cut the brownies into different sized rectangles and squares. I cut some of the odd shaped leftovers into triangles too.
Eyes
- It's important to do this step first to allow adequate time for the glaze to dry. To make the eyes you'll need any variety of Cheerios, some mini chocolate chips, powdered sugar and a little milk. Place the powdered sugar into a small bowl. Using a spoon, stir in some milk, a little bit at a time, until the consistency is good enough for dipping. Start with about a teaspoon and add a couple drops at a time until you get it where you want it.
- Drop a few Cheerios into the glaze coating the cereal. Use a spoon to lift the cereal out of the glaze and place on a wax paper lined cookie sheet.
- Place a mini chocolate chip, upside down, in the center of each glazed Cheerio. Gently press the mini chip to set. Set aside.
Icing Colors
- You could certainly use your own recipe for Royal icing, I have one myself as well. However, because this is such a great recipe for kids to get involved in, using these prepackaged icings is an excellent alternative. They are available in all of the colors that I used by my store only had a few. Therefore, I added some gel food coloring to mix up my colors. This icing is great, squeezes right out of the tube and onto the brownie, love it!
- If you have to mix, like I did, you might find the easiest way to apply the mixed icing is with a new paintbrush.
Decorating
- Gently press Trix and Cocoa Puffs cereals into the frosted brownies for the monsters' polka dots. Lift the eyes from the waxed paper using a toothpick and gently press onto the frosted brownie. You can use pretzel sticks for arms and legs, and add eyebrows, mouths and hair using decorator gel.
More monster stuff from my craft blog :)
Monster Treat Bags
Bread Tag Monsters
Juice Box Monsters
Halloween Luminaries
Amanda Davis
Latest posts by Amanda Davis (see all)
- Pretzel Chocolate Chip Cookies - December 19, 2024
- Christmas Tree Cheese Platter - December 16, 2024
- White Chocolate Macadamia Nut Cookies - December 12, 2024


A Little Bit of Everything! says
Oh, I just love these! Thanks for sharing.
Megan says
holy cuteness!!!! I"m featuring these in a post tomorrow on crazydomestic.com. Feel free to grab our "I was featured" button, thanks for the SUPER cute idea!!!!
Heidi says
okay – these are SO stink'n cute! my boys would LOVE making them!
popp'n over from tutorial tuesday,
-heidi
Jackie at Phamfatale.com says
So creative! Can't wait to make these cut monsters and bring them to the girls' school for Halloween :)
Chef Fresco says
Haha! OMG these are seriously THE best brownies I have ever seen!! Love them. One day when I have kids, I imagine making these for school parties and all the kids totally loving it.
Amanda says
Thank you guys! You are awesome!
polwig says
These ares adorable, fun to make an eat
Larissa says
I LOVE these. My little boy is sitting on my lap asking me to make these. Now I need to go through the rest of your blog AND visit your crafting blog…I sense some cooking a crafting fun coming. I love a good recipe blog AND I love a good recipe blog. SO excited.
Stop by sometime.
Just Another Day in Paradise
Tasty Eats At Home says
These are adorable! I read the title of this post and I'm just thinking "monster" as in "really big". Gee, how anti-Halloween am I? :)
Jennifer Juniper says
Between these brownies and the monster cupcakes someone linked up last week – I feel a monster Halloween party coming on!
Jenn says
These are fantastic!!! Love all the colors! I think I know what we're going to have to do for my son's birthday treat…November 2nd is close enough to Halloween for monsters to still be applicable!! :)
Amanda says
Thanks everyone for your wonderful comments! :) :)
Lisa says
If I do the base frosting, will it be difficult for three-year-olds to decorate later with some of the same food items you used? Will the icing be too hard or set up? Thanks!
Amanda Formaro says
Yes the icing will set up, so you will need to add the food items right away. Or you could use regular spreadable frosting for them to add items to later :)
Meg says
How FUN! I love this idea! Definitely trying it out!
I'd love for you to check out my giveaway going on now! http://alittleknickknack.blogspot.com/2010/10/felt-headband-giveaway.html
Have a great day!
Leslie says
These are soooo freakin cute Amanda!!!!
Barbara Bakes says
I love your little monsters. I love your little monster bread tag idea even more. So clever!
Laura Ingalls Gunn says
These are so cute and look yummy!
They're spooktacular.
I hope you have stopped by and entered my Fab Fall French Giveaway.
C.R.A.F.T. says
these are so CUTE :) come on over and link up to MMM!!
Jenglamgirl says
I adore all your cute colorful playful fun SCARY monsters. THESE ARE SO DARN CUTE! LOVE THEM! Jen
Tracy's Trinkets and Treasures says
Those are really cute. I like how you made the eyes. That was really fun and a good idea.
Christine says
Those look awesome! scary:)
Great job!
Christine
greatoakcircle.com