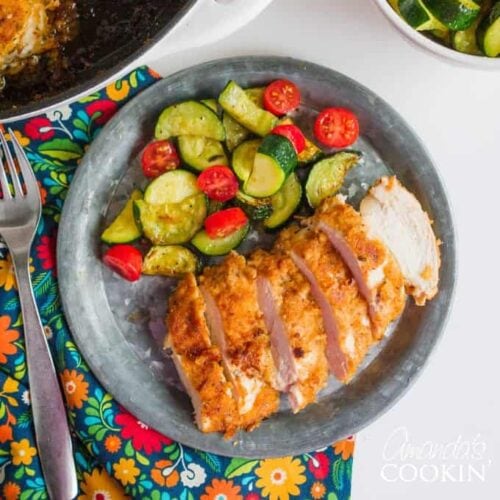
Try your hand at some spicy oven fried chicken for dinner tonight! This spicy oven fried chicken gets its flavor from the spicy marinade. So be sure to marinate your chicken first thing in the morning or the night before so your chicken has enough time to soak up the spices. Serve it up with Spanish rice with black beans and corn, or Crockpot Mac and Cheese for a hearty and satisfying combo or for a lighter choice, sautee some fresh zucchini and Roma tomatoes!

Spicy Oven Fried Chicken
This delicious Spicy Oven Fried Chicken was a recipe I came across many years ago. I saved it forever in my recipe printouts and finally pulled it out to make it. A very important step is to marinate for the time suggested; I put mine in the marinade in the morning. You could really taste the spice in the meat and the crispy coating was delicious.

Ingredients for Spicy Oven Fried Chicken
Makes 4 servings
Ingredients
- 1 cup buttermilk
- 1/4 cup hot pepper sauce
- 4 boneless, skinless chicken breast halves
- 1 cup dry breadcrumbs
- 1/2 cup all-purpose flour
- 2 teaspoons onion powder
- 1 teaspoon cornstarch
- 1 teaspoon white sugar
- 1 teaspoon garlic salt
- 1 teaspoon salt
- 1 teaspoon pepper
- 1 teaspoon paprika
- 1/2 teaspoon cayenne pepper
- 2 tablespoons olive oil
Helpful Kitchen Tools

Making Spicy Oven Fried Chicken
- In a medium bowl, mix the buttermilk and hot pepper sauce. Place chicken in the mixture to coat. Cover, and marinate in the refrigerator 8 hours or overnight.
- Preheat oven to 350 degrees F (175 degrees C).
- In a separate medium bowl, mix dry bread crumbs, flour, onion powder, cornstarch, white sugar, garlic salt, salt, pepper, paprika, and cayenne pepper. Thoroughly coat the chicken in the breadcrumb mixture.
- Heat the olive oil in a medium skillet over medium heat, and cook chicken 5 to 7 minutes on each side, until lightly browned.
- Transfer chicken to a medium baking dish, and bake in the preheated oven 30 minutes, until no longer pink and juices run clear.
- The time on the baking was right on. I actually baked mine a little longer because I wasn’t quite done with the rice etc, I should have turned it off and removed it from the oven. It would have been juicier. But again, that was my fault, I left it in about 15 minutes longer than the recipe suggested. It was still very tasty and had a great spicy flavor. Thumbs up!

You can scroll to the bottom of this post for the full printable version of this recipe!

If you like this you might want to try these Oven Fried Chicken Breasts and these Oven Fried Chicken Legs.

Oven Fried Chicken
IMPORTANT – There are often Frequently Asked Questions within the blog post that you may find helpful. Simply scroll back up to read them!
Print It Rate ItIngredients
- 1 cup buttermilk
- ¼ cup hot pepper sauce
- 4 boneless skinless chicken breast halves
- 1 cup dry bread crumbs
- ½ cup all-purpose flour
- 2 teaspoons onion powder
- 1 teaspoon cornstarch
- 1 teaspoon white sugar
- 1 teaspoon garlic salt
- 1 teaspoon salt
- 1 teaspoon pepper
- 1 teaspoon paprika
- ½ teaspoon cayenne pepper
- 2 tablespoons olive oil
Things You’ll Need
Instructions
- In a medium bowl, mix the buttermilk and hot pepper sauce. Place chicken in the mixture to coat. Cover, and marinate in the refrigerator 8 hours or overnight.
- Preheat oven to 350 degrees F (175 degrees C).
- In a separate medium bowl, mix dry bread crumbs, flour, onion powder, cornstarch, white sugar, garlic salt, salt, pepper, paprika, and cayenne pepper. Thoroughly coat the chicken in the bread crumb mixture.
- Heat the olive oil in a medium skillet over medium heat, and cook chicken 5 to 7 minutes on each side, until lightly browned.
- Transfer chicken to a medium baking dish, and bake in the preheated oven 30 minutes, until no longer pink and juices run clear.
Nutrition
The recipes on this blog are tested with a conventional gas oven and gas stovetop. It’s important to note that some ovens, especially as they age, can cook and bake inconsistently. Using an inexpensive oven thermometer can assure you that your oven is truly heating to the proper temperature. If you use a toaster oven or countertop oven, please keep in mind that they may not distribute heat the same as a conventional full sized oven and you may need to adjust your cooking/baking times. In the case of recipes made with a pressure cooker, air fryer, slow cooker, or other appliance, a link to the appliances we use is listed within each respective recipe. For baking recipes where measurements are given by weight, please note that results may not be the same if cups are used instead, and we can’t guarantee success with that method.
This post was originally published on this blog on September 22, 2008.

- 26 Best Ground Beef Casseroles for Easy Family Dinners - July 8, 2026
- Strawberry Shortcake Kabobs - July 2, 2026
- 30 Ground Beef Dinners Ready in 30 Minutes - June 26, 2026


BRUCE D Betterly says
It was delicious! Making it again tonight!
Randy Gollihugh says
Baking in the oven will it all be crispy or will the bottom be mushy
Amanda Formaro says
If the chicken pieces are fatty it can become a bit mushy on the bottom. Try turning them halfway through baking.
Apples and Butter says
I love anything that tastes fried, but isn’t. I will definitely have to try out your recipe. Thanks!
Pam says
This is my kind of chicken. I know my husband would love it too – the spicier the better. Nice recipe.
Prudy says
I’d love to add you to my blogroll. I haven’t updated mine in ages and you are inspiring me to do so.
Amanda says
Thanks ladies! It really was good, if you try it, you’ll love it. Thanks for commenting!
Katherine Aucoin says
Your chicken looks so crisp and yummy. You have a terrif blog!
Ann says
hmm..yummy and delicious looking.lemme try this once.
Prudy says
That looks wonderful and just how I would like it, spicy and nicely browned. I love your gingham background. It makes the food look wonderful!