


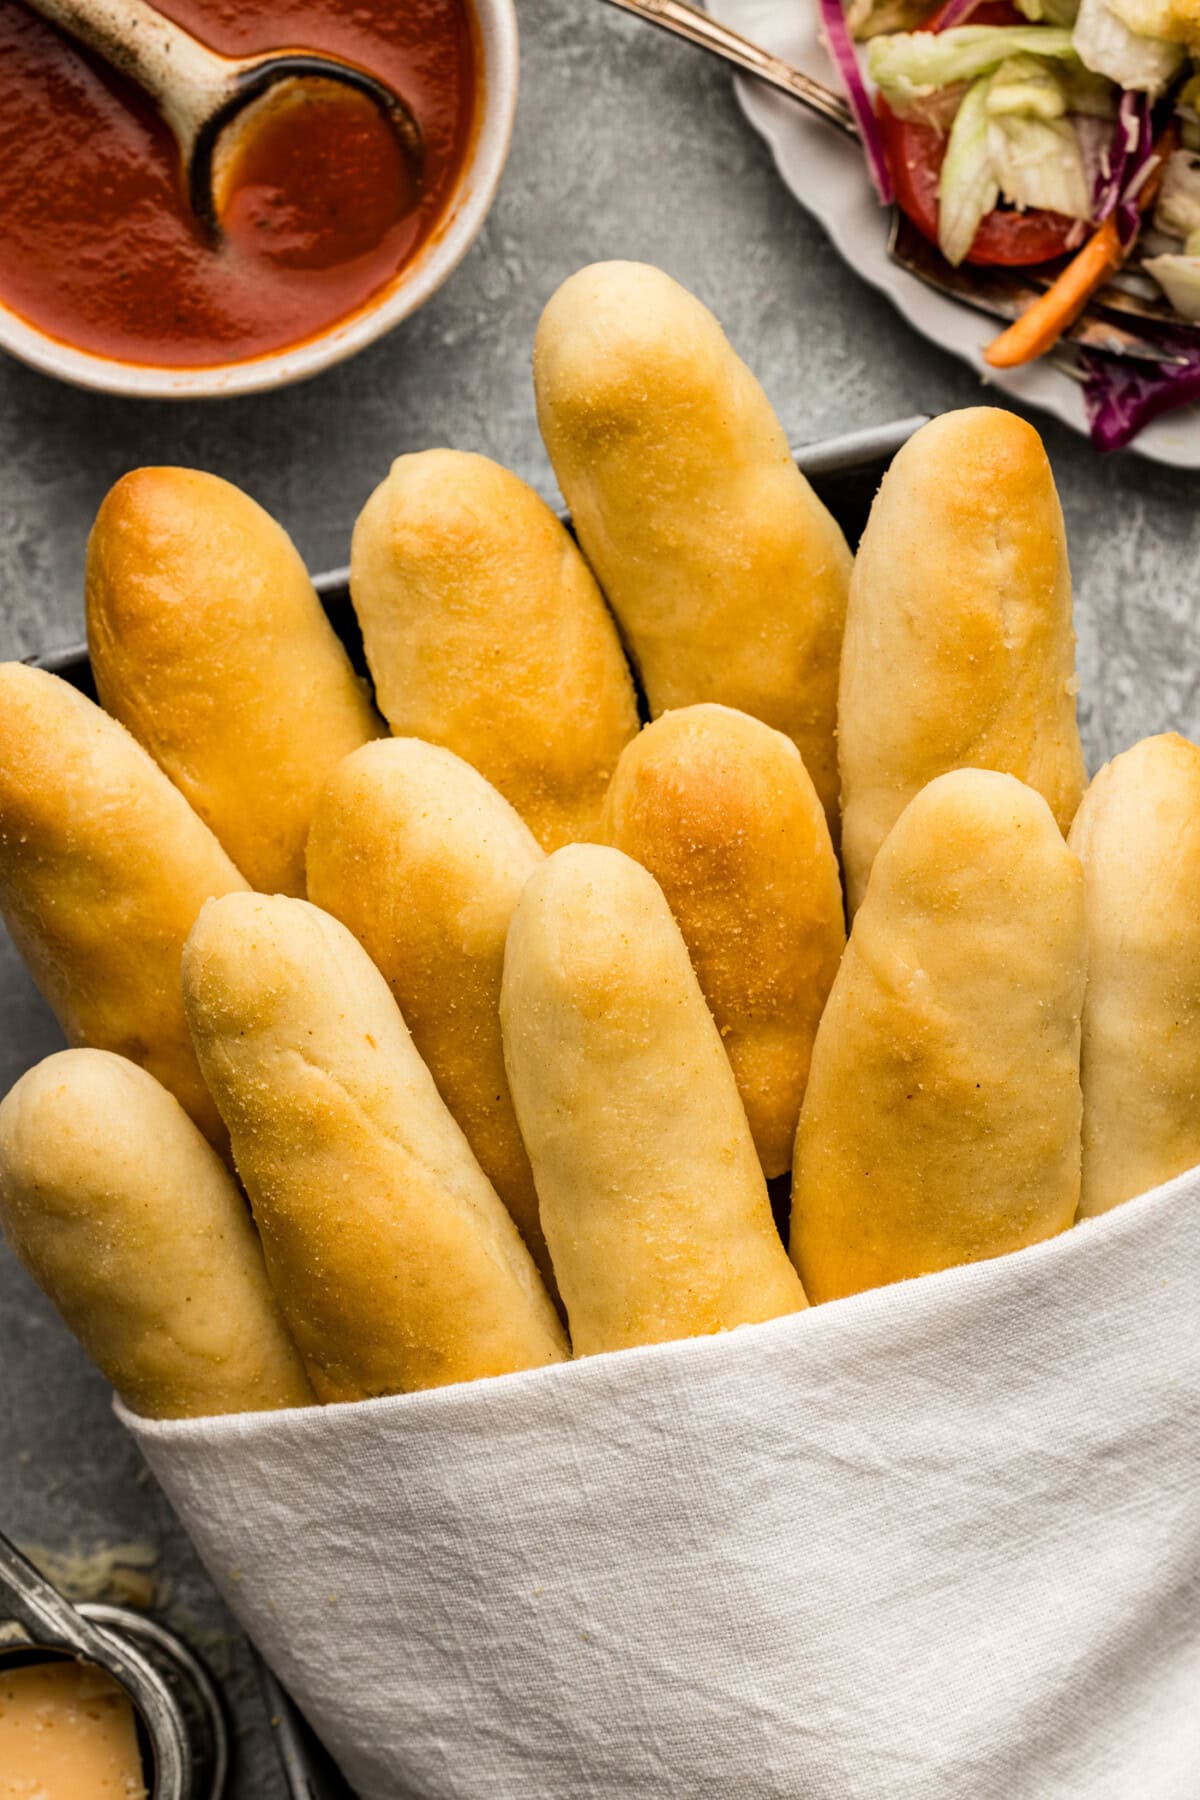
This homemade Olive Garden breadsticks recipe yields warm, garlic-sprinkled breadsticks that are pillowy soft every time!
Why this recipe works
There’s a secret to Olive Garden breadsticks. And let’s be real, it’s not the dough. It’s what happens when they come out of the oven. Any soft dough will work, though I’m partial to my pull apart dinner roll dough as I’ve always had success with it no matter how they’re shaped. However, the big, fat, juicy secret lies in the melted butter and dusting of garlic salt after they’re fresh out of the oven. Shocker, I know.
I’ve been making this Olive Garden breadsticks recipe since 2014, and it’s never failed me. If you really want to go the extra mile, pair your sticks with a hearty bowl of zuppa toscana or pasta fagioli for that classic OG experience.
Ingredients you will need
Get all measurements, ingredients, and instructions in the printable version at the end of this post.
Ingredient Info and Substitution Suggestions
YEAST – Double check that your yeast is not expired. More often than not, the cause of your dough not proofing is due to expired yeast.
MILK – It’s important to test the temperature of your milk. It should register between 105 – 115F on a digital cooking thermometer. If your milk is too hot it can kill the yeast and prevent it from activating, which again, can cause your dough not to proof.
How to Make Olive Garden Breadsticks
These step by step photos and instructions are here to help you visualize how to make this recipe. You can Jump to Recipe to get the printable version of this recipe, complete with measurements and instructions at the bottom.
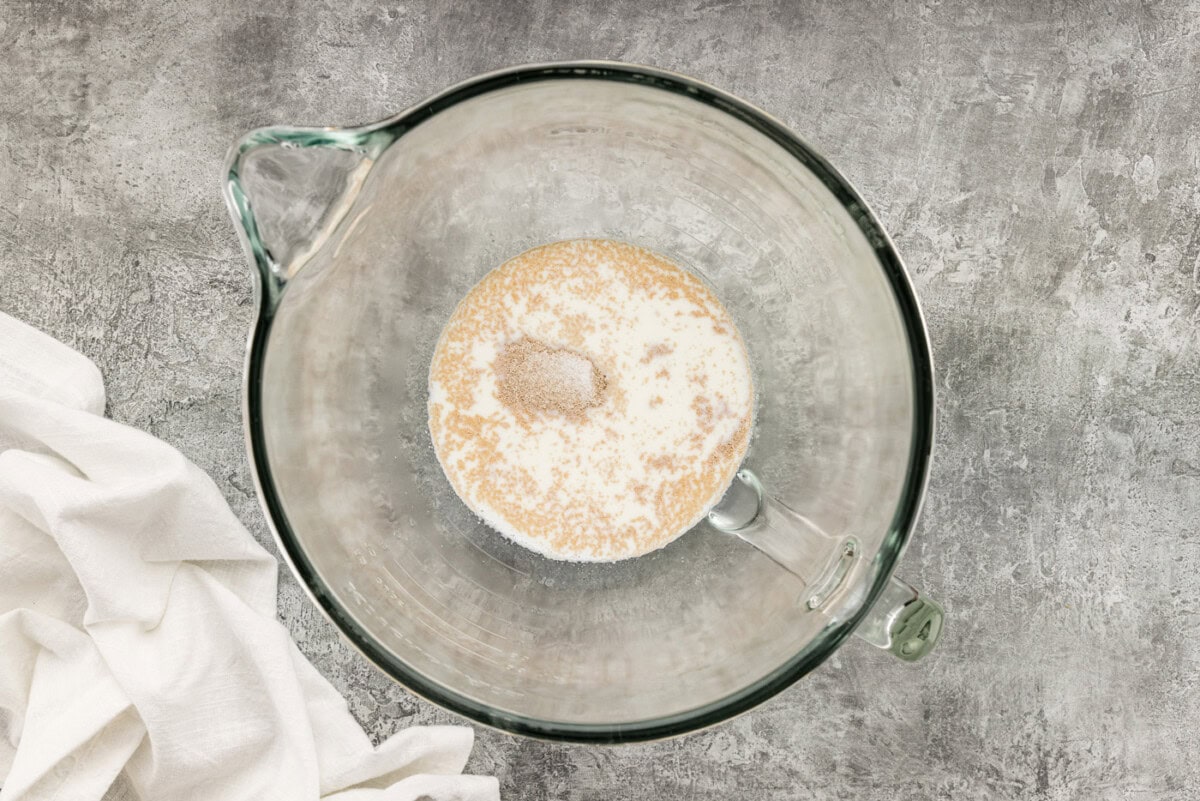
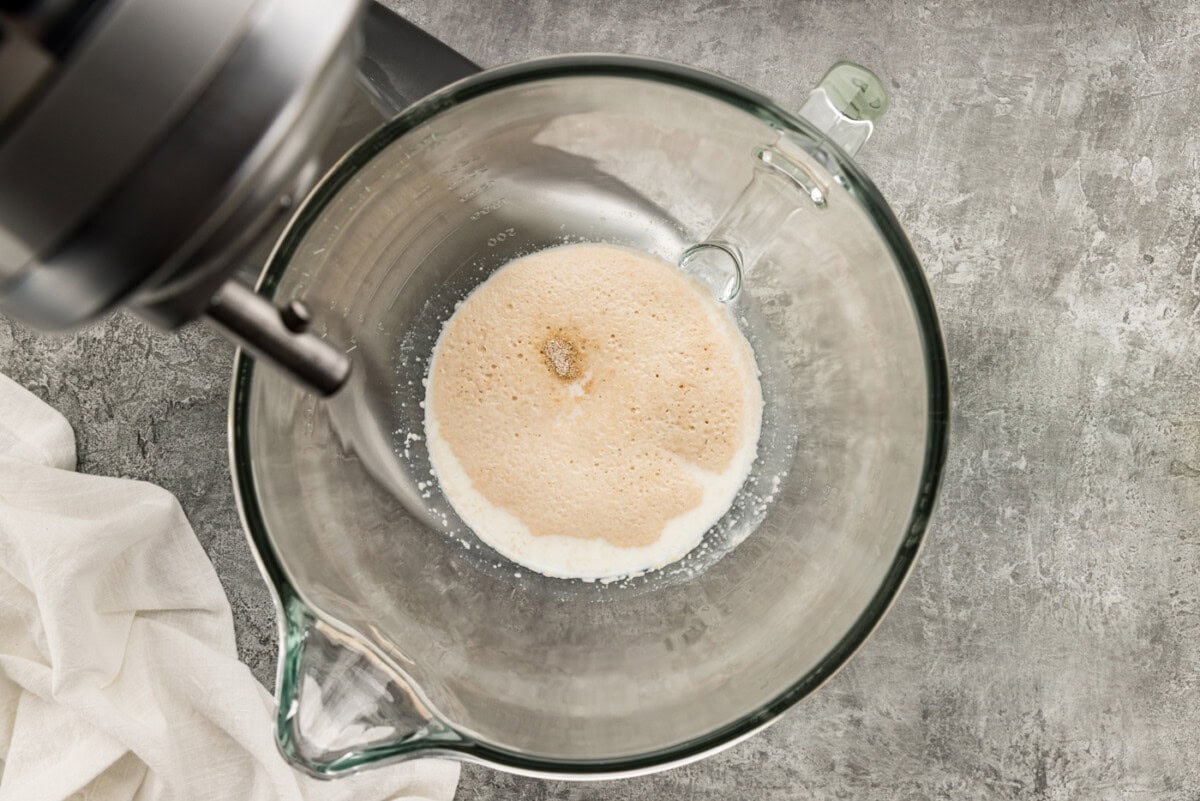
- Sprinkle yeast over warm milk, then sprinkle sugar over yeast in an electric mixer bowl. Let proof for 3-4 minutes.
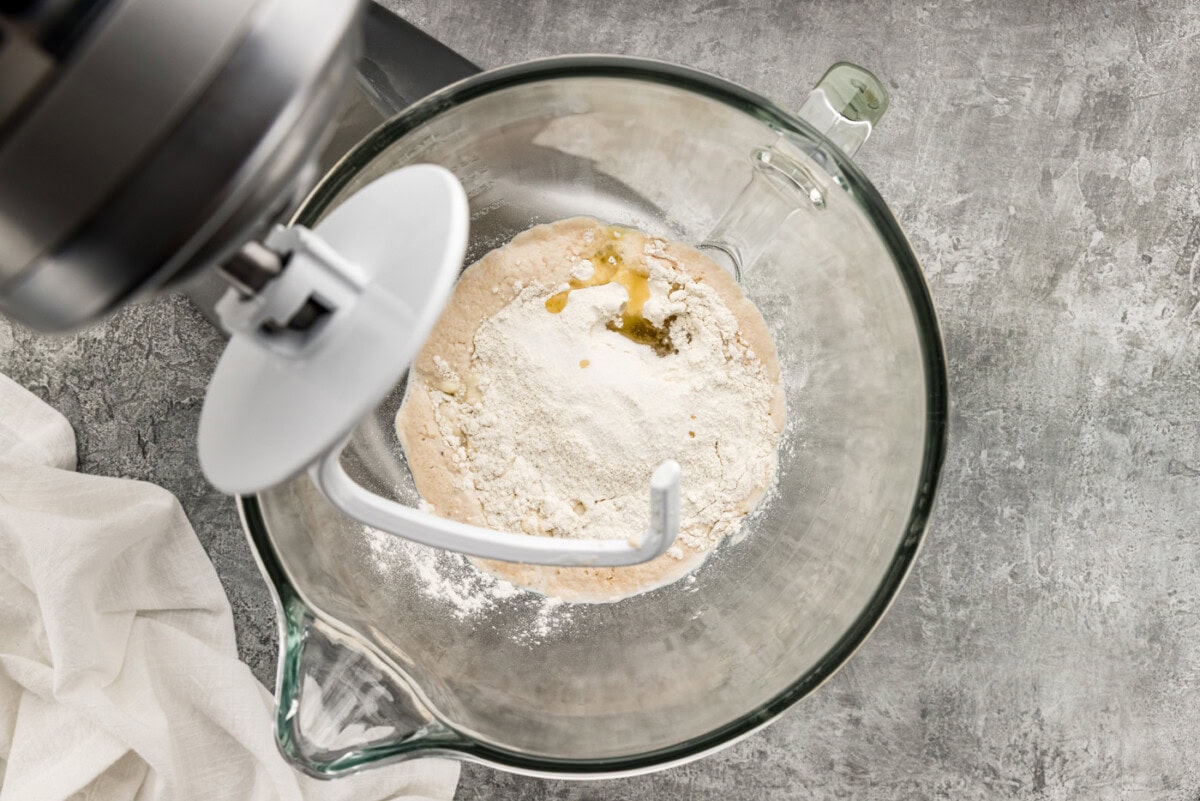
- With mixer on low speed, mix in 1 cup of the flour, olive oil, and salt. Increase speed to medium and beat until smooth. Beat in remaining flour and mix just until incorporated.
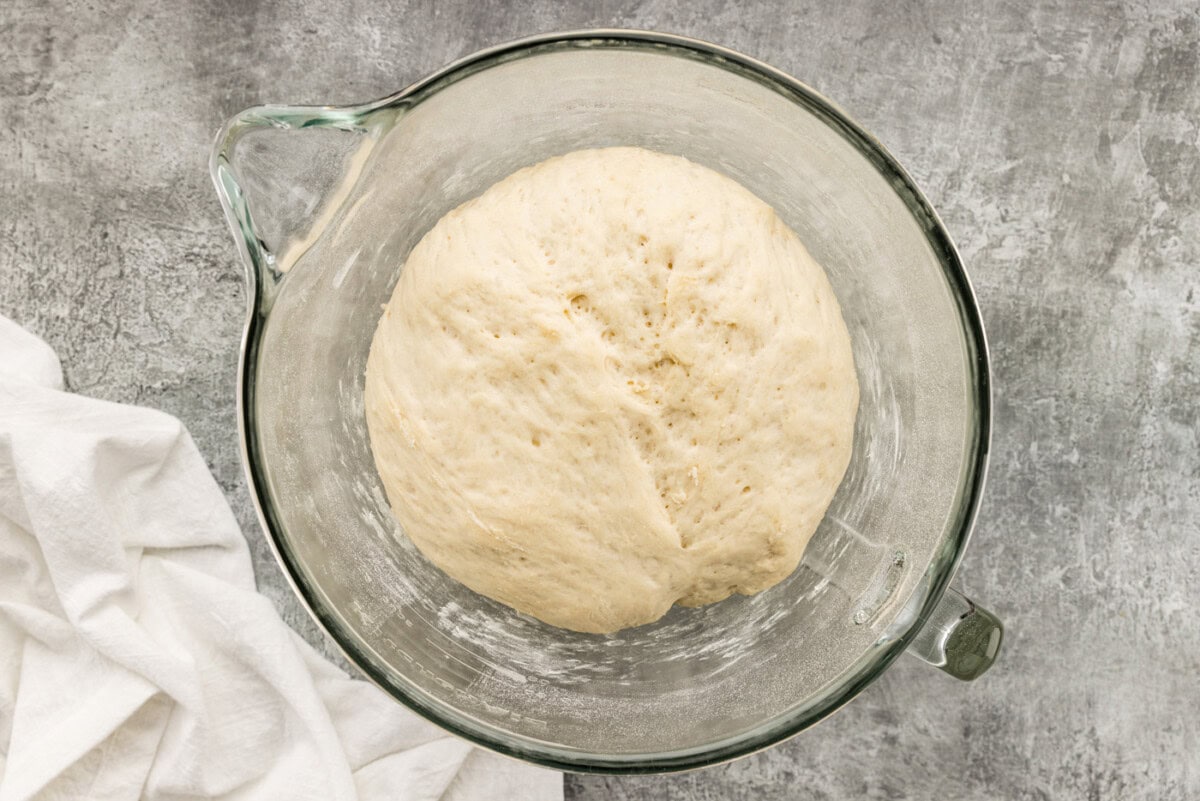
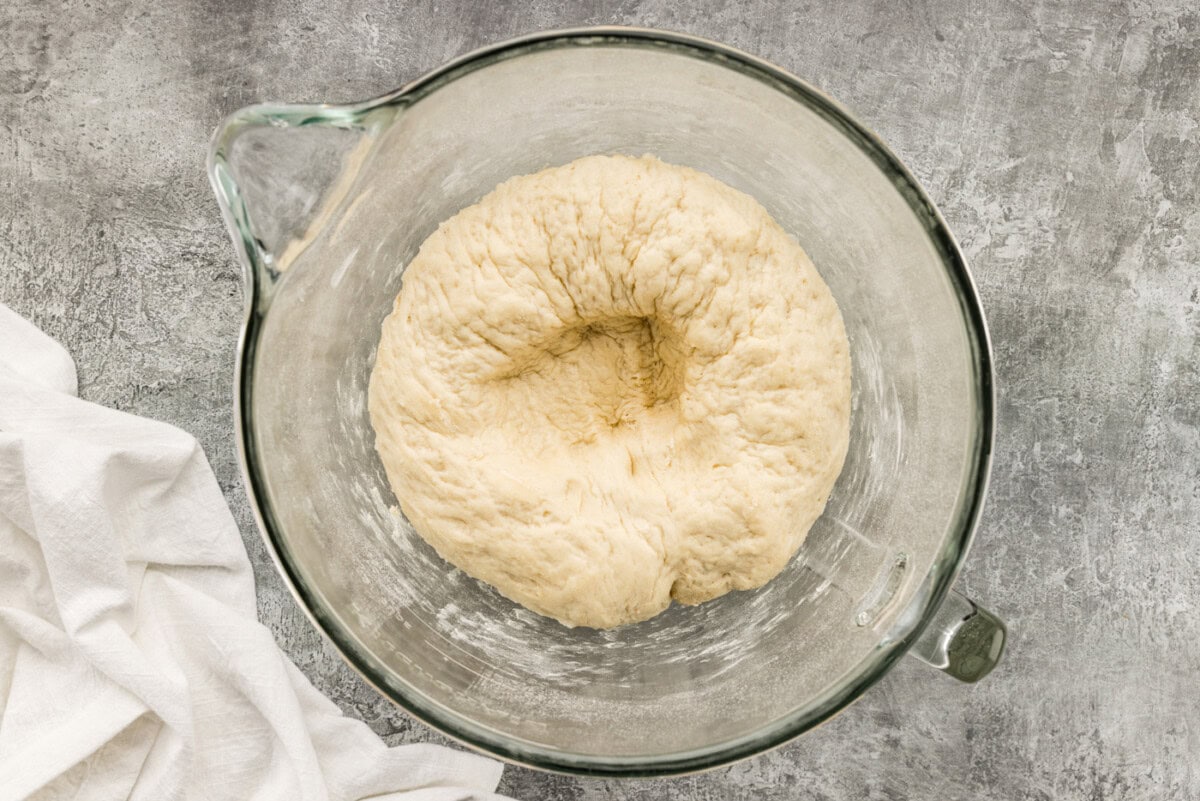
- Cover and let rise in a warm place until doubled, about 45 minutes.
- Preheat oven to 400 degrees F. Line two insulated baking sheets with parchment paper.
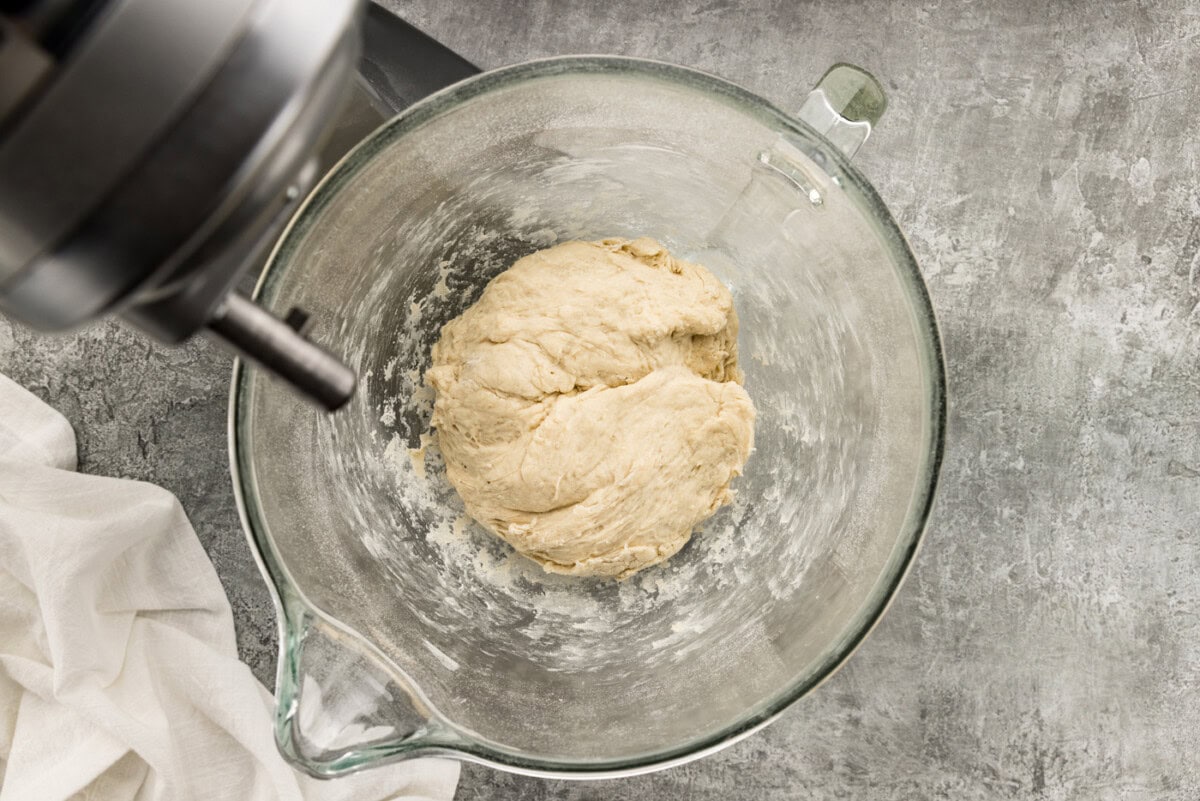
- Sprinkle work surface with extra flour. Punch down the dough and transfer it to the work surface, kneading it by hand for 3-5 minutes, or until the dough is soft and workable.

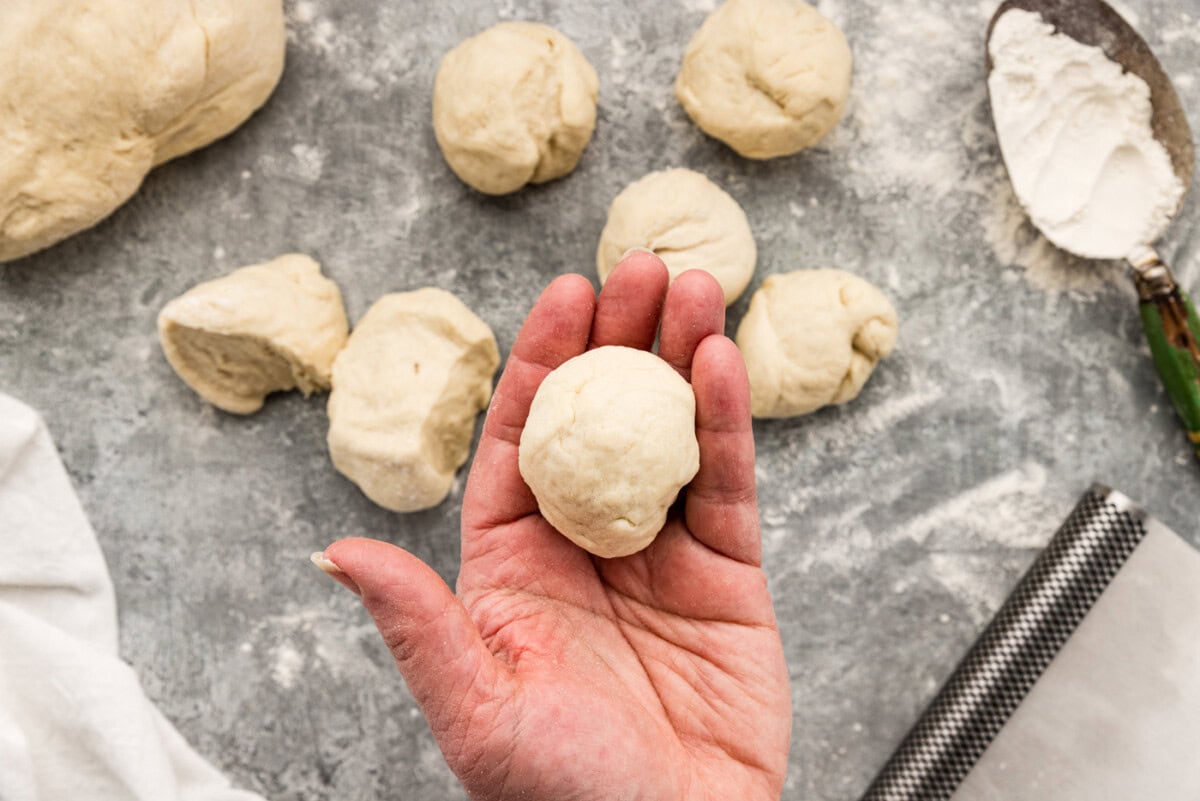
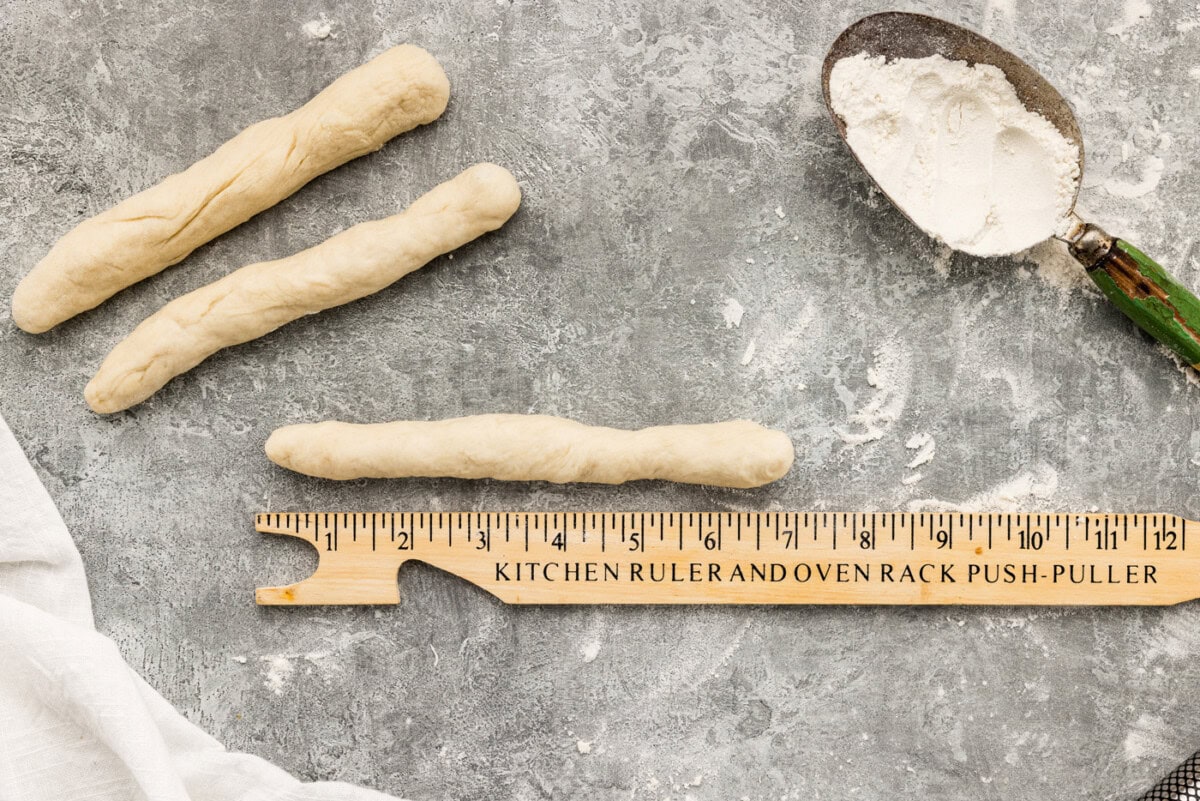
- Divide dough into 16 equal pieces (about 2 ounces each). Roll each piece into a ball, then roll between the palms of your hands into 7-inch-long sticks. Transfer sticks onto the baking sheet, placing them 2 inches apart. Cover and let rise for 15 minutes.
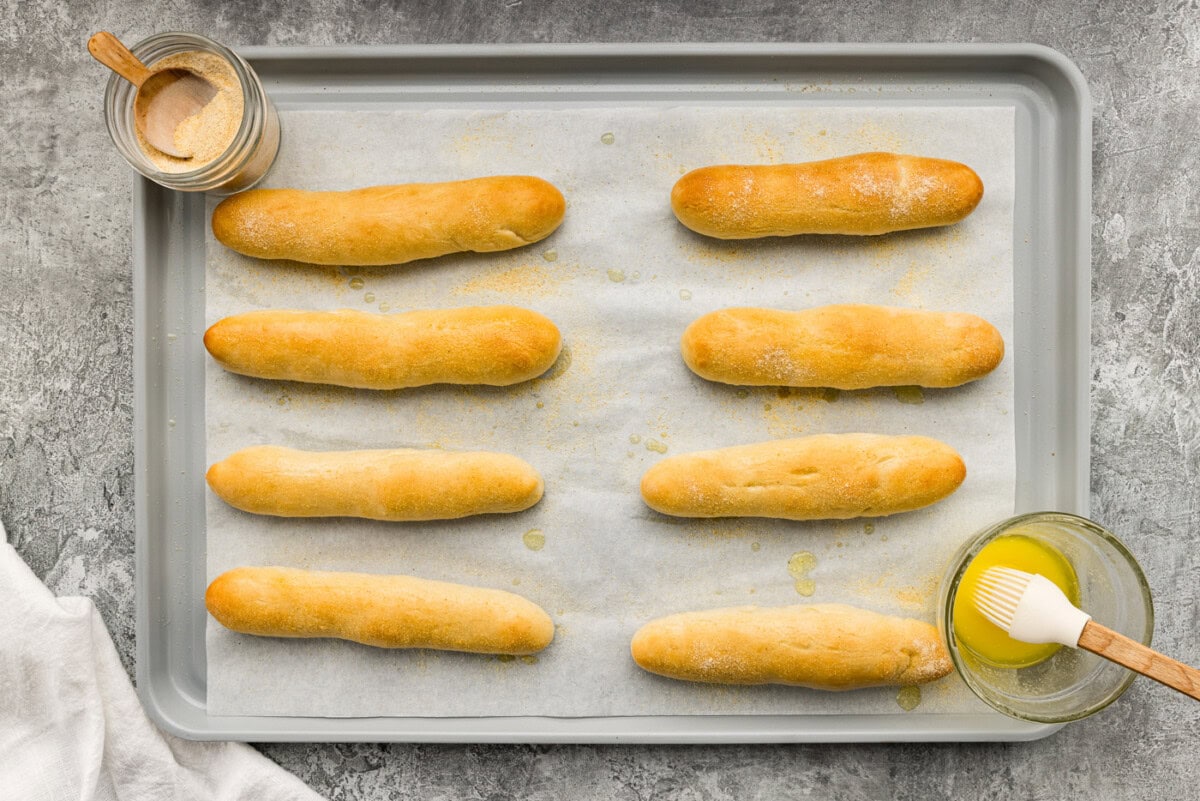
- Bake until crust is light golden brown, about 12-13 minutes.
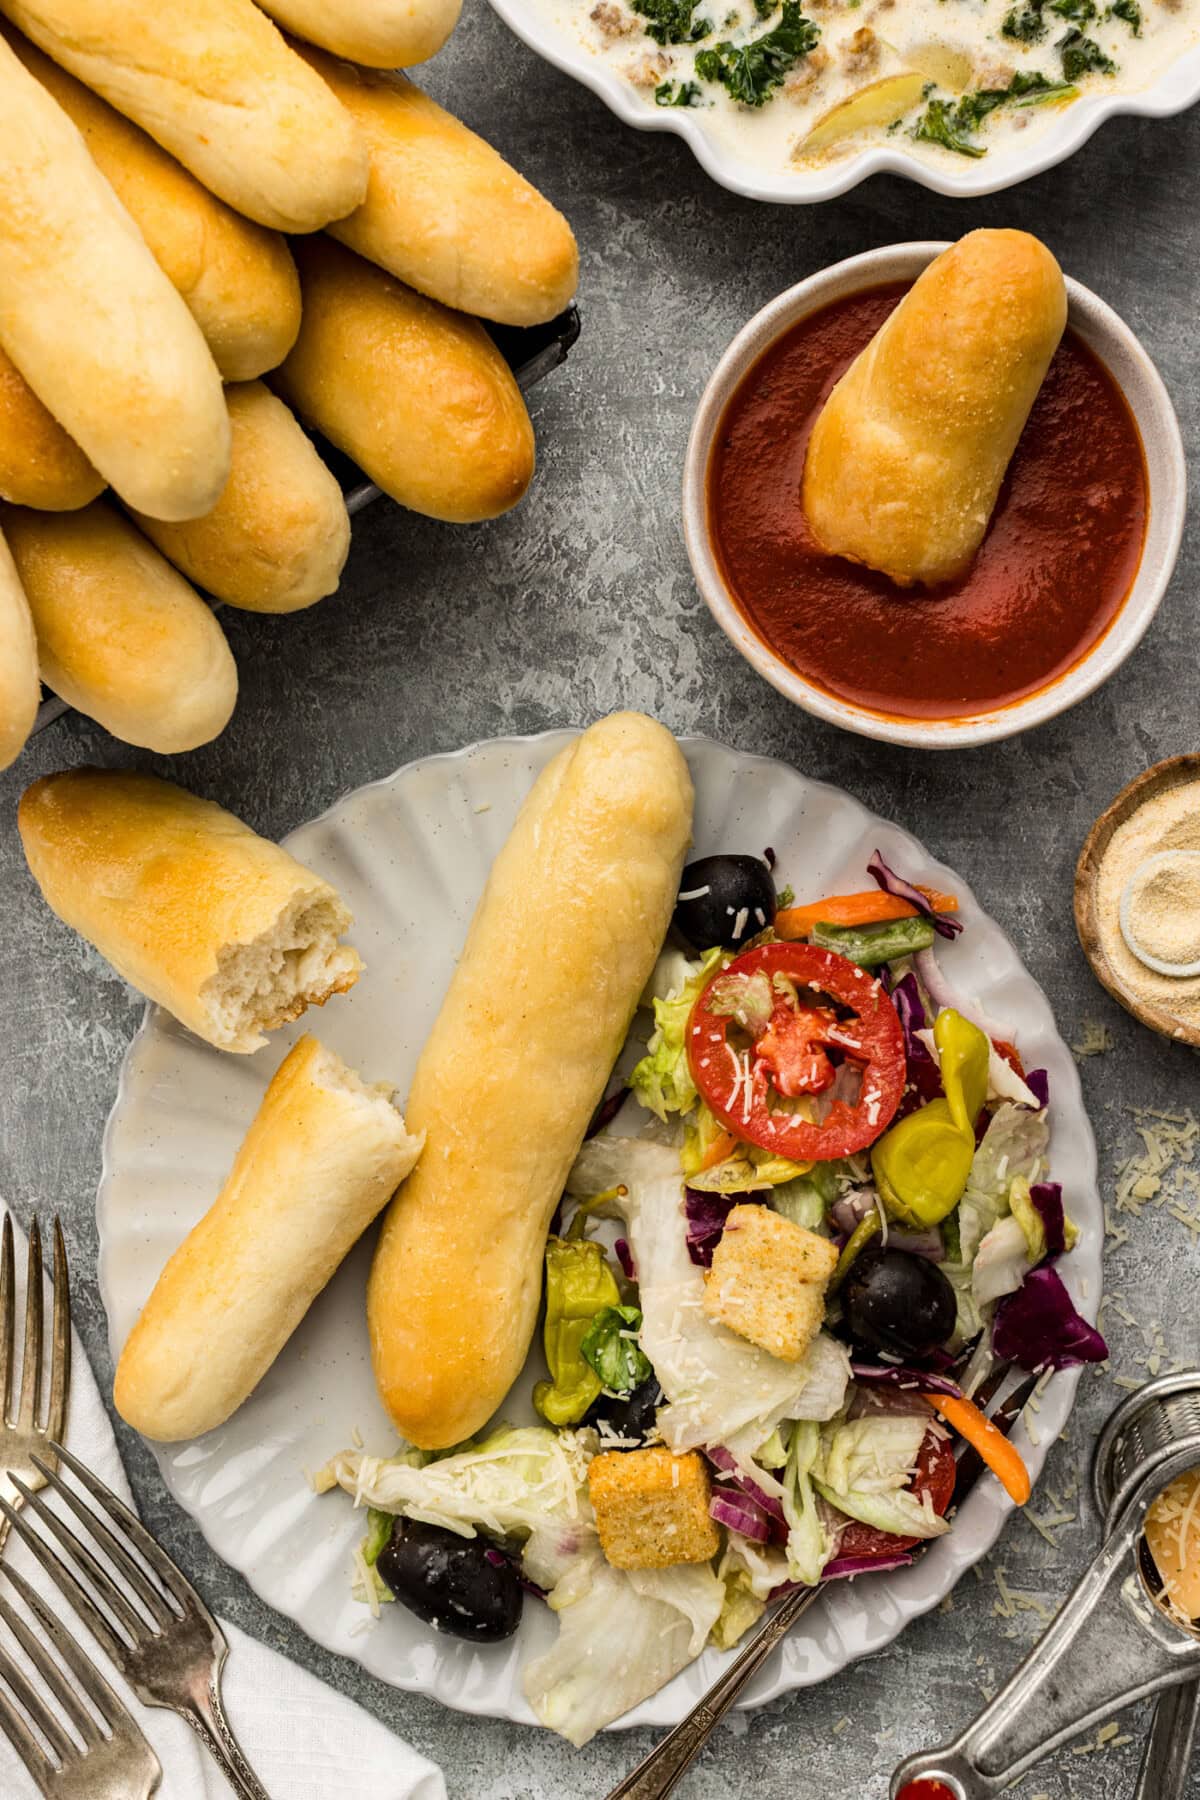
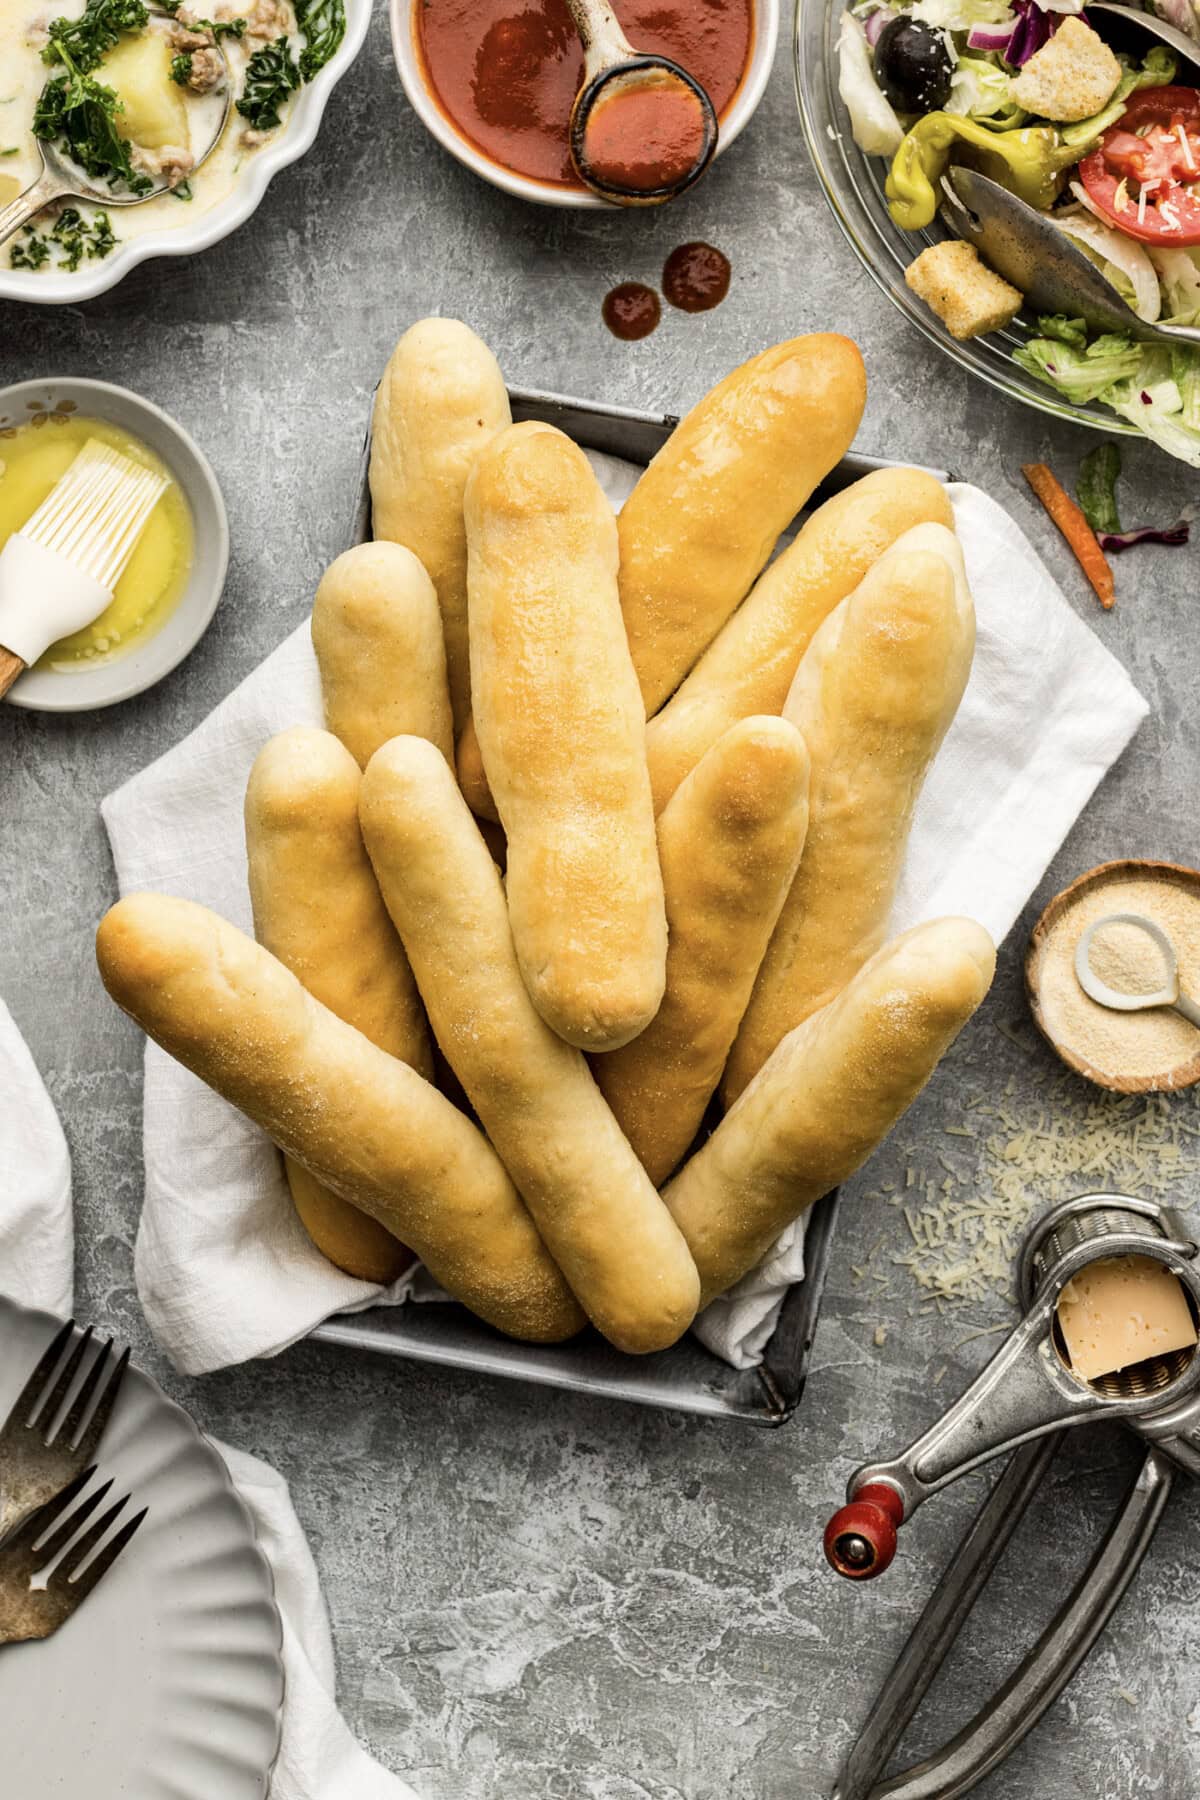
- Remove from oven and immediately brush with melted butter and sprinkle with garlic salt.
Frequently Asked Questions & Expert Tips
These breadsticks are best served warm and steamy from the oven, but you can store fully cooled leftovers in an air-tight container kept at room temperature for 2-3 days. Reheat them in the air fryer, toaster oven, or oven until warmed through.
Yes, you can freeze these breadsticks, but I would suggest parbaking them first (or freezing after baking). Place the prepared breadsticks in the oven until they form a slight crust. The breadsticks should hold their shape but not be browned. Allow them to cool, then place the breadsticks on a baking sheet and flash freeze them until solid. Once solid, transfer them to a large ziptop bag and freeze for up to 3 months. When you are ready to bake, place the frozen breadsticks on a cookie sheet and bake according to the original instructions. It may take a little less time, so keep an eye on them.
Serving Suggestions
Serve your copycat Olive Garden breadsticks with soup and salad or alongside pasta, pizza, or lasagna to name a few! You can also dip them in marinara, alfredo, or vodka sauce.
More Copycat Olive Garden Recipes
I love to bake and cook and share my kitchen experience with all of you! Remembering to come back each day can be tough, that’s why I offer a convenient newsletter every time a new recipe posts. Simply subscribe and start receiving your free daily recipes!

Olive Garden Breadsticks
IMPORTANT – There are often Frequently Asked Questions within the blog post that you may find helpful. Simply scroll back up to read them!
Print It Pin It Rate ItIngredients
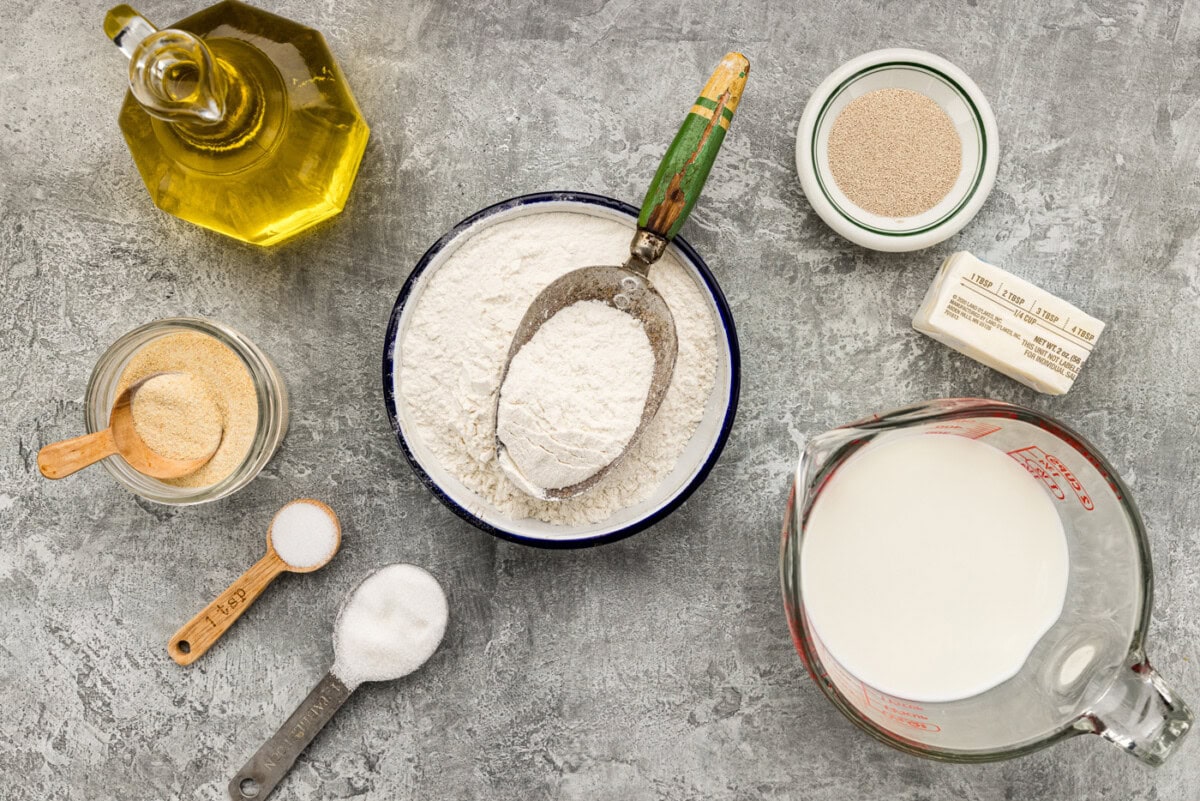
- 1 package quick-acting active dry yeast 4 tsp, or .2 ounces
- 1 ⅓ cup milk warmed to 105 to 115F degrees
- 1 Tablespoon granulated sugar
- 3 to 3 ½ cups all-purpose flour 390g – 455g. plus extra for dusting work surface
- 3 Tablespoons extra virgin olive oil
- 1 teaspoon salt
- 2-3 Tablespoons melted butter
- Garlic salt
Things You’ll Need
Before You Begin
- If you don’t have insulated baking sheets you can double the baking sheets (stacking one on top of the other). This helps the bottom not brown so quick.
- Double check that your yeast is not expired. More often than not, the cause of your dough not proofing is due to expired yeast.
- It’s important to test the temperature of your milk. It should register between 105 – 115F on a digital cooking thermometer. If your milk is too hot it can kill the yeast and prevent it from activating, which again, can cause your dough not to proof.
Instructions
- Sprinkle yeast over warm milk then sprinkle sugar over yeast in electric mixer bowl. Let proof for 3-4 minutes.1 package quick-acting active dry yeast, 1 1/3 cup milk, 1 Tablespoon granulated sugar
- With mixer on low speed, mix in 1 cup (130g) of the flour, olive oil, and salt.3 Tablespoons extra virgin olive oil, 1 teaspoon salt
- Increase speed to medium and beat until smooth. Beat in remaining flour and mix just until incorporated. Cover and let rise in warm place until double, about 45 minutes.
- Preheat oven 400 degrees F. Line two insulated baking sheets with parchment paper.
- Sprinkle work surface with extra flour. Punch down dough and transfer it to the work surface, kneading it by hand for 3-5 minutes, or until dough is soft and workable.
- Divide dough into 16 equal pieces (about 2-ounces each). Roll each piece into a ball then roll between the palms of your hands into 7-inch long sticks. Place sticks on the baking sheet, placing them 2-inches apart. Cover and let rise for 15 minutes.
- Bake until crust is light golden brown, about 12-13 minutes.
- Remove from oven and immediately brush with melted butter and sprinkle with garlic salt.2-3 Tablespoons melted butter, Garlic salt
Expert Tips & FAQs
- These breadsticks are best served warm and steamy from the oven, but you can store fully cooled leftovers in an air-tight container kept at room temperature for 2-3 days. Reheat them in the air fryer or oven until warmed through.
Nutrition
The recipes on this blog are tested with a conventional gas oven and gas stovetop. It’s important to note that some ovens, especially as they age, can cook and bake inconsistently. Using an inexpensive oven thermometer can assure you that your oven is truly heating to the proper temperature. If you use a toaster oven or countertop oven, please keep in mind that they may not distribute heat the same as a conventional full sized oven and you may need to adjust your cooking/baking times. In the case of recipes made with a pressure cooker, air fryer, slow cooker, or other appliance, a link to the appliances we use is listed within each respective recipe. For baking recipes where measurements are given by weight, please note that results may not be the same if cups are used instead, and we can’t guarantee success with that method.
This post originally appeared on this blog on Oct 8, 2014 and has since been updated with new photos and expert tips.

- Strawberry Fluff Salad with Cottage Cheese - July 30, 2026
- Homemade Baja Citrus Marinade - July 29, 2026
- 50+ Budget-Friendly Ground Beef Meals to Feed a Family - July 24, 2026


Lee Ann says
These breadsticks are fantastic! Even better than Olive Garden. I printed the recipe a few months ago and made them several times. I lost the printout and it took me FOREVER to find it again . . . will be bookmarking this site for the future!
Rhadonda Sedgwick says
I just made these breadsticks and they are DELICIOUS!! Super easy to make too! I love that it’s all in one bowl and it’s a yeast bread that doesn’t take all day with fairly short rise time for the dough and a short rise time for the sticks. And they reheat great (if you have any leftover!)
Carol Meadows says
At the beginning of the recipe it says to proof e-4 minutes. What does that mean ?
Amanda Formaro says
I don’t see that. I see 3-4 minutes.
Donna says
These are the most perfect breadsticks ever!
Diane says
Can these rolls be made up one day and baked the next day. I have baked them the same day and they were delicious but I would like to make up dough one day and bake the next for a family dinner.
Amanda Formaro says
Any kind of yeast dough would have to be parbaked in order to stop the rising process. Then you could bake them the next day.
kalai says
HI Amanda, Thank you for your idea. I just made this and it turned out perfectly. Actually this time I reduced the temperature it works now. thank you for feeding my baking addiction.
Amanda Formaro says
Awesome, so glad they worked!
kalai says
Thank you for the recipe.It came out good but only one issue. Inside of the bread it was so soft [ like olive Garden bread stick] but not out side. out side was crispy.so how do I get the soft side. help me……
Amanda Formaro says
Hi Kalai. Did you brush the melted butter on as soon as you removed them from the oven? That usually keeps them soft. The only other thing I can think of is that your oven runs hotter than mine and you may need to reduce the temp by 10-15 degrees.
Shannon says
I tried this recipe and had some issues. I got the fast acting dry yeast and the active dry yeast but never saw the poof, and my dough never seemed to rise. I tried it twice with two different yeasts that are brand new. The bread turned out super dense and not light and fluffy like how olive garden’s always is. I got the milk to the right temp, mixed in the yeast, sprinkled sugar, and nothing happened. So I continued on with the recipe as directions indicate. The first batch I left to rise for 1 1/2 hours and the second 45 minutes, still nothing. Any suggestions?
Amanda Formaro says
Hi Shannon. I’ve made this recipe probably fifty times, so as long as you followed the instructions it should have worked. The only thing I can think of, based off of what you describe, is that the yeast was expired. Even if you had just purchased it, doesn’t mean it wasn’t old :/ My local grocery store here in town is famous for having expired items! You described proofing the yeast and that it never happened, that means either the milk was too hot (which you say it wasn’t) or the yeast was no good.
Cheryl says
I saw yeast in the store 2 yrs outdated. They said they would pull it and 2 more times within a month it was still there, before I took it off the shelf and gave it to them. Always a possibility of old yeast.
Ashton says
Also if your milk is too hot you can scald the yeast and it is basically useless.
Jan says
It is also possible that your liquid was to warm. It can kill the yeast.
Alice says
Can these be frozen? If so, before or after baking.
Amanda Formaro says
Hi Alice. Anytime you want to freeze a bread dough to bake later, you need to “parbake” it first. That basically means putting them in the oven and baking them until they have a slight crust but haven’t started browning yet. So basically about half the cooking time, the bread sticks should hold their shape but not be browned. Then allow them to cool and place them on a plate or cookie sheet, not touching, and freeze. Once frozen, you can toss them all into a freezer bag together. Freezing them beforehand will keep them from sticking together and being one big blob :) When you are ready to bake, just place the frozen breadsticks on a cookie sheet and bake according to the original instructions. It may take a little less time, so keep an eye on them. Enjoy!
JanetFCTC says
These look great. The rare times we can get to Olive Garden, the males in my family all load up on about 43,785 breadsticks. Now I can ease their cravings at home and not feel embarrassed in front of a waitress hehe
Amanda Formaro says
LOL! Right?!