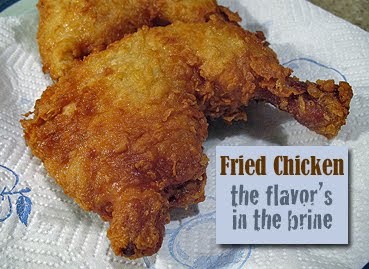
I love fried chicken. It’s not something I cook often simply because of the less than healthy aspects of fried foods (not to mention the mess I have to clean up afterward), but once in a while, fried chicken is a glorious treat. I’ve tried a few different kinds, and I’ve found that many recipes try to add a lot of flavor to the coating. Really, if you think about that, even just briefly, that’s not where the flavor comes from. Don’t get me wrong, I love a tasty and crunchy fried chicken skin as much as the next guy, but the fabulous flavor really comes from brining the chicken first.
On one of my library excursions, I checked out a book called The Best Chicken Recipes
from the editors of Cook’s Illustrated. Cook’s Illustrated is part of of America’s Test Kitchen. I have tried quite a few of their recipes and have yet to be disappointed. They aren’t called America’s Test Kitchen for nothing. They live up to their name by providing their extensive test results prior to each recipe they print. Their goal is to find the best version available and provide that to their readers.
A little note about my library book. I had it for a long time. I renewed it twice online, which is all the library will allow. Then it was late, so I took it in and paid the late fee. Then I renewed it again. And again. Finally, I looked up the book on Amazon and bought my own copy. I’m sure the library is relieved to have theirs back. ;)
On to the chicken. You’ll notice that the coating is just plain flour. All the flavors are added to the brine, the buttermilk coating and the flour are simple, but I’m sure you could add something to it if it made you feel better. :)
This chicken is juicy. It’s totally delicious. it’s lip smackin’ good! I promise, it’s worth it.
Some good accompaniments to this meal might be these fabulously easy and delicious Grilled Potatoes or this amazing Shout Hallelujah Potato Salad, especially if a picnic is involved. Or if you prefer, these easy Fried Potatoes are great too!
Amanda’s Notes:
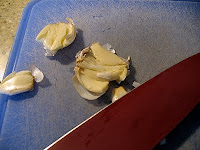
1) The brine uses a LOT of garlic, 3 heads to be exact. Don’t be afraid. Because it’s simply flavoring the brine, it’s a wonderful addition you won’t want to skimp on. To smash the garlic, simply separate the cloves but don’t peel them. Place garlic on a cutting board, lay the flat side of a large knife on top of the garlic clove, then give the flat side of the knife a good whack or two with the heel of your hand. Lift the knife and your clove should be smashed. Simply slide the skin off now. Smashing the garlic opens up the flavors without the pain of mincing or chopping.
2) The original recipe calls for 4 cups of flour. Waste, waste, waste! What is it with TV cooks? Do they just have too much money they feel they can waste like they do? I only used 2 cups of flour and while it got a little challenging to coat the last couple of pieces, I still had flour left over. I’ve adjusted the recipe to read 2-3 cups instead. Tisk.
3) This recipe does require a couple hours of brining time and a couple hours in the fridge. However, I’ve made this twice and can tell you that the fridge time is not entirely required, just the brining time. I’ve made it once with the fridge time and once without. You can also put the chicken in the brine in the morning (in the refrigerator) and finish everything else in the evening.
4) If you have a deep fryer, this is a much easier way to go. The Dutch oven method definitely works, but keeping the temperature adjusted is a pain because you are using the stove top flame and the temperature drops as soon as you add the chicken. A deep fryer does all that work for you.
5) Photos are inserted below, but the printable version link will give you the recipe without the photos.
Crispy Fried Chicken
adapted from The Best Chicken Recipes
BRINE
1/2 cup of table salt OR 1 cup Kosher salt
1/4 cup sugar
2 tablespoons paprika
7 cups buttermilk
3 medium garlic heads, cloves separated and smashed
3 bay leaves, crumbled
4 pounds bone-in chicken pieces (split breasts cut in half, drumsticks, and/or thighs), trimmed
peanut or vegetable oil (I used canola)
COATING
2-3 cups unbleached four
1 large egg
1 teaspoon baking powder
1/2 teaspoon baking soda
1 cup buttermilk
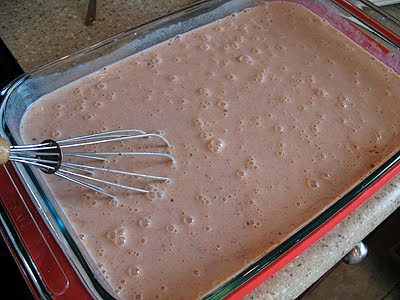
Make the brine by dissolving the salt, sugar, and paprika in the buttermilk in a large container (I used a 13×9 Pyrex baking dish and it was filled to the rim after the chicken was added). Add the garlic and bay leaves, then submerge the chicken on the brine, cover, and refrigerate for 2-3 hours.
Remove chicken from brine, shake off excess brine, and place on a single layer on a wire rack set over a rimmed baking sheet. Refrigerate uncovered for 2 hours (In my opinion, you can skip this step, but if you have time go ahead with it).
Preheat the oven to 200 F, this is for keeping the chicken warm as you fry. Measure 2 inches of oil into a large Dutch oven and heat over medium-high heat to 375 F. You will need a thermometer, or you can use a deep fryer with built in thermometer if you have one. I have made this recipe successfully with both methods.
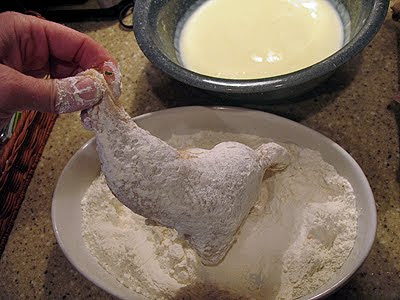
For the coating, place the flour into a shallow dish. In a separate medium bowl, whisk the egg, baking powder, and baking soda together, then whisk in the buttermilk (it will bubble and foam a bit).
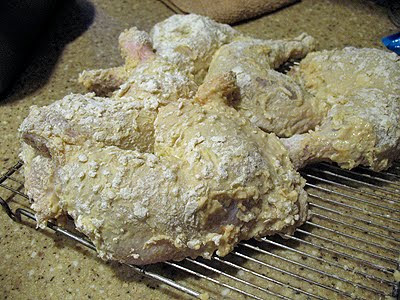
Dredge a piece of chicken in the flour, then coat in buttermilk mixture (allow excess to drip off), then coat in flour again and gently shake off the excess. Return chicken to wire rack. Repeat until all pieces are coated.
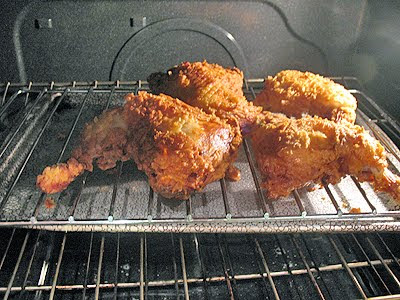
When the oil is ready, add as many chicken pieces to the pot as you can without crowding them. Place them in skin side down, cover the pot, and fry until deep golden brown, 7-11 minutes, adjusting the heat as necessary to maintain an oil temperature of about 325 F. After 4 minutes, check for even browning and rearrange if necessary. Turn pieces over and continue to cook until instant read thermometer registers 160-165 for breasts, or 170-175 for thighs or drumsticks, 6-8 minutes more.
Drain chicken briefly on paper towels, then transfer to a clean wire rack set over a rimmed baking sheet and keep warm in the oven.
Return oil to 375 F and repeat with remaining chicken pieces. Serve!
be sure to try my oven fried chicken too!

Crispy Fried Chicken recipe
IMPORTANT - There are often Frequently Asked Questions within the blog post that you may find helpful. Simply scroll back up to read them!
Print It Rate ItIngredients
Brine
- ½ cup of table salt OR 1 cup Kosher salt
- ¼ cup sugar
- 2 tablespoons paprika
- 7 cups buttermilk
- 3 medium garlic heads cloves separated and smashed
- 3 bay leaves crumbled
- 4 pounds bone-in chicken pieces split breasts cut in half, drumsticks, and/or thighs, trimmed
- peanut or vegetable oil I used canola
Coating
- 2-3 cups unbleached four
- 1 large egg
- 1 teaspoon baking powder
- ½ teaspoon baking soda
- 1 cup buttermilk
Instructions
- Make the brine by dissolving the salt, sugar, and paprika in the buttermilk in a large container (I used a 13x9 Pyrex baking dish and it was filled to the rim after the chicken was added). Add the garlic and bay leaves, then submerge the chicken on the brine, cover, and refrigerate for 2-3 hours.
- Remove chicken from brine, shake off excess brine, and place on a single layer on a wire rack set over a rimmed baking sheet. Refrigerate uncovered for 2 hours (In my opinion, you can skip this step, but if you have time go ahead with it).
- Preheat the oven to 200 F, this is for keeping the chicken warm as you fry. Measure 2 inches of oil into a large Dutch oven and heat over medium-high heat to 375 F. You will need a thermometer, or you can use a deep fryer with built in thermometer if you have one. I have made this recipe successfully with both methods.
- For the coating, place the flour into a shallow dish. In a separate medium bowl, whisk the egg, baking powder, and baking soda together, then whisk in the buttermilk (it will bubble and foam a bit). Dredge a piece of chicken in the flour, then coat in buttermilk mixture (allow excess to drip off), then coat in flour again and gently shake off the excess. Return chicken to wire rack. Repeat until all pieces are coated.
- When the oil is ready, add as many chicken pieces to the pot as you can without crowding them. Place them in skin side down, cover the pot, and fry until deep golden brown, 7-11 minutes, adjusting the heat as necessary to maintain an oil temperature of about 325 F. After 4 minutes, check for even browning and rearrange if necessary. Turn pieces over and continue to cook until instant read thermometer registers 160-165 for breasts, or 170-175 for thighs or drumsticks, 6-8 minutes more.
- Drain chicken briefly on paper towels, then transfer to a clean wire rack set over a rimmed baking sheet and keep warm in the oven.
- Return oil to 375 F and repeat with remaining chicken pieces. Serve!
Amanda Davis
Latest posts by Amanda Davis (see all)
- Raspberry Poke Cake - January 21, 2025
- Chocolate Covered Strawberries - January 20, 2025
- Cauliflower Pizza Crust - January 13, 2025




Jennifer, A Self-Confessed Foodie says
Wow, this looks good! I'm always too much of a chicken to fry anything!
Minny says
This looks really good, but I would have to cut the recipe down for just the 2 of us. Thanks for sharing the recipe.
Lana from Never Enough Thyme says
You know, being a southern girl and all, that I would jump at a fried chicken recipe. And, wow does this one look divine! I do several different types of fried chicken and you are correct that brining gives a very moist finished piece of chicken. Now it's only 9:30 in the morning and I'm craving fried chicken.
Deeba PAB says
I loved making the earlier pan fried chicken Amanda, and now this ones look so good too! The brine certainly grabbed my attention! WOW!!
cookies and cups says
Hello tastey!
I have never done a brine, so I am super anxious to try this! YAY, a new one for this weekend!
HoneyB says
Looks yummy Amanda – I admit I don't fry chicken like this because of the mess myself!
triolus says
Looks delicious! I typically let my chicken sit in buttermilk overnight, but I'll have to try this version out sometime! What do you fry your chicken in? Check out mine sometime!
Culinary Cory says
I LOVE fried chicken. But I hate the mess it makes. I'm going to be trying a baked version sometime soon. Yours looks yummy.
Susan says
Man, that looks fabulous! I love fried chicken and will definitely have to try this. Cooks Illustrated is the best!
Lynda says
Really there is nothing better than fried chicken. But I don't make it often either, because of the same reasons you listed. But now I'm craving it- yours looks perfectly crisp and yummy!
Tami says
I'm hoping this works. Thanks for letting me know Amanda.
Sue Sparks says
Your fried chicken looks soooooo good!!!
Tami says
OMG, I'm drooling!!! This is one of my weaknesses!
msmeanie says
I have been looking for a fried chicken recipe to make for the BF and this looks great. I agree, I think brining is an essential step that many recipes omit. Thanks for the recipe/tips!
Federica says
favoloso questo piatto!! complimenti!
Mary says
I don't have a good recipe for oven-fried chicken. I think I've just found one. This looks wonderful
Bridgett says
Perfection! Dinner (or lunch!) doesn't get any better than good comfort foods such as this.
Snooky doodle says
oh this surely looks mouth watering. thanks for sharing :)
jose manuel says
El típico pollo frito de estados unodos. Que buena receta. Siempre he tenido curiosidad por hacerlo. Me copio tu receta.
Un saludo desde España
5 Star Foodie says
Wow, those fried chicken look perfectly crispy and super delicious, yummm!!!